Again I find myself in need of a pattern and not a free suitable one in sight. My original Norbert Calendar was a hit that I didn’t realize that so many people liked. We didn’t make one this year and had many people inquire about it… so here I go again.
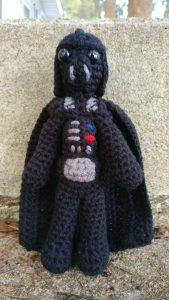
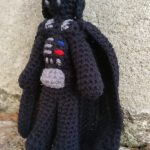
I wanted to make a roughly 6″ Darth Vader and Storm Troopers. I do have a long standing grump about paying for patterns, so I’ve decided to pay homage to these iconic characters in yarm. I freely give this pattern out for others to celebrate them as well.
Worsted weight yarn i(or any weight of your choosing) n black, dark grey, red and green
Size G hook (or whatever hook to make a tight crochet with your yarn)
Safety eyes, 12mm
Poly-fil for stuffing
Legs(make two)
8 sc in magic circle
inc around
sc around for 2 rounds
dec x4, sc x8
dec x2, sc x8 (by this round it should be 10sc) Stuff foot and continue to stuff as you go.
sc around for 8 rounds. Bind off both, but no need to leave a long tail for sewing.
Now about joining the legs, what you need to do is hold the legs together and sl st through both the legs twice in the middle where they meet, from the front of the legs to the back. Then continue around the legs. You should end with 2 sl st and 16 sc (8 sc around each leg). Moving on to the body you will forgo the sl st and only work in the sc.
Body
sc around for 3 rounds
*dec, 3* x3, sc, make sure to continue to stuff as you go
sc around for 8 rounds
sc, dec, dec, 2 sec, dec, dec
dec around, Bind off both, but no need to leave a long tail for sewing.
Arms (make two)
6 sc in magic circle
inc around
sc around for 2 rounds
*dec, sc in next 2* around, make sure to stuff lightly as you go
sc around for 10 rounds. Bind off, leaving a tail to go ahead and sew onto the sides of the body.
Upper body armor
4 sc in magic circle, ch 1 and turn
*inc, sc* across, ch 1 and turn
sc across, switch colors to dark grey, ch 1 and turn
sc across, switch back to black, ch 1 and turn
sc across for 3 round, switch colors to dark grey, ch 1 and turn
sc across, switch back to black, ch 1 and turn
*dec, sc* across, ch 1 and turn
dec x2, ch 1 and sc around the armor
sl, ,st to first sc of the round going around the armor, bind off and leave a long tail. Sew this to the top of the body (no need to stuff, just push the ends under as you sew), the sides hanging down over the ‘shoulders’.
Head
6 sc in magic circle
inc around
*inc, sc* around
sc around for 5 round, insert safety eyes between rounds 4 and 5, leaving about 3 sc in between.
*dec, sc* around, be sure to stuff
dec around, bind off, leaving a tail to go ahead and sew in the middle of the upper body armor.
Mouth
ch 2, ,3 sc in first ch, ch 1 and turn
sc across, ch 1 and turn
sc, sc inc, sc, bind off, leave a tail and sew to face. Stuff the end behind as you sew. Sew two vertical lines in grey for accent markings.
Helmet
6 sc in magic circle
inc around
*inc, sc* around
sc in next 2, hdc and dc in next, dc and hdc in next, sc in the rest. Ch 1 and turn
sc in the next 12, ch 1 and turn. Repeat this for 6 rows. Ch 1 and sc around the helmet, put 3 sc in the bottom points/corners of the back of the helmet (the sc rows). Bind off, leave a tail and sew onto the head.
Ch 18 and bind off, leave a tail and sew down the middle of the helmet starting between the eyes.
Belt
Start with black and ch 19. Sc in second chain from hook and across. Ch 1 and turn
sc across, bind off with a long tail to sew around his middle.
In grey, for the buckle, ch 5, sc in the second chain from hook and across. Ch 1 and turn
sc across, bind off with a long tail to sew to the front of the belt.
Abdomen light box
ch 6, sc in second chain from hook, ch 1 and turn
sc across, ch 1 and turn. Repeat for a total of 4 rows. Bind off with a long tail to sew on the abdomen. Before you sew though, use the blue, red and grey to add some accent lines.
Cape
Now, with the cape you can attach some felt or cloth if you prefer. I went ahead and crocheted one up so I could include it in these instructions and as a matter of preference as well.
ch 27, dc in the third chain from hook and across, ch 2 (does not count as a st) and turn
dc across, ch 2 and turn for total of 12 rows. Sc around it all, putting 3 sc in each corner. When you get back to the beginning of the sc around, sl st to the first one and tie a little knot leaving a long tail for sewing.
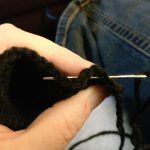
Now to make your life easier to make the gathered look of the top of the cape use your needle to help weave the end in about every 2-3 stitches along the top. When you get to the end, gently pull and compare it to where you will sew the cape to the upper body armor then sew it on. 
And that’s all there is!
Mad Hooking!


