Halo Braid Hat

Firstly, bare with me. This is my first knitted pattern and I come to it from a primarily crocheters point of view. This pattern is more of a recipe of how I made this hat.. how to put the three pieces together. Also I should mention I usually only get to craft when I’m half awake (night shift and kids) and exact counts never seem to be my thing. This hat will work without the exact counts because goodness knows I didn’t have exact ones…

A family member found a hat and thought of me asking me to make it for them. I found the pattern for it and of course it was a paid pattern… anyone who knows me knows I don’t prefer to buy singular patterns like that. Personal preference and all… I wouldn’t have a problem with it if it was a dollar or two, but I can’t justify six dollars for one pattern. That’s just me though and my personal soapbox because I have been burned before by that.

Anywho what follows is how I made this hat in as simplest terms as I can make it. In true crocheter fashion I didn’t do a gauge swatch. My hope is that you can adjust this to fit any size yarn. Just use the corresponding straight and circular needles (or dpn I suppose) for your yarn. I will of course list what I used.

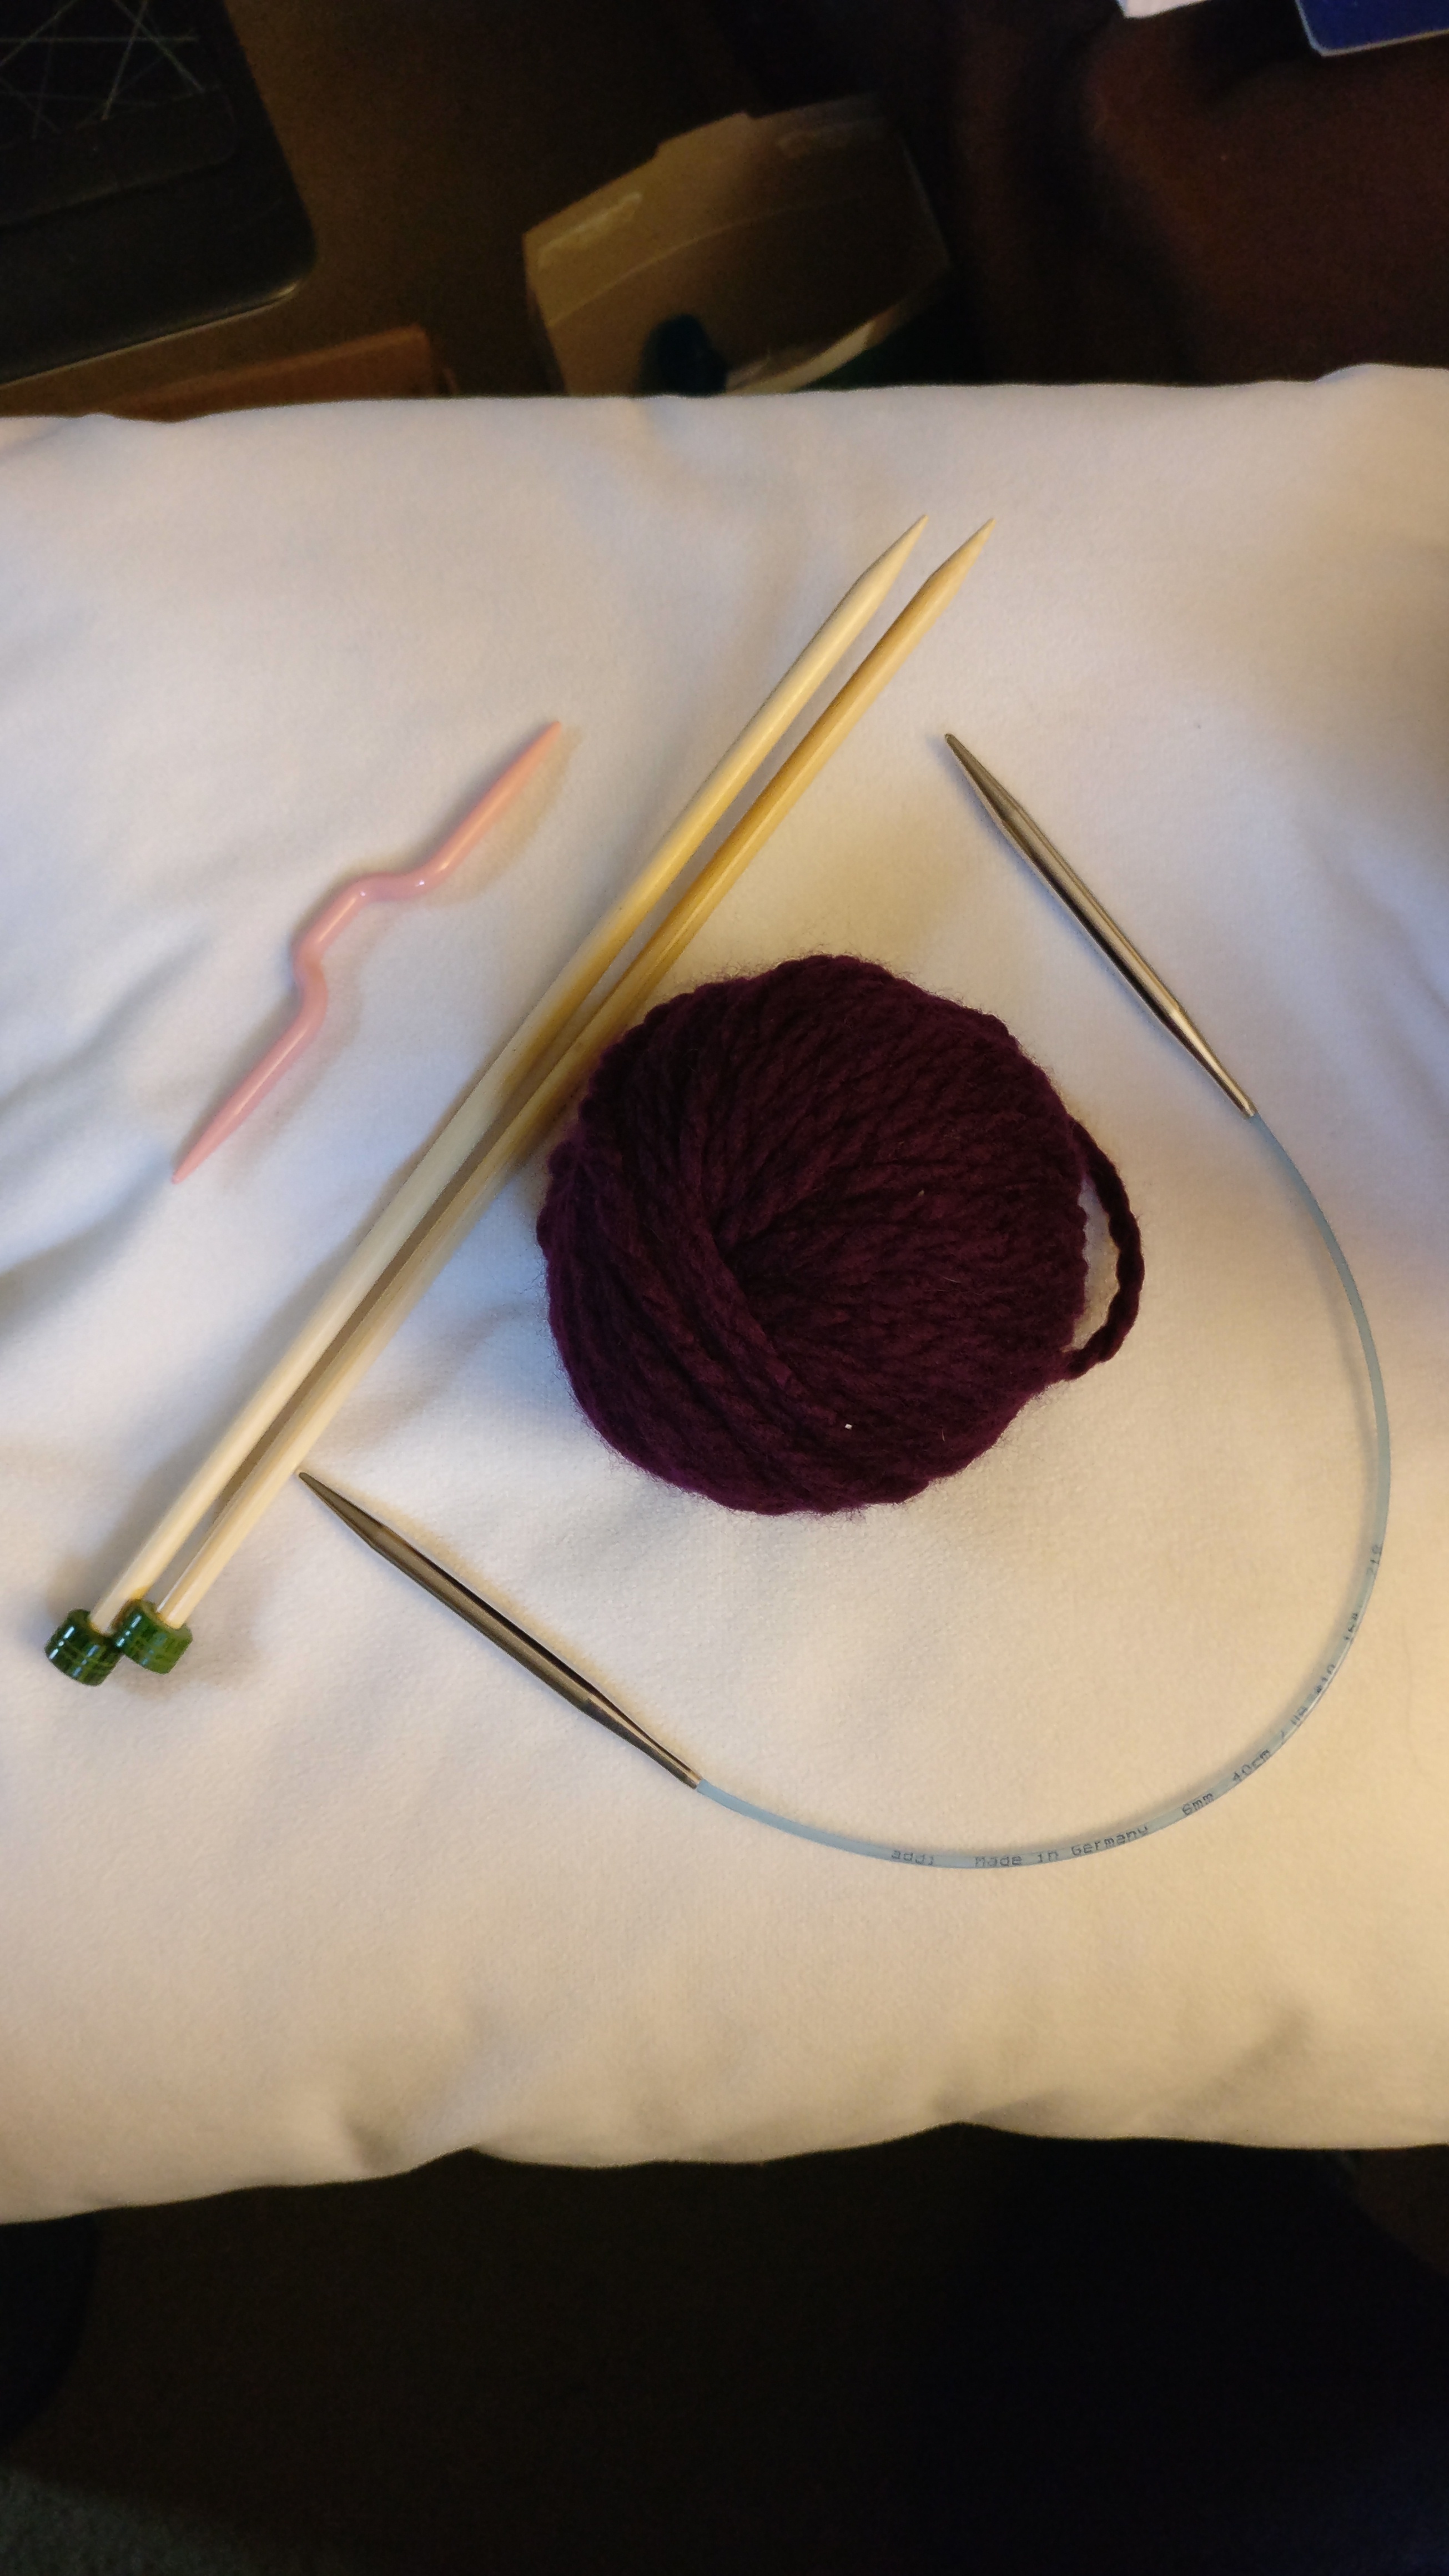
Straight needles US 10/6.00mm
16″ Circular needles US 10/6.00mm
Optional crochet hook J/6.00mm
Cable needle
Darning needle
#5 Bulky yarn (I used I Love This Chunky! yarn I found at Hobby Lobby. I bought 2 skeins and each skein has 109 yards.  I had a decent amount leftover and honestly I don’t know if I would buy that again.  The yarn got fuzzy just working with it and after the first wash… more than I would think appropriate. I did take a picture of the leftover amount to show.)
Very cute button

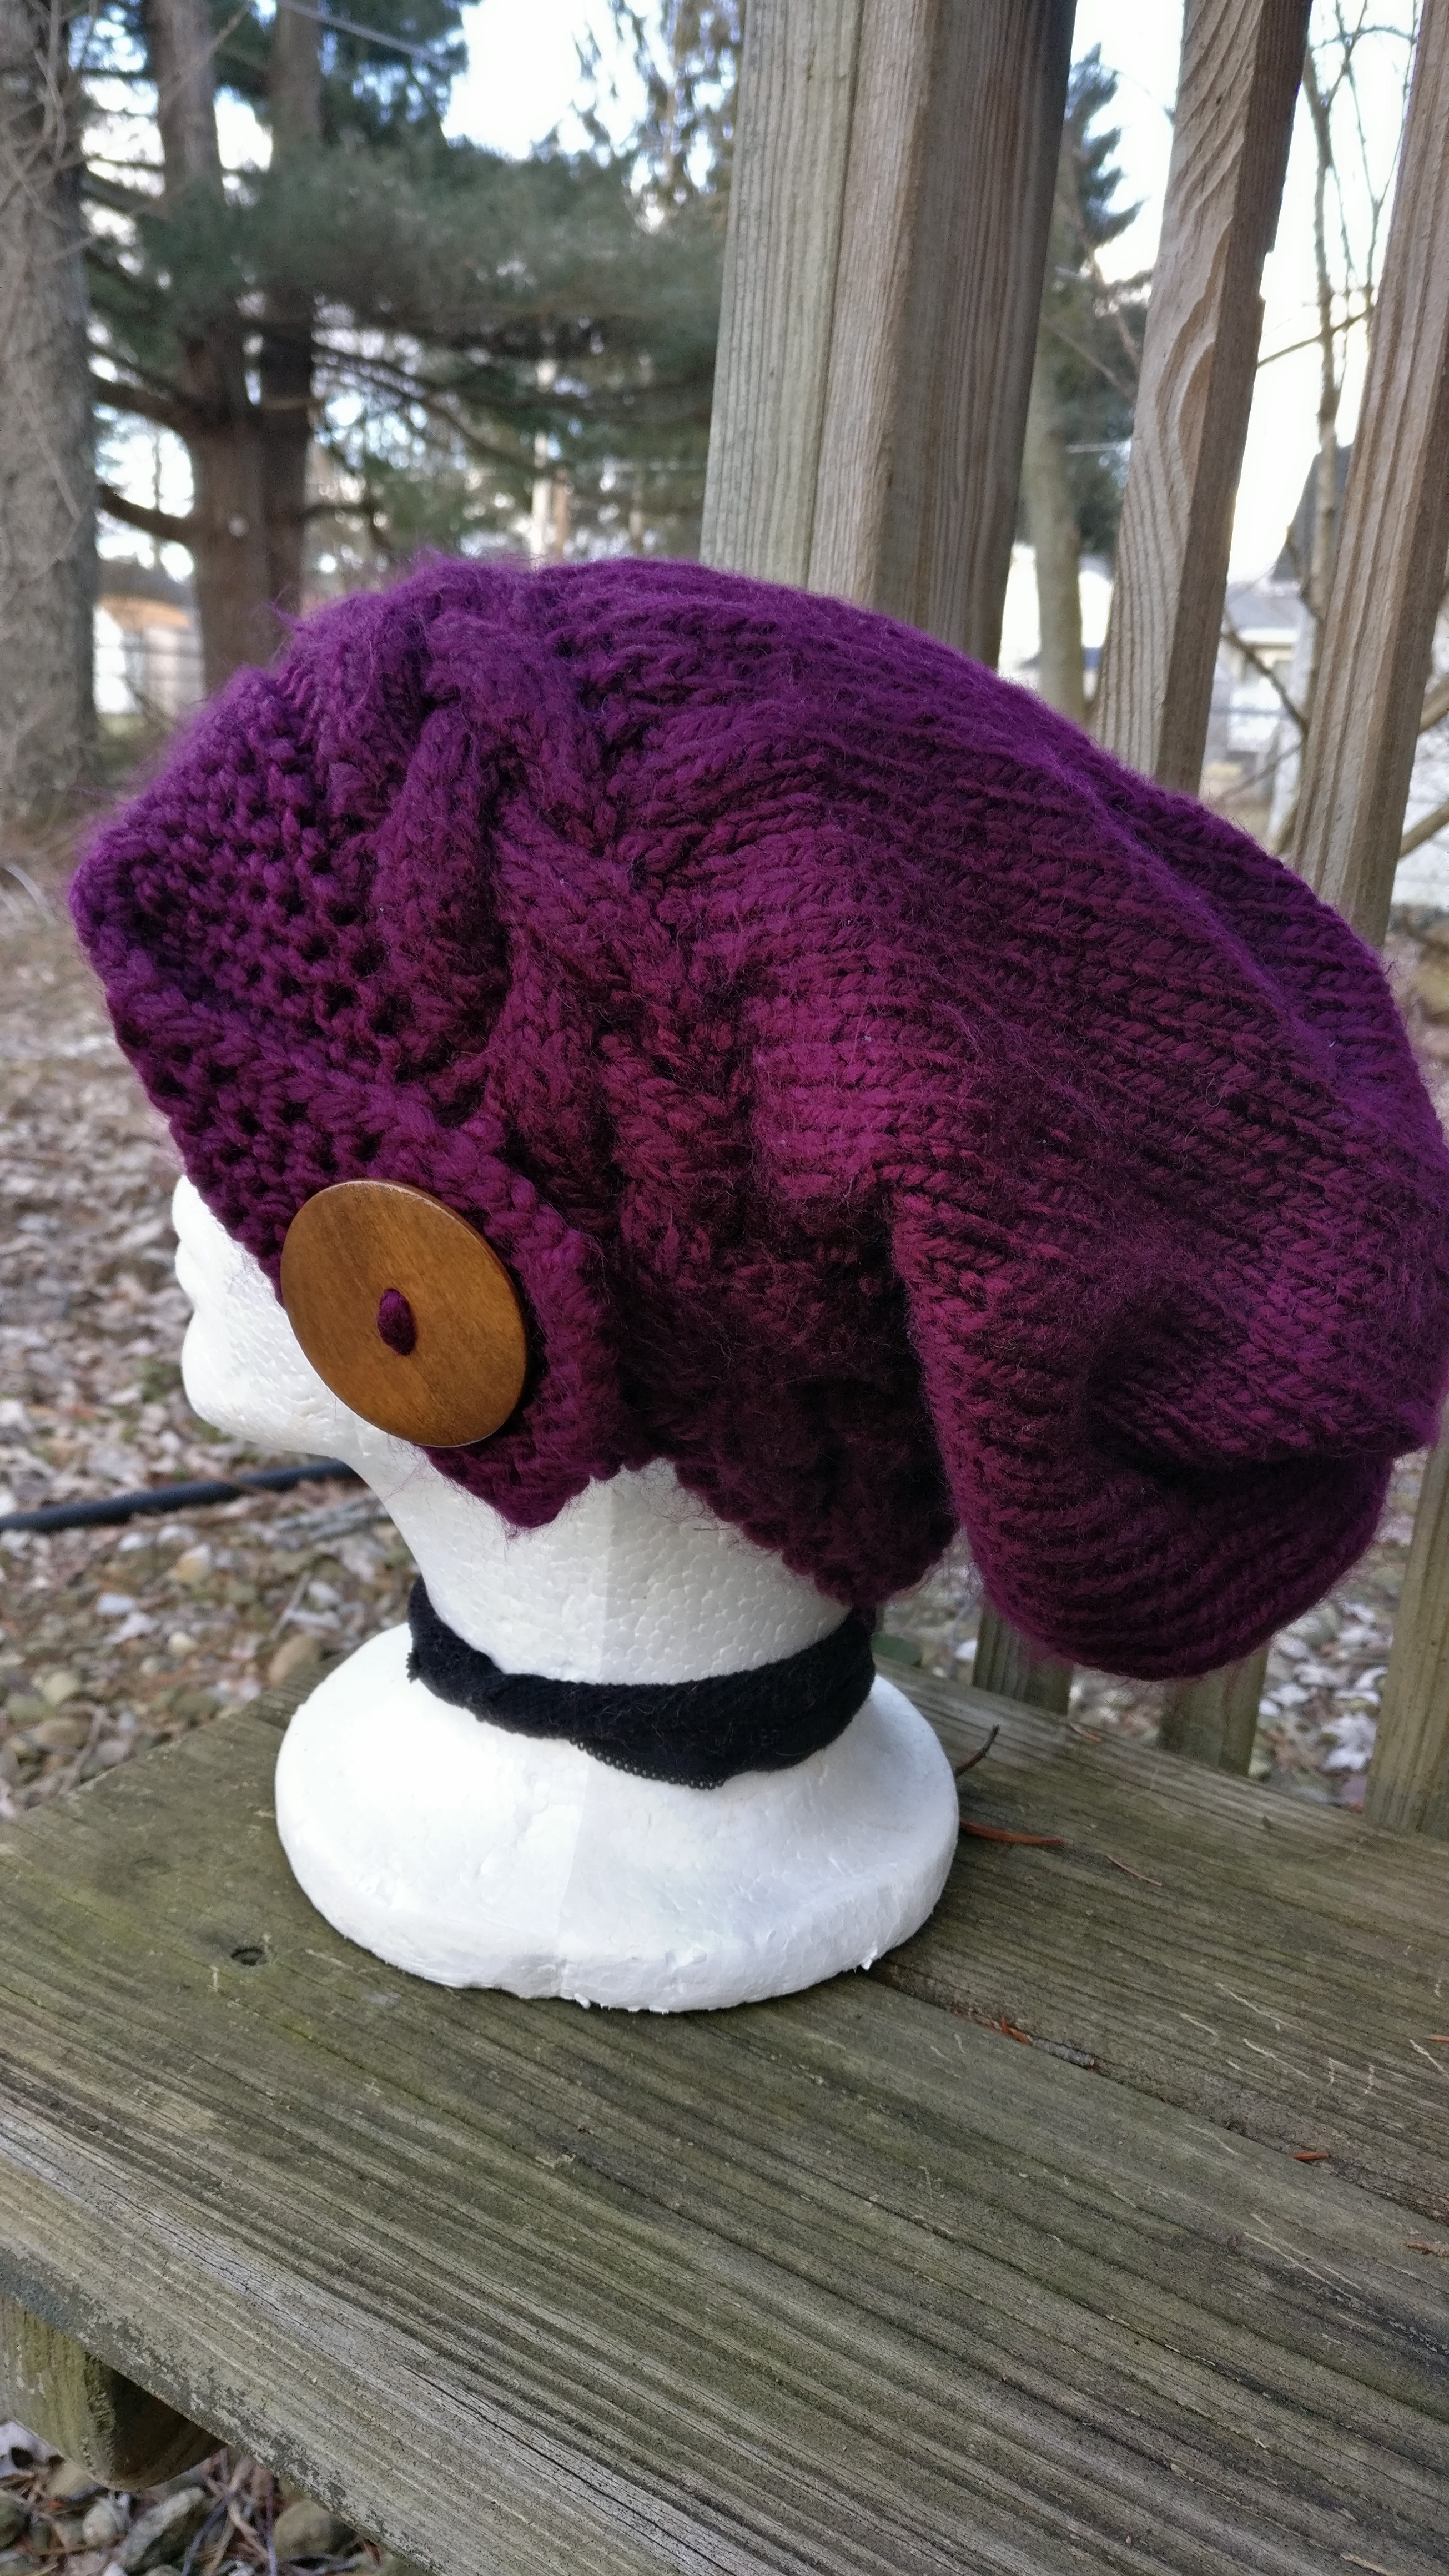
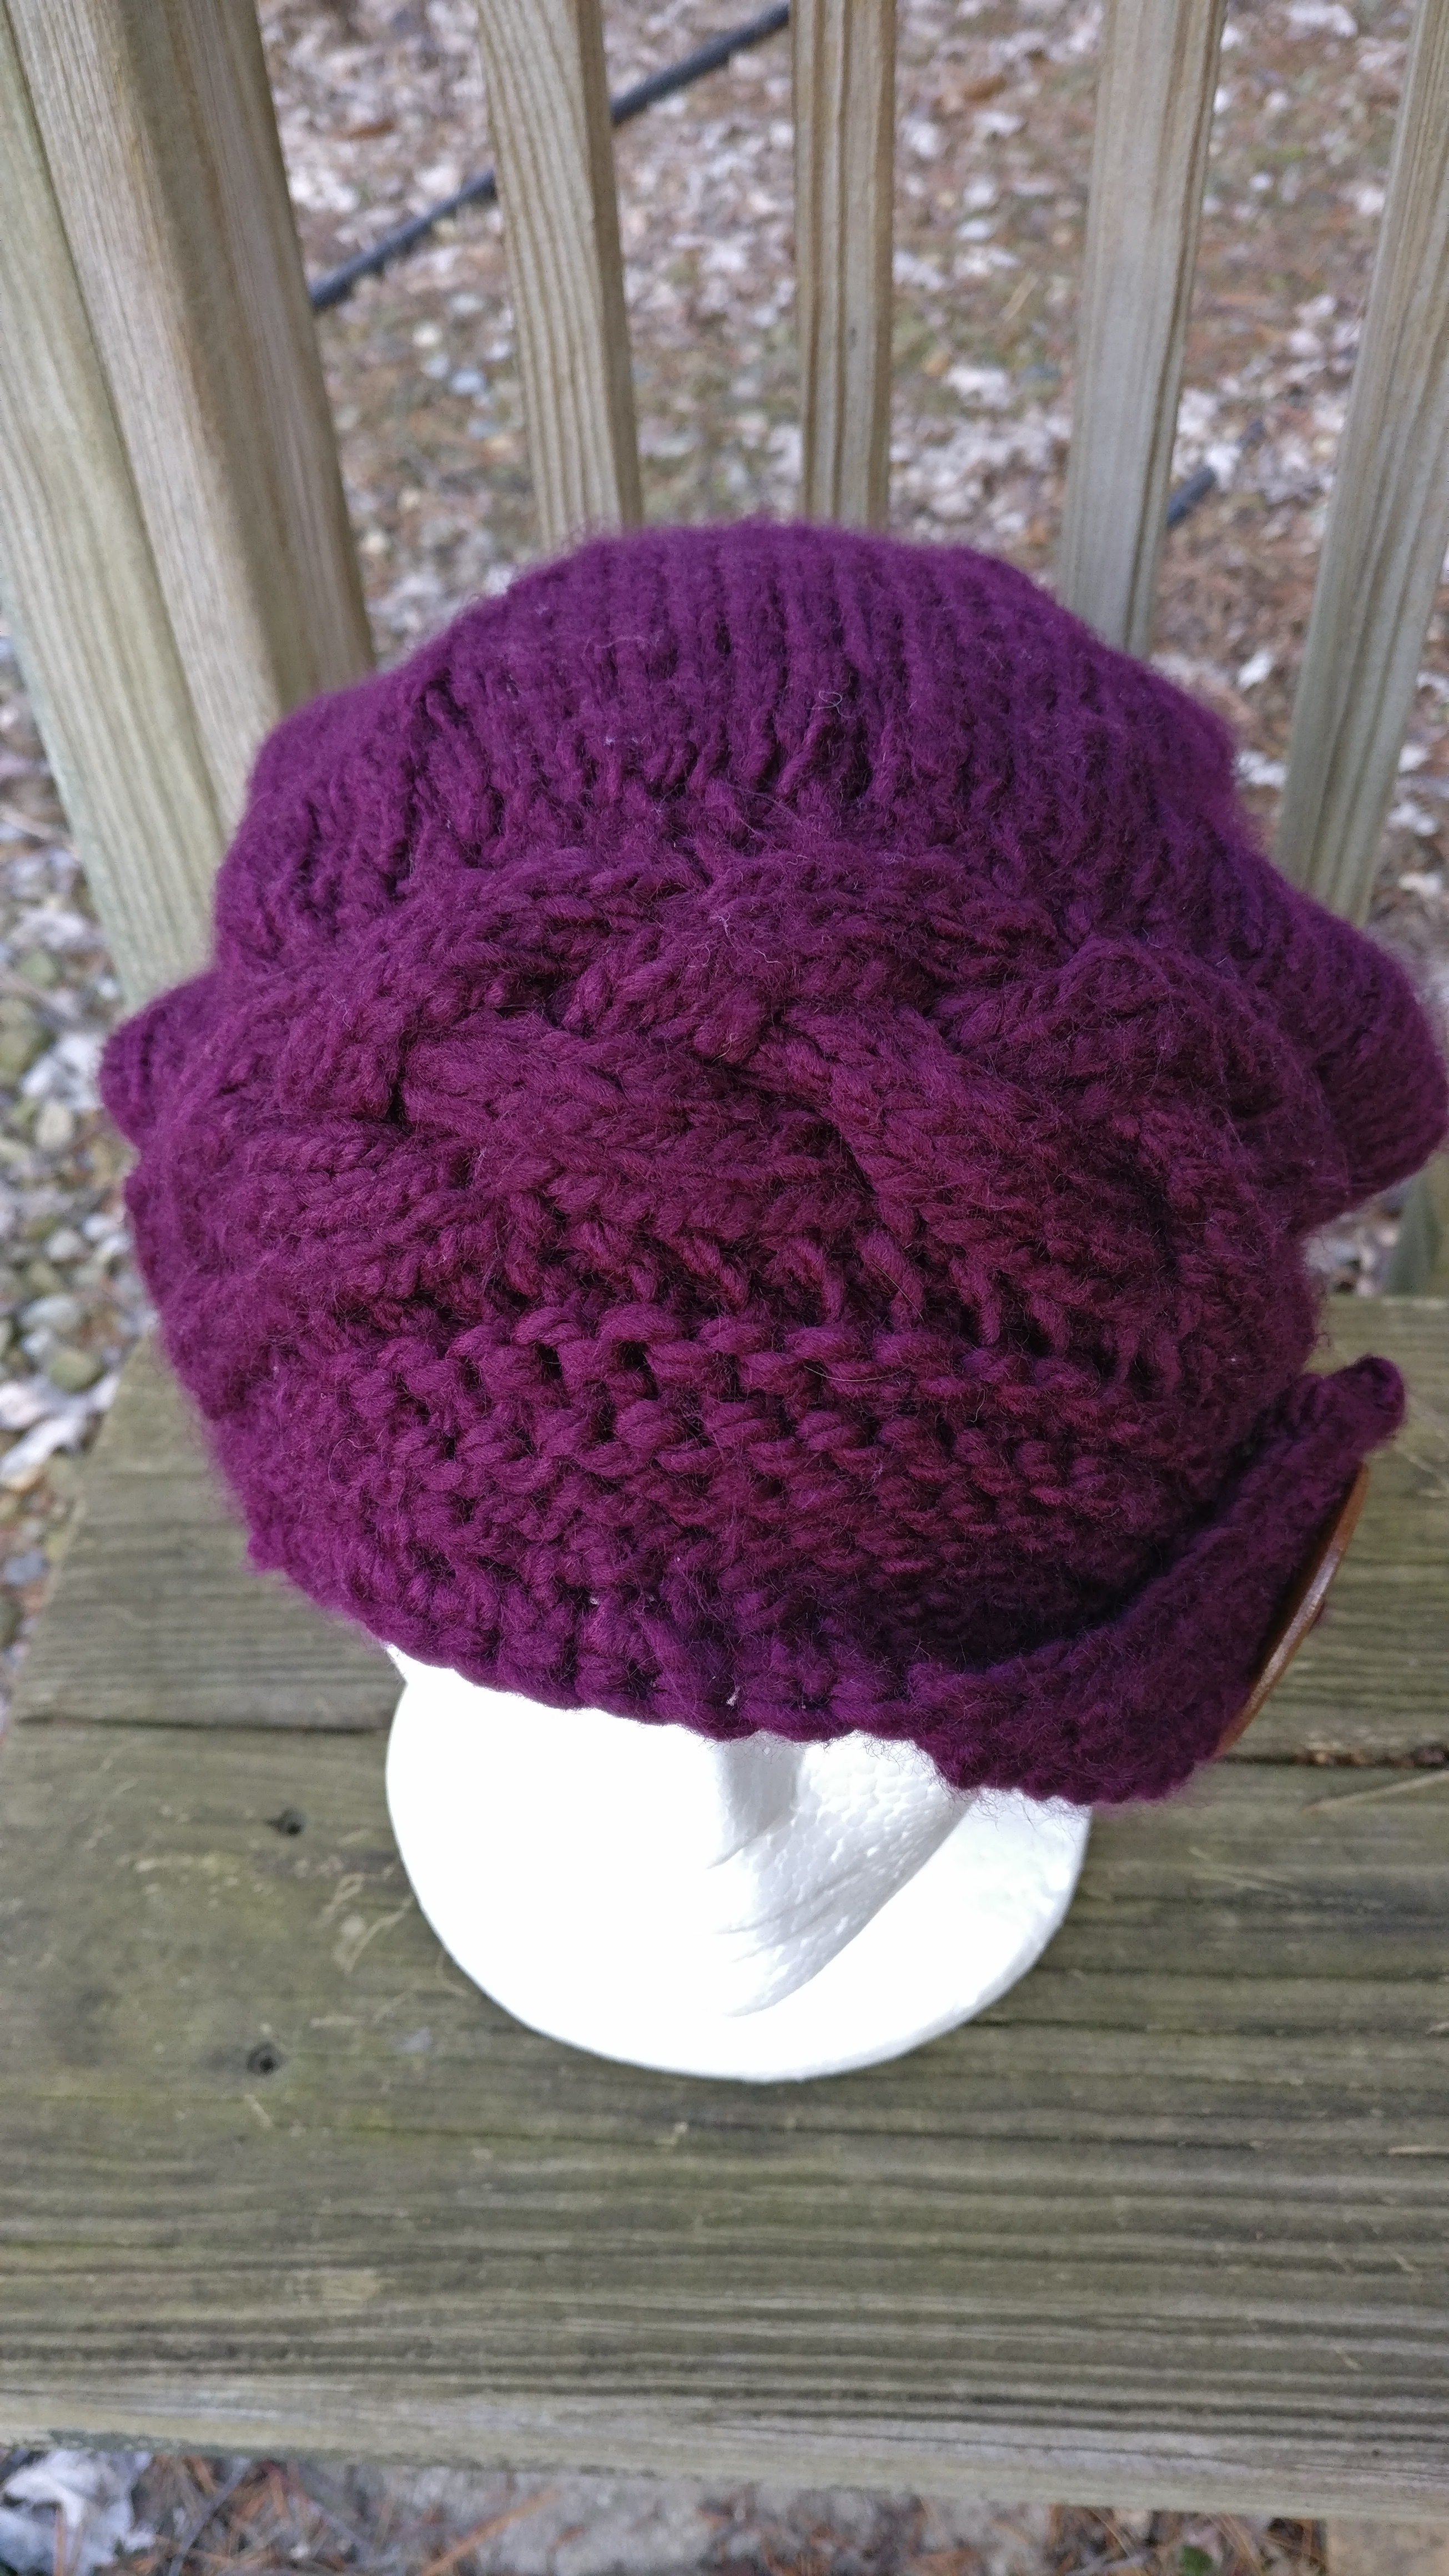
First thing is to make the cabled part. This is essentially a cabled headband. I found a lovely pattern already written up! WOOt! So use this pattern and make a headband to the size of 21″. For me this ended up being 13 repeats… she mentioned that she did 14. Bind off and seam the two ends together.

Now, with the right side facing and using circular needle pick up the stitches along the one side. Now since I had 13 repeats of 8 each that left me picking up 104, place marker if you want. It’ll be a spiral from here out so it doesn’t have to be exact.

Knit around for 2 rounds

Now, maybe it’s just me, but 104 stitches in this bulky yarn seems a bit excessive. I wanted to get it down to roughly 80 stitches. So this is how I did it, but you might have to adjust to decrease to the amount of stitches that works for you. Keep in mind I was designing this for an average size woman’s head.

*knit 7, decrease* around (this should give you roughly 93 stitches, seriously, don’t sweat the count to be exact)

Knit around for 2 rounds

*knit 12, decrease* around

Knit around and count how many stitches you have. If you have more than 80 stitches then on the next round just space out a few decreases around on the next round. I had 83 somehow so I just put 3 decreases on the next round. Seriously, don’t sweat it.

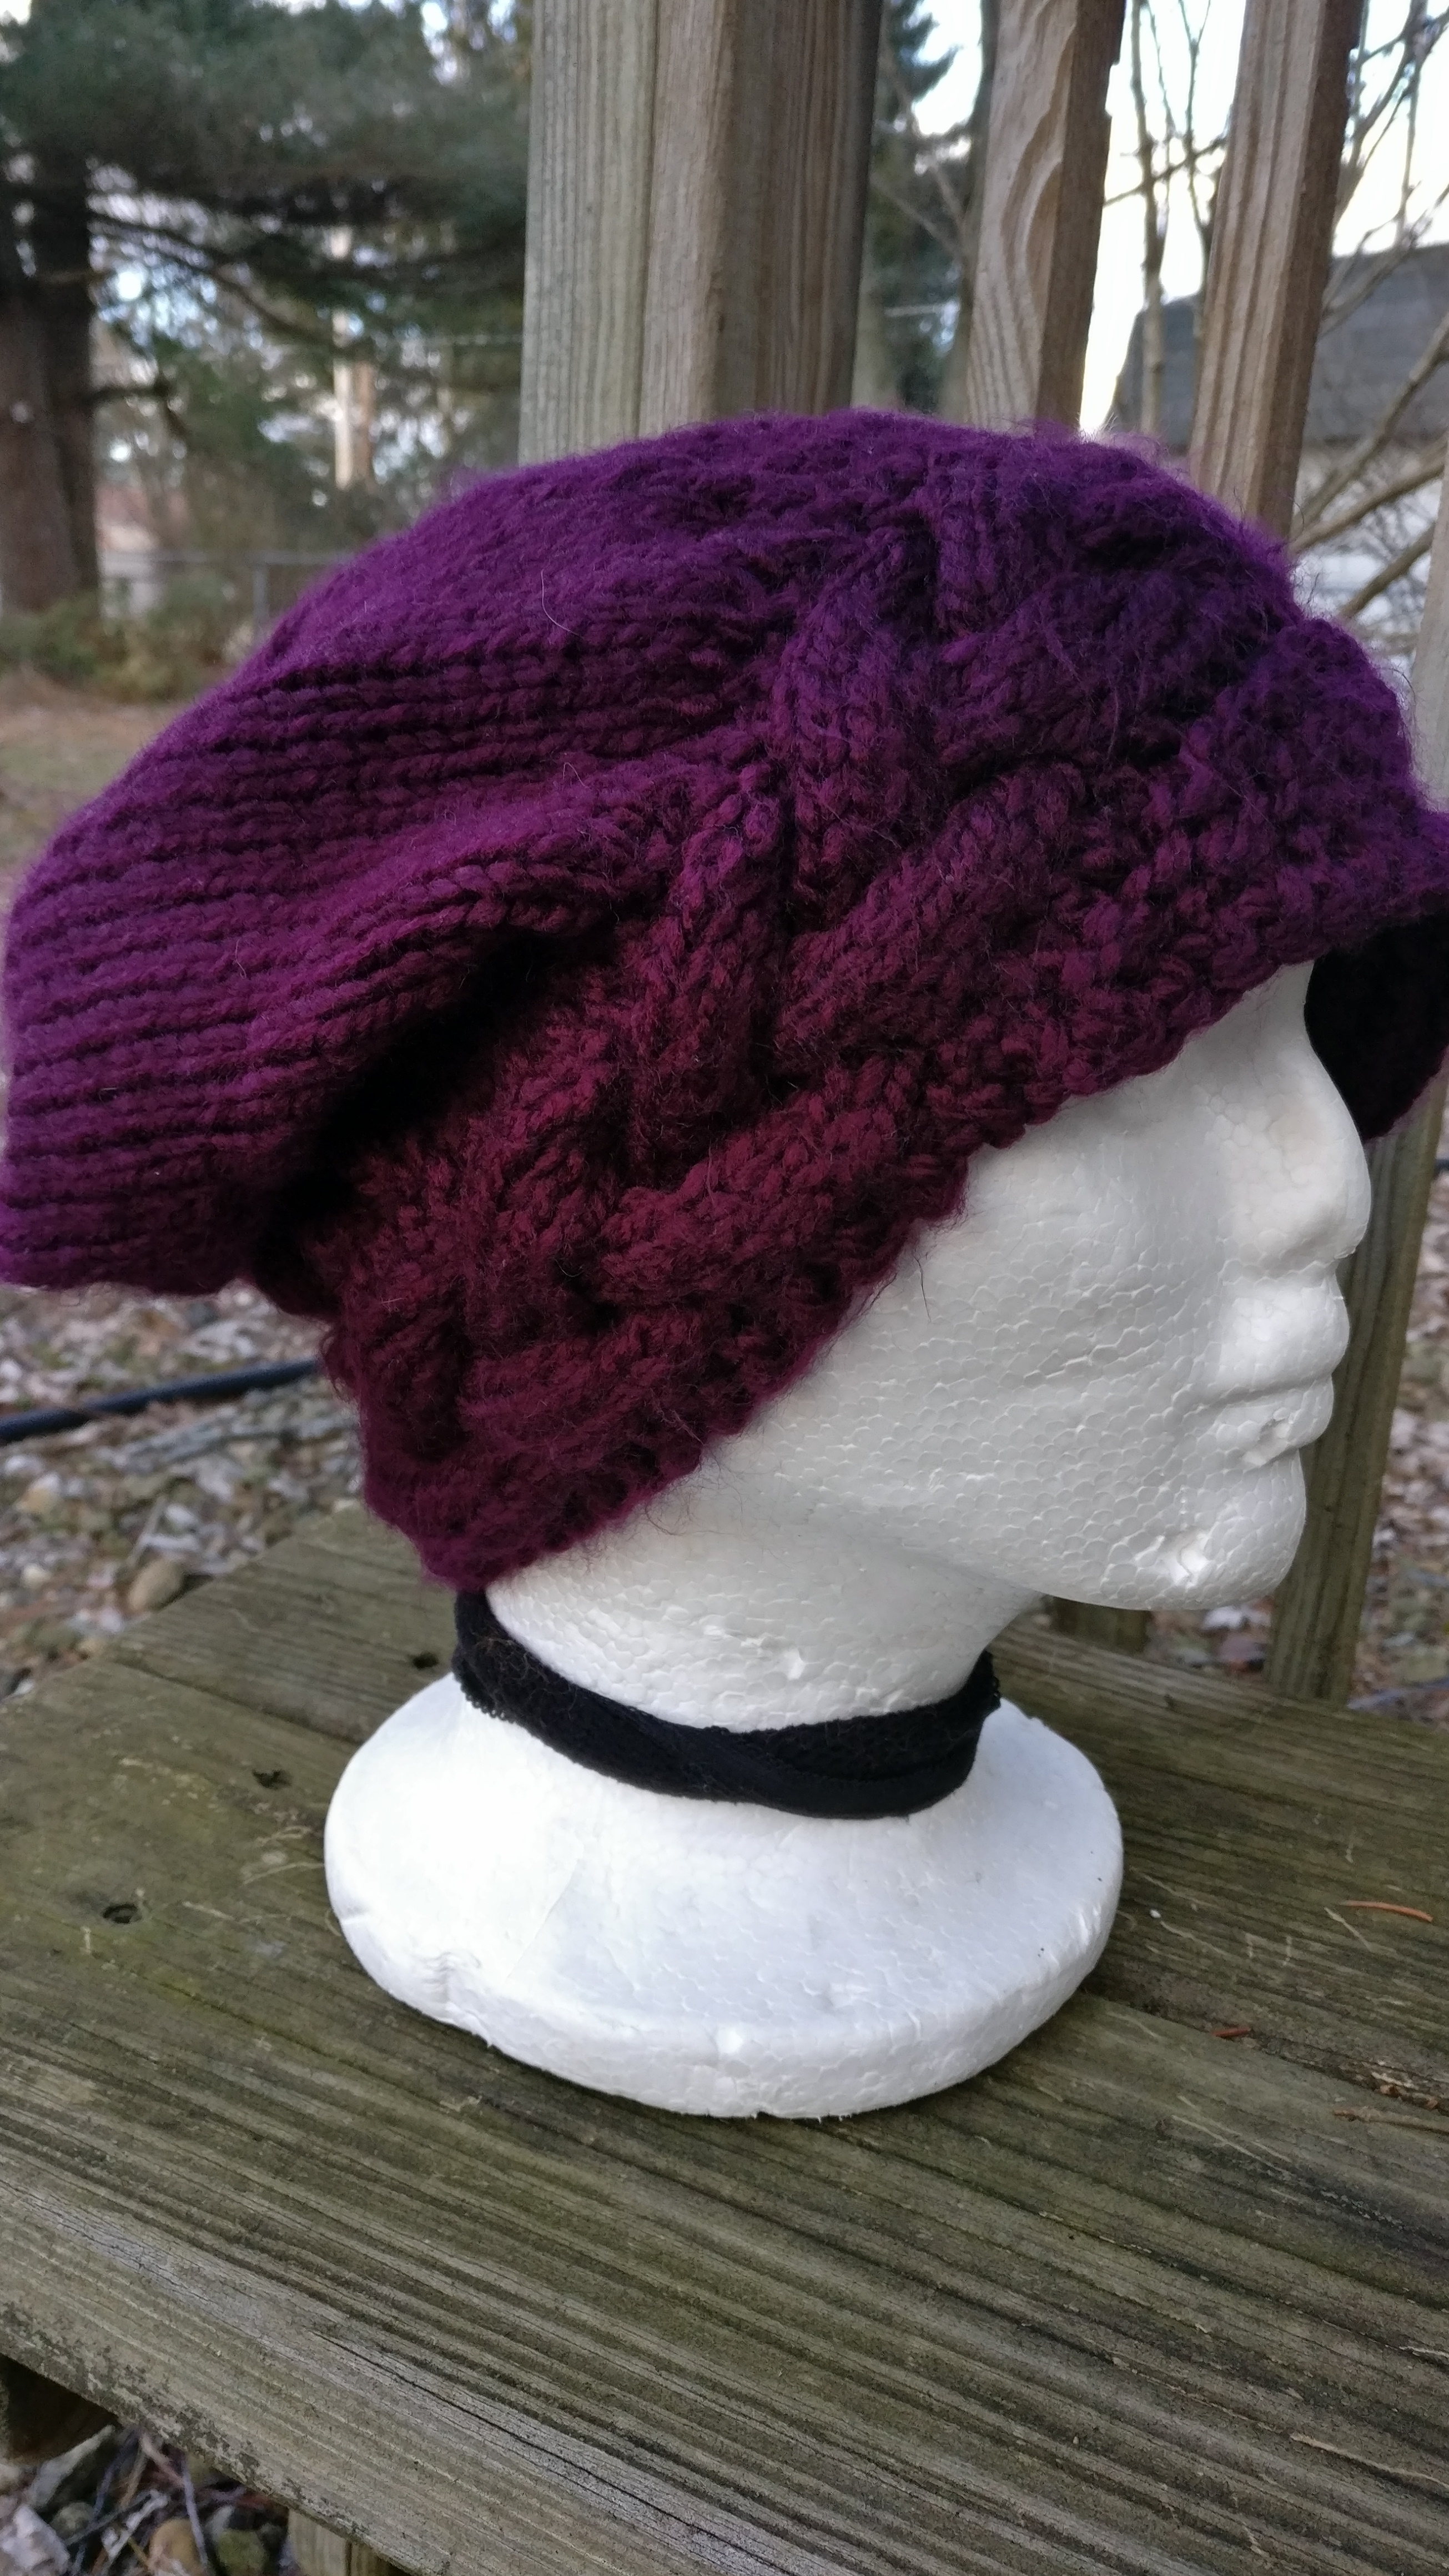
knit in stockinette stitch until the whole piece measures 11.5″ for a really slouchy hat like I made or 8.5″ for a loose beanie.

Decrease around

Knit around for 2 rounds then bind off using the drawstring method.

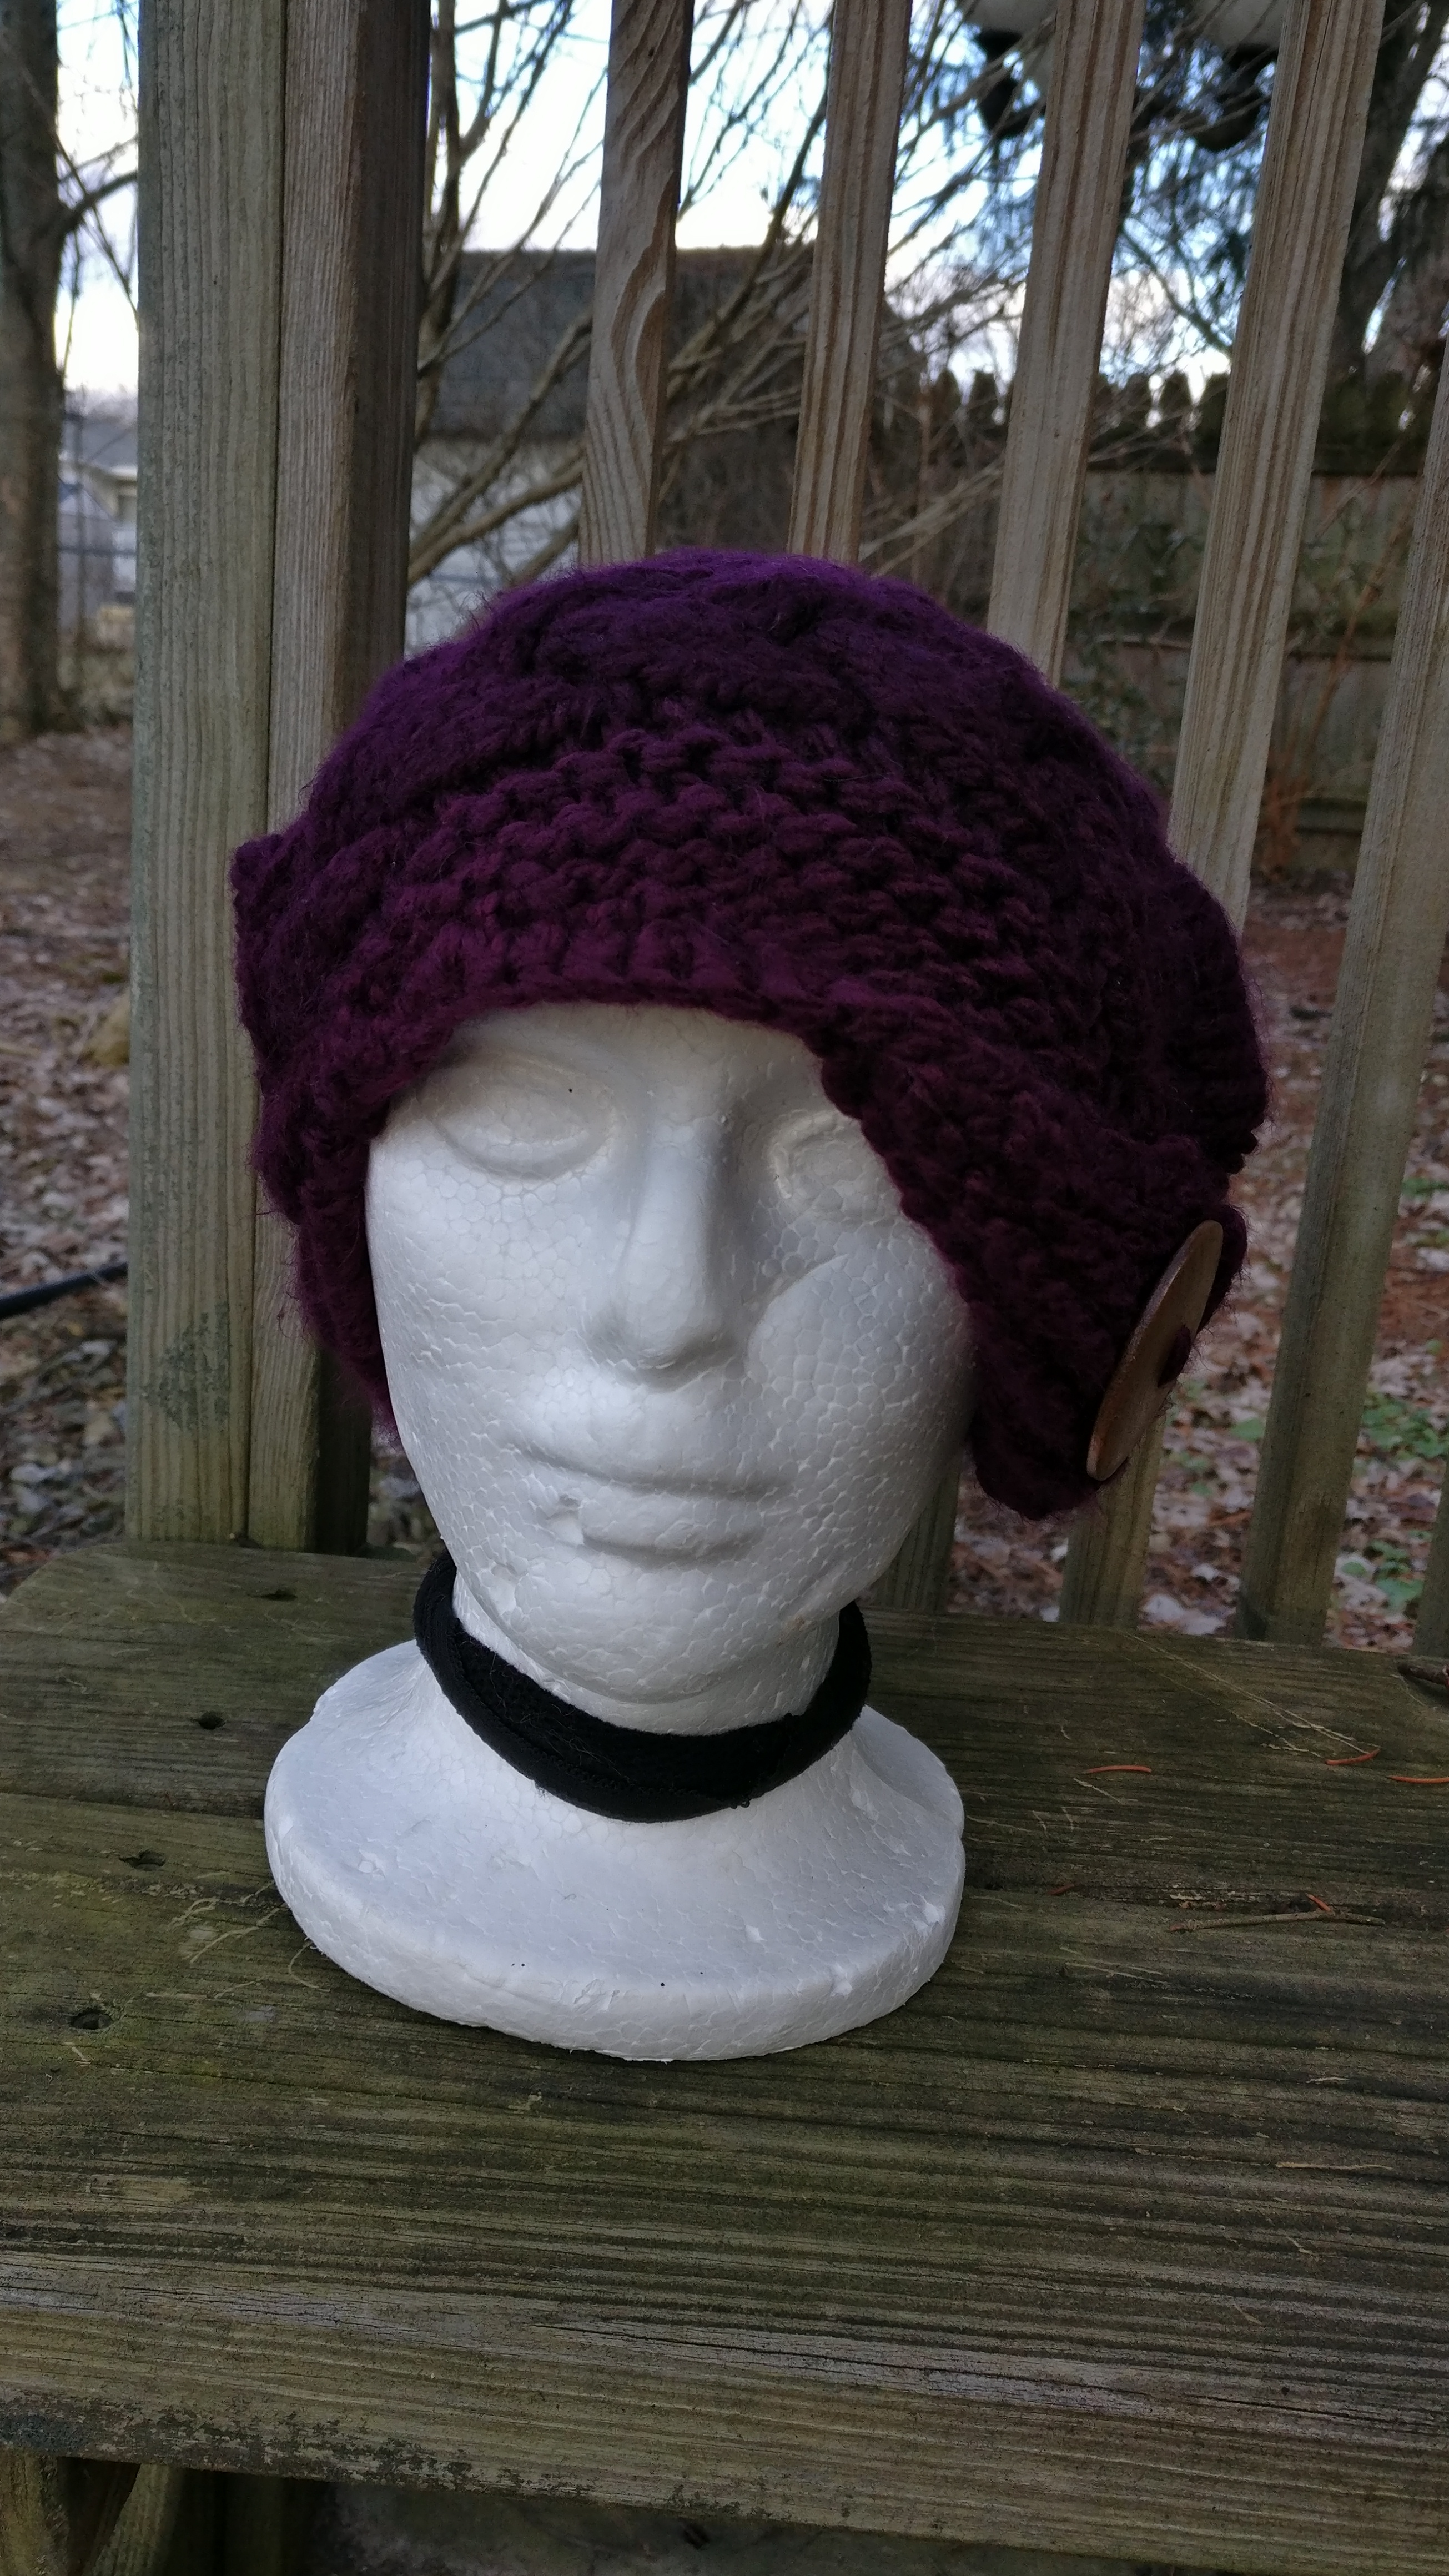
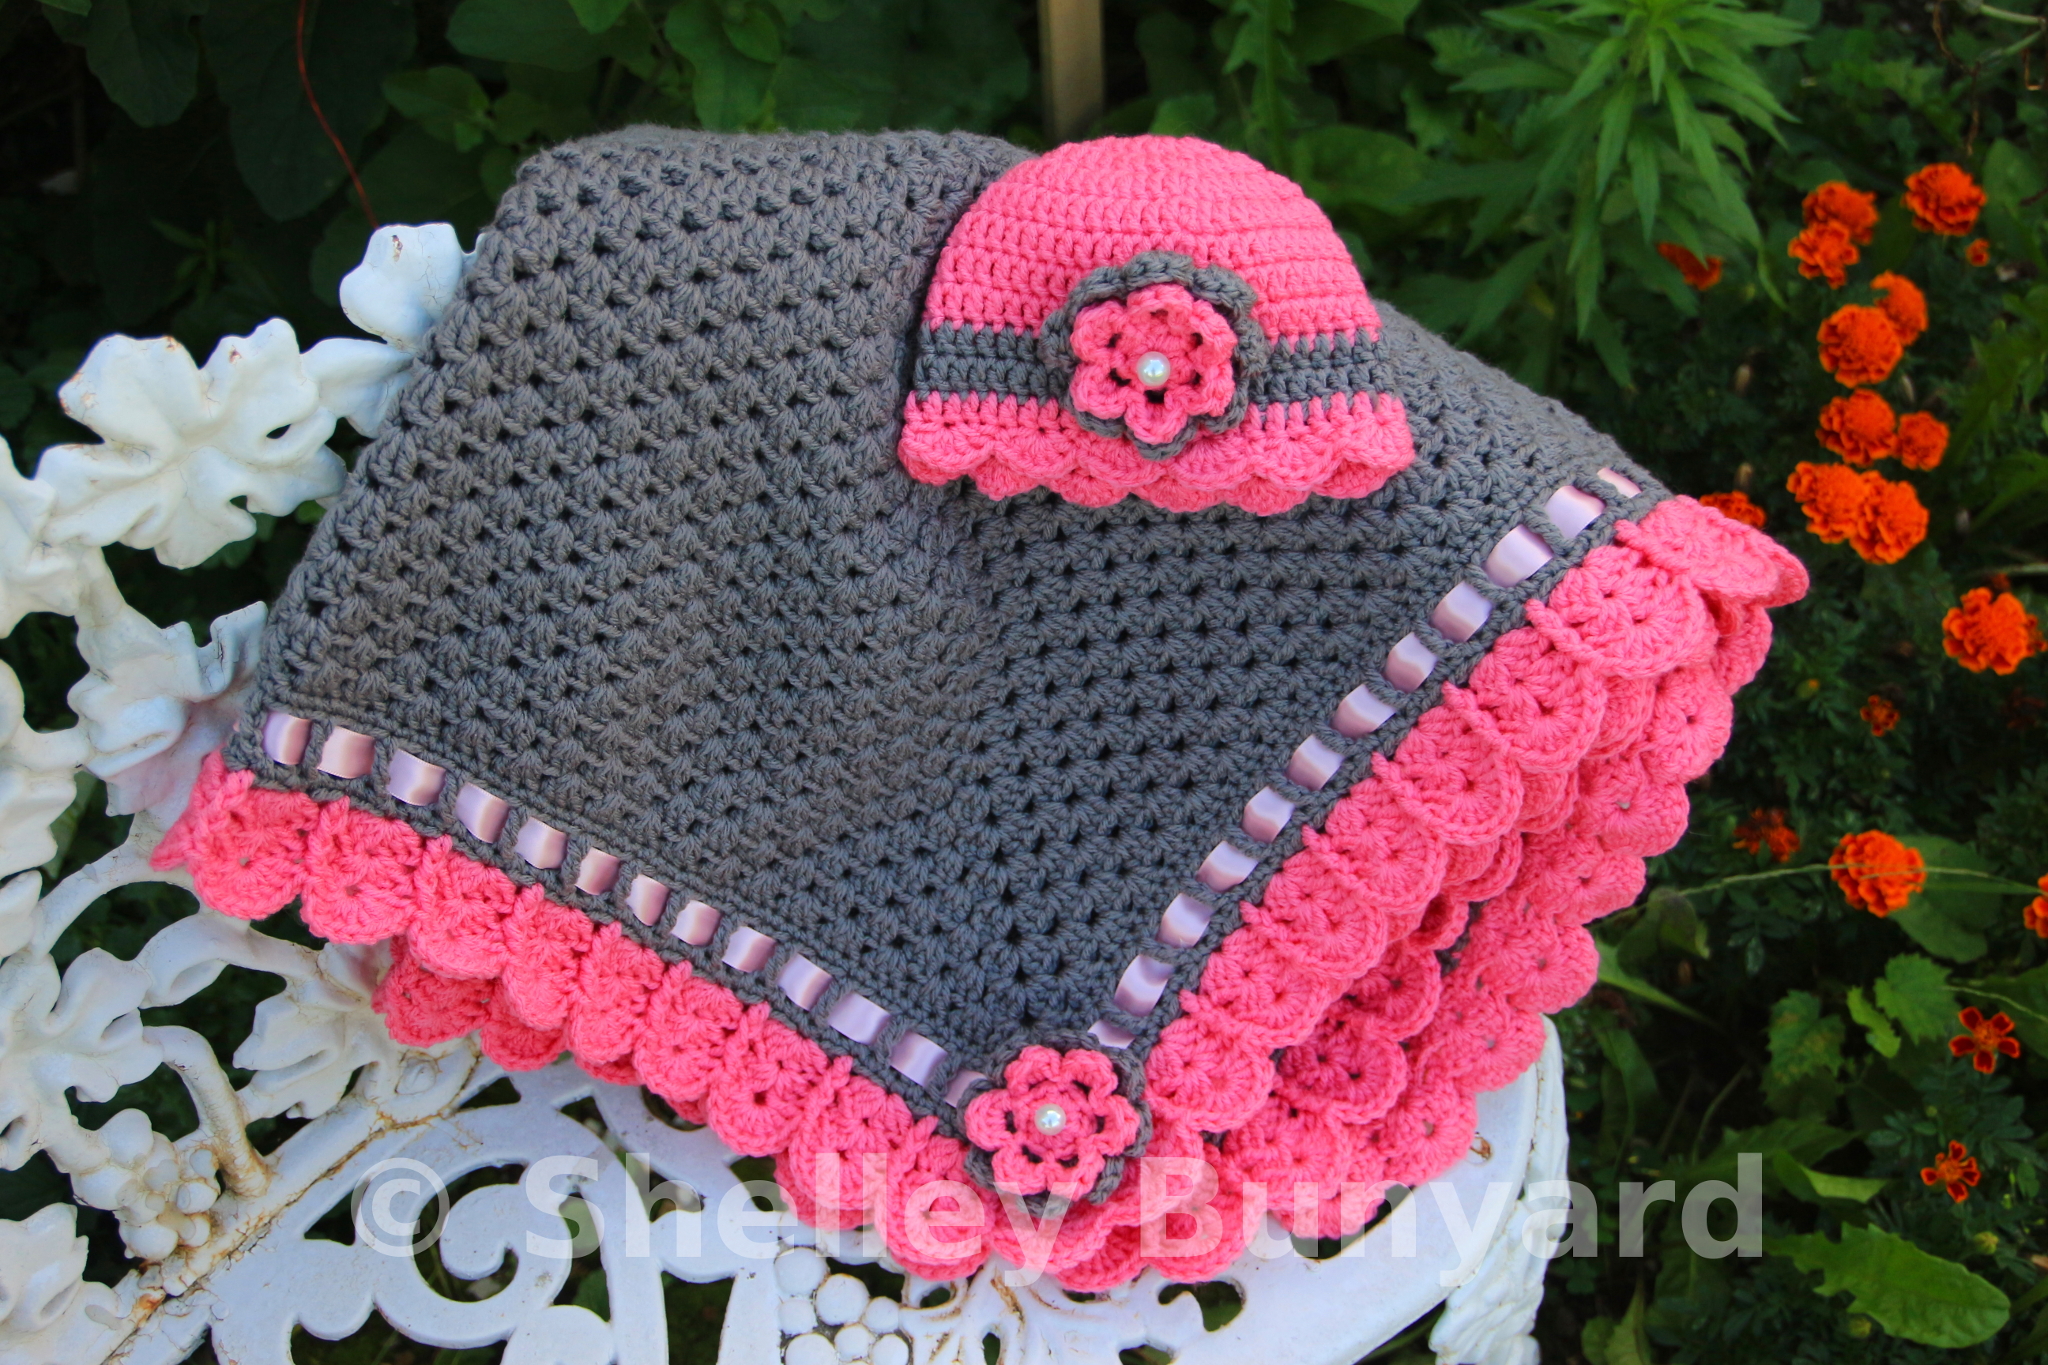
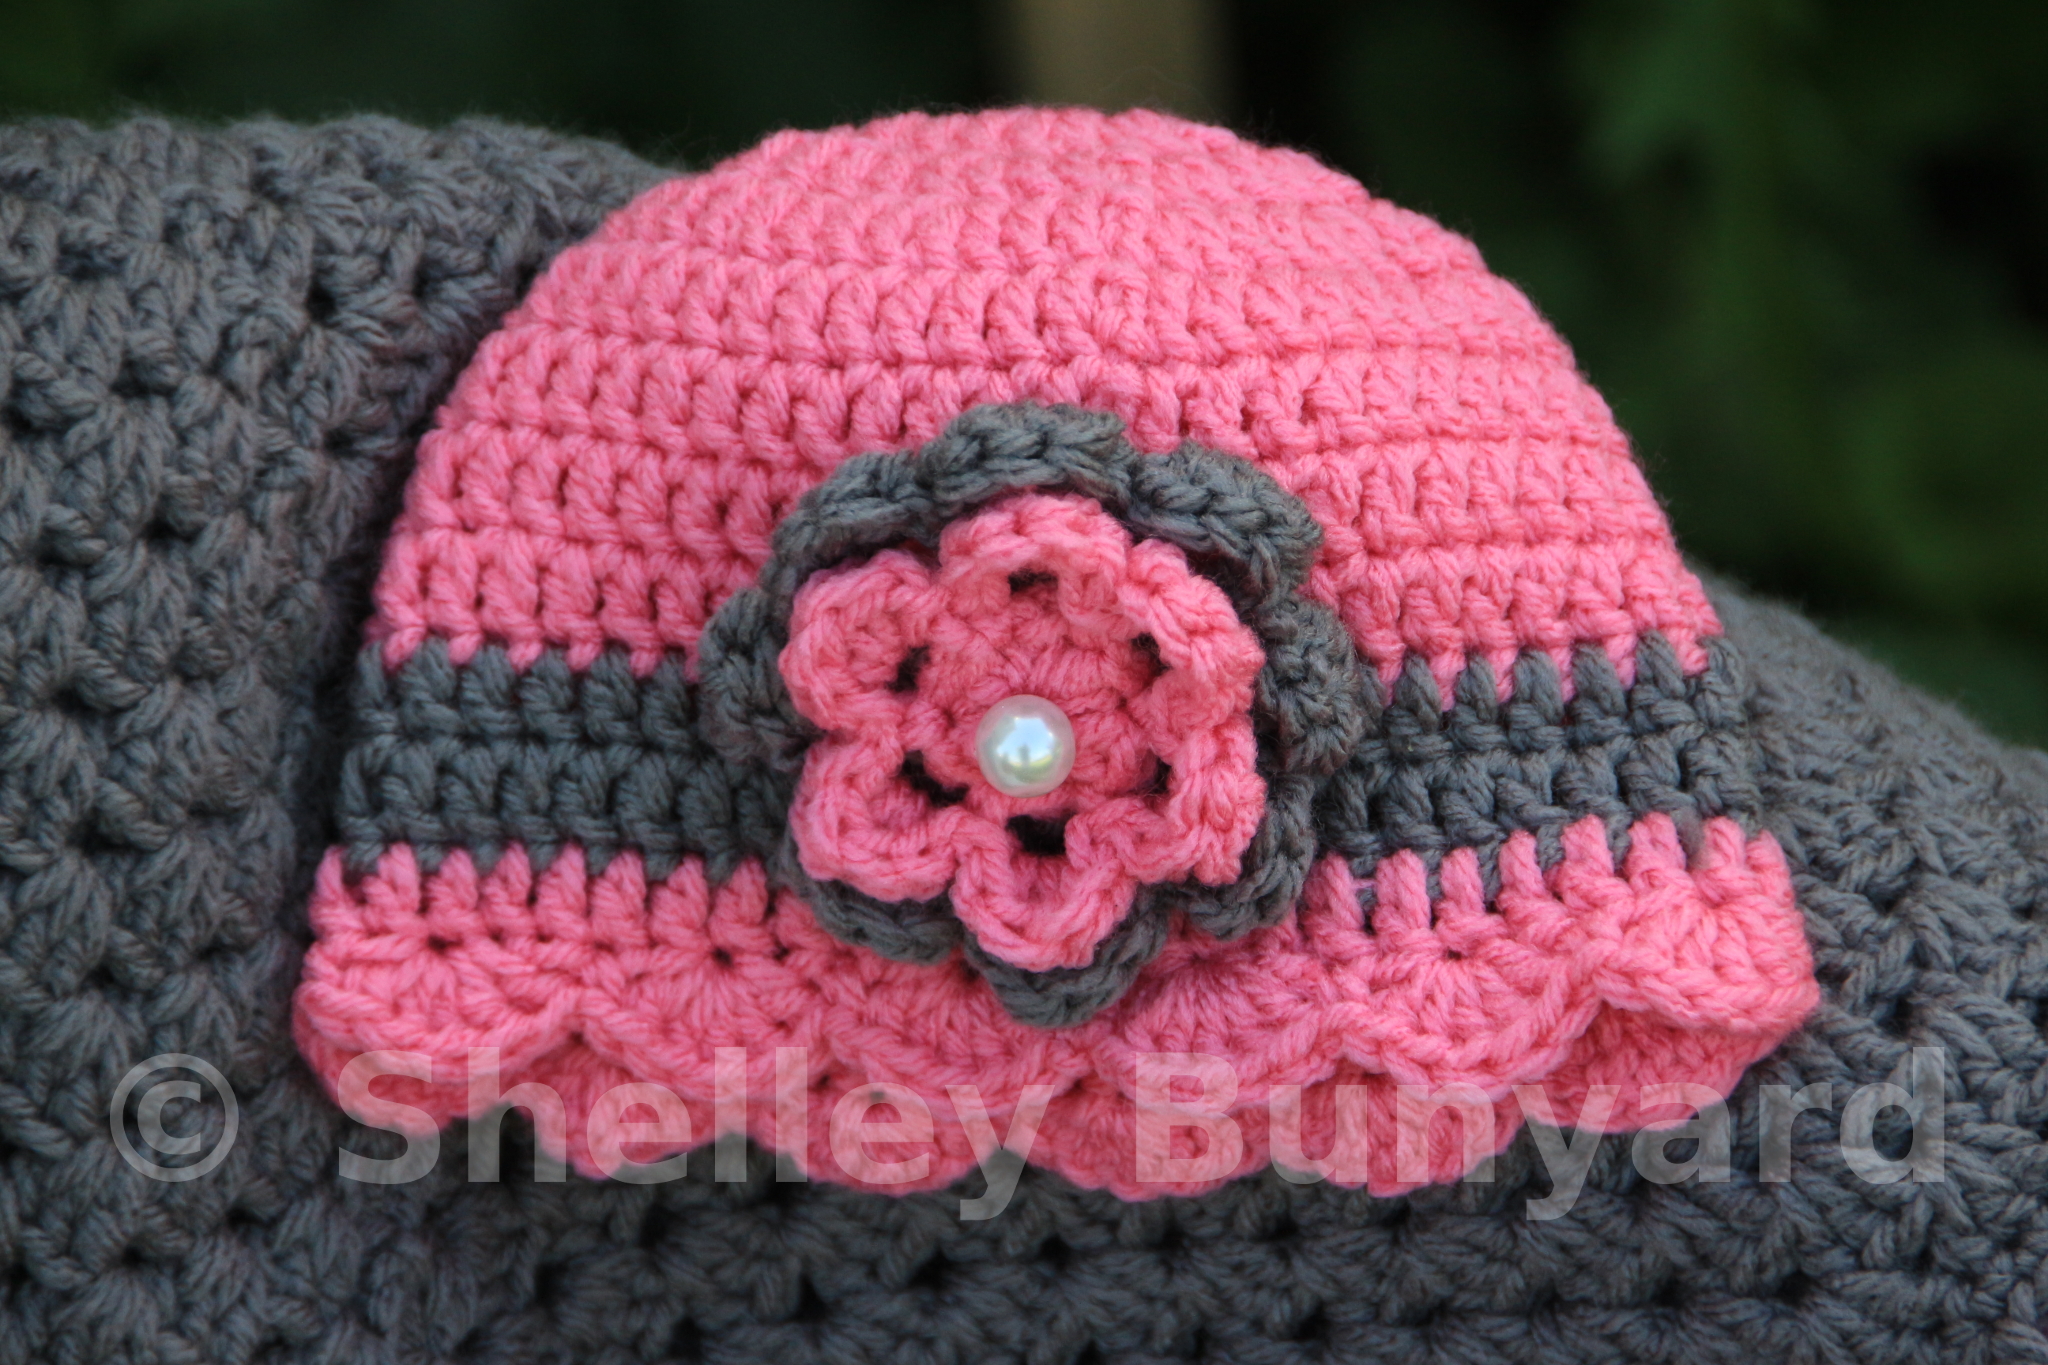
Now, you could stop now and have quite the lovely hat in my opinion or you can continue on and make the brim to make it the cloche hat.

Ok, so find the middle of the front (the seam from the headband is obviously what you want for the back), face the unworked side away from you and count 15 bumps as it were… essentially 30 stitches, but for these purposes we are only thinking of the space between the bumps. Starting here pick up 30 total stitches but only using the spaces between the bumps. You are leaving the rest unworked.

Row 1: knit across
Row 2: decrease, decrease then knit across

Repeat these two rows until you have 6 stitches left on your needles, but end on a row 1 then bind off. Here I didn’t cut my yarn, but I pulled out my crochet hook to just do a quick sc border on this piece only, I didn’t go all the way around. This is completely optional, but I am a hooker at heart…

Now, after you weave in your ends, pull the long side of the piece you made over and sew on your button and that’s that!

Granny Square and Ribbon Baby Blanket Set

IMG_3885

So this one started out as my sister finding this picture of a lovely blanket and wanted me to duplicate it for a gift. It isn’t my original idea and I couldn’t find the pattern listed in my usual hunting grounds, so of course this hooker made up one!

A warning. This isn’t an exact pattern. Depending on the size of your granny square will change the count for the edging and really that is all this blanket is… a traditional granny square with a fancy edging. The hat is a bit more exact.  The hat fits a 0-3 month baby.

Red Heart with Love yarn (I used gray and bubblegum pink)
H size hook
Ribbon (I used 5/8″ or 15mm wide and it took just under 18ft or 5.4m)
Accent pearl or button (or nothing)

Alright, start by making your granny square with the gray. You can find a tutorial just about everywhere, but here is one in case you need it and are feeling lazy (like me usually) and don’t want to search… just note as a personal choice I start my squares with a chain 6 and a decent size tail. This way it is easier to start then by pulling the tail and weaving it in it closes up and takes away the starting bump.

http://stephiescorner.blogspot.com/2013/10/crochet-101-make-basic-granny-square.html

I did 34 rounds so that the blanket would be roughly 3ft wide with the edging. How big you make the square is up to you… just make sure you have enough ribbon.

Edging:

Now, I have written down what to do. That being said you might have to add a stitch or skip an extra stitch to make it work with your granny square. Keep calm, have a glass of wine or beer, and know it will be fine.  It doesn’t need to be exact as the edging is very forgiving and will look great no matter what.  Nobody wants a grumpy hooker.

Don’t bind off yarn, just continue on with the gray.  Ch 1, sc in same st as joining then sc in every st.  Put 3 sc in the corner space. Sl st into first sc.

Ch 5, *skip 1 st then tc (triple crochet) in next st, ch 1* around. Corners:  In the 2nd sc of the 3sc corner do *tc, ch 1, tc, ch 1, tc, ch 1* then skip a st and continue down the row. This is the round where you will weave in your ribbon later.

Ch 1, sc in same st as joining then sc in every tc and in each ch 1 space.  Corners:  Put 3 sc in the corner tc (the second tc in the corner grouping). Sl st into first sc and cut and bind your yarn.

Now using pink join in the second st of any of the previous round corner grouping. Ch 3, (2 dc, ch 1, 3 dc) in same st as joining. Skip 1 st, *dc in next, skip 2 st then (3dc, ch 1, 3dc) in next st, skip 2 st* around. Corners:  When you get to the corners though you will only be skipping 1 st instead of the 2.  Sl st into top of beginning ch 3.

Sl st in the first two dc and into the space (just like you did for the granny square).  Ch 3, (2 dc, ch 1, 3 dc) in same space. *fpdc (front post double crochet) around the dc in middle of groups, (3dc, ch 1, 3dc) in next space* around. Corners:  Nothing special to do in the corners for a change. Sl st into top of beginning ch 3.

Sl st in the first two dc and into the space like last round. Ch 3 and do 8 dc in same space. *fpdc around previous round fpdc, 9 dc in ch 1 space* around.  Cornets:  Again, nothing special to do in the corners. Sl st into top of beginning ch 3. Bind off and weave in your ends.

Now weave in your ribbon doing the over/under in the triple crochet row. Keep the kids away because there will most likely be some choice words here trying to keep the ribbon from twisting.  Also be sure to pull your square into flatness before you cut the ribbon. It will pull the work together a little, but you don’t want to end up with a bunched up blanket and having to reweave the ribbon. Tie your ribbon, making sure it will be where the flower goes to cover it up.  I also got out my sewing needle and thread to add some stitches in all the corners to keep it from twisting and pulling weird.  This will also secure it a bit for future washings.

For the flower I used this pattern: http://www.sccmag.com/crochet-a-sweet-simple-flower-clip-for-spring/

The top part I did with the pink, bottom with gray then I sewed on a pearl bead in the middle.

Now for the 0-3 month old baby hat! And you thought you were done… silly hooker…

IMG_3886

In pink, ch 2 then 12 dc in first chain. Sl st to top of first dc.

Ch 2, 2 dc in joining and each st around. Sl st to top of first dc.

Ch 2, 2 dc in joining. *1 dc in next st, 2 dc in next st* around. Sl st to top of first dc.

Ch 2, 2 dc in joining. *1 dc in next 2st, 2 dc in next st* around. Sl st to top of first dc.

Ch 2, dc in joining and each st around. Sl st to top of first dc. Repeat for 4 rows.

Switch to gray. Ch 2, dc in joining and each st around. Sl st to top of first dc. Repeat for 2 rows.

Switch back to pink. Ch 2, dc in joining and each st around. Sl st to top of first dc. Only for 1 row.

Ch 1, sc in joining. *skip 1 st, 5 dc in next, skip 1 st, sc in next* around. Sl st in first sc and bind off, weaving in ends.

Sew on matching flower as blanket and now you are done! Woot, Woot!

Mad Hooking!

Baby Turban Hat with a Bow

IMG_20140718_171929_650

I had a request for this style hat for a baby… I found a precious few free patterns and none for the light weight yarn. So like more often than not I found myself coming up with my own patten. I’m just proud that I actually wrote it down to share.

G hook
Baby light #3 yarn I used Bernat softee baby yarn because I had it in my stash

Ch 2, 12 dc in first chain, sl st into top of first dc

Ch 2, 2 dc in same as joining, *2 dc in each st around then sl st in first dc.

Ch 2, 2 dc in same as joining, 1 dc in next, *2 dc in next stitch, 1 dc in next* around then sl st in first dc.

Ch 2, 2 dc in same as joining, 1 dc in next 2, *2 dc in next stitch, 1 dc in next 2* around then sl st in first dc.

Ch 2, 2 dc in same as joining, 1 dc in next 3, *2 dc in next stitch, 1 dc in next 3* around then sl st in first dc.

Ch 2, 2 dc in same as joining, 1 dc in next 4, *2 dc in next stitch, 1 dc in next 4* around then sl st in first dc.

For the next 4 rows: Ch 2, dc in same as joining and then in each st around.

Ch 1, sc in joining and each st around, sl st in first sc.

Ch 1, hdc in joining in the back loop only and in each st around. Sl st in first hdc.

Repeat last two rows for total of 8 rows.

Ch 1, sc in joining and each st around, sl st in first sc.

Finish off and weave the ends.

Bow

Ch 27, dc in 3rd Ch and across. Turn

Ch 2,  dc across.

Repeat for a total of 8 rows. Finish off and leave a really long tail.

Weave the tail to the middle of the square, pinch together the middle and wrap about 10 times. Thread your yarn into a needle.

Now place it on the hat roughly where the second row of hdc is and holding tightly in place you want to insert your needle where you want the bow to be. Now bring up the yarn on the outside of the hat and pull tight creating the v. Do this another 10ish times and knot the yarn on the inside of the hat.

I then added some hidden stitches to hold the bow into place about an inch from the edges of the bow. Just my preference honestly. Just make sure to weave in the ends when you are done.

Mad Hooking!

Small Top Hat

IMG_20131115_195310_916

So I needed a go to pattern for a top hat. Why? Because everyone needs a top hat every now and then! This makes a small top hat perfect for a snowman hat, cat hat or to put on a headband or clip for yourself!

I used my G size hook and some Red Heart Super Saver and I Love This Yarn from Hobby Lobby yarn

6 sc in magic circle
*2 sc in each sc* around
*2 sc in next sc, sc in next 1 sc* around
*2 sc in next sc, sc in next 2 sc* around
*2 sc in next sc, sc in next 3 sc* around
*2 sc in next sc, sc in next 4 sc* around
*2 sc in next sc, sc in next 5 sc* around
Sc around in BACK loop only
*sc over next 2 sc, sc in next 5 sc* around
Sc around for the next 4 rounds
*sc over next 2 sc, sc in next 4 sc* around
Sc around
Here is where I changed colors for the next 2 sc  rounds
Sc around again in primary color
*2 sc in next sc, sc in next 4 sc* around
*2 sc in next sc, sc in next 5 sc* around
*2 sc in next sc, sc in next 6 sc* around
Finish off and sport your top hat!

Mad Hooking!