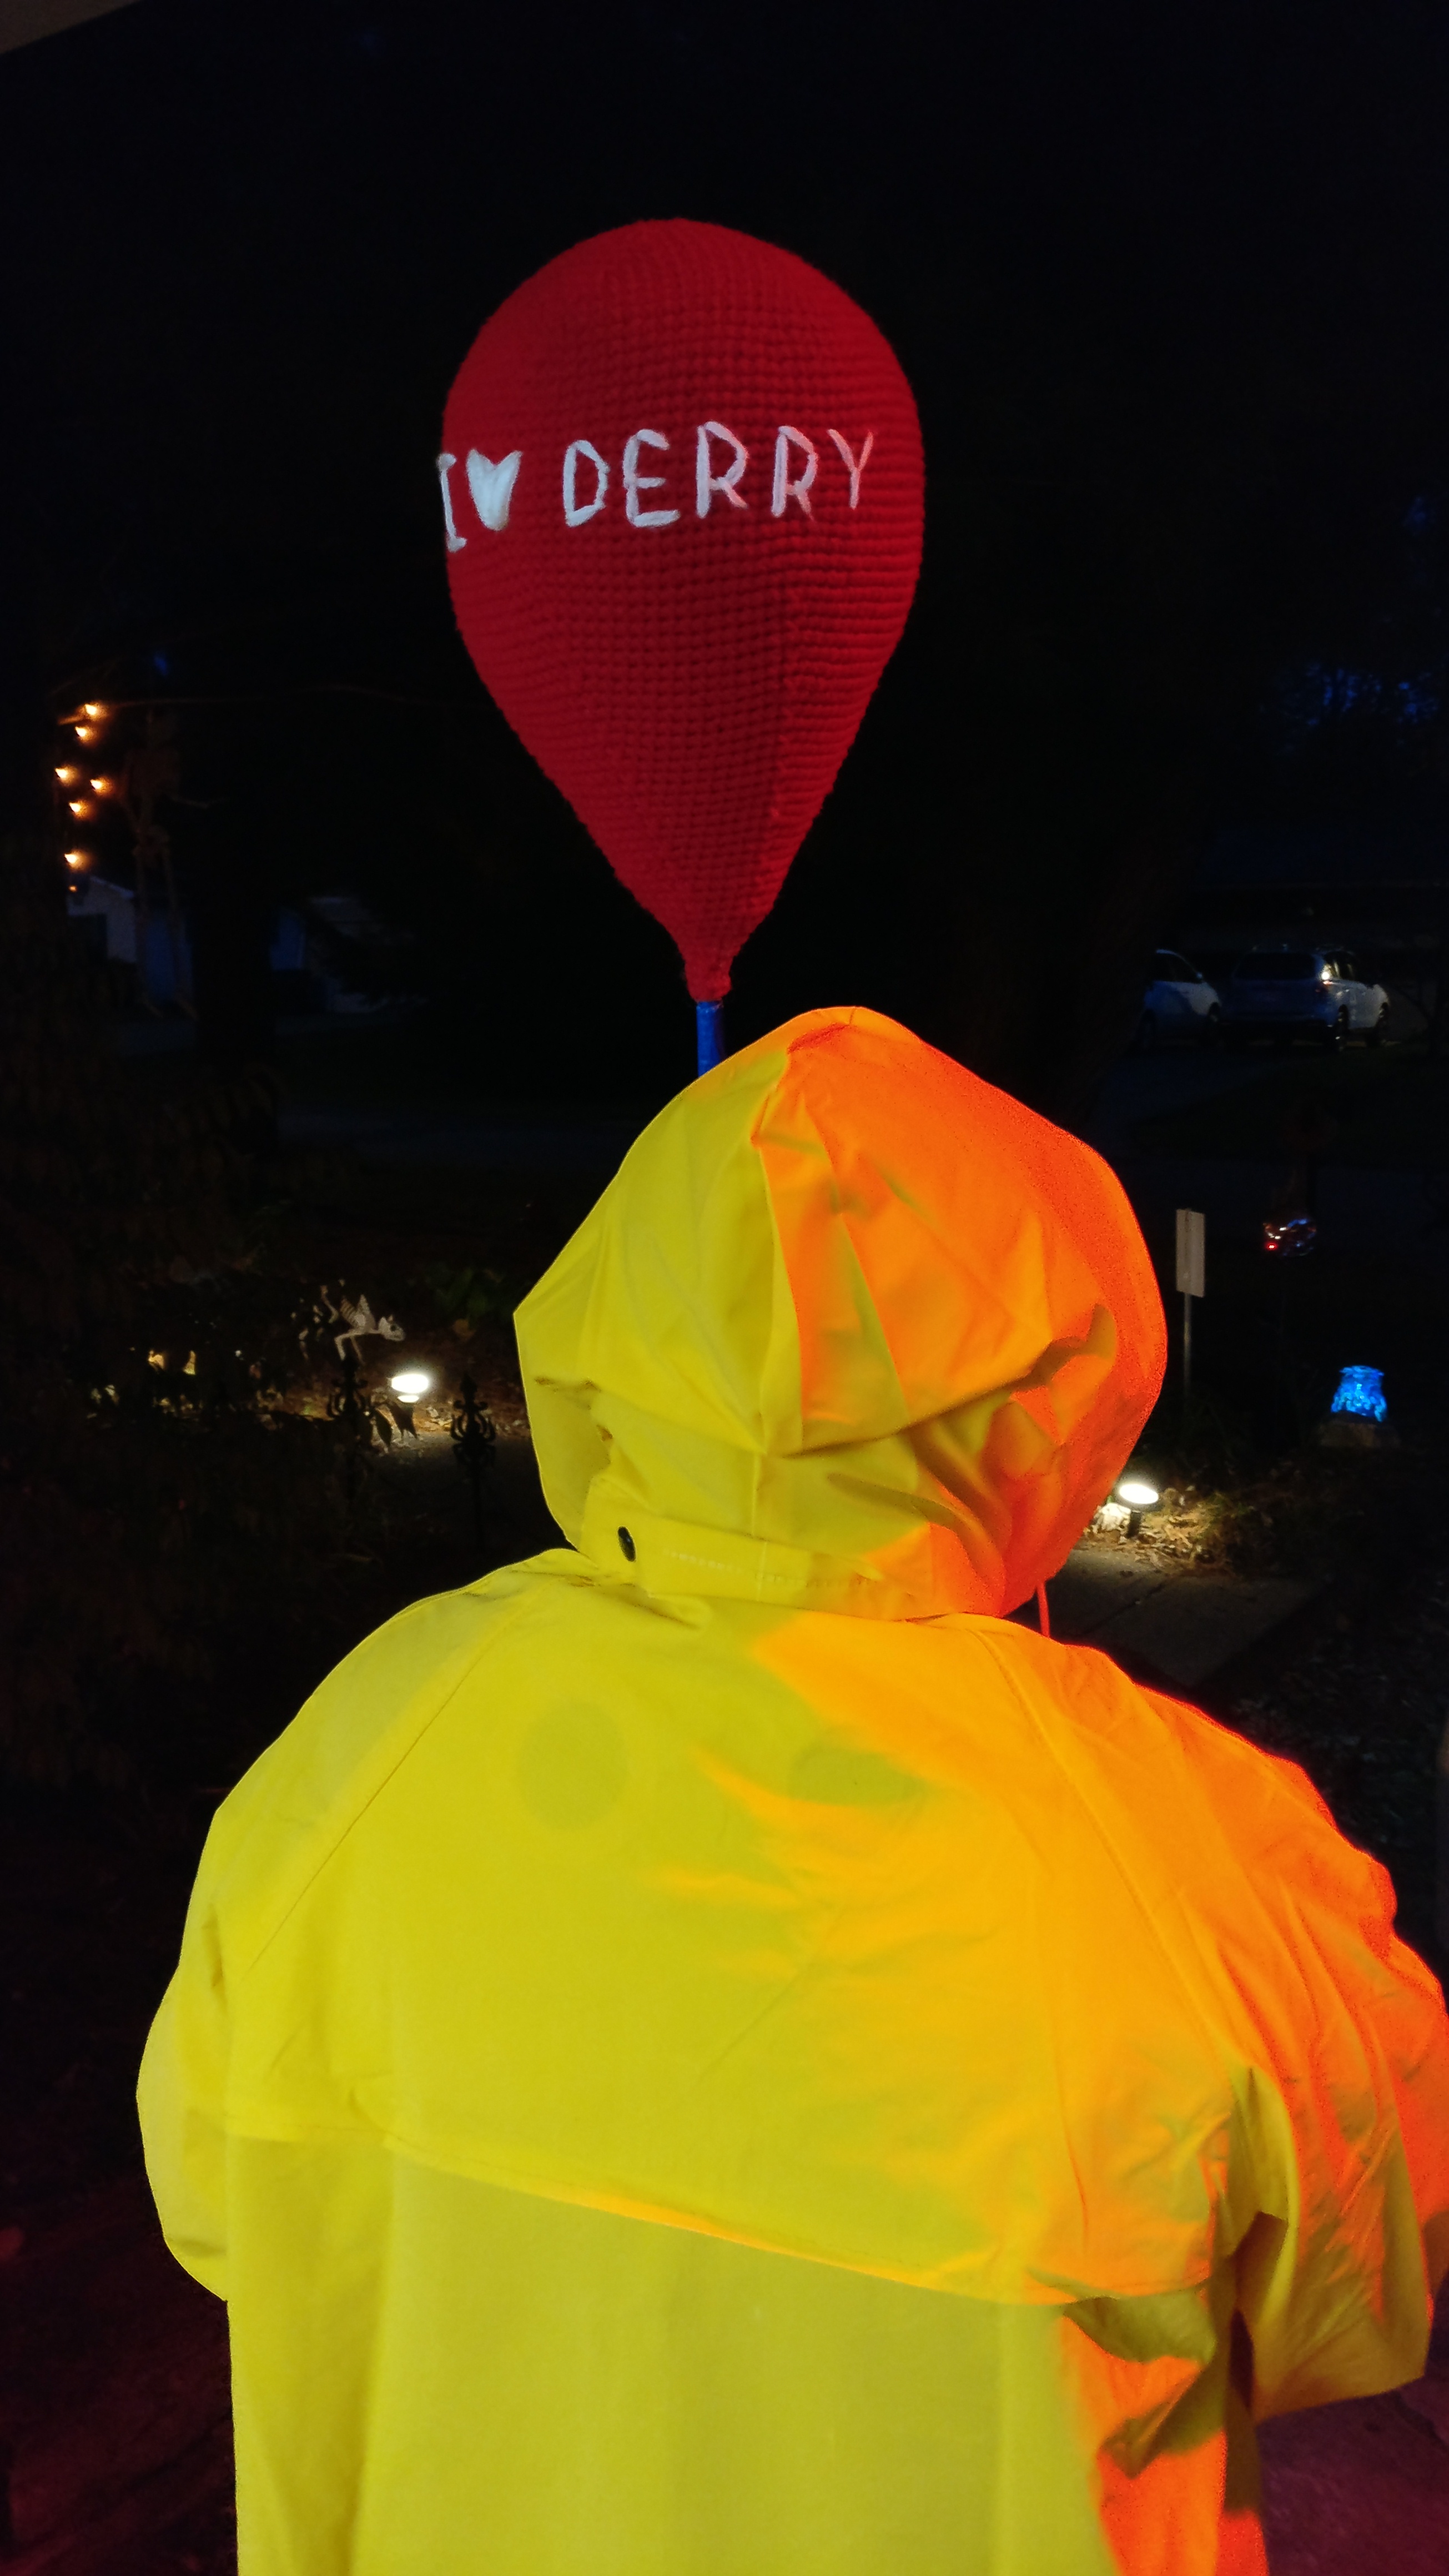
This year my son decided he wanted to be Georgie from Stephen King’s It. Great! Another easy costume to pull together! I had originally thought to make a paper mache balloon for him to carry (a real helium balloon was just asking to get let go and I so didn’t want to deal with that breakdown). Then I got more and more afraid that he would drop it and break it or that I wouldn’t be able to hold the balloon upright without making a hole in it… so I decided just to go ahead and make one! Of course there wasn’t a pattern readily available because how many people think to make a large balloon out of crochet? So, here’s my It balloon pattern…. written as a amigurumi style pattern.
Note: This balloon is big. Like adult head size. You could decrease the amount of increase rounds then decrease the sc and decrease, sc rounds by the exact same and it will work out fine.
Note: As I was making this it made me think that this would be awesome in blue or pink for a baby gift…
G hook or whatever you usually use to keep the polyfil from showing
worsted weight yarn in color of choice, I used red that I had in my stash (which feels like some scratchy Red Heart basic) and white for the lettering
polyfil
dowel of whatever length you want
Duck Tape (I had dark blue and not black so I just used that. Wrapping it around the dowel helps with the stability)
Super Glue (to keep the balloon from sliding)
option red ribbon (I plan on doing this after we use it for Halloween just in the attempt to keep at least one thing off his floor)
6sc in magic circle
*inc* around
*inc, sc* around
*inc, 2 sc* around
*inc, 3 sc* around
*inc, 4 sc* around
*inc, 5 sc* around
*inc, ,6 sc* around
*inc, ,7 sc* around
*inc, ,8 sc* around
*inc, ,9 sc* around
*inc, ,10 sc* around
*inc, ,11 sc* around
*inc, ,12 sc* around
*inc, ,13 sc* around
*inc, ,14 sc* around
*inc, ,15 sc* around
sc around for 15 rounds
*dec, 15 sc* around
sc around
*dec, 14 sc* around
sc around
*dec, 13 sc* around
sc around
*dec, 12 sc* around
sc around
*dec, 11 sc* around
sc around
*dec, 10 sc* around
sc around
*dec, 9 sc* around
sc around
*dec, 8 sc* around
sc around
*dec, 7 sc* around
sc around
*dec, 6 sc* around
sc around
*dec, 5 sc* around
sc around
*dec, 4 sc* around
sc around
Make sure you go ahead and stuff the balloon and insert the dowel. Try to get the dowel in just under a little bit of stuffing at the top of the balloon. Stuff around the dowel… The next few rows you will work around the dowel closing in the balloon and keep stuffing as you go. It’s awkward, but it works.
*dec, 3 sc* around
sc around
*dec, 2 sc* around
sc around
*dec, 1 sc* around
sc around
dec around
sc around
sc around
bind off, weave in end
This is where the super glue comes in. Drop a few drops to where you closed in. This keeps the balloon from sliding off the dowel.
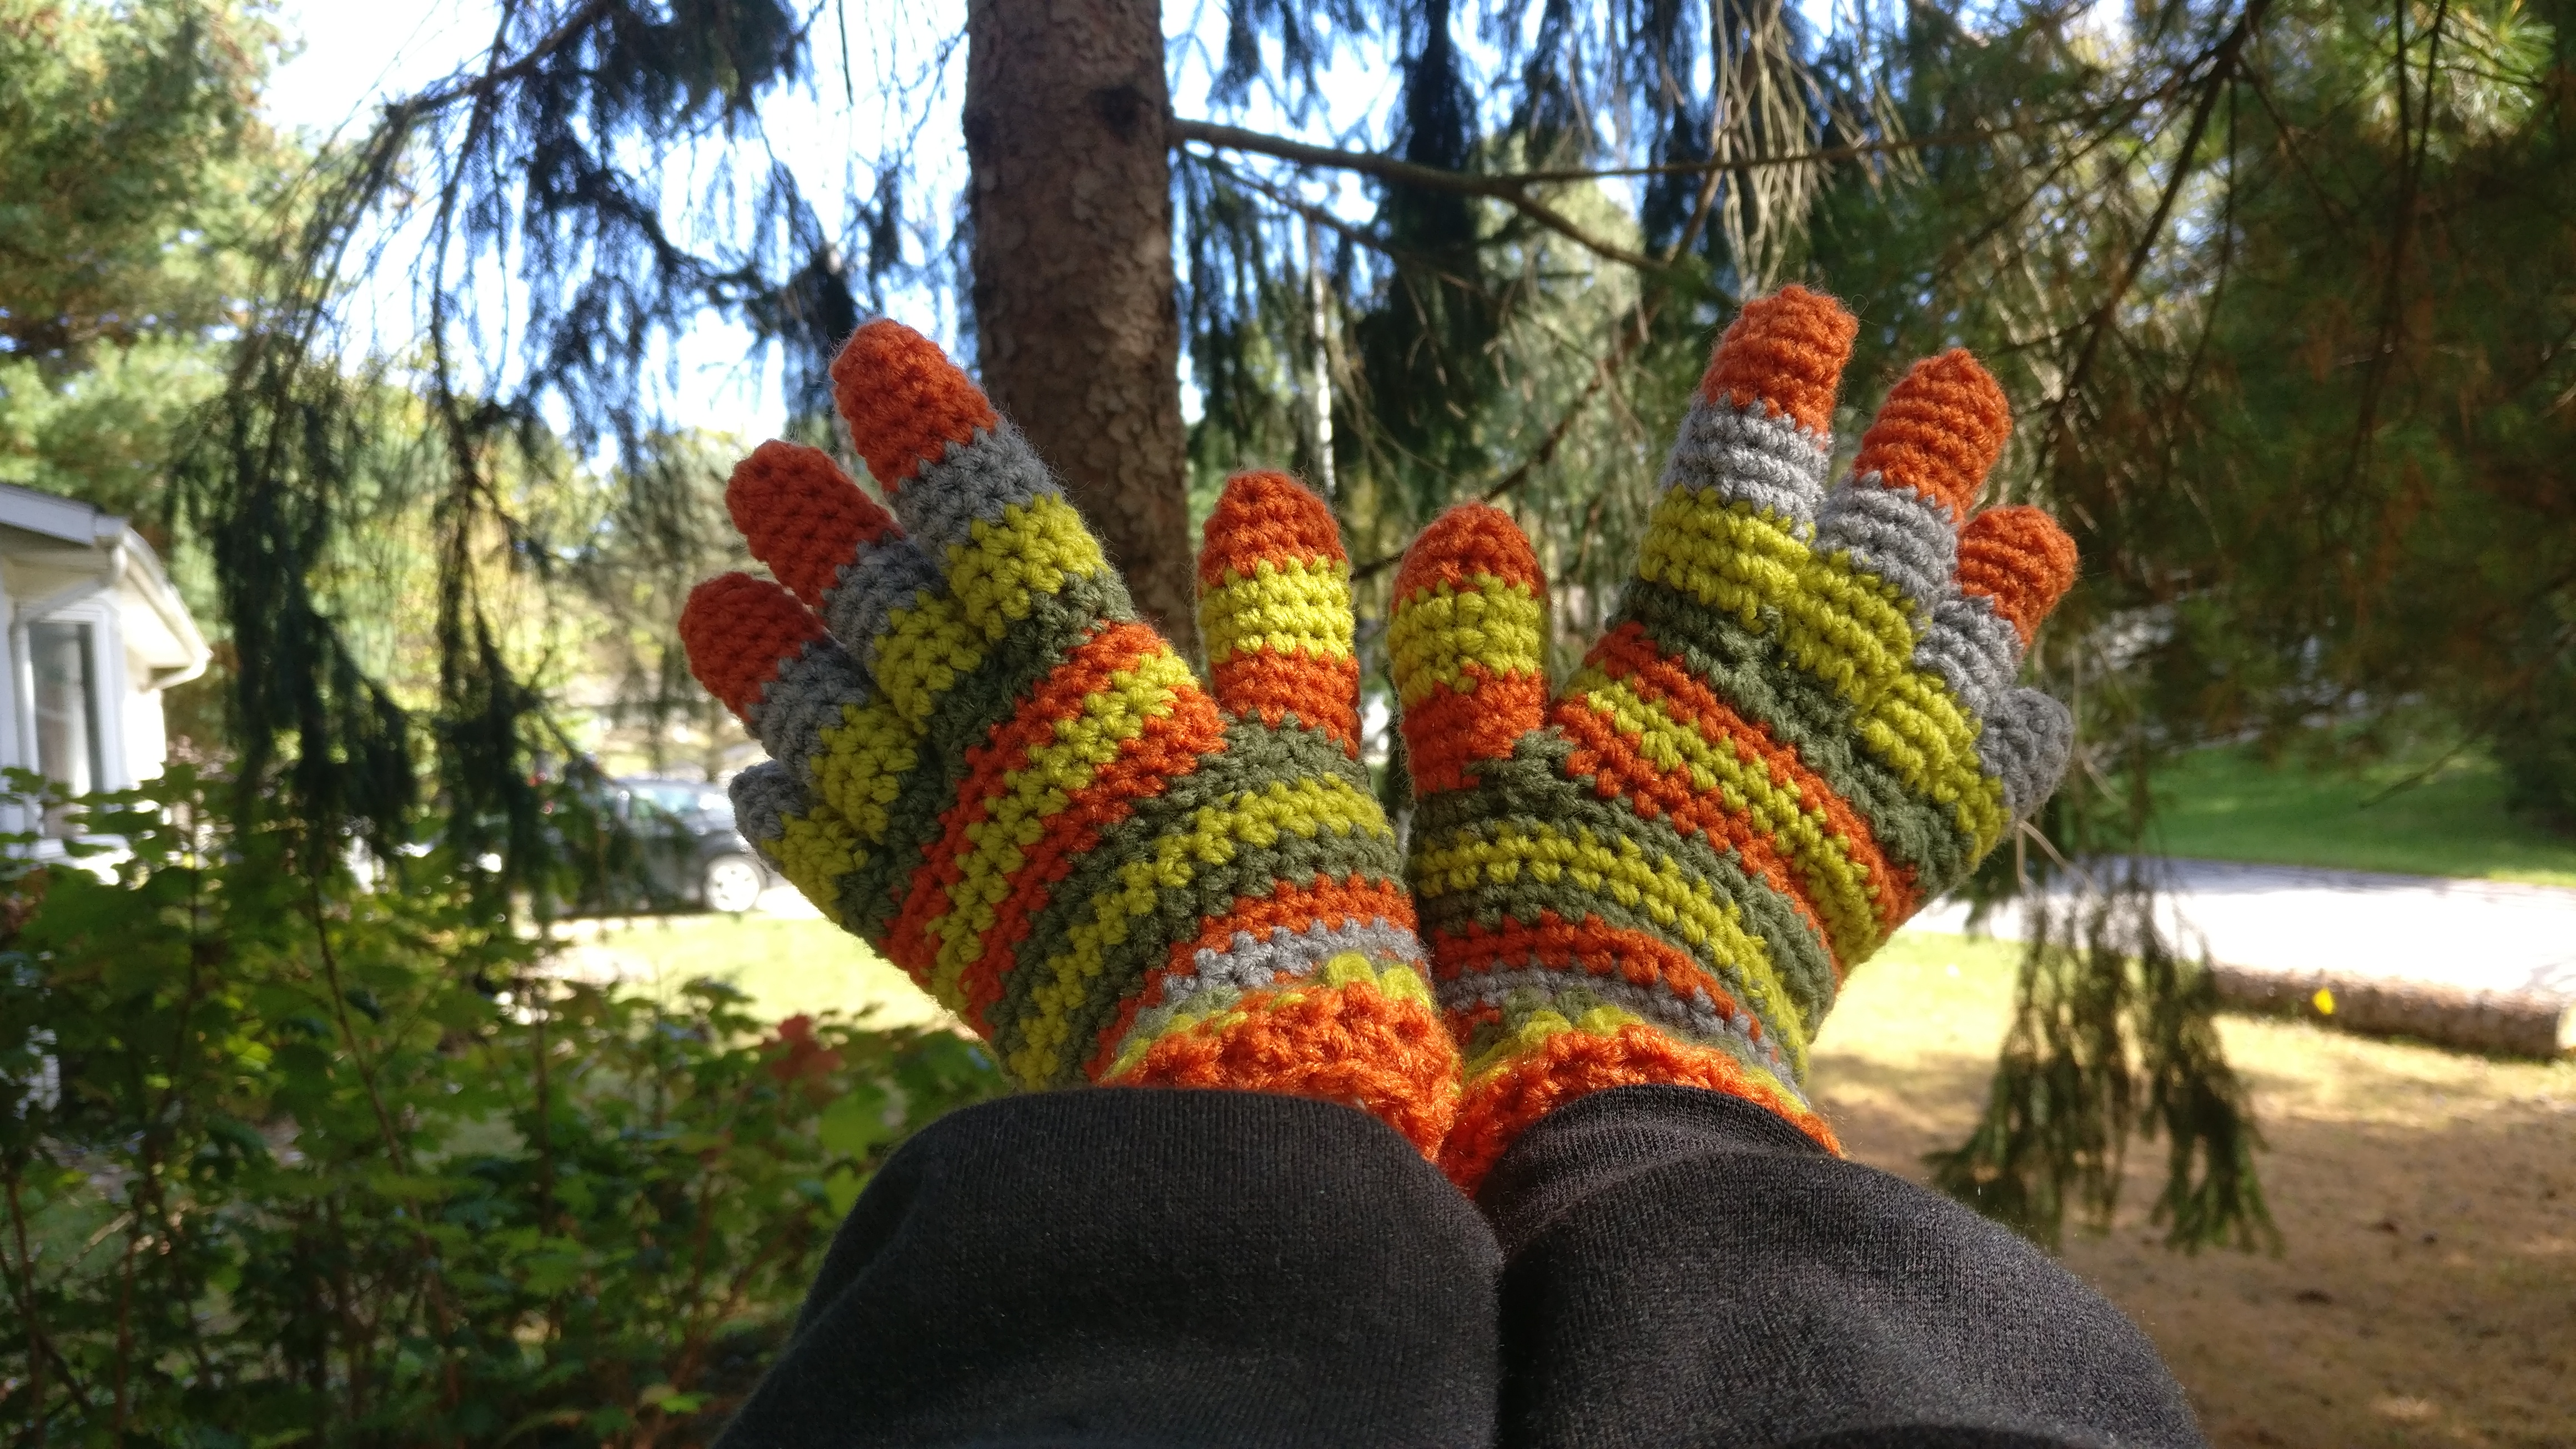
As my daughter decided to dress up as Coraline this year for Halloween. I was thrilled! Not only have we always loved the movie, but it is an easy costume to pull together. Though she mentioned she wanted some gloves like the ones from the movie. I originally thought it would be no problem. The movie has been out for a while, I won’t have a problem finding the pattern. Yeah, in part I could… for knitting. Now if I even attempted to knit these she might get them in a few years. So, here’s my humble attempt to recreate them in crochet.
Size I hook (now, I do tend to crochet a bit tight as some others have pointed out. These gloves are meant to fit what I would consider a small/medium woman.) worsted weight yarn in the colors of your choice/ I used orange, medium gray, olive green and a yellow green that was in my stash… great time to stash bust!
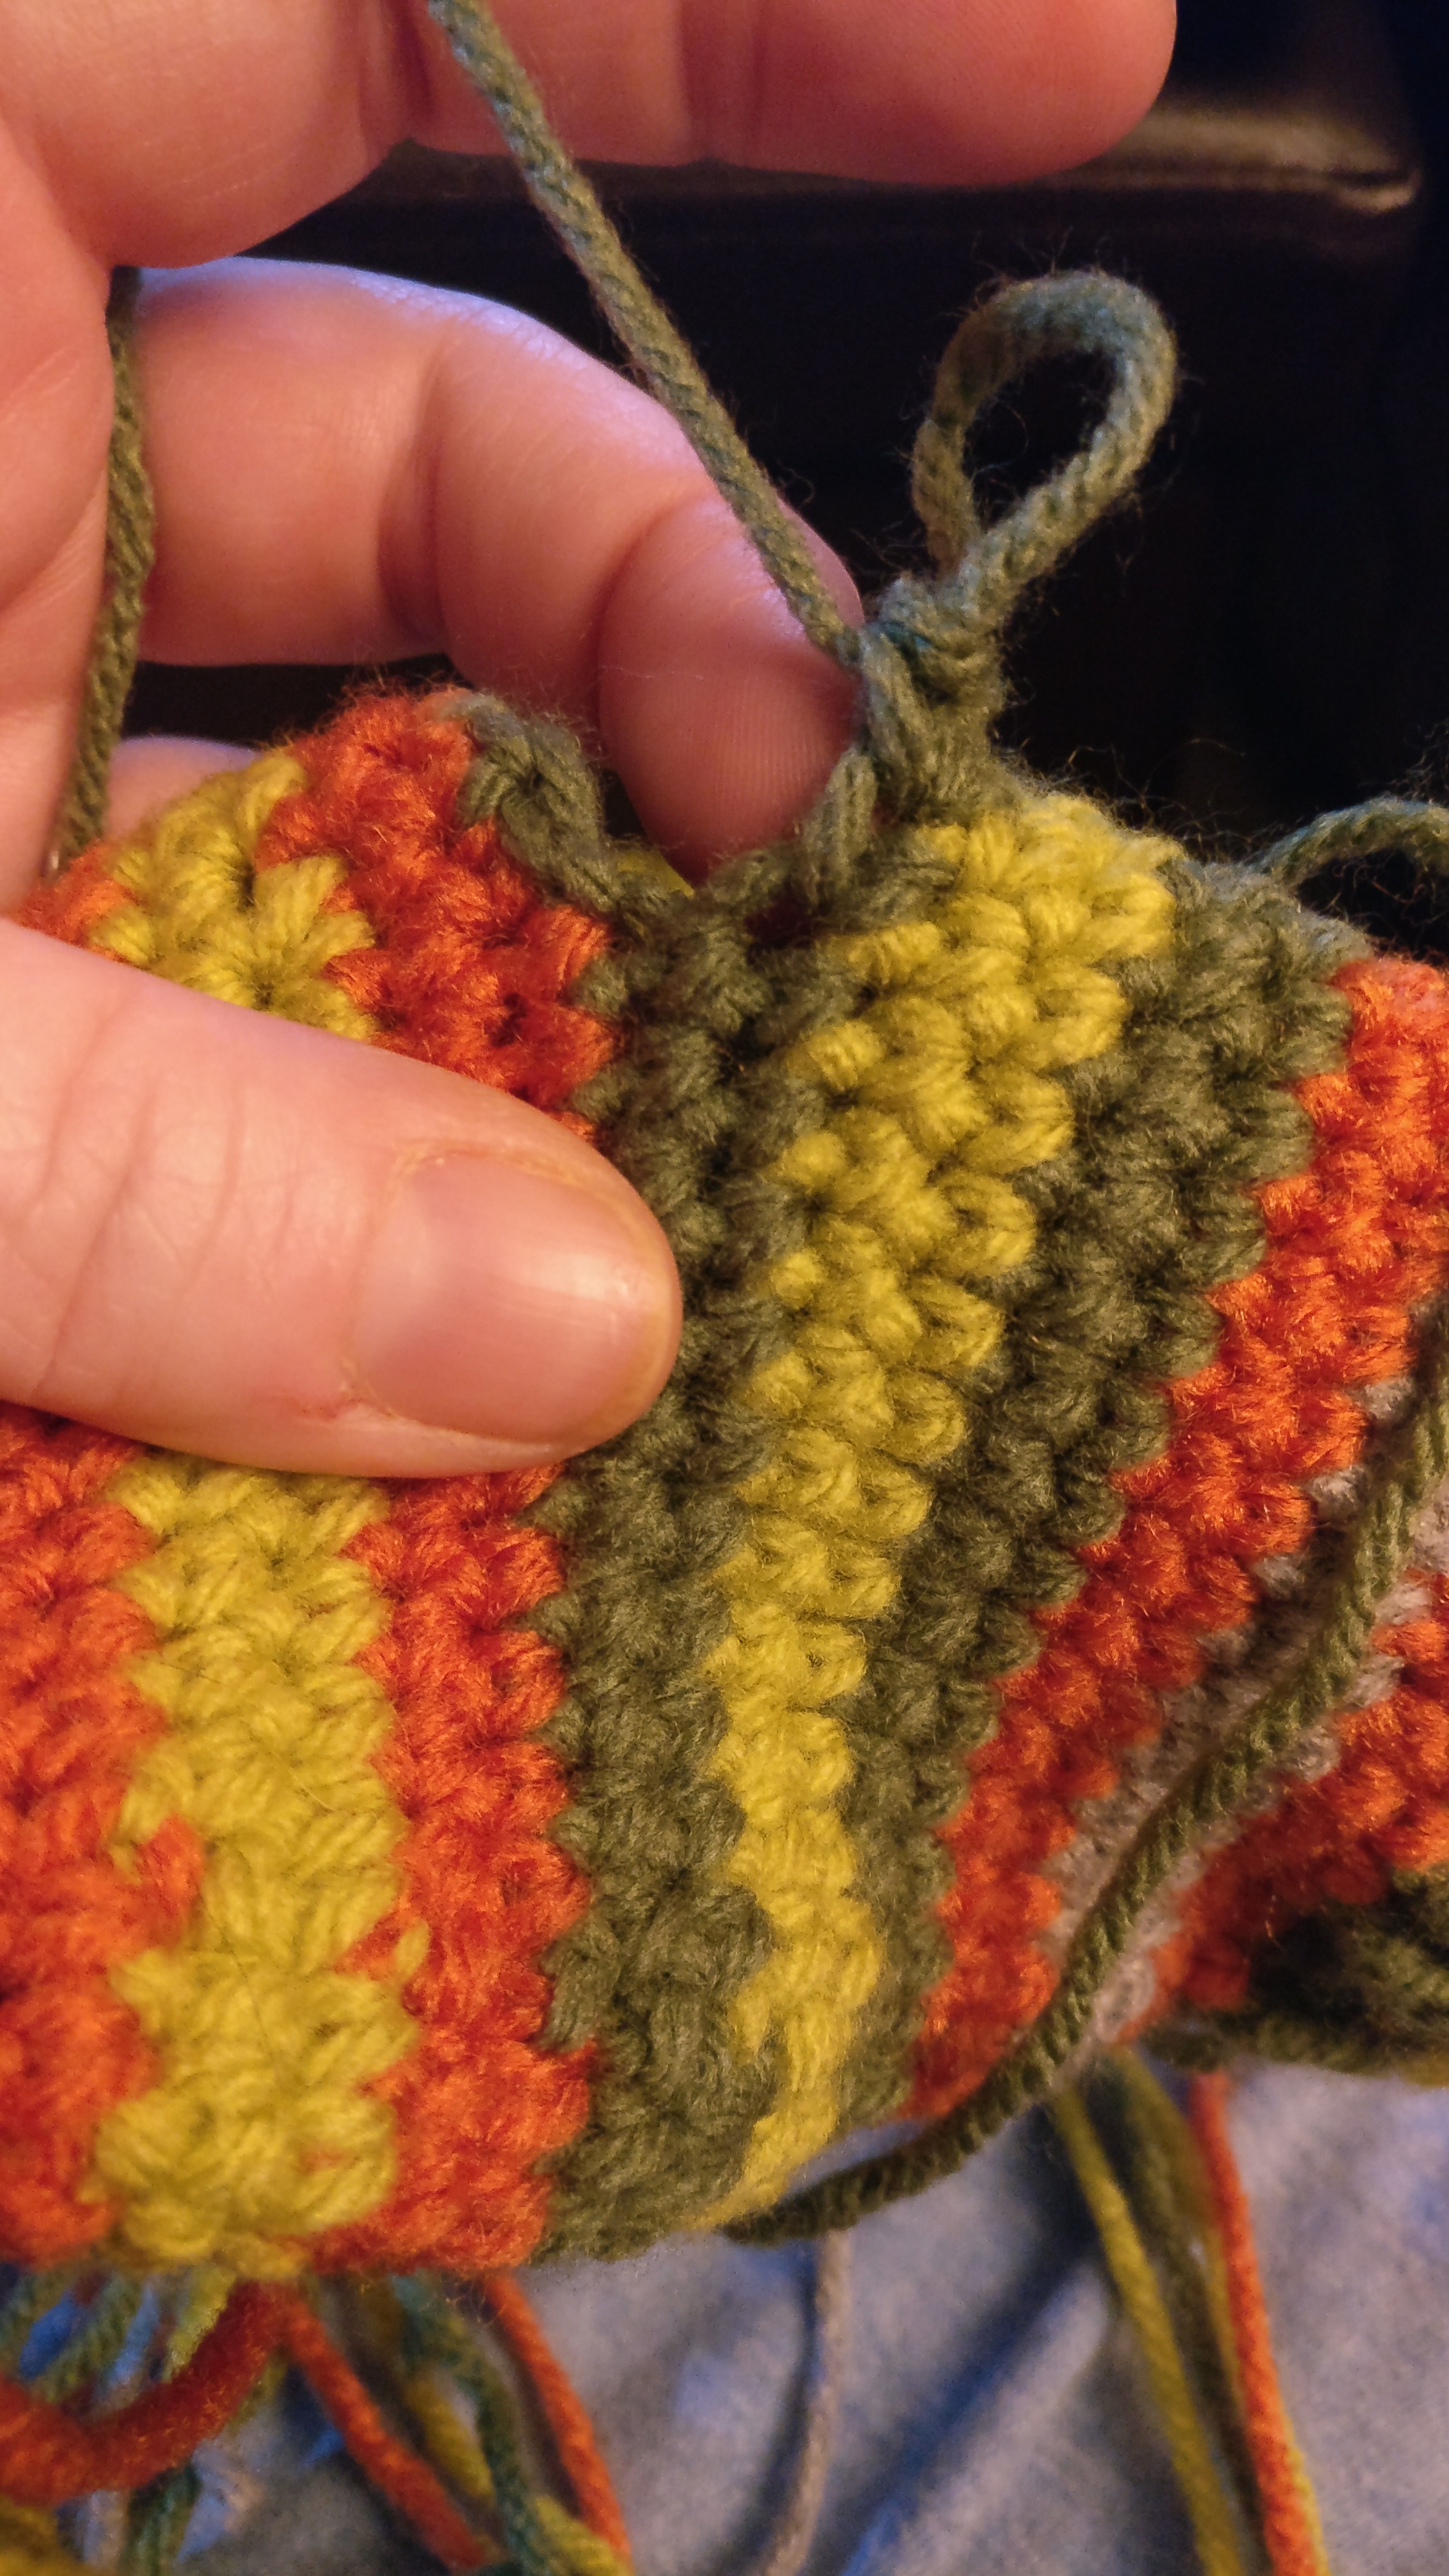
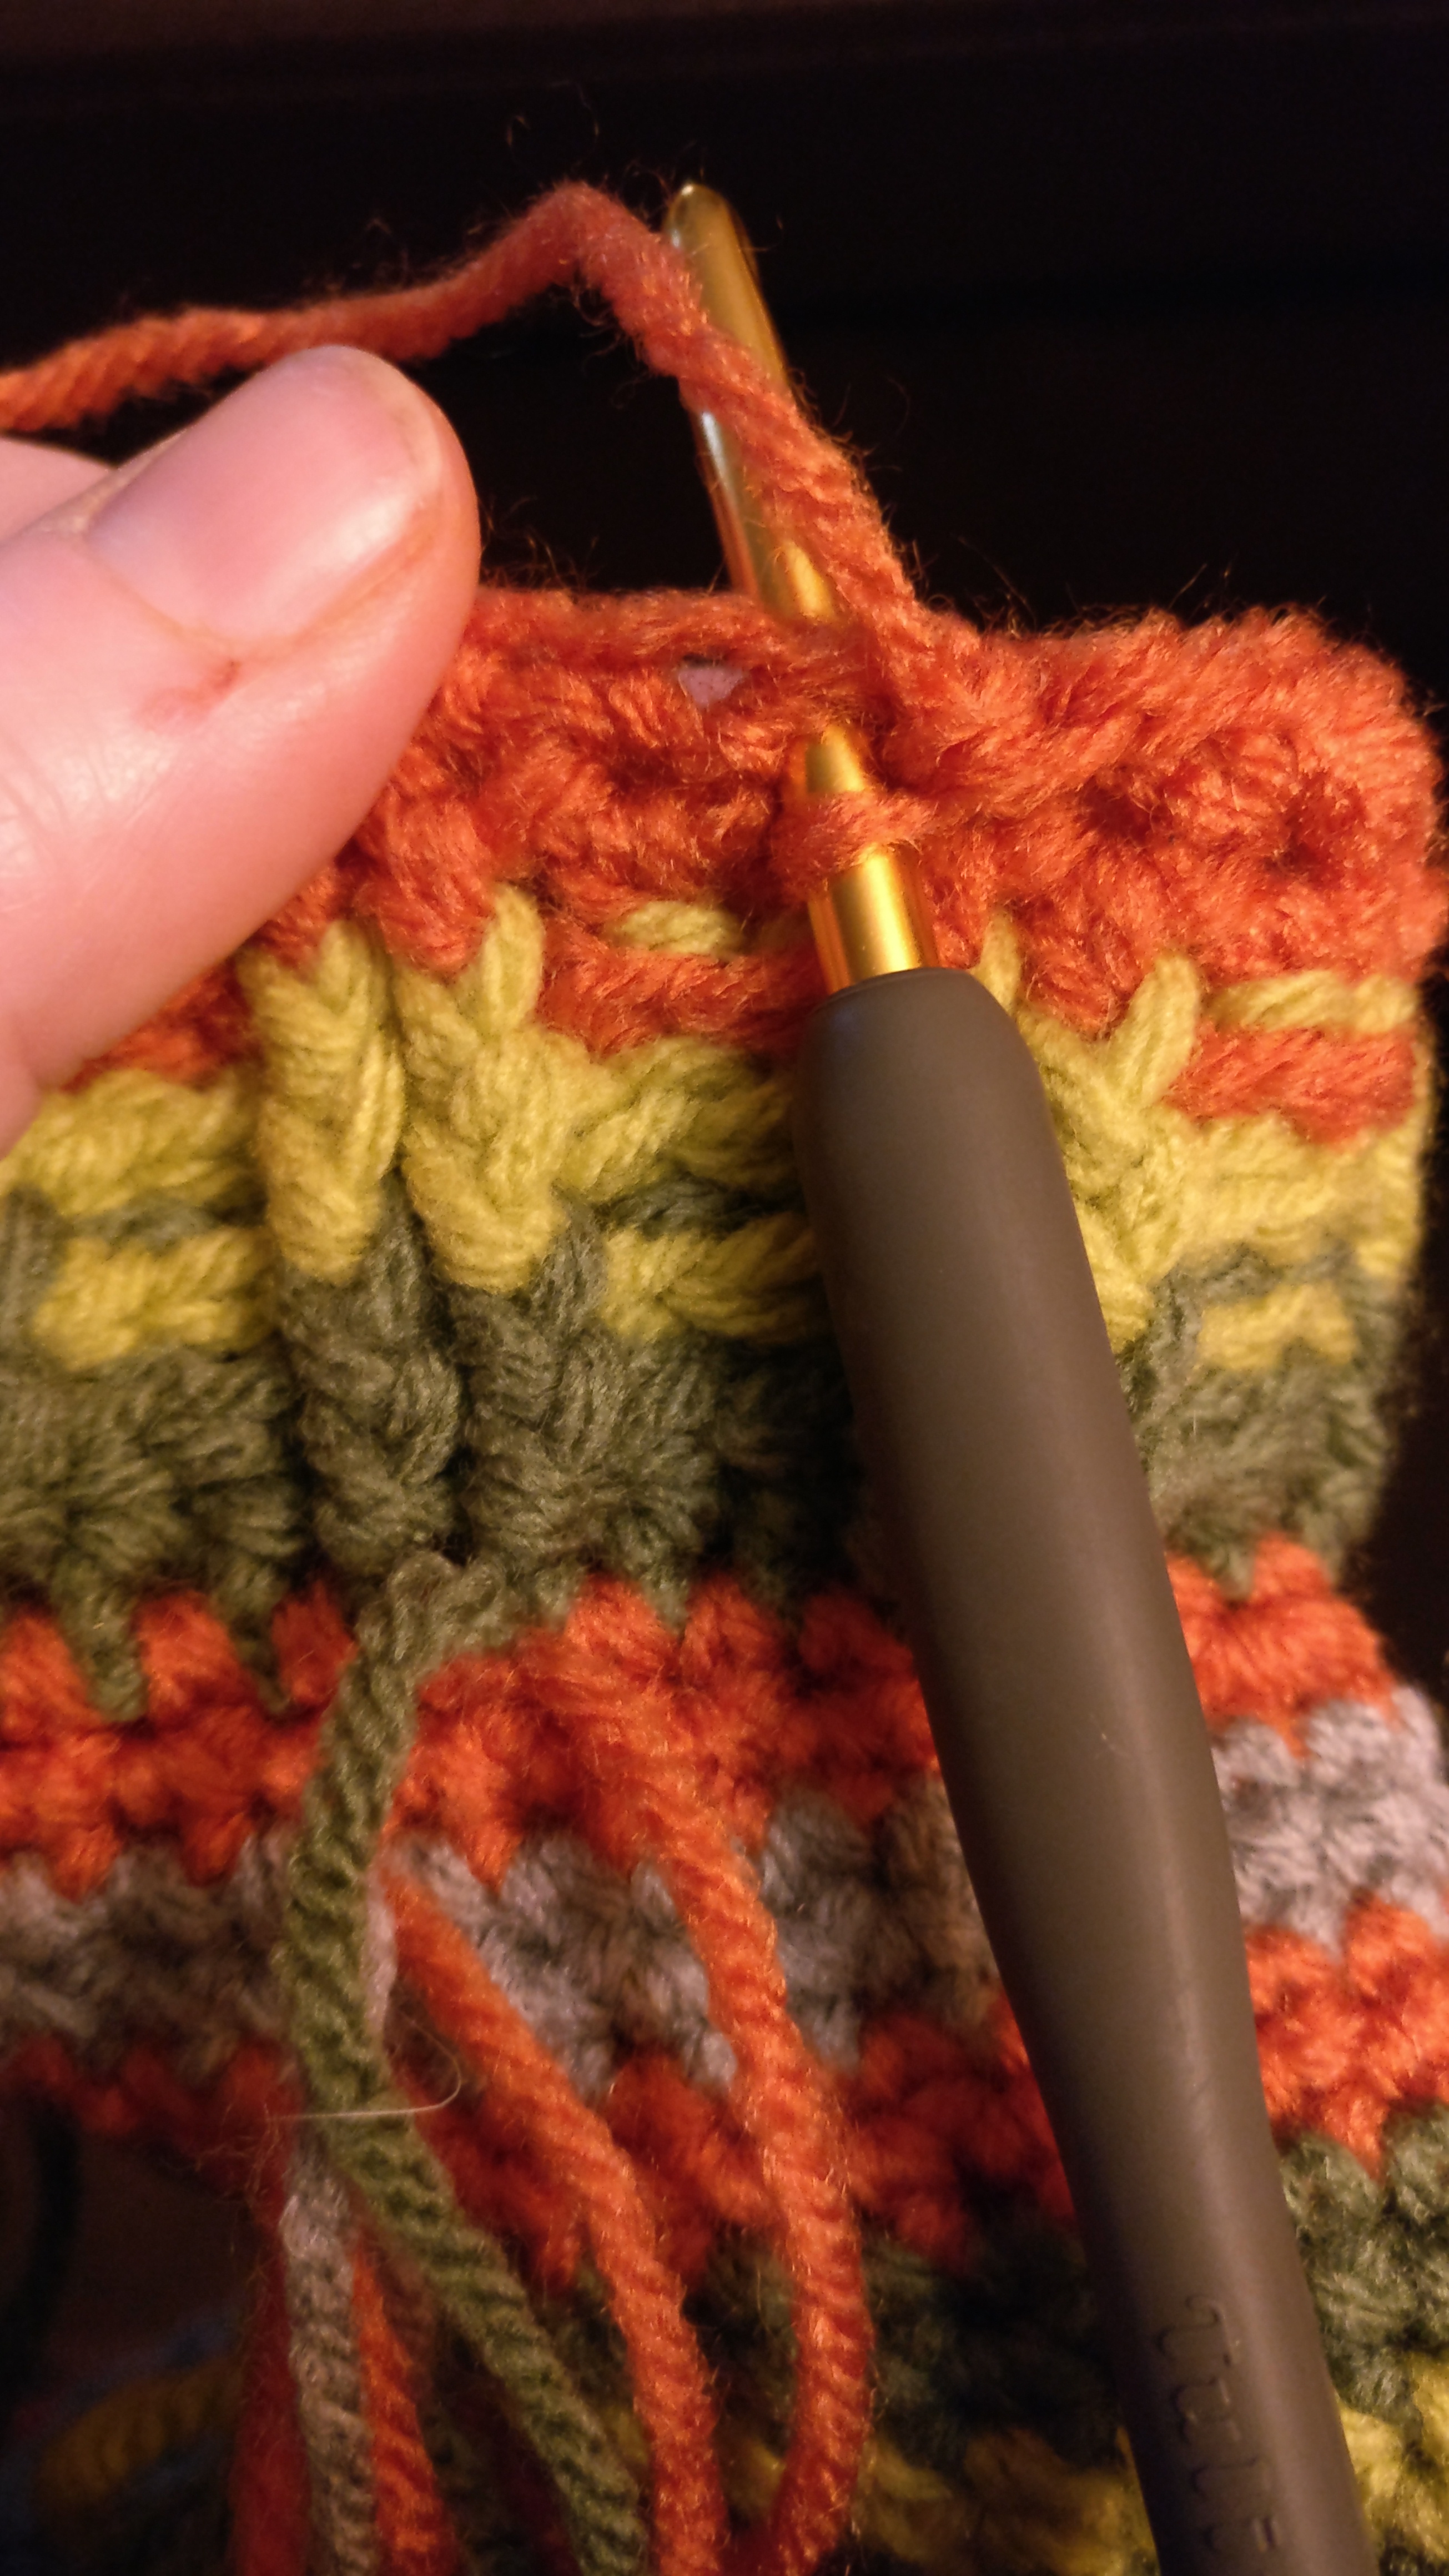
Notes: Note on sizing. This pattern worked for me to make my daughter a pair of gloves. I tried them on her multiple times, much to her annoyance. She does have small woman size hands. They would never have fit my hands. NEVER. I also don’t know how well they would fit a smaller child since I don’t have one to try them on. This was my first foray into making gloves honestly. Note on color changes. I found it easier to change colors and then let the ends fall to the FRONT of your work. You so don’t want to have to try and turn the glove inside out to sew in the ends later. I didn’t carry the yarn as I usually would because I was afraid of any extra loops for fingers to get caught on. Most likely just my mind. Note on fingers. When pulling up the yarn to start another finger I found that if I left an extra long beginning ‘end’ then it made it easier to sew the webbing of the fingers together later. Make two, they are interchangeable on the sides… or make one. Who am I to tell you what to do?
Cuff: RND 1: Starting with orange, 25 fsc (foundation single crochet or ch 25 and a round of sc), sl st to join. This measured 8″. RND 2: ch 1(doesn’t count for a stitch), hdc around, sl st to join RND 3: change to yellow green, ch 1, fphdc (front post half double crochet x2 stitches, bphdc (back post half double crochet) x2 around and ends with a single fphdc and sl st to join RND 4: ch 1, fphdc in fphdc, bphdc in bphdc, end with single fphdc and sl st to join RND 5-6: change to olive green and repeat RND 4 RND 7: change to orange and sc around, sl st to join RND 8: ch 1, inc (increase), 1 sc in next 10 sc, inc in next 2 sc, 1 sc in next 10 sc, inc in next 2 sc, sl st to join RND 9-10: change to gray and sc around then sl st to join RNDS 11-12: change to orange and sc around then sl st to join RNDS 13-14: change to olive green, ch 1 and sc around then sl st to join RNDS 15-16: change to yellow green, ch 1 and sc around then sl st to join RND 17: change to olive green, ch 1 and inc, sc 14, inc, sc to end, sl st to join RND 18: ch 1, sc in next 14 sc, ch 6 and skip the next 6, sc to the end, sl st to join RND 19: change to orange, ch 1, sc in next 14, sc in the next 6 ch, sc to the end, sl st to join RND 20: ch 1, sc around, sl st to join RND 21: change to yellow green, ch 1, sc next 12, dec (decrease), sc in next 5, dec, sc to the end, sl st to join RND 22: ch 1, sc around, sl st to join RND 23-24: change to orange, ch 1, sc around, sl st to join
PINKIE: RND 1 – change to olive green, ch 1, 1 sc in next 7 sc, ch 3, sl st to first sc of this round RND 2 – ch 1, sc in next 7 and in each ch, sl st to join RNDS 3-5: change to yellow green, ch 1 and sc around, sl st to join RNDS 6-8: change to gray, ch 1 and sc around, sl st to join RND 9: ch 1, dec x5, sl st and cut yarn leaving a long end to weave through last stitches to pull close
RING FINGER Using olive green pull up a loop in the last worked stitch from the pinkie, the 7th stitch from the beginning, then pull up another stitch immediately in the 8th stitch then pull through both loops on the hook. RND 1 – Ch 1, sc in the 8th, 9th, and 10th st, ch 3, 1 sc in the third st from the baby finger on the other side of glove and the next stitch. Dec from the 3rd stitch and the first st of the backside of the pinkie, ch 3, sl st to join(make sure it is to the top of the first stitch and not the first loop) RND 2 – ch 1, sc in each st and ch around, sl st to join RNDS 3-5: change to olive green and ch 1, sc around, sl st to join RNDS 6-8: change to gray and ch 1, sc around, sl st to join RNDS 9-11: change to orange and ch 1, sc around, sl st to join RND 12: ch 1, *dec, sc* x4, sl st to join RND 13: ch 1, dec around, sl s to join leaving a long end to close
MIDDLE FINGER Using olive green pull up a loop in the last worked stitch from the pinkie, the 10th stitch from the beginning, then pull up another stitch immediately in the 11th stitch then pull through both loops on the hook. RND 1 – Ch 1, sc in the 11th, 12th, and 13th st, ch 3, 1 sc in the third st from the ring finger on the other side of glove and the next stitch. Dec from the 3rd stitch and the first st of the backside of the ring finger, ch 3, sl st to join(make sure it is to the top of the first stitch and not the first loop) RND 2 – ch 1, sc in each st and ch around, sl st to join RNDS 3-5: change to olive green and ch 1, sc around, sl st to join RNDS 6-8: change to gray and ch 1, sc around, sl st to join RNDS 9-12: change to orange and ch 1, sc around, sl st to join RND 13: ch 1, *dec, sc* x4, sl st to join RND 14: ch 1, dec around, sl s to join leaving a long end to close
INDEX FINGER Using olive green pull up a loop in the last worked stitch from the middle finger, then pull up another stitch immediately in the next stitch then pull through both loops on the hook. RND 1 – Ch 1, sc in next 4, inc, sc in next 3, Dec from the next stitch and the first st of the backside of the middle finger, ch 3, sl st to join(make sure it is to the top of the first stitch and not the first loop) RND 2 – ch 1, sc in each st and ch around, sl st to join RNDS 3-5: change to olive green and ch 1, sc around, sl st to join RNDS 6-8: change to gray and ch 1, sc around, sl st to join RNDS 9-11: change to orange and ch 1, sc around, sl st to join RND 12: ch 1, *dec, sc* x4, sl st to join RND 13: ch 1, dec around, sl s to join leaving a long end to close
THUMB Join olive green at the first skipped stitch for the thumb. RND 1 – ch 1 and sc in the next 6 of the skipped stitches. Place hdc dec using the st on each side of the ‘V’ of the thumb, space 6 sc across the back of the ch, hdc dec in the ‘V’ then sl st to join
RNDS 2-4: change to orange, ch 1, sc around, sl st to join RNDS 5-7: change to yellow green, ch 1, sc around, sl st to join RNDS 8-9: change to orange, ch 1, sc around, sl st to join RND 10: ch 1, *dec, sc* x4, dec, sl st to join RND 11: ch 1, dec around, sl st to join leaving a long end to close
Now do a sc round at the bottom/beginning of the glove to make it look more finished. I do prefer to crochet in the second available hole down, not what would be the back of the chain.
Go put on a good show that you enjoy and get to weaving in the ends and complaining how much they better love these gloves and never want to go without them…. Don’t forget to sew the webbing together. Else that’s exactly where they are going to stick their fingers then look at you wondering what’s wrong and you are going to look at them swearing you thought they were smarter than that. That’s it then.
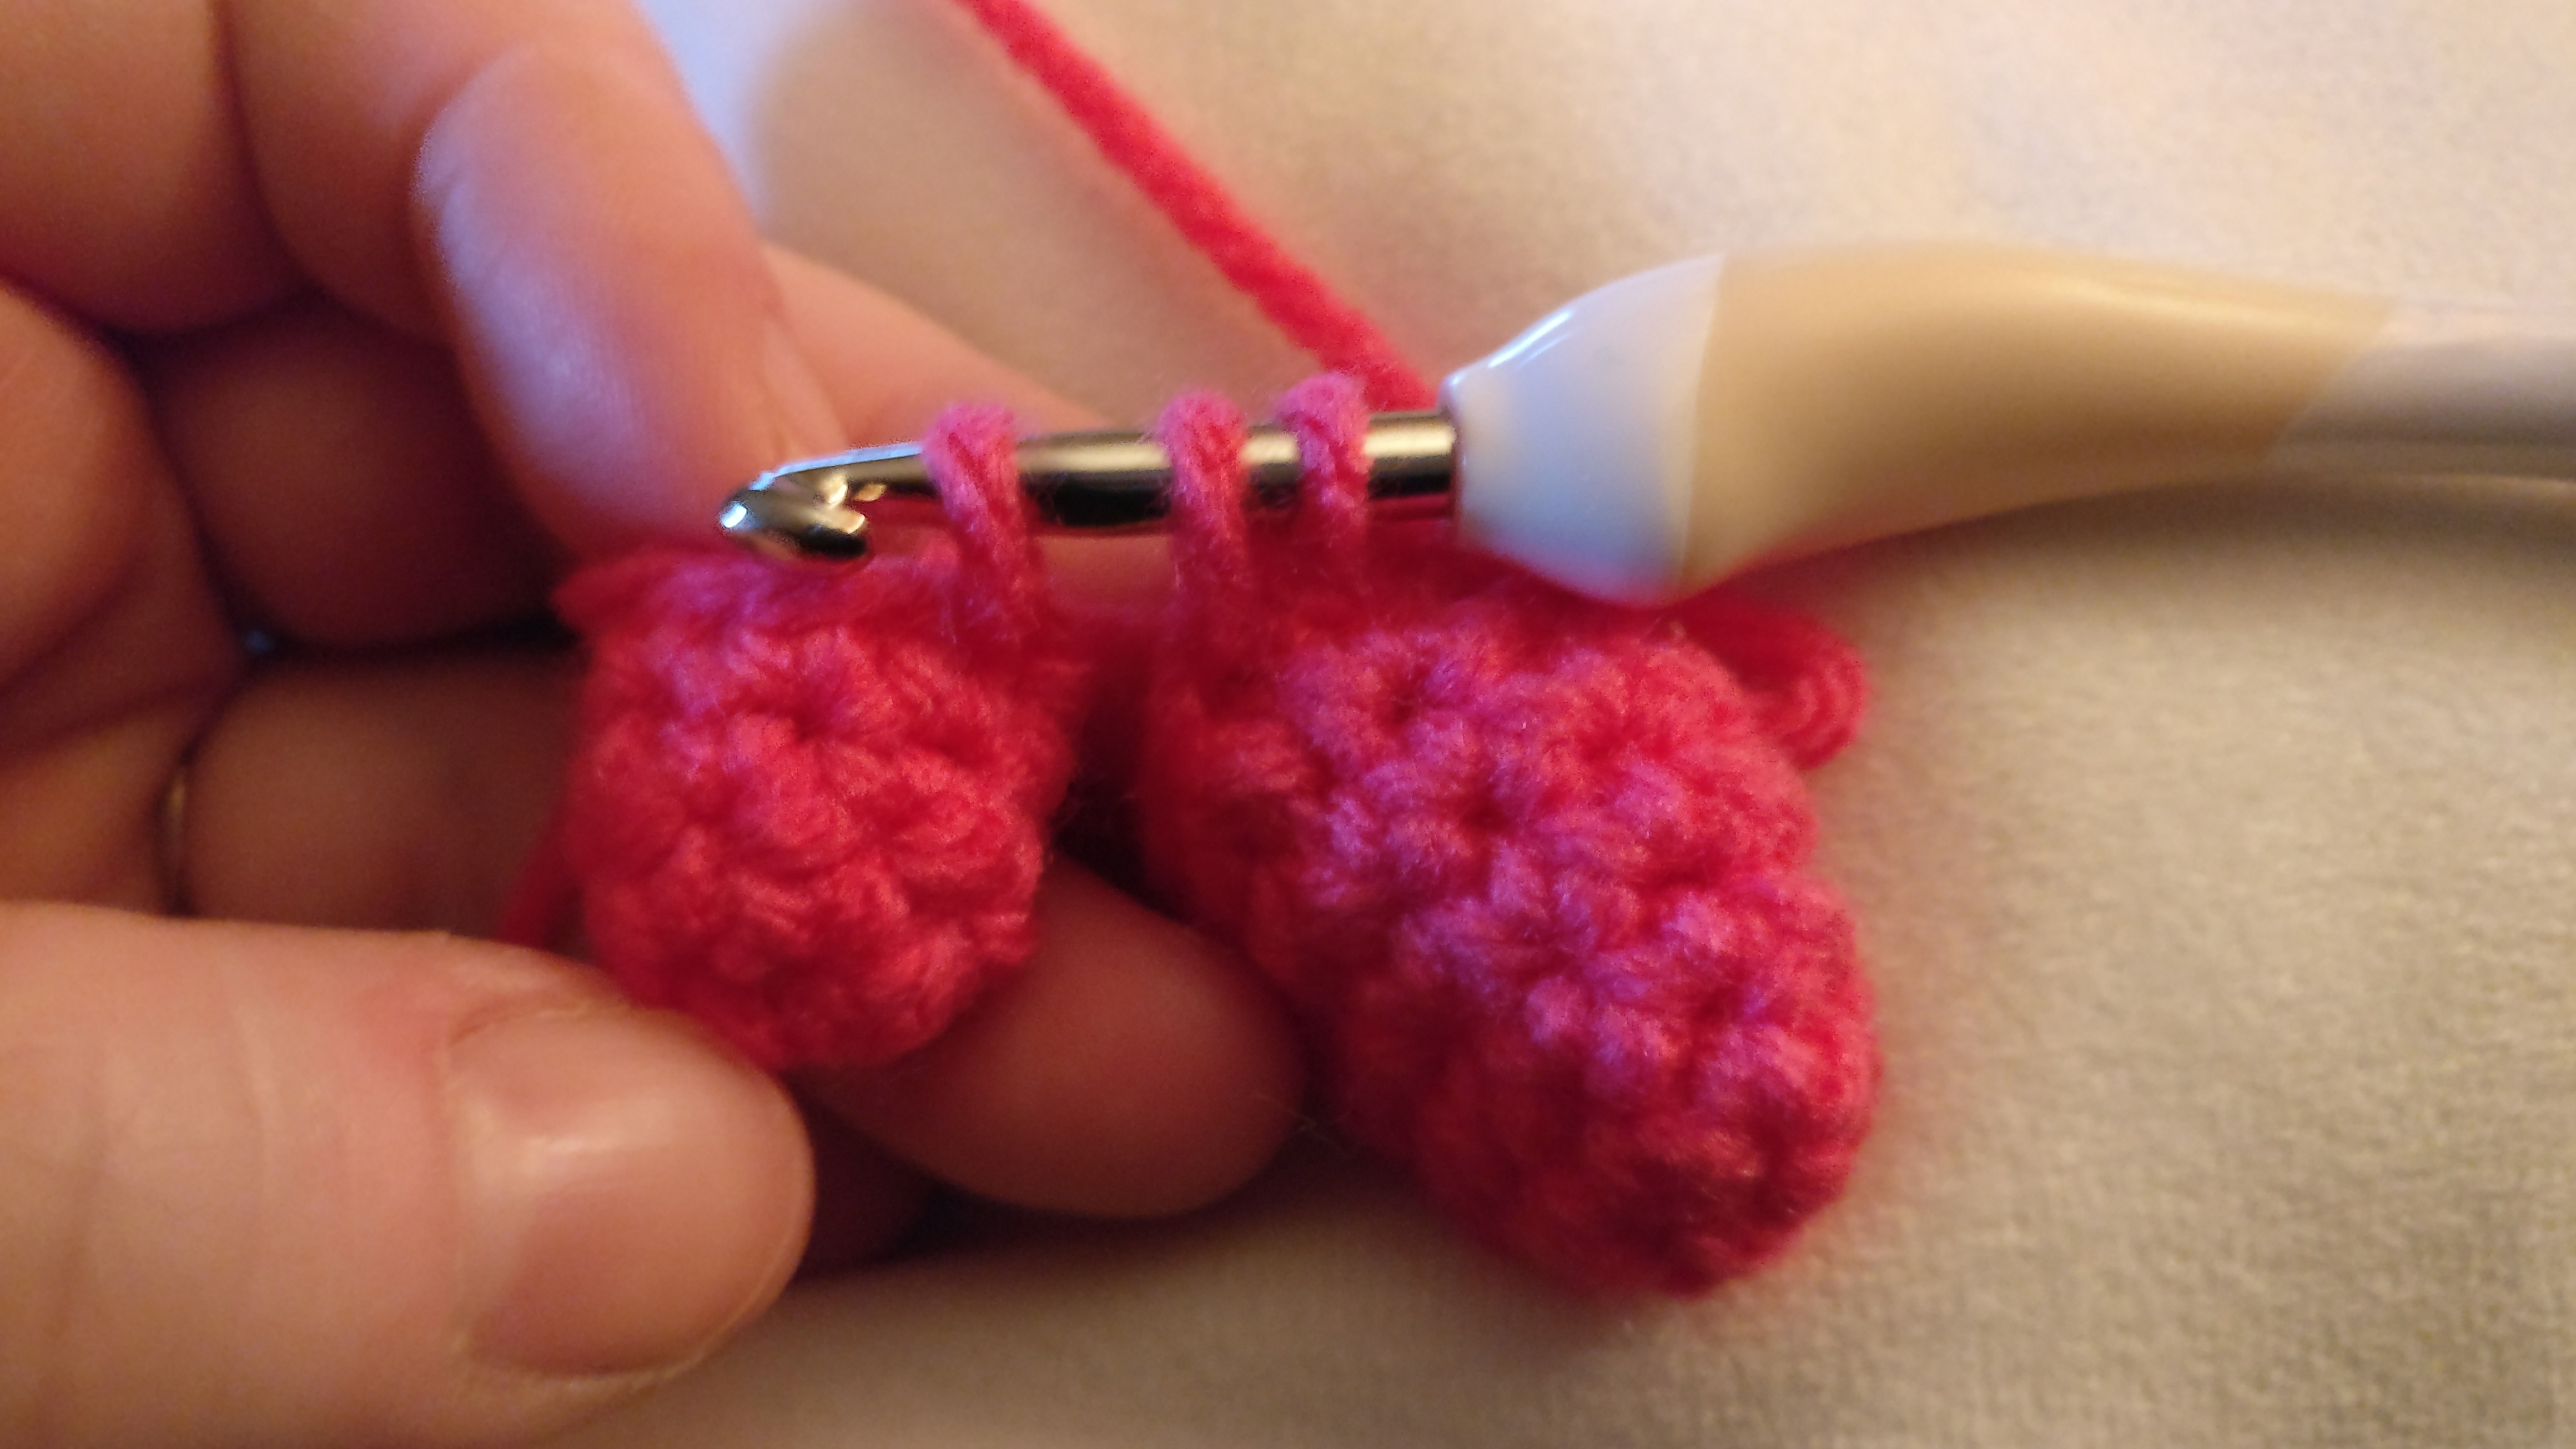
So, I was presented with a picture of a knitted pattern by Sandra Mceachran asking if I had anything similar. I didn’t, but it was a little challenge and got the hamster in my head kicking a little… just a little mind you. It was early and she hadn’t had enough caffeine. After a few cups of coffee, I had a plan of action…
I went back and forth about toe down or sewing on the toes. Going by the picture I went with the toe down and less sewing because let’s face it, I’m all for less sewing on my crochet projects!
G hook (or whatever hook you prefer for your amigurumi projects and so the stuffing doesn’t show)
Yarn of choice (I happened to have pink Bernat worsted weight near me at the time)
Ribbon if wanted for hanging or yarn (I used a satin finish 15mm wide ribbon)
poly-fil
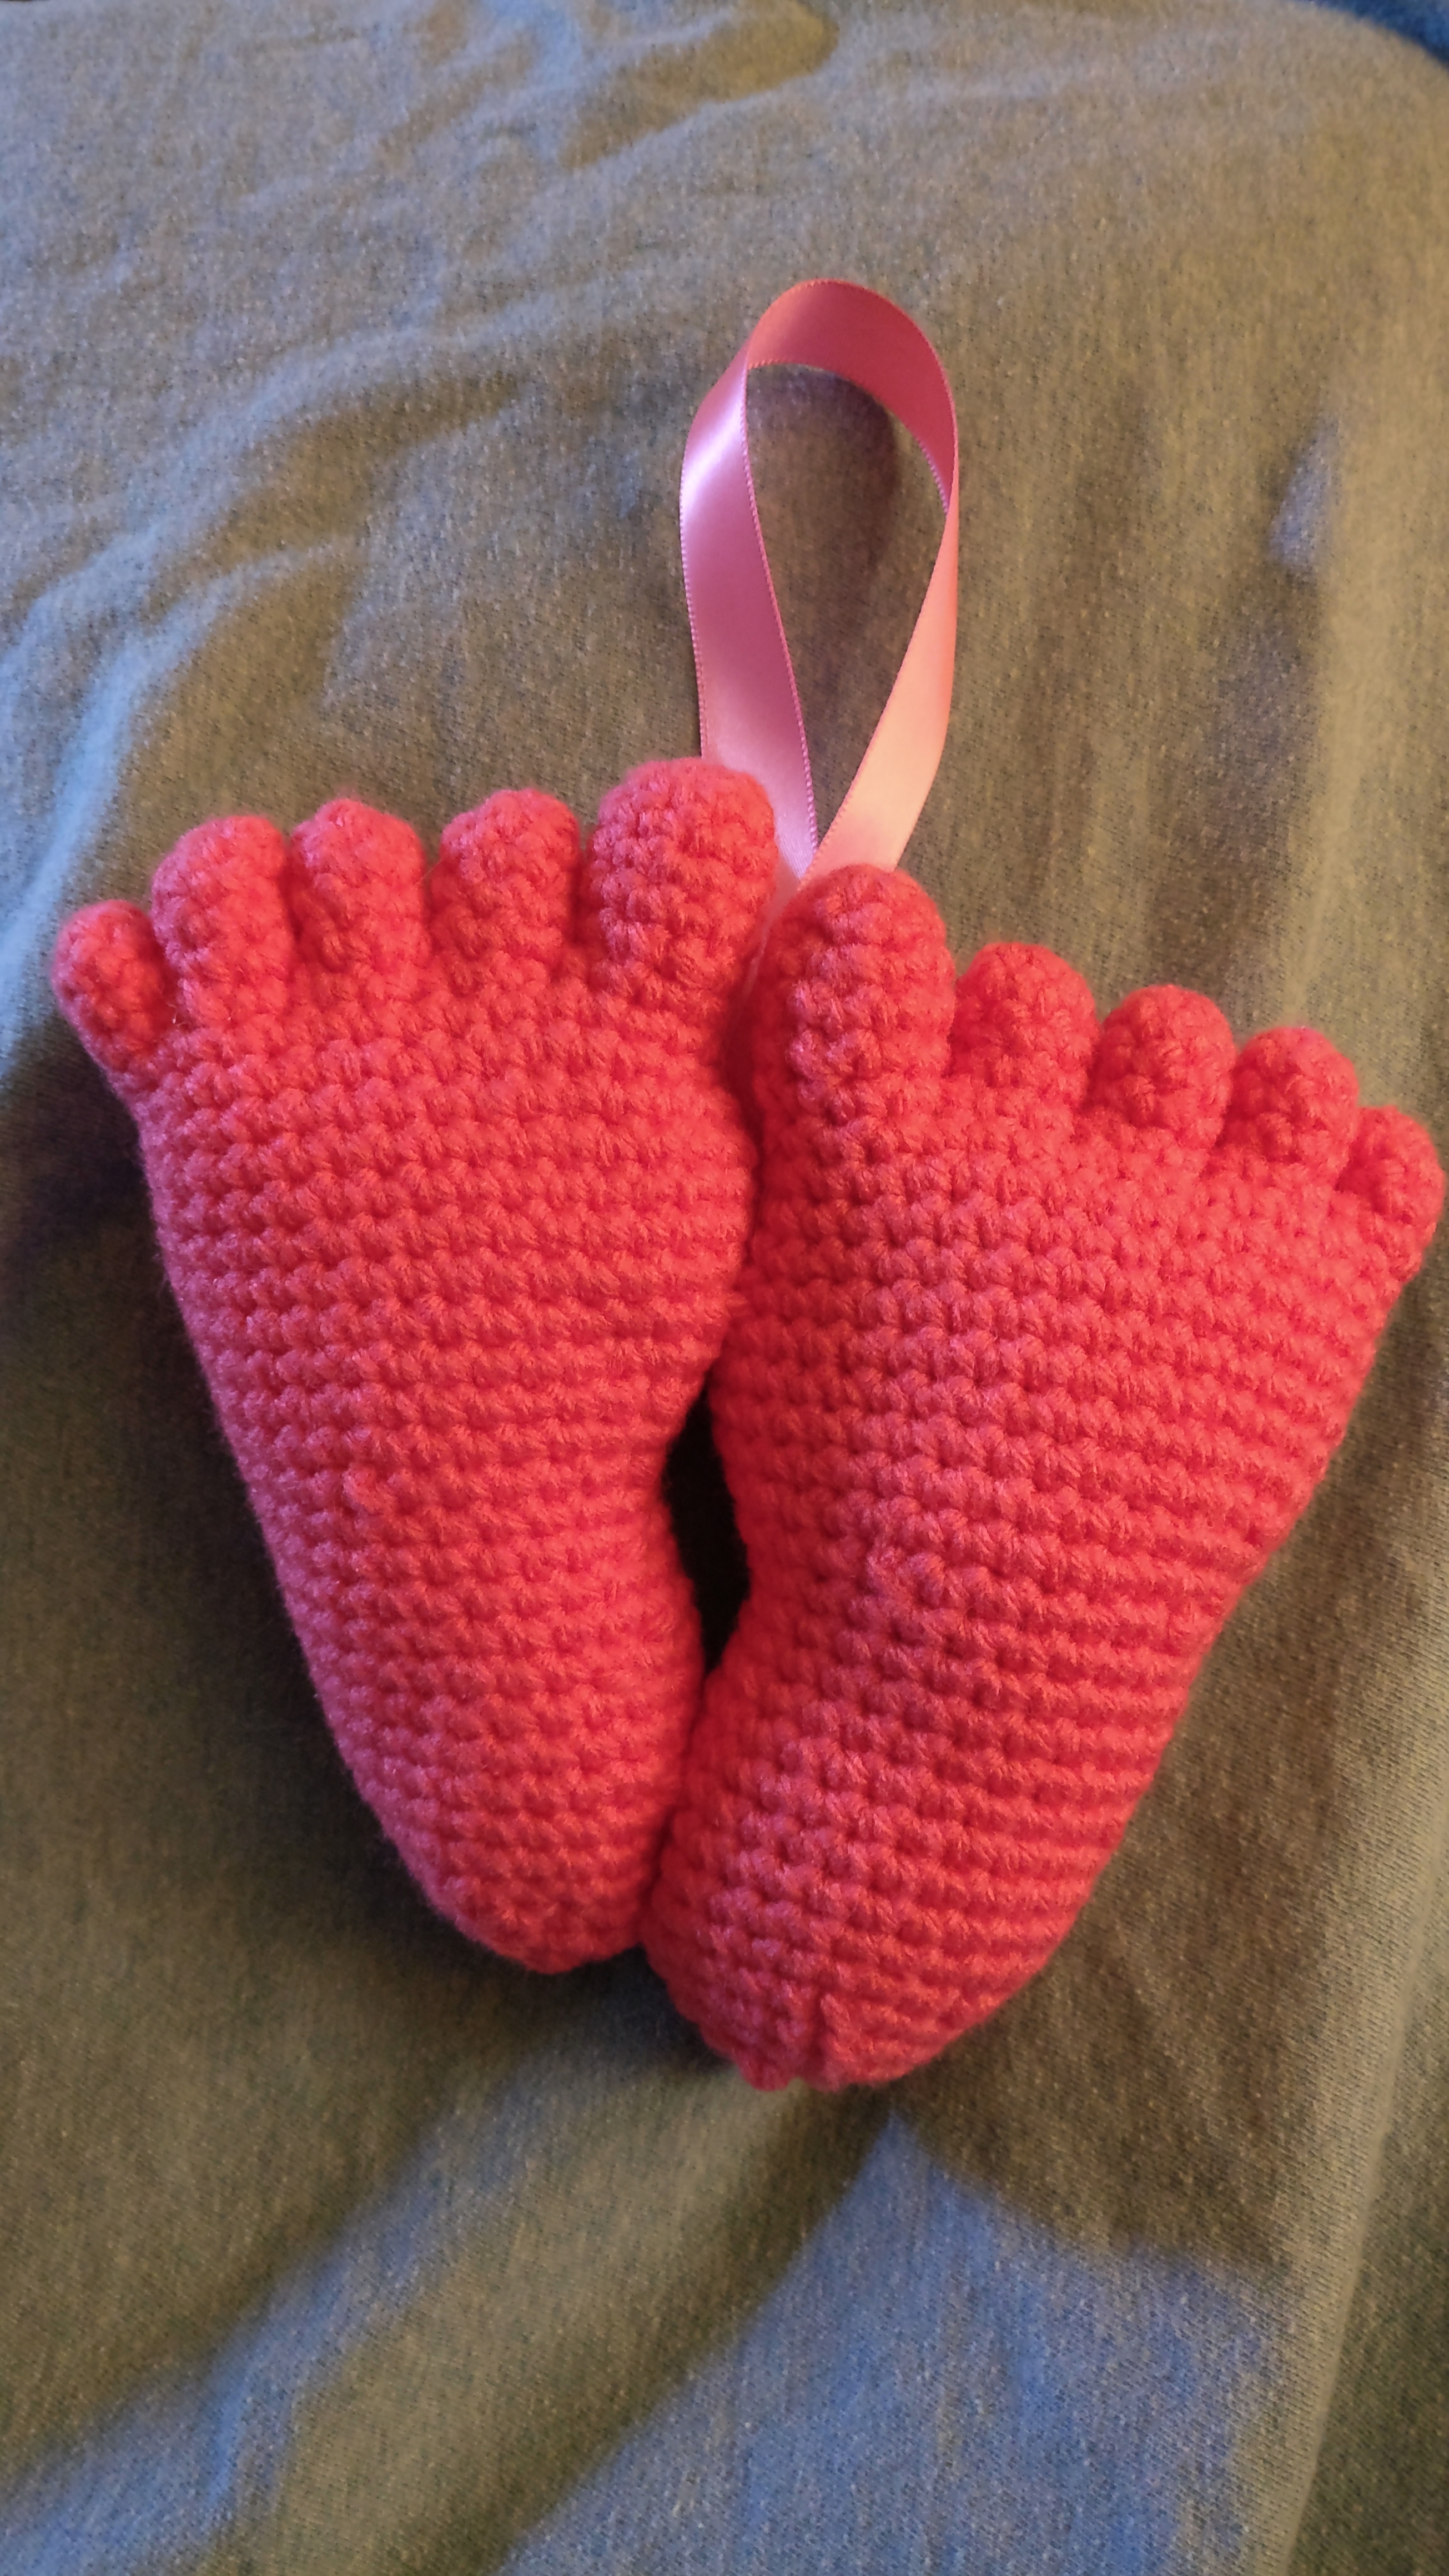
So, make two of these. It is the same on the front as the back so flipping one makes the other foot…
Also, mine ended up being about 6.5 inches from big toe to heel.
Little Toes, 3 per foot:
6sc in magic circle
*inc, sc in next 2* around
sc for 2 rounds then bind off
Pinky Toe, 1 per foot:
6sc in magic circle
sc around for 2 rounds then bind off
Foot, starting with the big toe:
6sc in magic circle
*inc, sc* around
sc around
*inc, sc in next 2*
sc around
*dec, sc in next 2*
Ok, here’s where it can get tricky. Just take one stitch at a time and it will be fine.
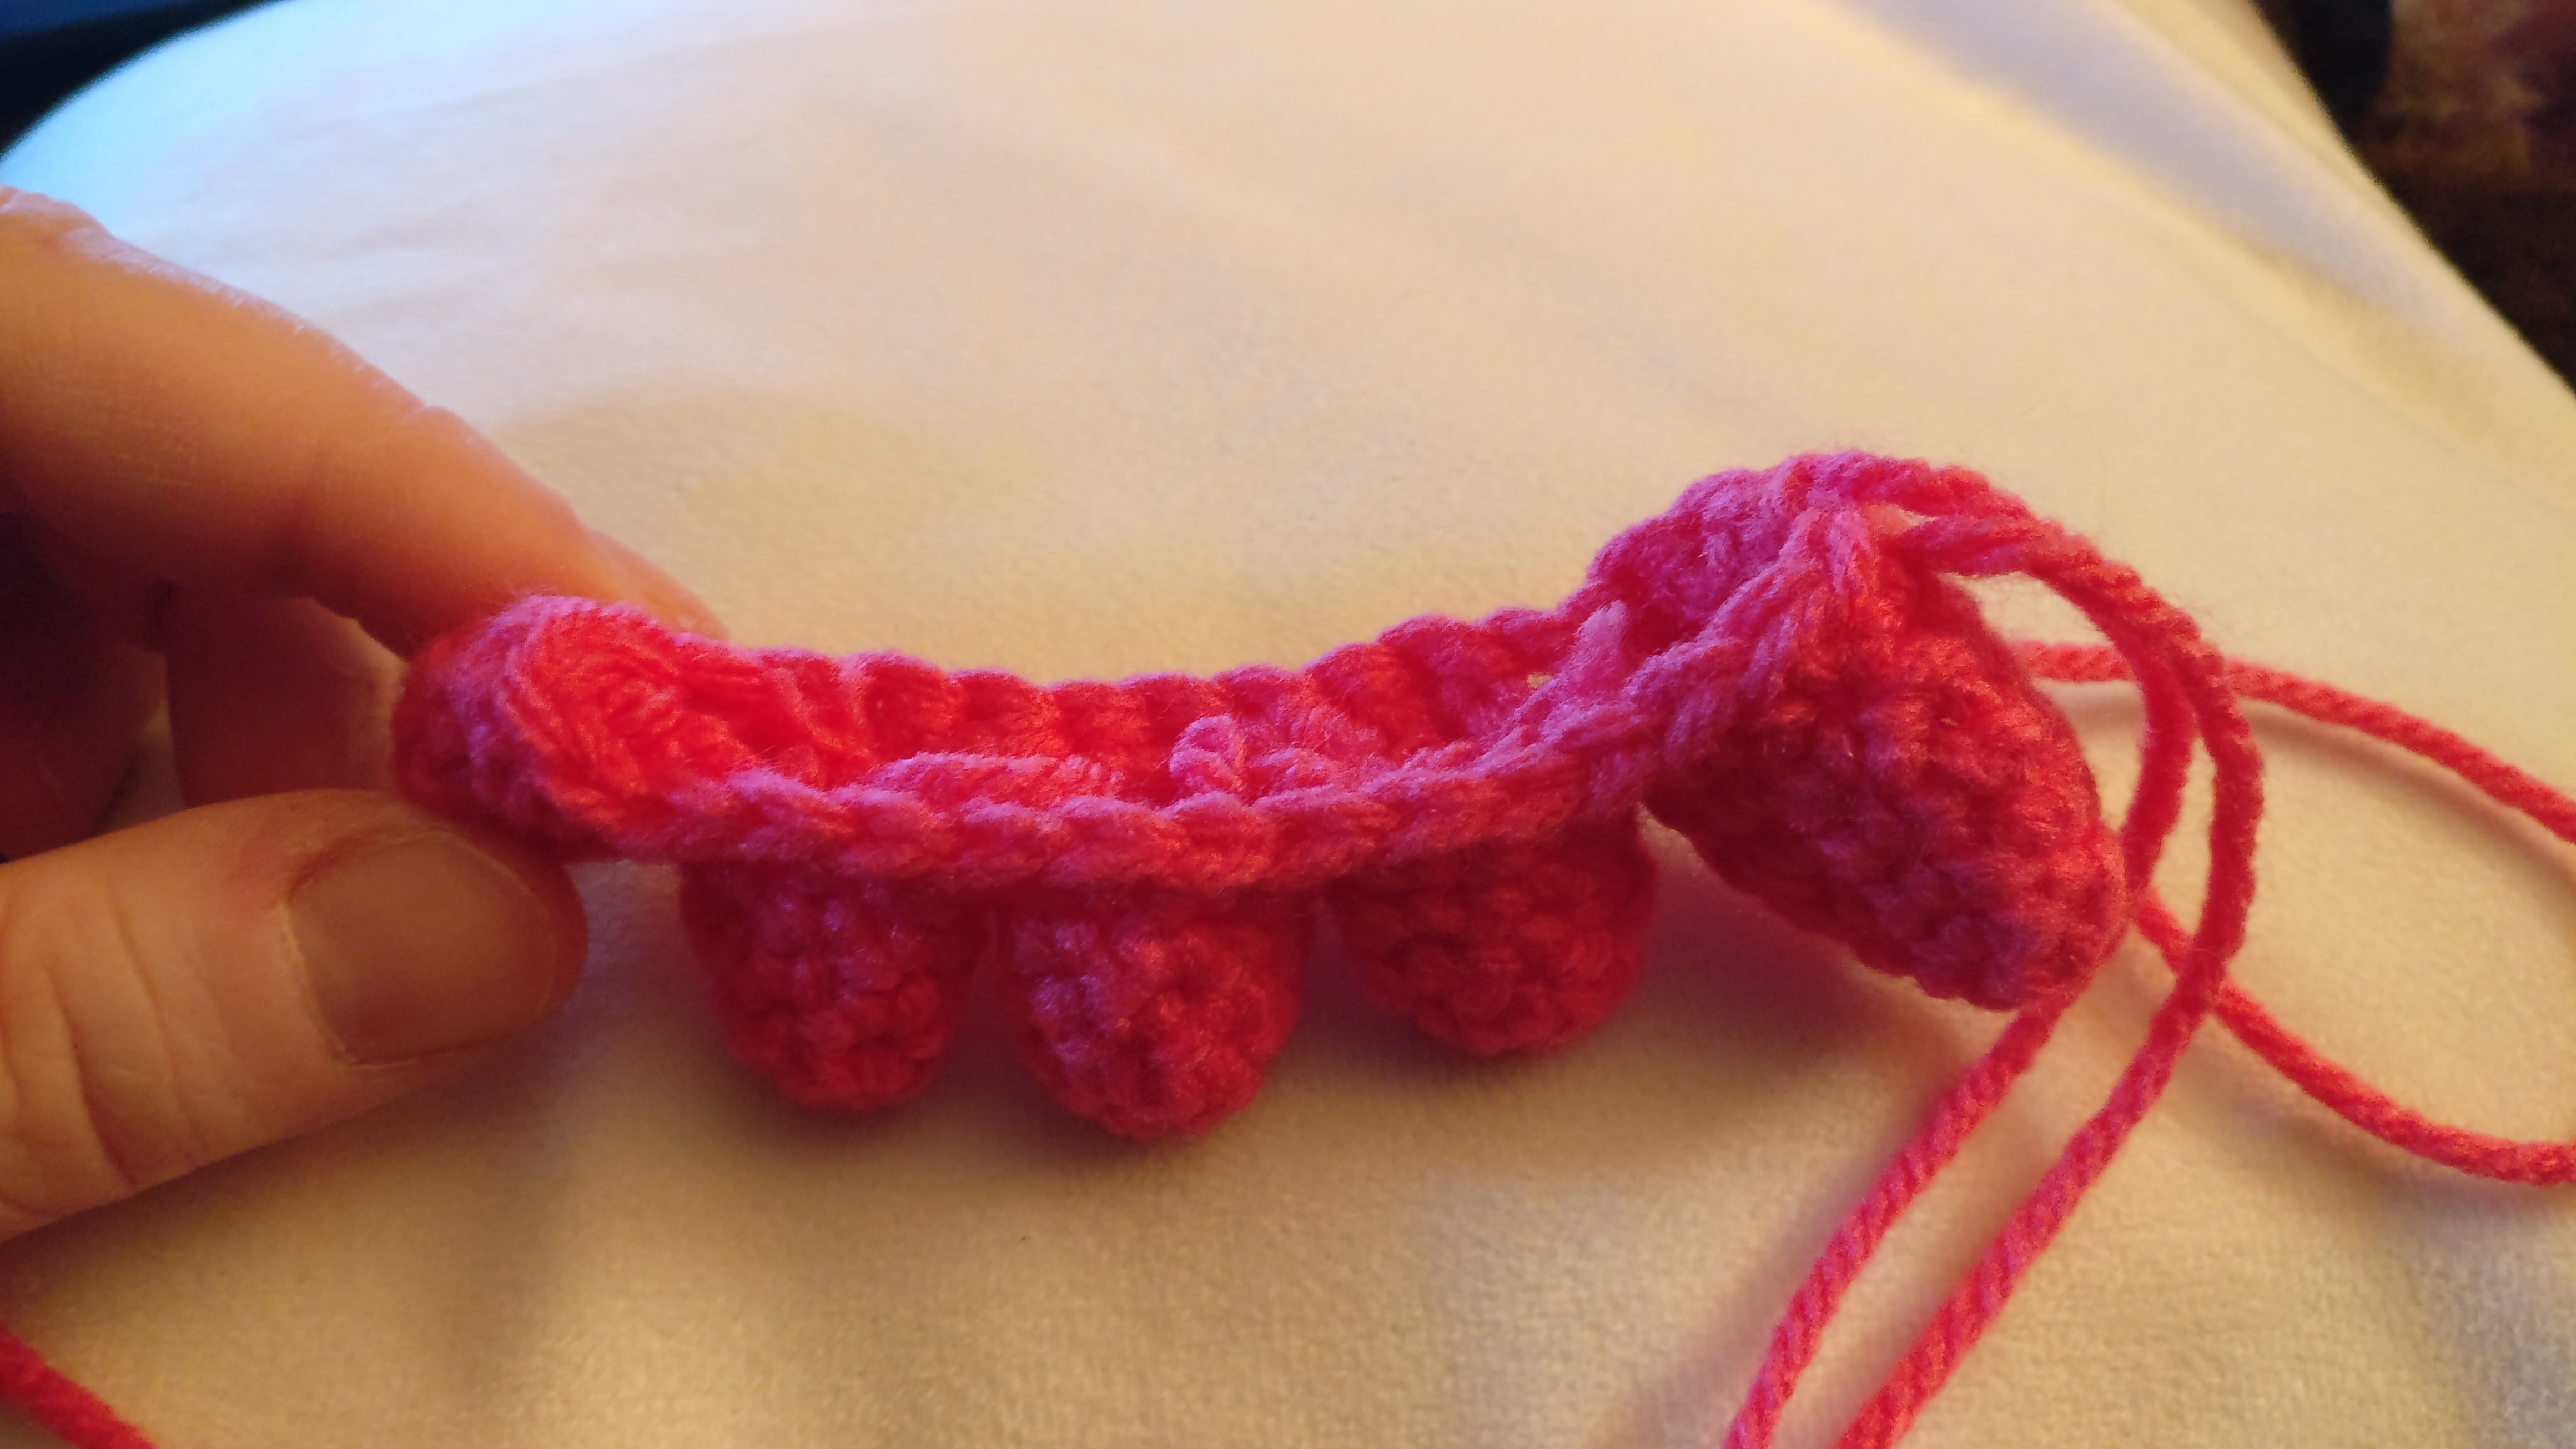
sc in next 3, then crochet together the second toe (draw up a loop in the current toe, draw up a loop in the new toe, yarn over and pull through all 3 loops)
sc in next 2, crochet together third toe, sc in next 2, crochet together fourth toe, sc in next 2, crochet together the pinky toe, sc in next 4 (around the pinky toe), crochet together to the fourth toe, sc in next 2,crochet together to the third toe, sc in next 2, crochet together to the second toe, sc in next 2, crochet together to the big toe, sc in next 4 and you should be back to the beginning with a slightly curling weird thing that resembles toes. It gets to looking better, trust me. Go ahead and stuff all the endings from the toes into the toes to get them out of your way.
Sc around for 2 rows (total of 31 stitches for those keeping count)
Inc in first stitch, sc around until the last 2 stitches. Inc in the last 2
Sc around for 4 rounds
Sc in next 14 stitches, dec, sc in next 14, dec, dec
Sc around
Sc in next 13 stitches, dec, sc in next 12, dec, dec
*sc in next 5, dec* around
Sc around for 2 rounds then take a break and make sure those toes are stuffed the way you would like.
Inc, sc in the next 10 stitches, dec, sc in rest
Sc around
Inc, sc in the next 10 stitches, dec, sc in rest
Sc around for 3 rounds
Sc in next 11 stitches, dec, sc in rest
Sc in next 10 stitches, dec, dec, sc in rest
*dec, sc in next 5* around
*dec, sc in next 4* around, stuff and shape as needed. Don’t get carried away and stuff too firmly, you want it to be kinda flatish.
*dec, sc in next 3* around
*dec* around, leaving a long tail to sew close
That’s all… you can sew them together and then sew a ribbon on back for hanging or whatever you want to do with the feet!
Tip: How I sewed my feet together I just made sure that the second foot I left a really long tail and sewed the end closed, placed the other foot next to it and went from there. I then made the ribbon and used the same tail to sew that to the feet. Less chance of things coming undone and certainly less threading of the needle.
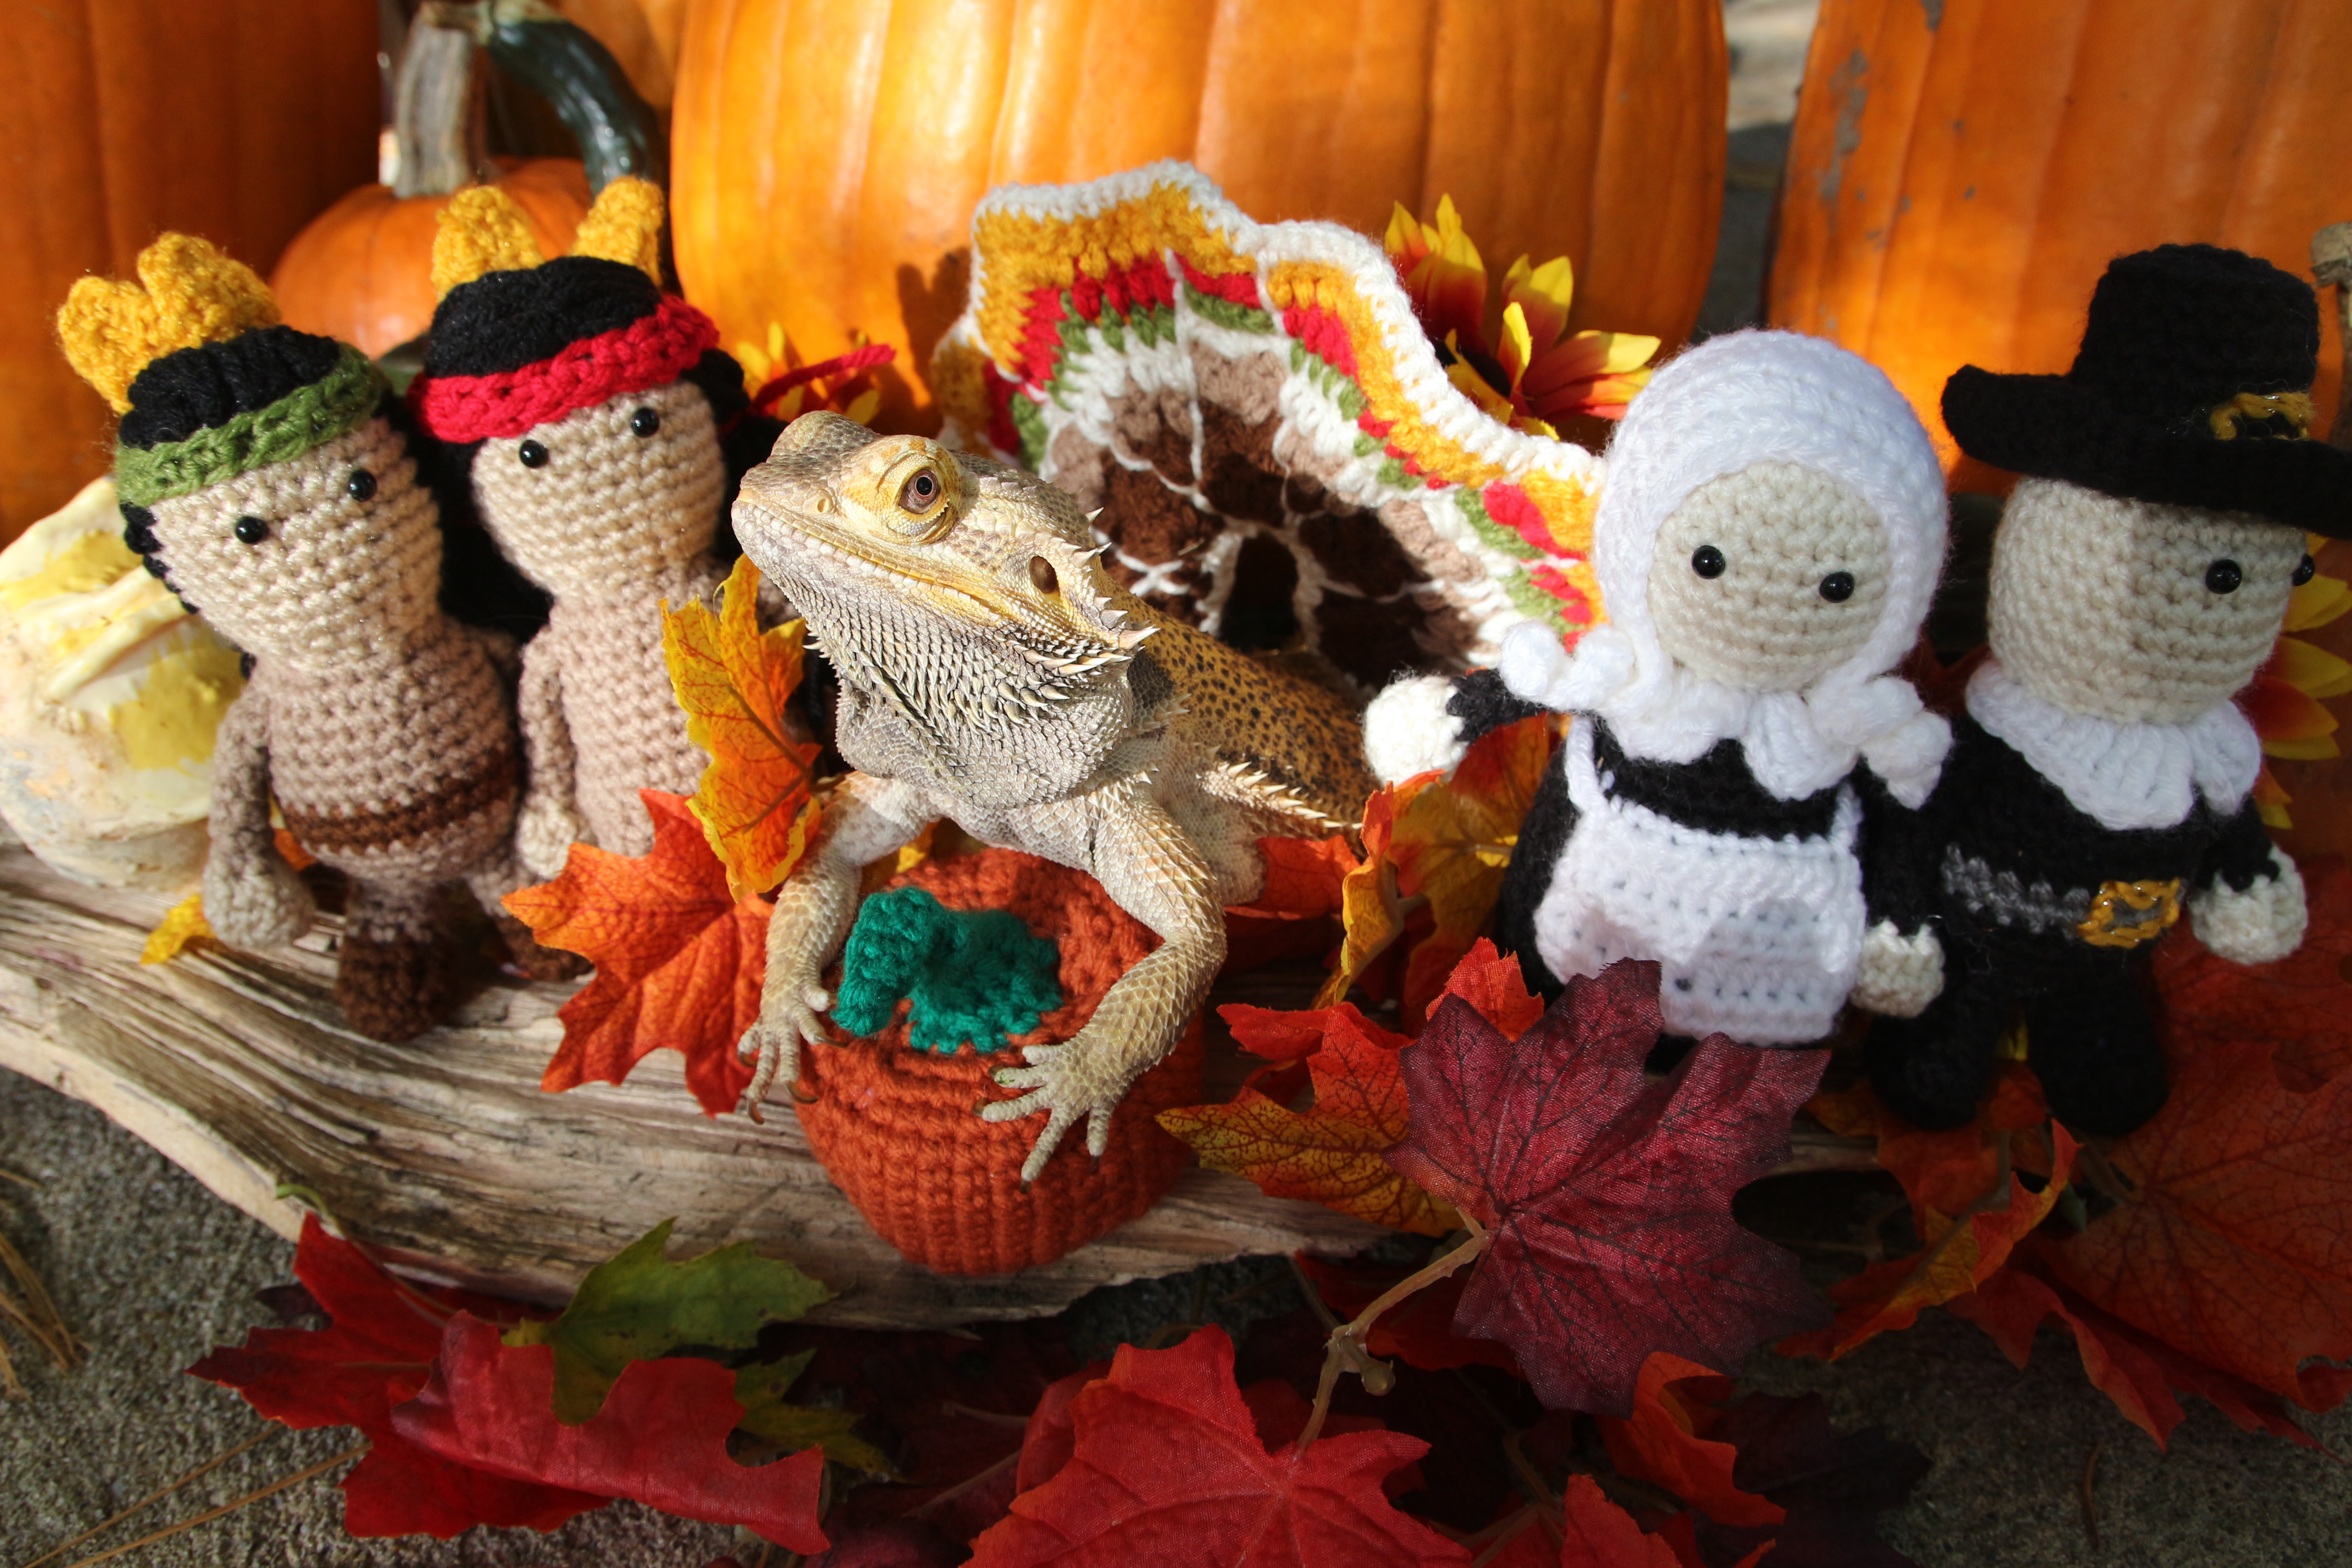
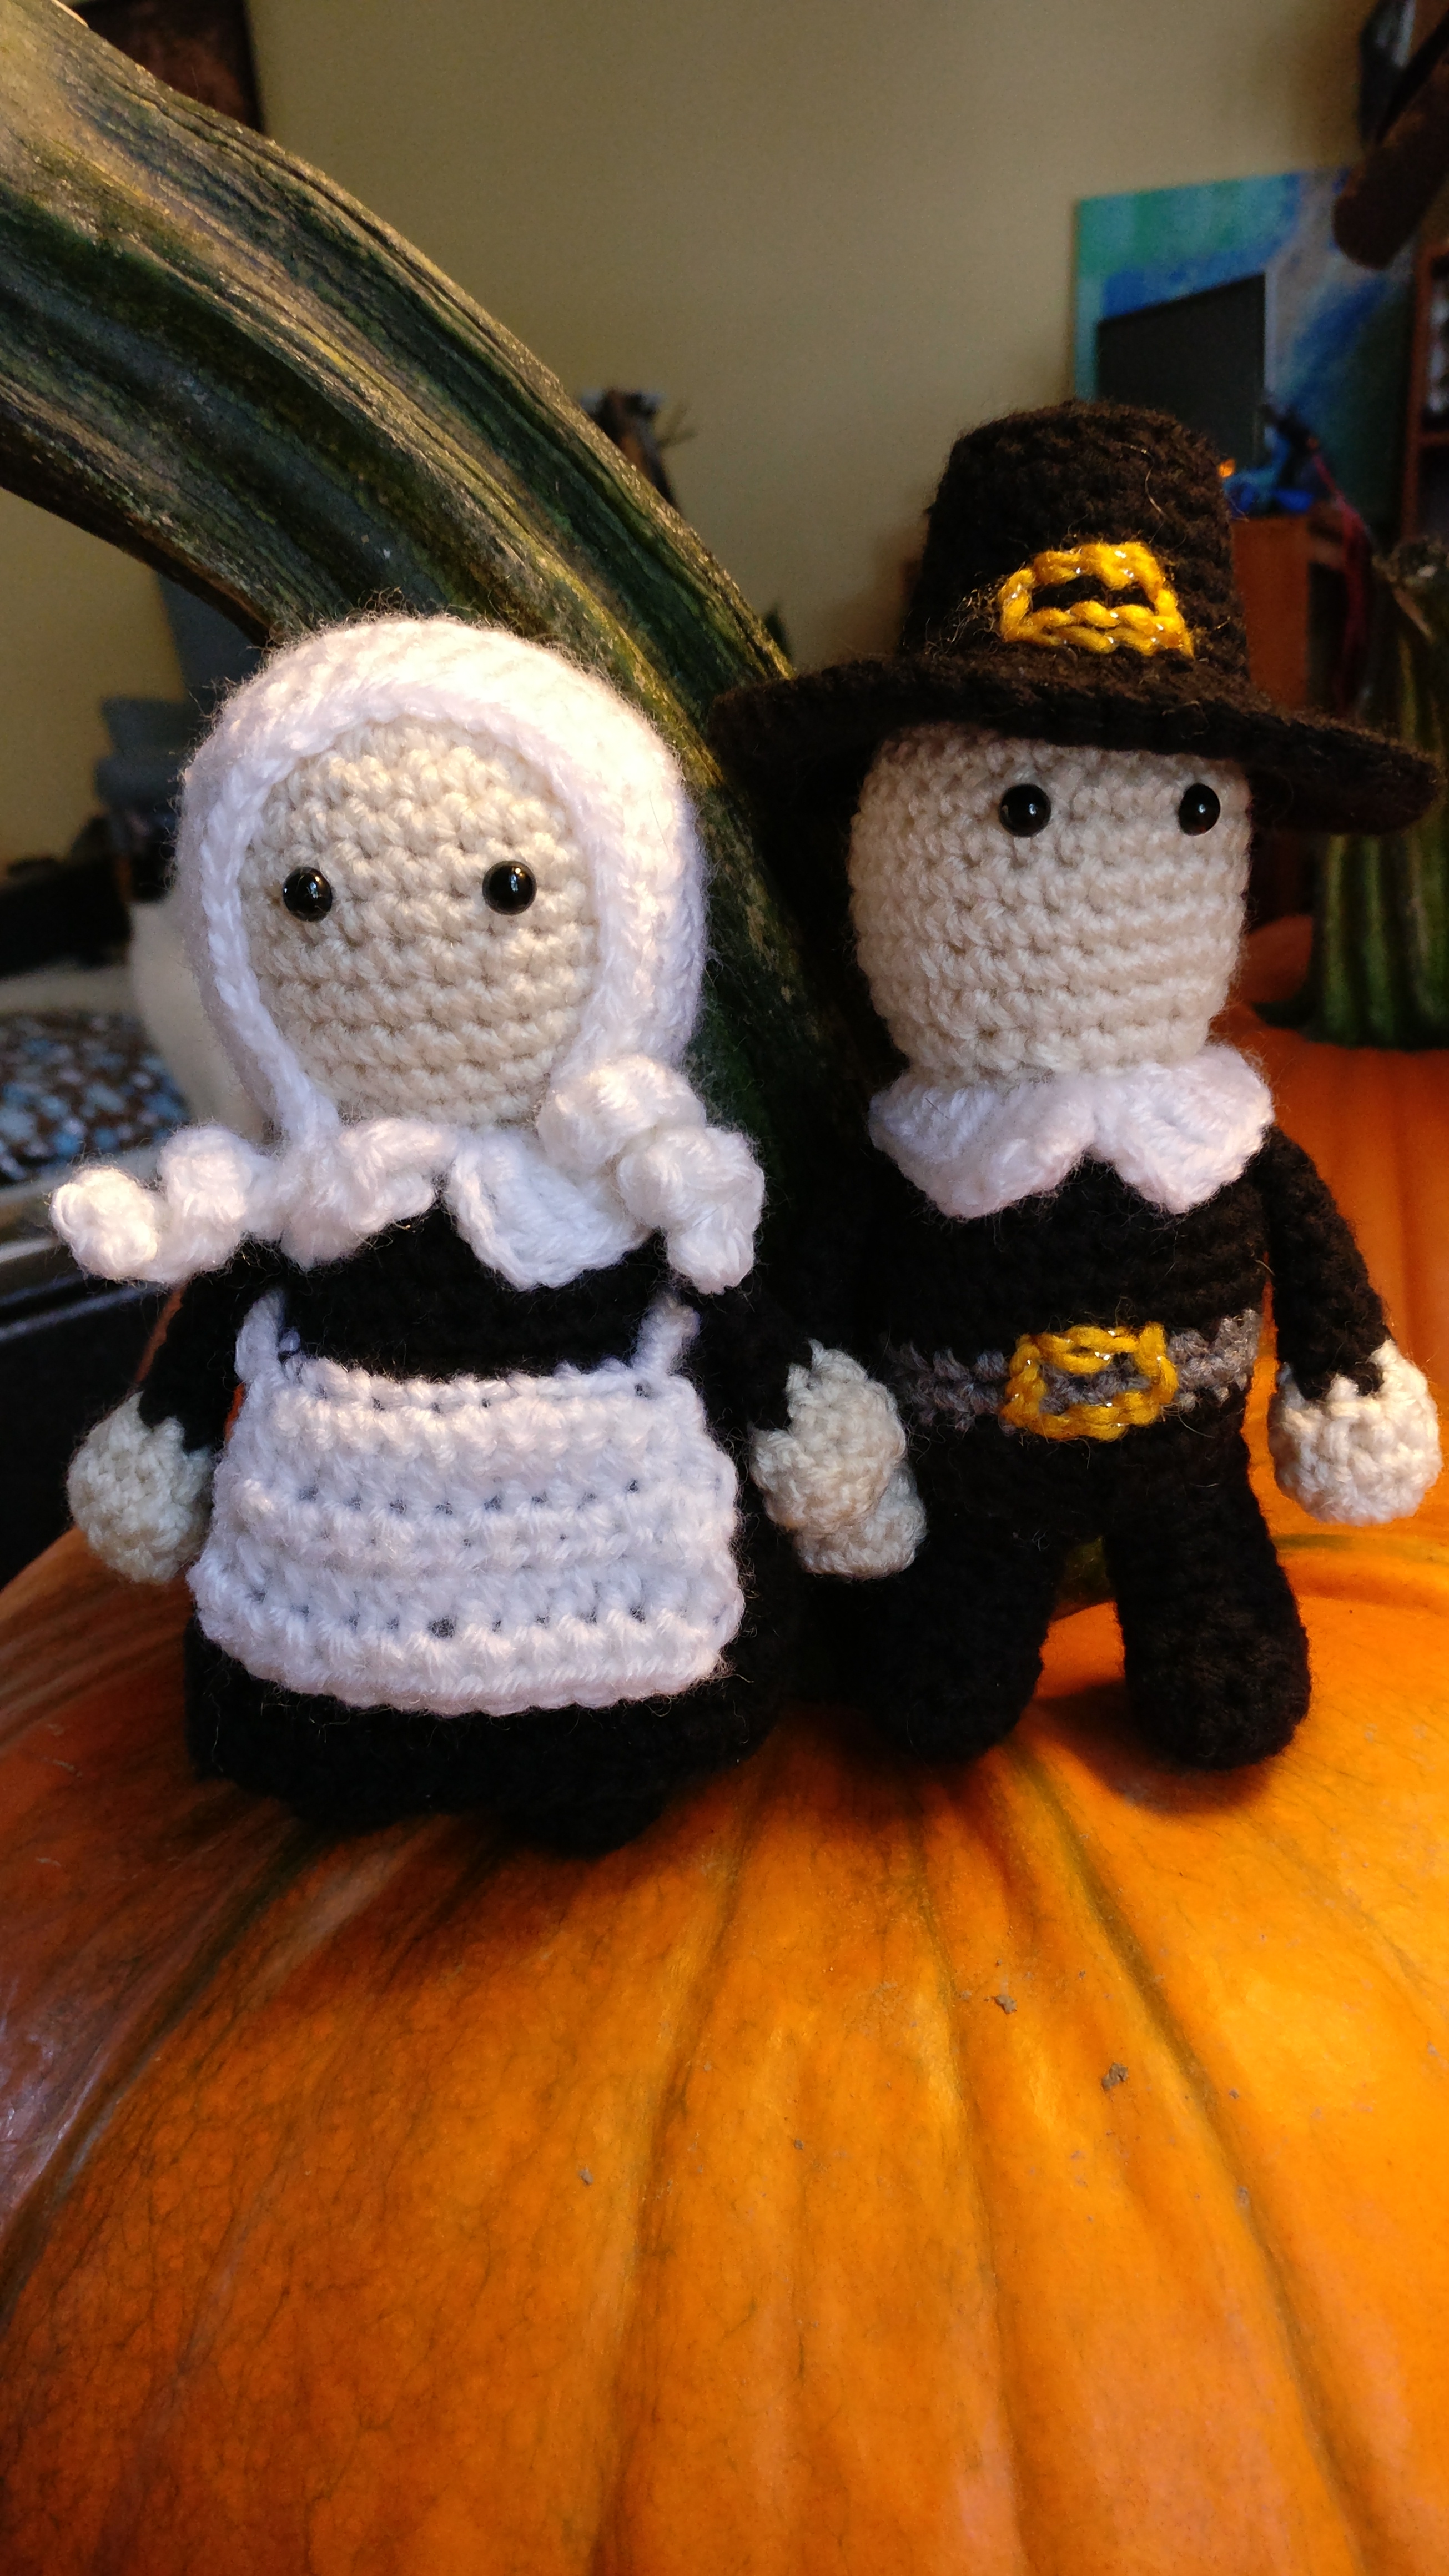
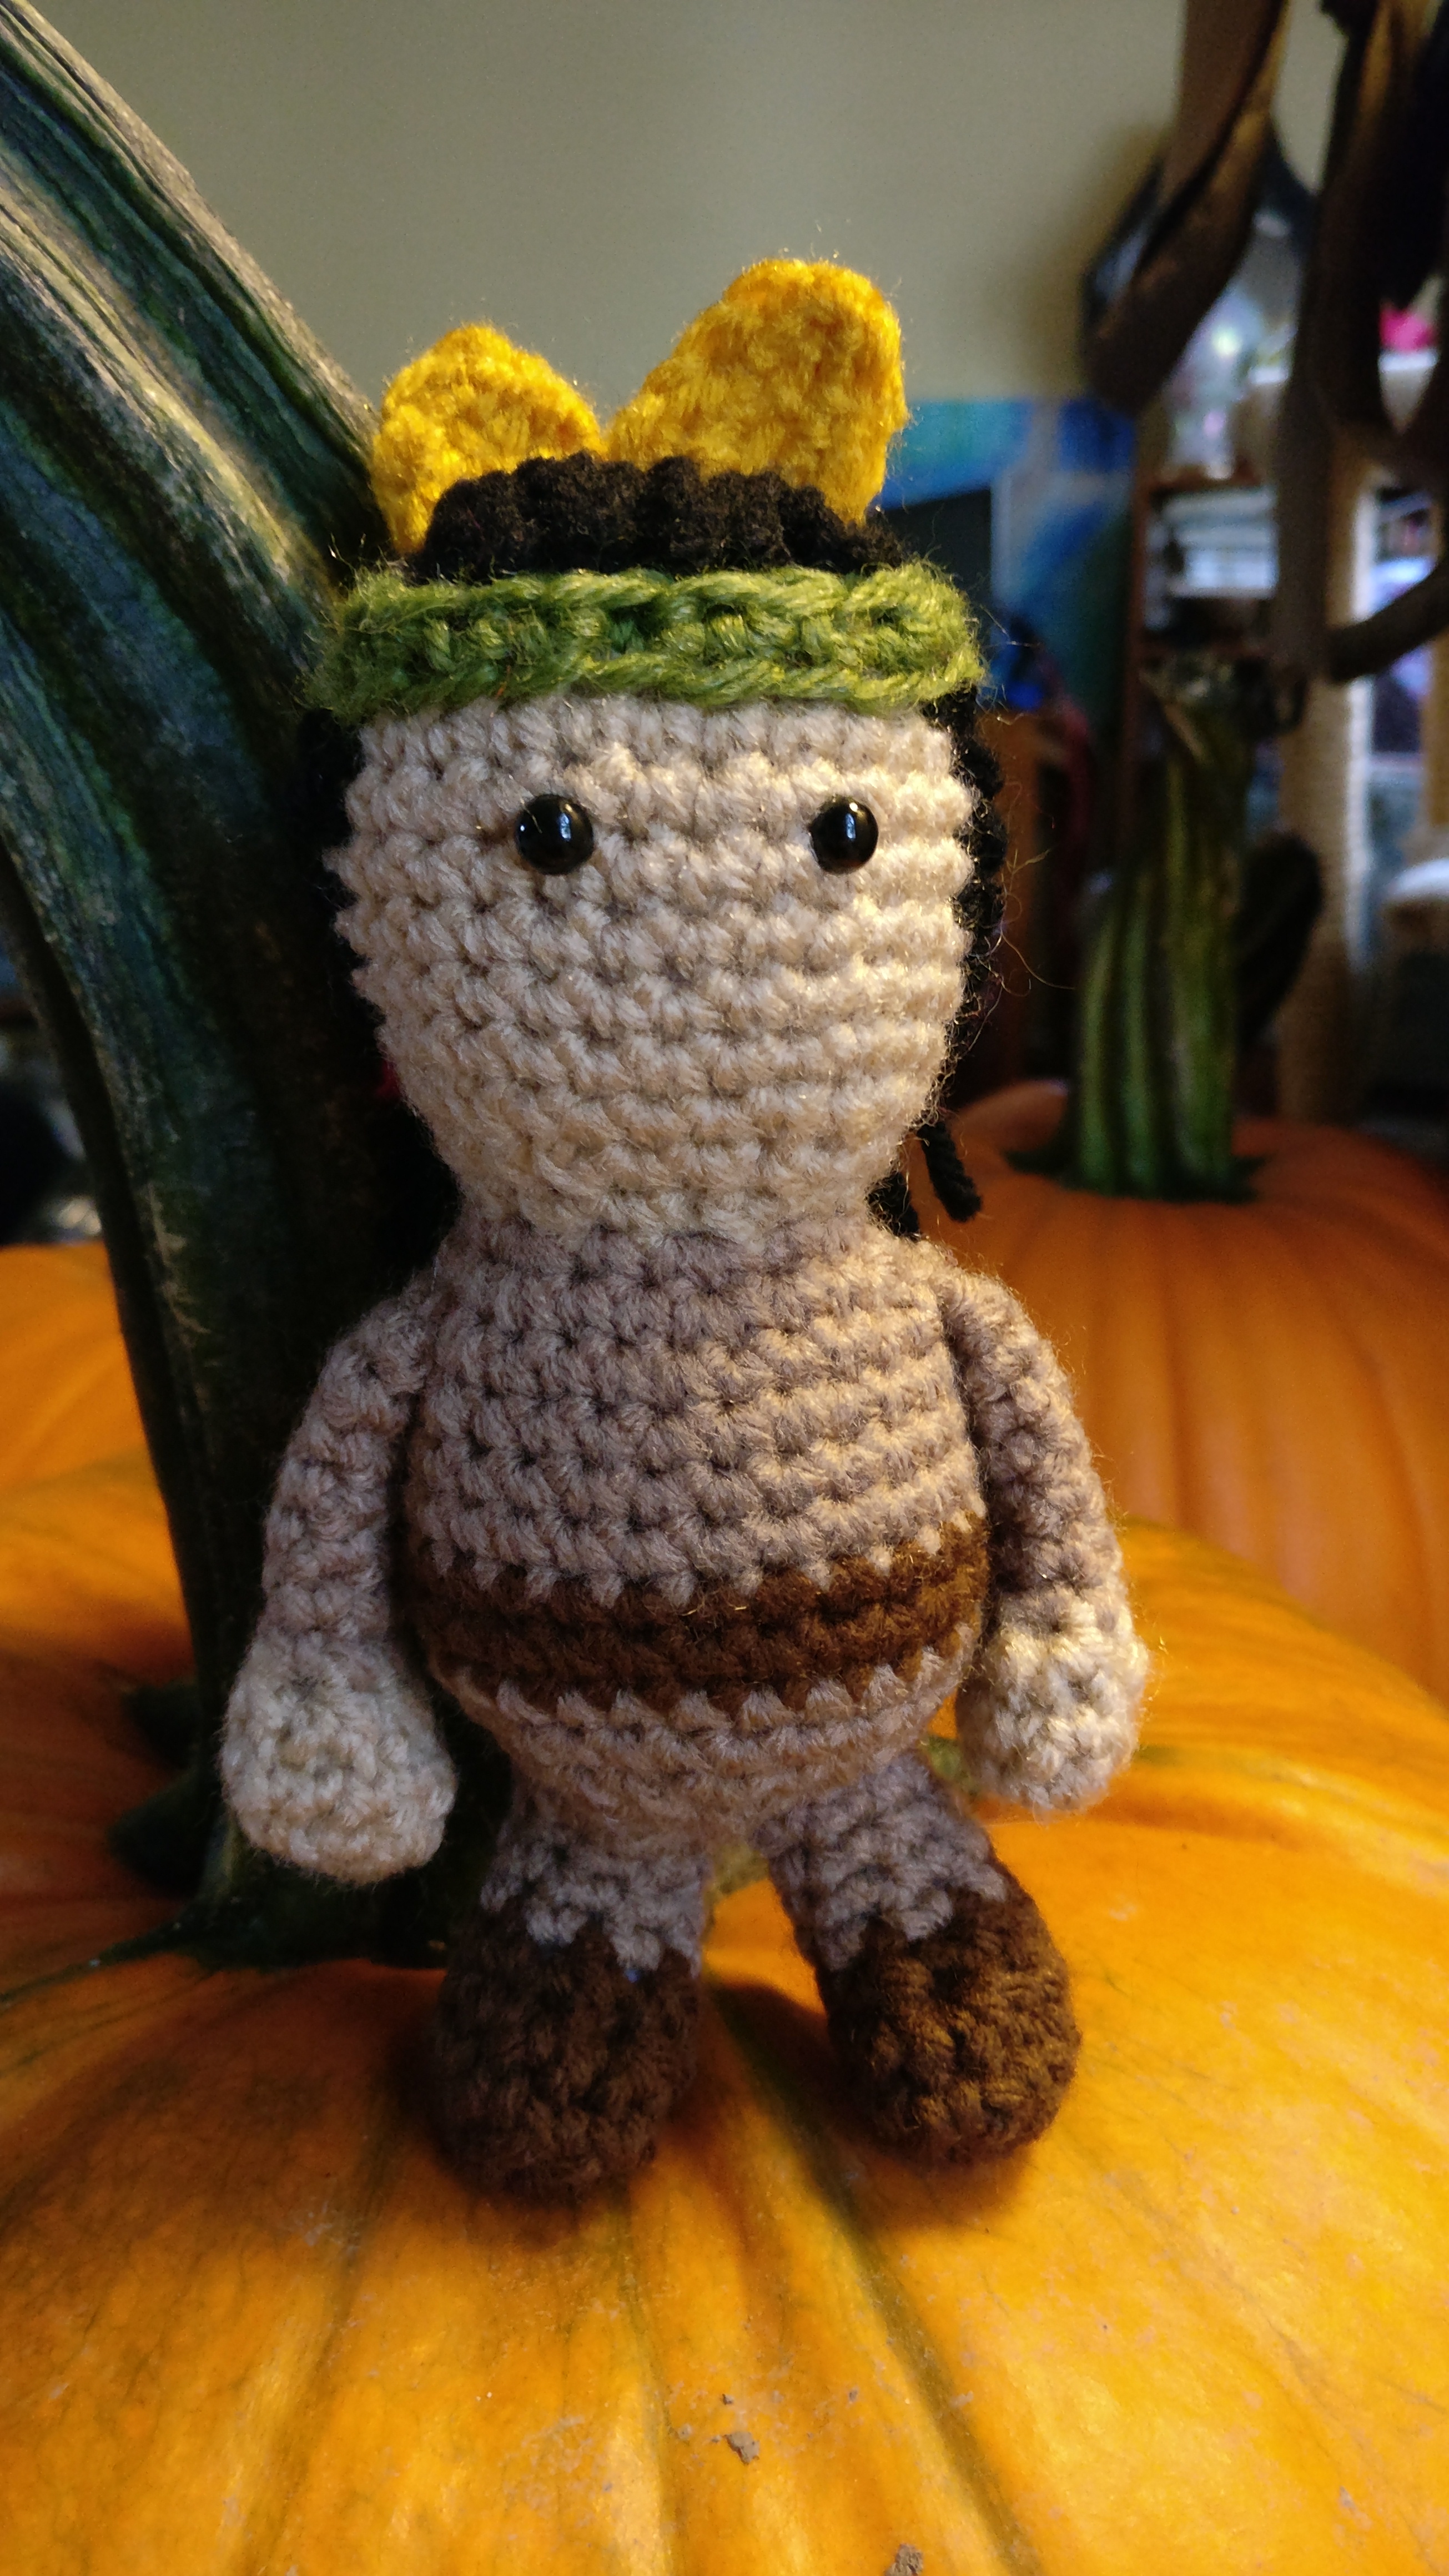
So as some of you know I have been working on a Norbert Calendar of sorts… essentially our bearded dragon dressed up in crochet with other crochet items around him. Silly, yes, but it has been so fun honestly. Well I was on to month November and could not find a set of Pilgrims and Indians (those being the hardest) that would work. In typical fashion then here goes my own pattern in case others need or want to make up some. They should be roughly 6 inches tall, but the hats make them a little bigger… Also, no, these are not historically correct, they are simple little patterns for what I had in my head as a typical set from when I was growing up. Also, yes, I know I should say Native Americans and no, I’m not going to enter in that debate…
For the base of the body I turned to a wonderful pattern already done since it met my needs for the most part. You can find the basic pattern here in case you want to use it (http://www.amigurumitogo.com/2015/08/wee-ones-basic-body-pattern.html). Also, check out the other patterns she has listed… very nice work!
Using a G hook with some miscellaneous worsted weight yarn I had around and poly fil for stuffing. I went with 6mm safety eyes as well.
Starting with the Pilgrims
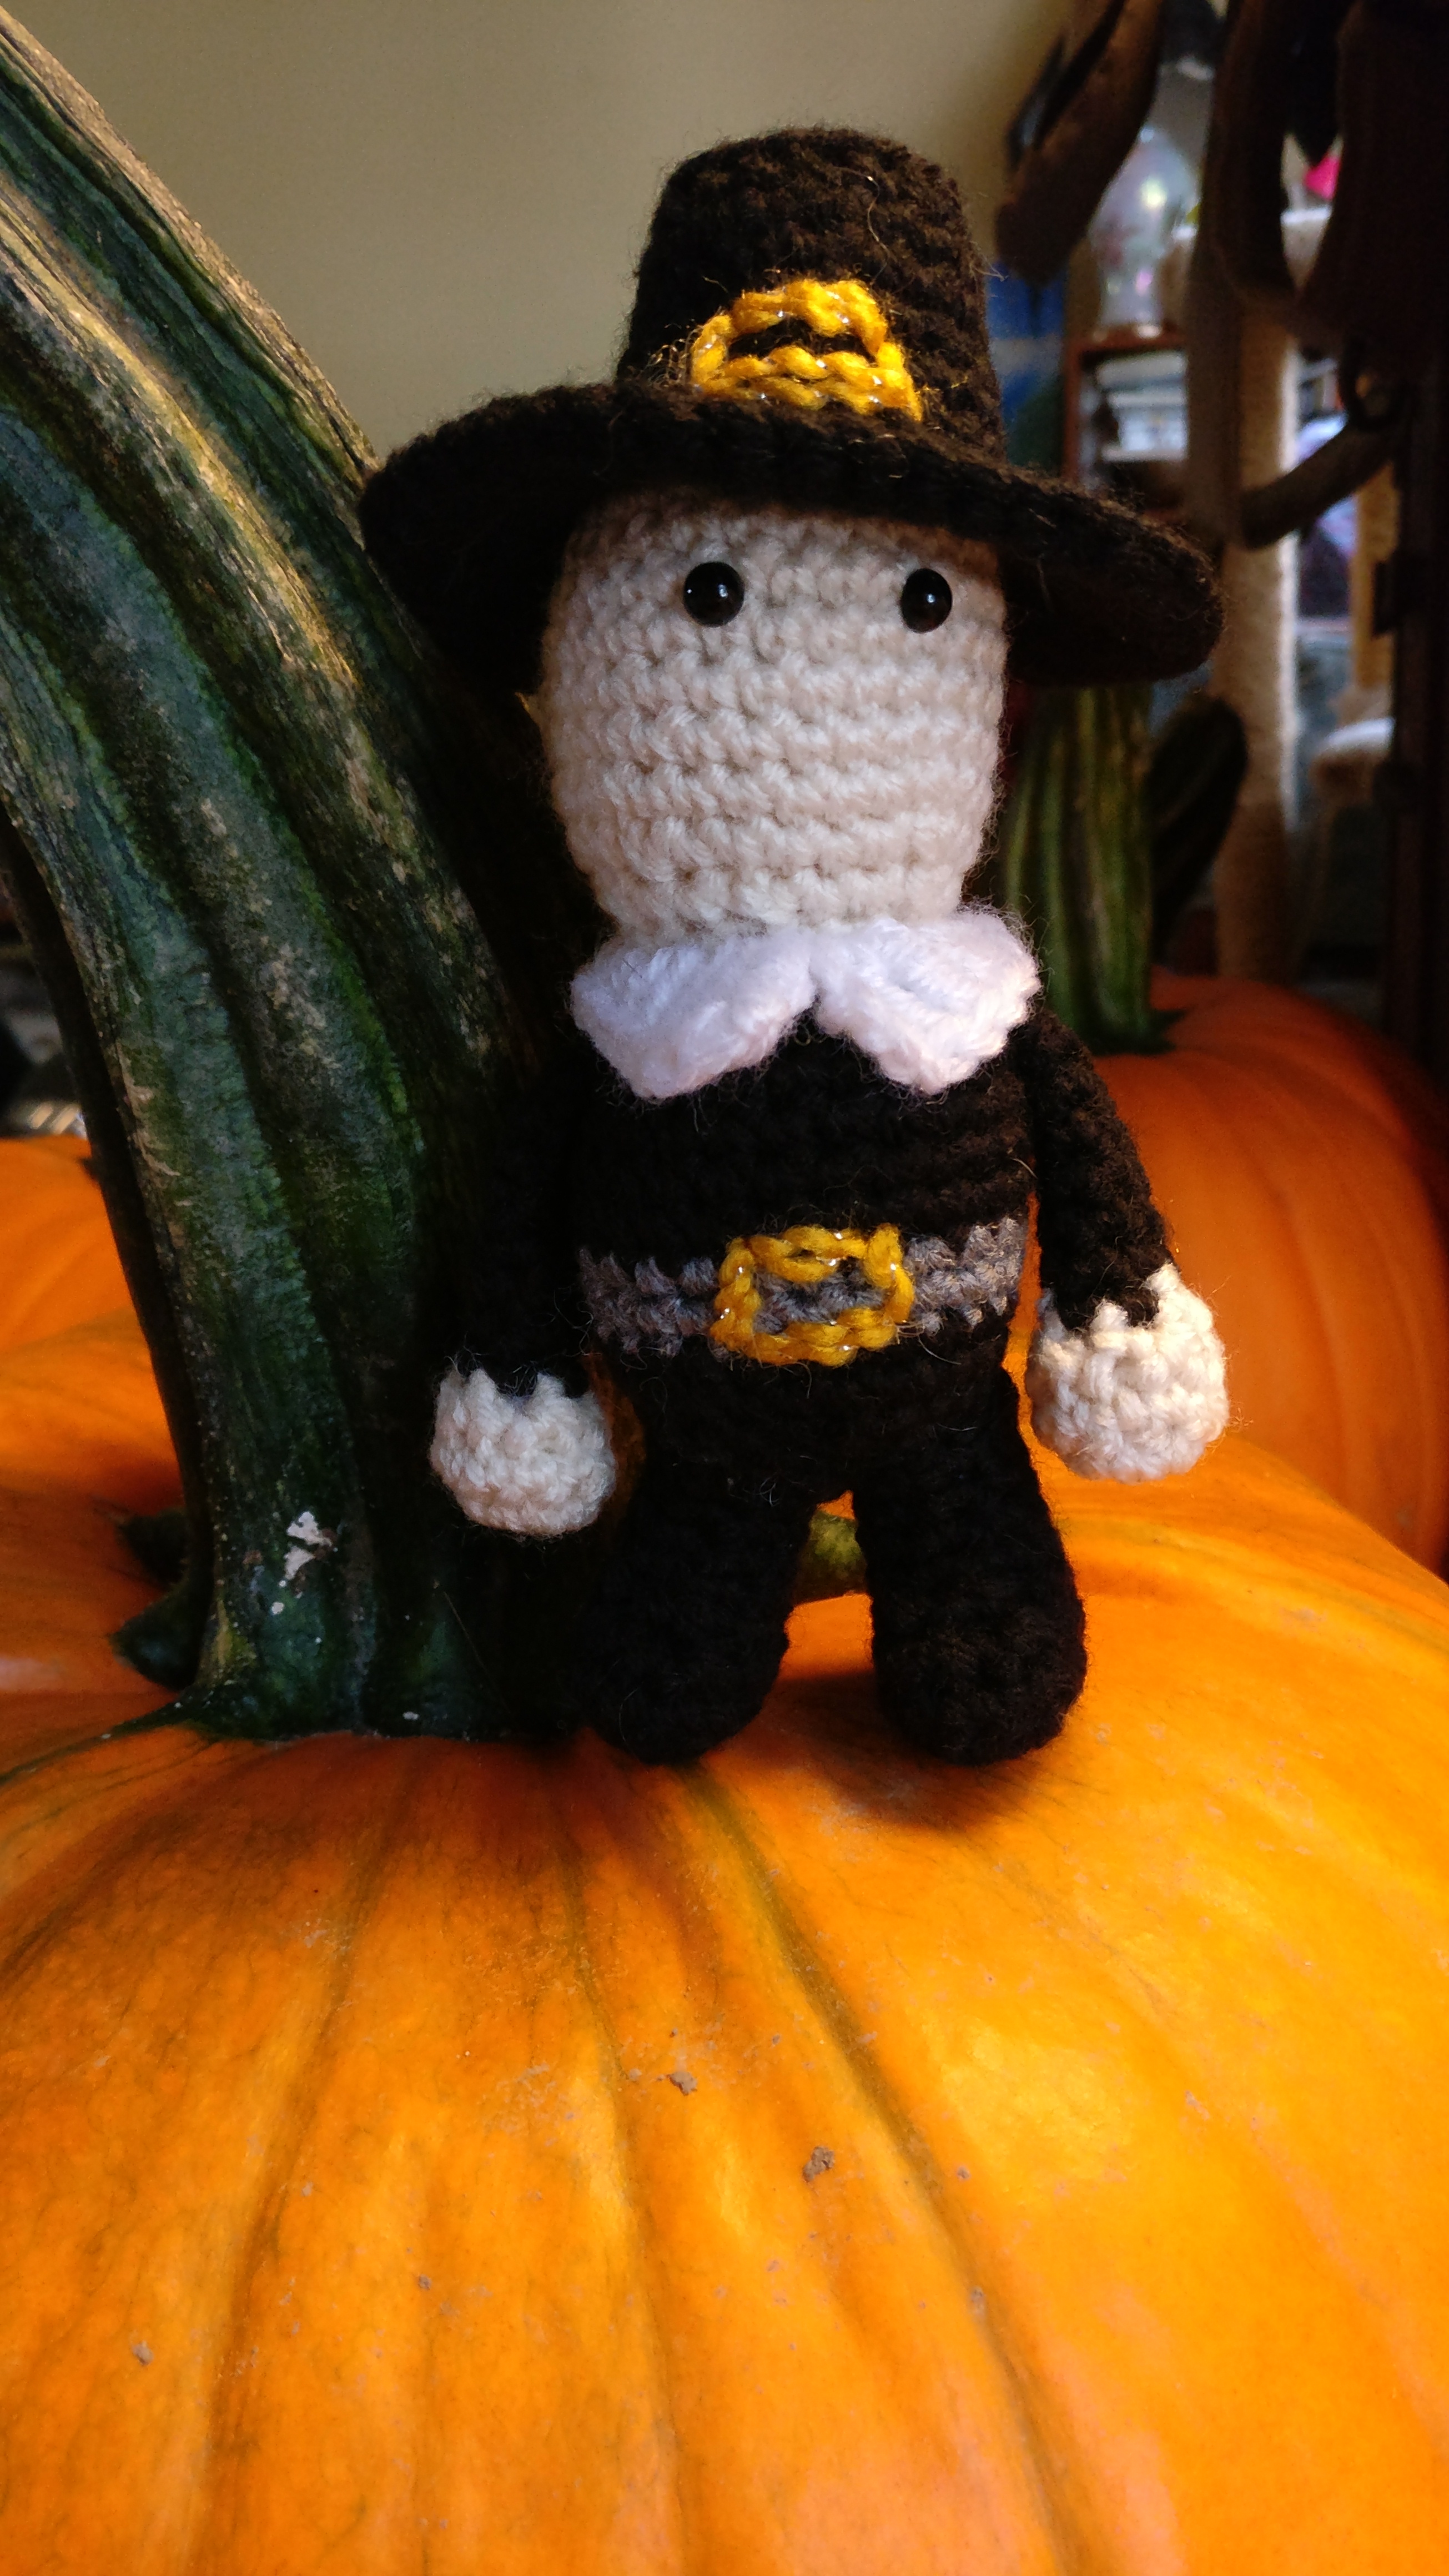
Pilgrim Boy
start with skin color 1) magic circle with 6st (6) 2) 2sc in each st (12) 3) 1sc then 2sc in next st (18) 4) 1sc in next 2st then 2sc in next st (24) 5) 1sc in next 5st then 2sc in next st (28) 6-11) 1sc in each st for 6 rows go ahead and insert safety eyes roughly between rows 7 and 8 about 3 stitches apart 12) 1sc in next 5st then 2tog (24) 13) 1sc in next 2st then 2tog (18) 14) 1sc then 2tog (12) switch to black 15) IN BLO, 1sc then 2sc in next st (18) 16) 1sc in next 2st then 2sc in next st (24) 17-20) 1sc in each st for 4 rows change to grey 21-22) 1sc in each st for 2 rows change back to black 23-24) 1sc in each st for 2 rows *stuff head, shape while stuffing 25) 1sc in next 2st then 2tog (18) 26) 1sc then 2tog (12) *stuff body, make sure to stuff more into the head and neck area as needed. 27) 2tog around (6) bind off and sew opening closed.
Legs, make two in black, stuff as you go and sew to bottom of body 1) magic circle or an adjustable loop with 6st (6) 2) 2sc in each st (12) 3) 1sc in each st for 1 row 4) 2tog twice then 1sc in next 8st (10) 5) 2tog twice then 1sc in next 6st (8) 6-8) 1sc in each st for 3 rows 9) 1sc in next st, 2sc in next st f/o leaving a tail for sewing.
Arms, make two starting with skin color and lightly stuff in skin color part only. You will be sewing it to the sides of the body roughly between rows 16/17. 1) magic circle or an adjustable loop with 6st (6) 2) 2sc in each st(12) 3) sc in each st 4) 2tog 6 times switch to black 5-10) 1sc in each st for 6 rows sc through both thickness for 3 sc, f/o and leave a tail for sewing.
Pilgrim Collar So for this it is going to be a bit tricky at first. With the body of the pilgrim facing head down attach your yarn in the FLO at the neck where you worked in the BLO. Your first st will be just to the right of the right eye (when the pilgrim is right side up). 1) ch 4 and 2 tc in the same st do 2dc in next st 2hdc in each st until the last 2 st then 2 dc in next st 3tc in the next st, bind off and weave in the end
Pilgrim Hat In black 1) magic circle or an adjustable loop with 6st (6) 2) 2sc in each st (12) 3) 1sc then 2sc in next st (18) 4) in BLO sc around 5-6) sc around 7) 1 sc in next 2 then 2sc (24) 8-9) sc around 10) in FLO 1sc in next 3 then 2sc (30) 11) 1sc in next 4 then 2sc (36) 12) 1sc in next 5 then 2sc (42) 13) 1sc in next 6 then 2sc (48) 14) sc around Bind off, leaving a tail for sewing. Weave the tail back to row 10 and sew on top of your Pilgrim’s head, making sure to stuff lightly before completely sewing close. Lastly go ahead and sew on a belt buckle and a buckle on the hat… then a nose and mouth if you wish.
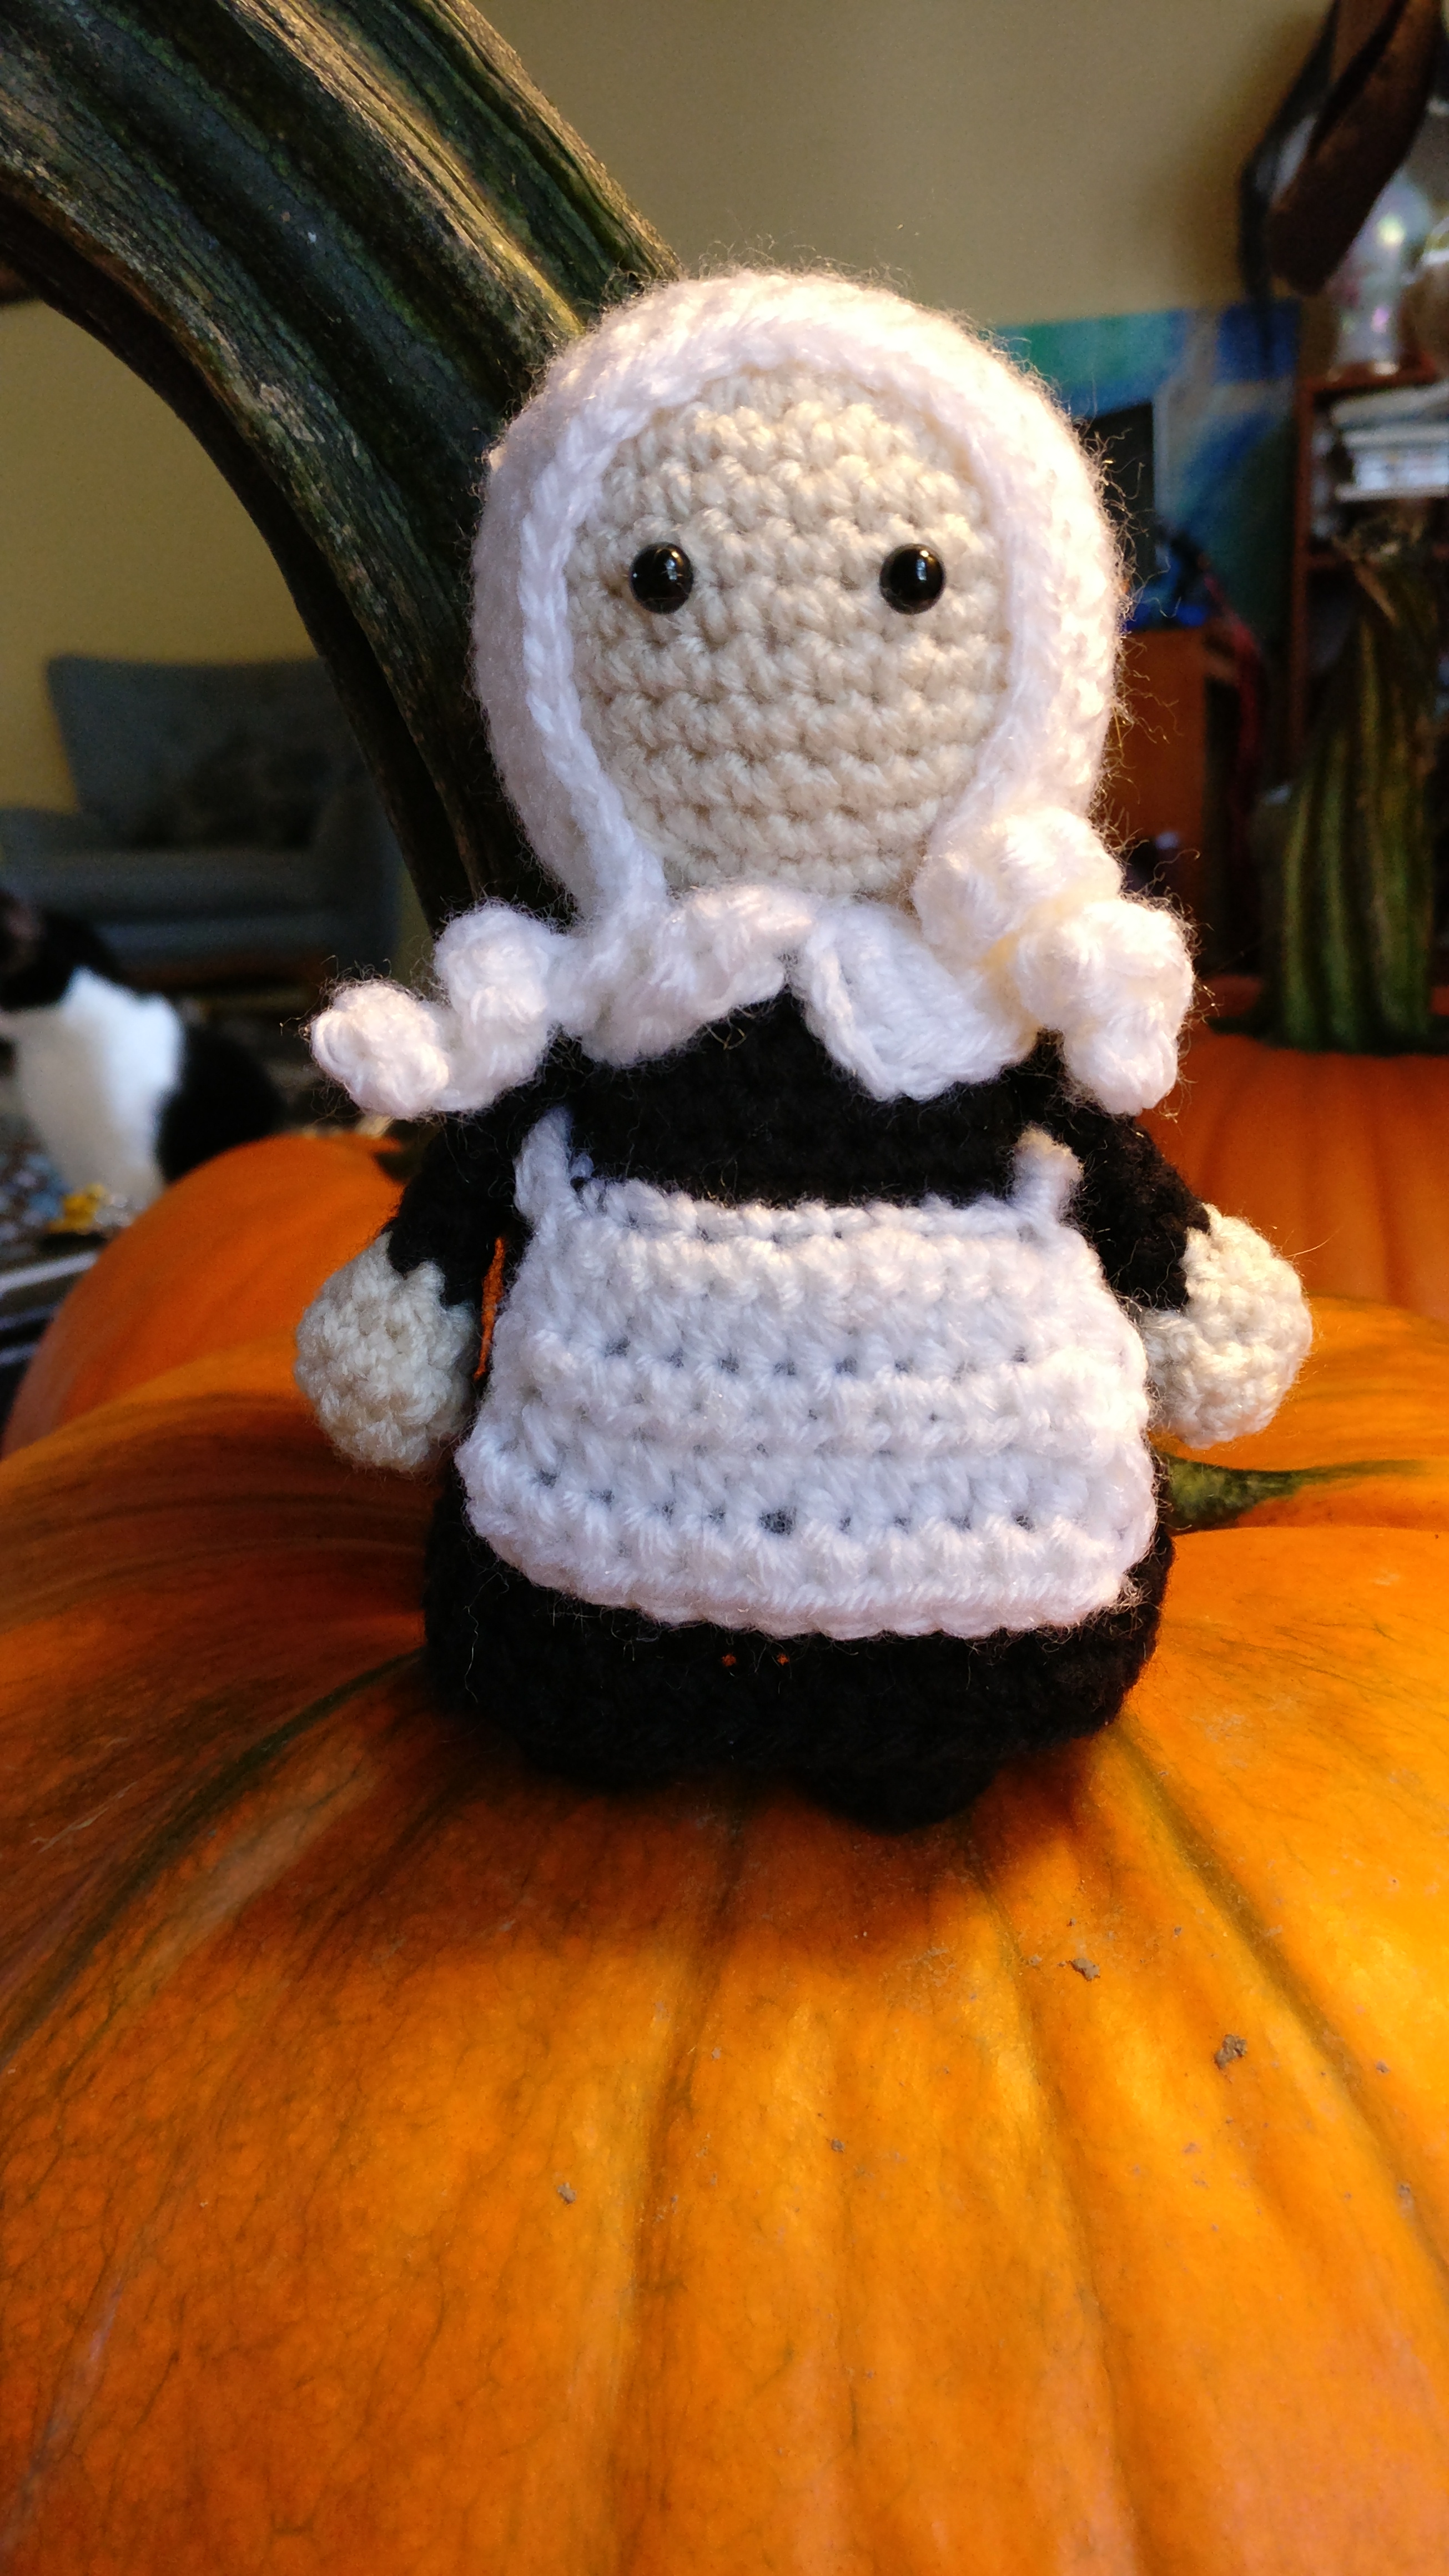
Pilgrim Girl
start with skin color 1) magic circle with 6st (6) 2) 2sc in each st (12) 3) 1sc then 2sc in next st (18) 4) 1sc in next 2st then 2sc in next st (24) 5) 1sc in next 5st then 2sc in next st (28) 6-11) 1sc in each st for 6 rows go ahead and insert safety eyes roughly between rows 7 and 8 about 3 stitches apart 12) 1sc in next 5st then 2tog (24) 13) 1sc in next 2st then 2tog (18) 14) 1sc then 2tog (12) switch to black 15) IN BLO, 1sc then 2sc in next st (18) 16) 1sc in next 2st then 2sc in next st (24) 17) In BLO 1 sc in each 18-24) 1sc in each st for 7 rows *stuff head, shape while stuffing 25) 1sc in next 2st then 2tog (18) 26) 1sc then 2tog (12) *stuff body, make sure to stuff more into the head and neck area as needed. 27) 2tog around (6) bind off and sew opening closed.
Legs, make two in black, stuff as you go and sew to bottom of body 1) magic circle or an adjustable loop with 6st (6) 2) 2sc in each st (12) 3) 1sc in each st for 1 row 4) 2tog twice then 1sc in next 8st (10) 5) 2tog twice then 1sc in next 6st (8) 6-8) 1sc in each st for 3 rows 9) 1sc in next st, 2sc in next st f/o leaving a tail for sewing.
Arms, make two starting with skin color and lightly stuff in skin color part only. You will be sewing it to the sides of the body roughly between rows 16/17. 1) magic circle or an adjustable loop with 6st (6) 2) 2sc in each st(12) 3) sc in each st 4) 2tog 6 times switch to black 5-10) 1sc in each st for 6 rows sc through both thickness for 3 sc, f/o and leave a tail for sewing.
Pilgrim Collar So for this it is going to be a bit tricky at first. With the body of the pilgrim facing head down attach your yarn in the FLO at the neck where you worked in the BLO. Your first st will be just to the right of the left eye (when the pilgrim is right side up), essentially in the middle. 1) ch 4 and 2 tc in the same st do 1 tc and 1dc in next st 2hdc in each st until the last 2 st then 2 dc and 1tc in next st 3tc in the next st, bind off and weave in the end.
Pilgrim Dress So with doll facing you count 4 st to the left from center of the FLO of row 17 and place a marker here. Now attach your black yarn at the back of the doll (doll now head down) in the FLO of the BLO only row from the body. 1) sc around, move your marker up to this row, Sl st to first hdc 2) hdc around until you get to your marker. At the marker hdc in BLO for the next 8 st (you don’t need the marker anymore unless you want to leave it so it is easier to find this spot again for the apron part). Hdc in the rest of the st using both loop around, Sl st to first hdc 3) 3 hdc, 2 hdc in next st around . Sl st to first hdc. 4-7) hdc around, Sl st to first hdc. Bind off and weave in ends. Apron 1) ch 22 then attach your yarn to the FLO of the 2nd row of the dress and sc in the 8 st. ch1 and turn 2) 1 hdc then 2 hdc in next across, ch1 and turn 3-6) hdc across, ch 1 and turn. After last row bind off and weave in ends. The beginning ch should be sewn around the back of the body to the other side of the apron.
Pilgrim Bonnet done in white 1) magic circle with 6st (6) 2) 2sc in each st (12) 3) 1sc then 2sc in next st (18) 4) 1sc in next 2st then 2sc in next st (24) 5) 1sc in next 3st then 2sc in next st (30) 6) 1 sc in next 24 st, ch 1 and turn 7-10) hdc in next 24 st, ch 1 and turn 11) ch 10 then starting in 2nd ch, 2sc in each ch going back up to the bonnet. Sc around the bottom of the bonnet to the other side then ch 10 then starting in 2nd ch, 2sc in each ch going back up to the bonnet. Sc around the front to the other tie then bind off, leaving a tail to sew on to the Pilgrim head. Now, to note, I did design the hat a little bit bigger than absolutely necessary. This I did in case I wanted to add hair, but I choose not to. Just know that it might be a little loose or you can add hair if you want.
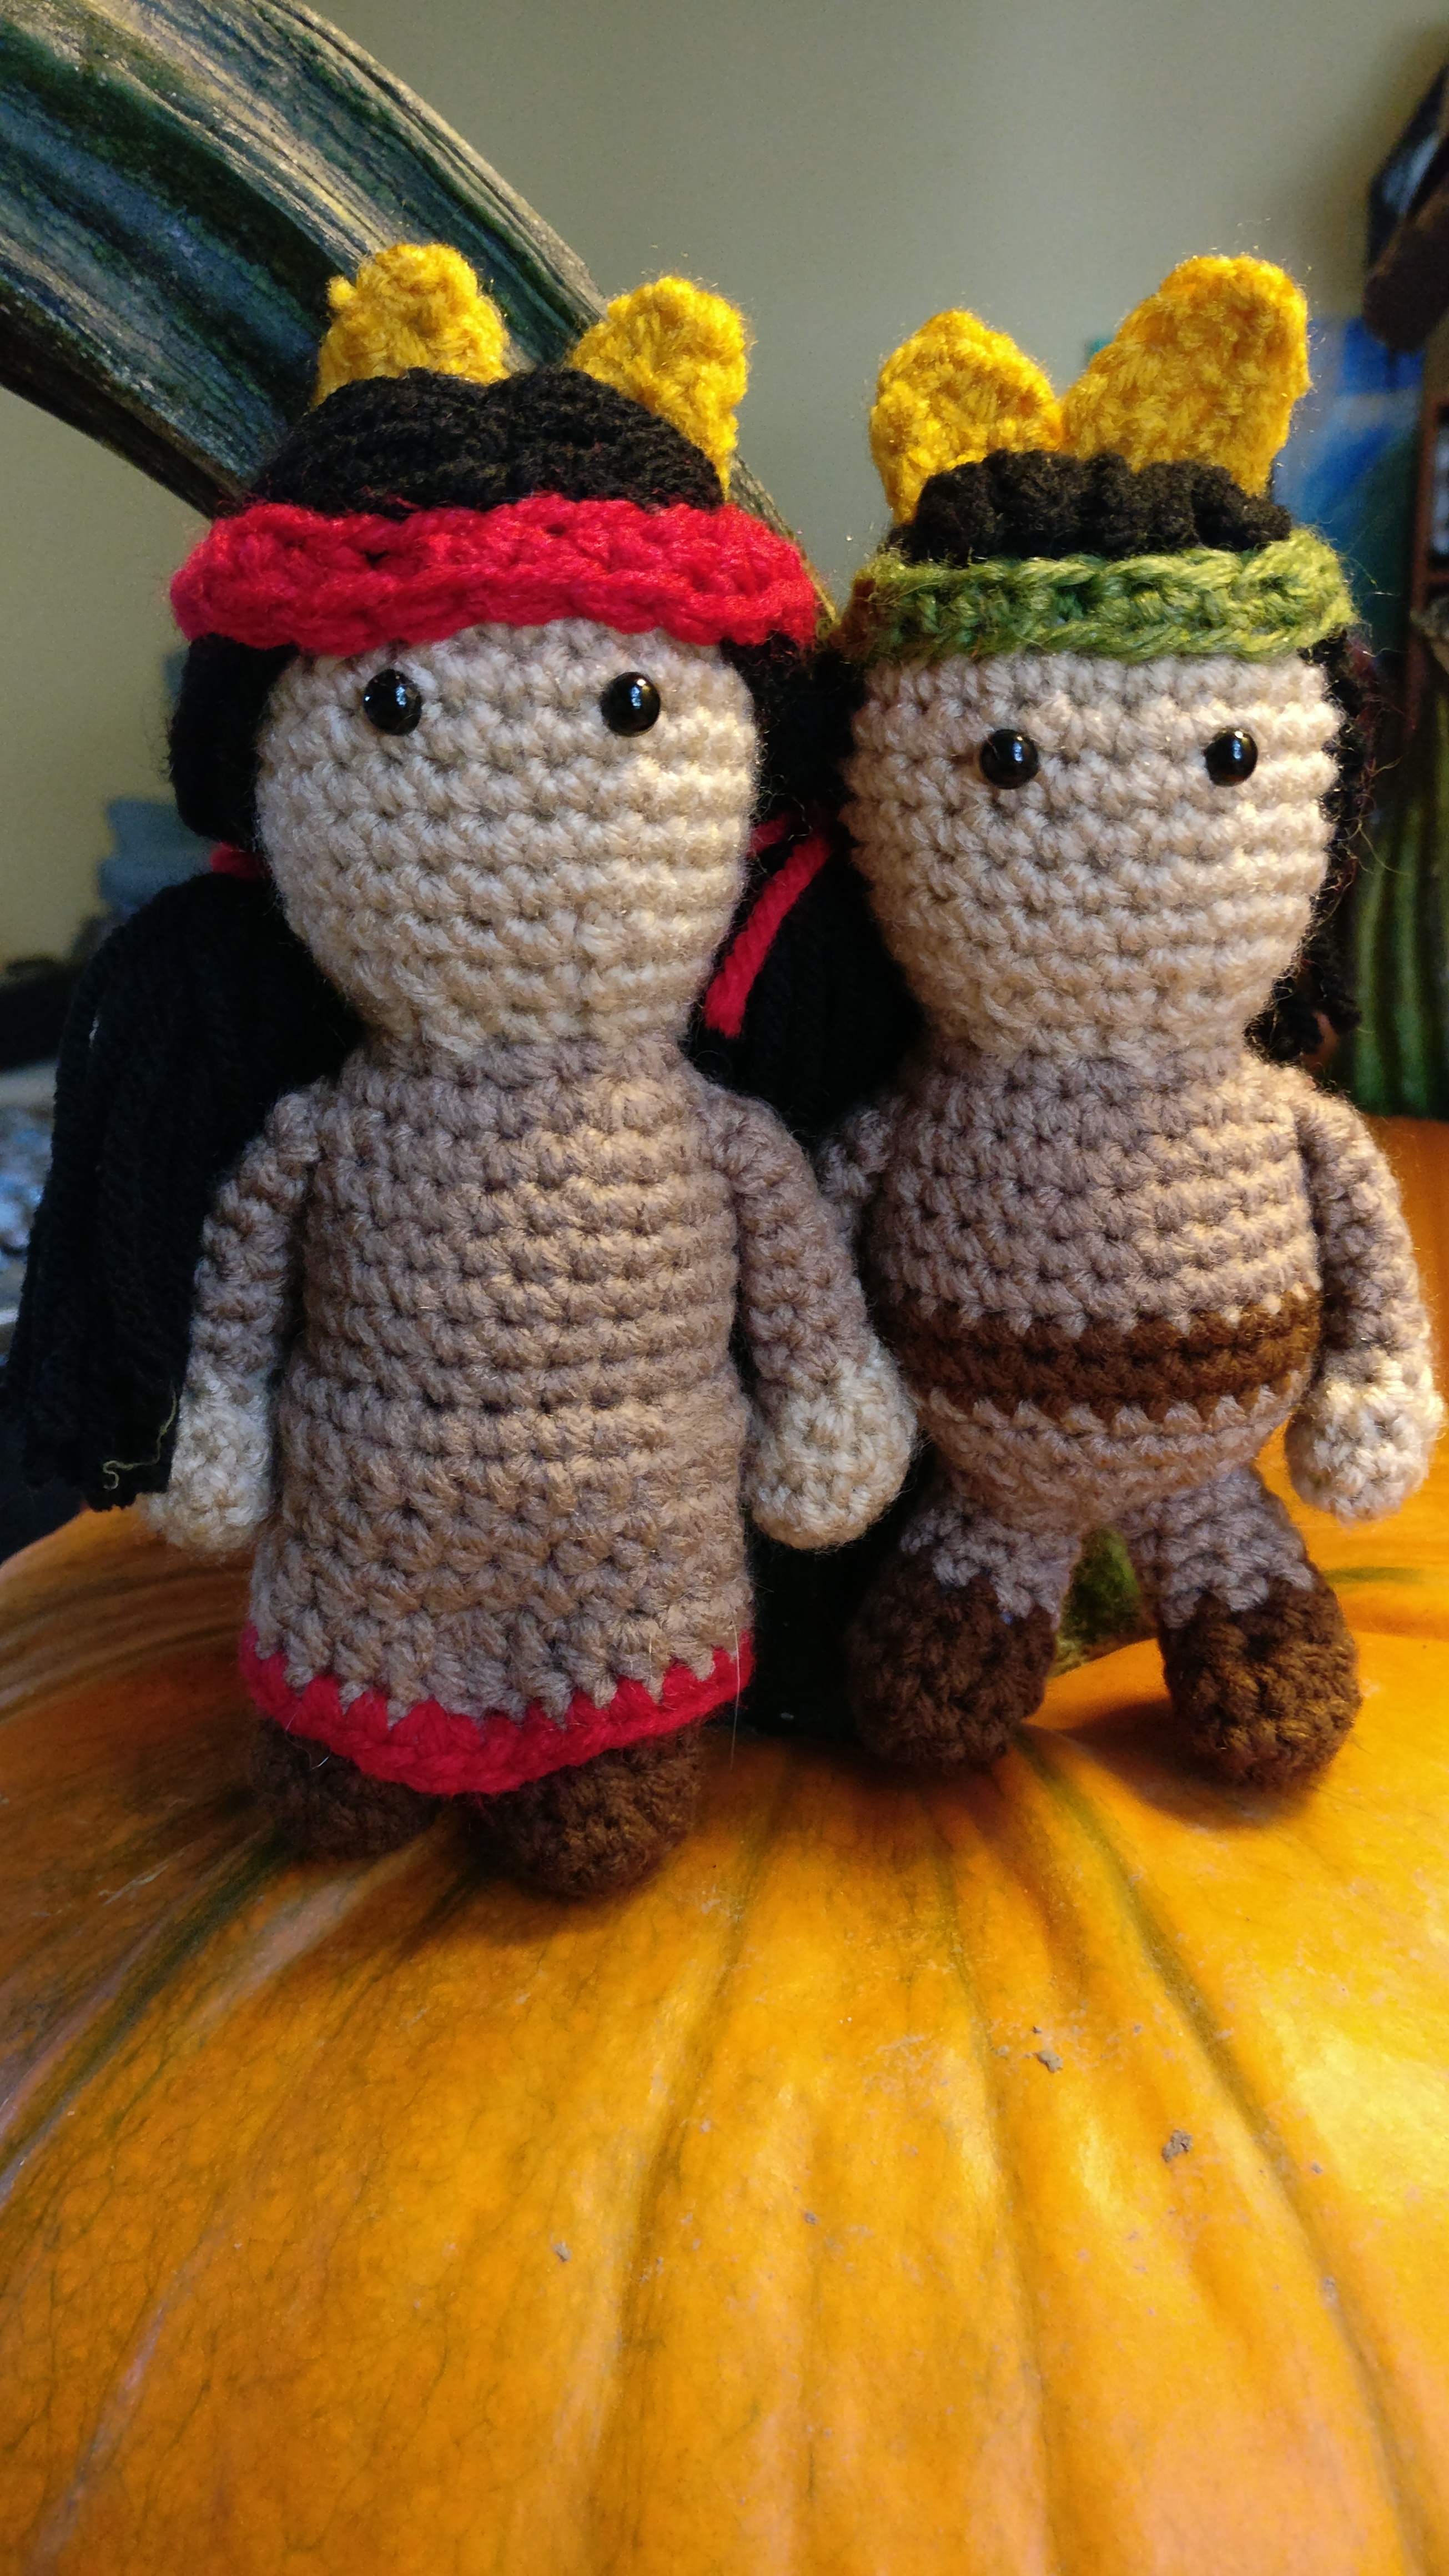
Now for the Indians
Indian Boy
start with skin color 1) magic circle with 6st (6) 2) 2sc in each st (12) 3) 1sc then 2sc in next st (18) 4) 1sc in next 2st then 2sc in next st (24) 5) 1sc in next 5st then 2sc in next st (28) 6-11) 1sc in each st for 6 rows go ahead and insert safety eyes roughly between rows 7 and 8 about 3 stitches apart 12) 1sc in next 5st then 2tog (24) 13) 1sc in next 2st then 2tog (18) 14) 1sc then 2tog (12) switch to medium brown 15) 1sc then 2sc in next st (18) 16) 1sc in next 2st then 2sc in next st (24) 17-20) 1sc in each st for 4 rows change to dark brown 21-22) 1sc in each st for 2 rows change back to medium brown 23-24) 1sc in each st for 2 rows *stuff head, shape while stuffing 25) 1sc in next 2st then 2tog (18) 26) 1sc then 2tog (12) *stuff body, make sure to stuff more into the head and neck area as needed. 27) 2tog around (6) bind off and sew opening closed.
Legs, make two starting with the dark brown, stuff as you go and sew to bottom of body 1) magic circle or an adjustable loop with 6st (6) 2) 2sc in each st (12) 3) 1sc in each st for 1 row 4) 2tog twice then 1sc in next 8st (10) 5) 2tog twice then 1sc in next 6st (8) switch to light brown 6-8) 1sc in each st for 3 rows 9) 1sc in next st, 2sc in next st f/o leaving a tail for sewing.
Arms, make two starting with skin color and lightly stuff in skin color part only. You will be sewing it to the sides of the body roughly between rows 16/17. 1) magic circle or an adjustable loop with 6st (6) 2) 2sc in each st(12) 3) sc in each st 4) 2tog 6 times switch to medium brown 5-10) 1sc in each st for 6 rows sc through both thickness for 3 sc, f/o and leave a tail for sewing.
Hair So I decided the hair was the next step. I simply cut some black yarn about 10-12 inches long and latch hooked them in the head just at the front hair line. I didn’t have a reason to do the whole head, but if you want have fun. I then tied the hair at the nape of the neck with a piece of red yarn. Gave him a slight trim and that was his hair…
Headdress With a green I simply did a chainless sc foundation row (or if you want a chain then go back and sc the length of the chain) the length that would fit his head. This will depend slightly on how thick his hair is and your crochet style. For me, it was a total of 22. Now for the feathers. This is really just like a simple leaf pattern. Make as many as you want to decorate the back of the headdress and in your chosen colors. 1) ch 7, then sc, sc, hdc, dc,hdc, sc 2) now working in the opposite side of the chain, sc, hdc, dc, hdc, sc, sl st. Leave a long tail, weave it back to the bottom of the feather (gives it more stability and helps to close up any spaces) and sew it to the beginning of the chainless sc foundation row. This is going to be the back of the headdress with the feathers against the hair when you sew it on the head. Go ahead and finish sewing the headdress on around his head.
Indian Girl
start with skin color 1) magic circle with 6st (6) 2) 2sc in each st (12) 3) 1sc then 2sc in next st (18) 4) 1sc in next 2st then 2sc in next st (24) 5) 1sc in next 5st then 2sc in next st (28) 6-11) 1sc in each st for 6 rows go ahead and insert safety eyes roughly between rows 7 and 8 about 3 stitches apart 12) 1sc in next 5st then 2tog (24) 13) 1sc in next 2st then 2tog (18) 14) 1sc then 2tog (12) switch to medium brown 15) 1sc then 2sc in next st (18) 16) 1sc in next 2st then 2sc in next st (24) 17-22) 1 sc in each for 6 23) In BLO 1 sc in each 24) 1sc in each st *stuff head, shape while stuffing 25) 1sc in next 2st then 2tog (18) 26) 1sc then 2tog (12) *stuff body, make sure to stuff more into the head and neck area as needed. 27) 2tog around (6) bind off and sew opening closed.
Legs, make two starting with dark brown, stuff as you go and sew to bottom of body 1) magic circle or an adjustable loop with 6st (6) 2) 2sc in each st (12) 3) 1sc in each st for 1 row 4) 2tog twice then 1sc in next 8st (10) 5) 2tog twice then 1sc in next 6st (8) switch to medium brown 6-8) 1sc in each st for 3 rows 9) 1sc in next st, 2sc in next st f/o leaving a tail for sewing.
Arms, make two starting with skin color and lightly stuff in skin color part only. You will be sewing it to the sides of the body roughly between rows 16/17. 1) magic circle or an adjustable loop with 6st (6) 2) 2sc in each st(12) 3) sc in each st 4) 2tog 6 times switch to medium brown 5-10) 1sc in each st for 6 rows sc through both thickness for 3 sc, f/o and leave a tail for sewing.
Indian dress With the doll head facing down, attach your yarn anywhere really in the FLO only of round 23 with the medium brown. 1) sc around in the FLO, no need to join, just go in a spiral 2-4) hdc around Now, locate the rough middle of the front and back, then mark them with a stitch marker or another color yarn. 5) hdc until 1 st before the marker, dc in next st, 2 tc in next, dc in next then hdc around until 1 st before the marker, dc in next st, 2 tc in next, dc in next then hdc around to end of row. Switch to red 6) sc around, bind off and weave in end
Hair So I decided the hair was the next step. I simply cut some black yarn about 12-13 inches long and latch hooked them in the head just at the front hair line, back and down the middle. I didn’t have a reason to do the whole head, but if you want have fun. I then tied the hair at the sides of the neck with a piece of red yarn. Gave her a slight trim and that was her hair…
Headdress With a green I simply did a chainless sc foundation row (or if you want a chain then go back and sc the length of the chain) the length that would fit her head. This will depend slightly on how thick his hair is and your crochet style. For me, it was a total of 22. Now for the feathers. This is really just like a simple leaf pattern. Make as many as you want to decorate the back of the headdress and in your chosen colors. 1) ch 7, then sc, sc, hdc, dc,hdc, sc 2) now working in the opposite side of the chain, sc, hdc, dc, hdc, sc, sl st. Leave a long tail, weave it back to the bottom of the feather (gives it more stability and helps to close up any spaces) and sew it to the beginning of the chainless sc foundation row. This is going to be the back of the headdress with the feathers against the hair when you sew it on the head. Go ahead and finish sewing the headdress on around her head.
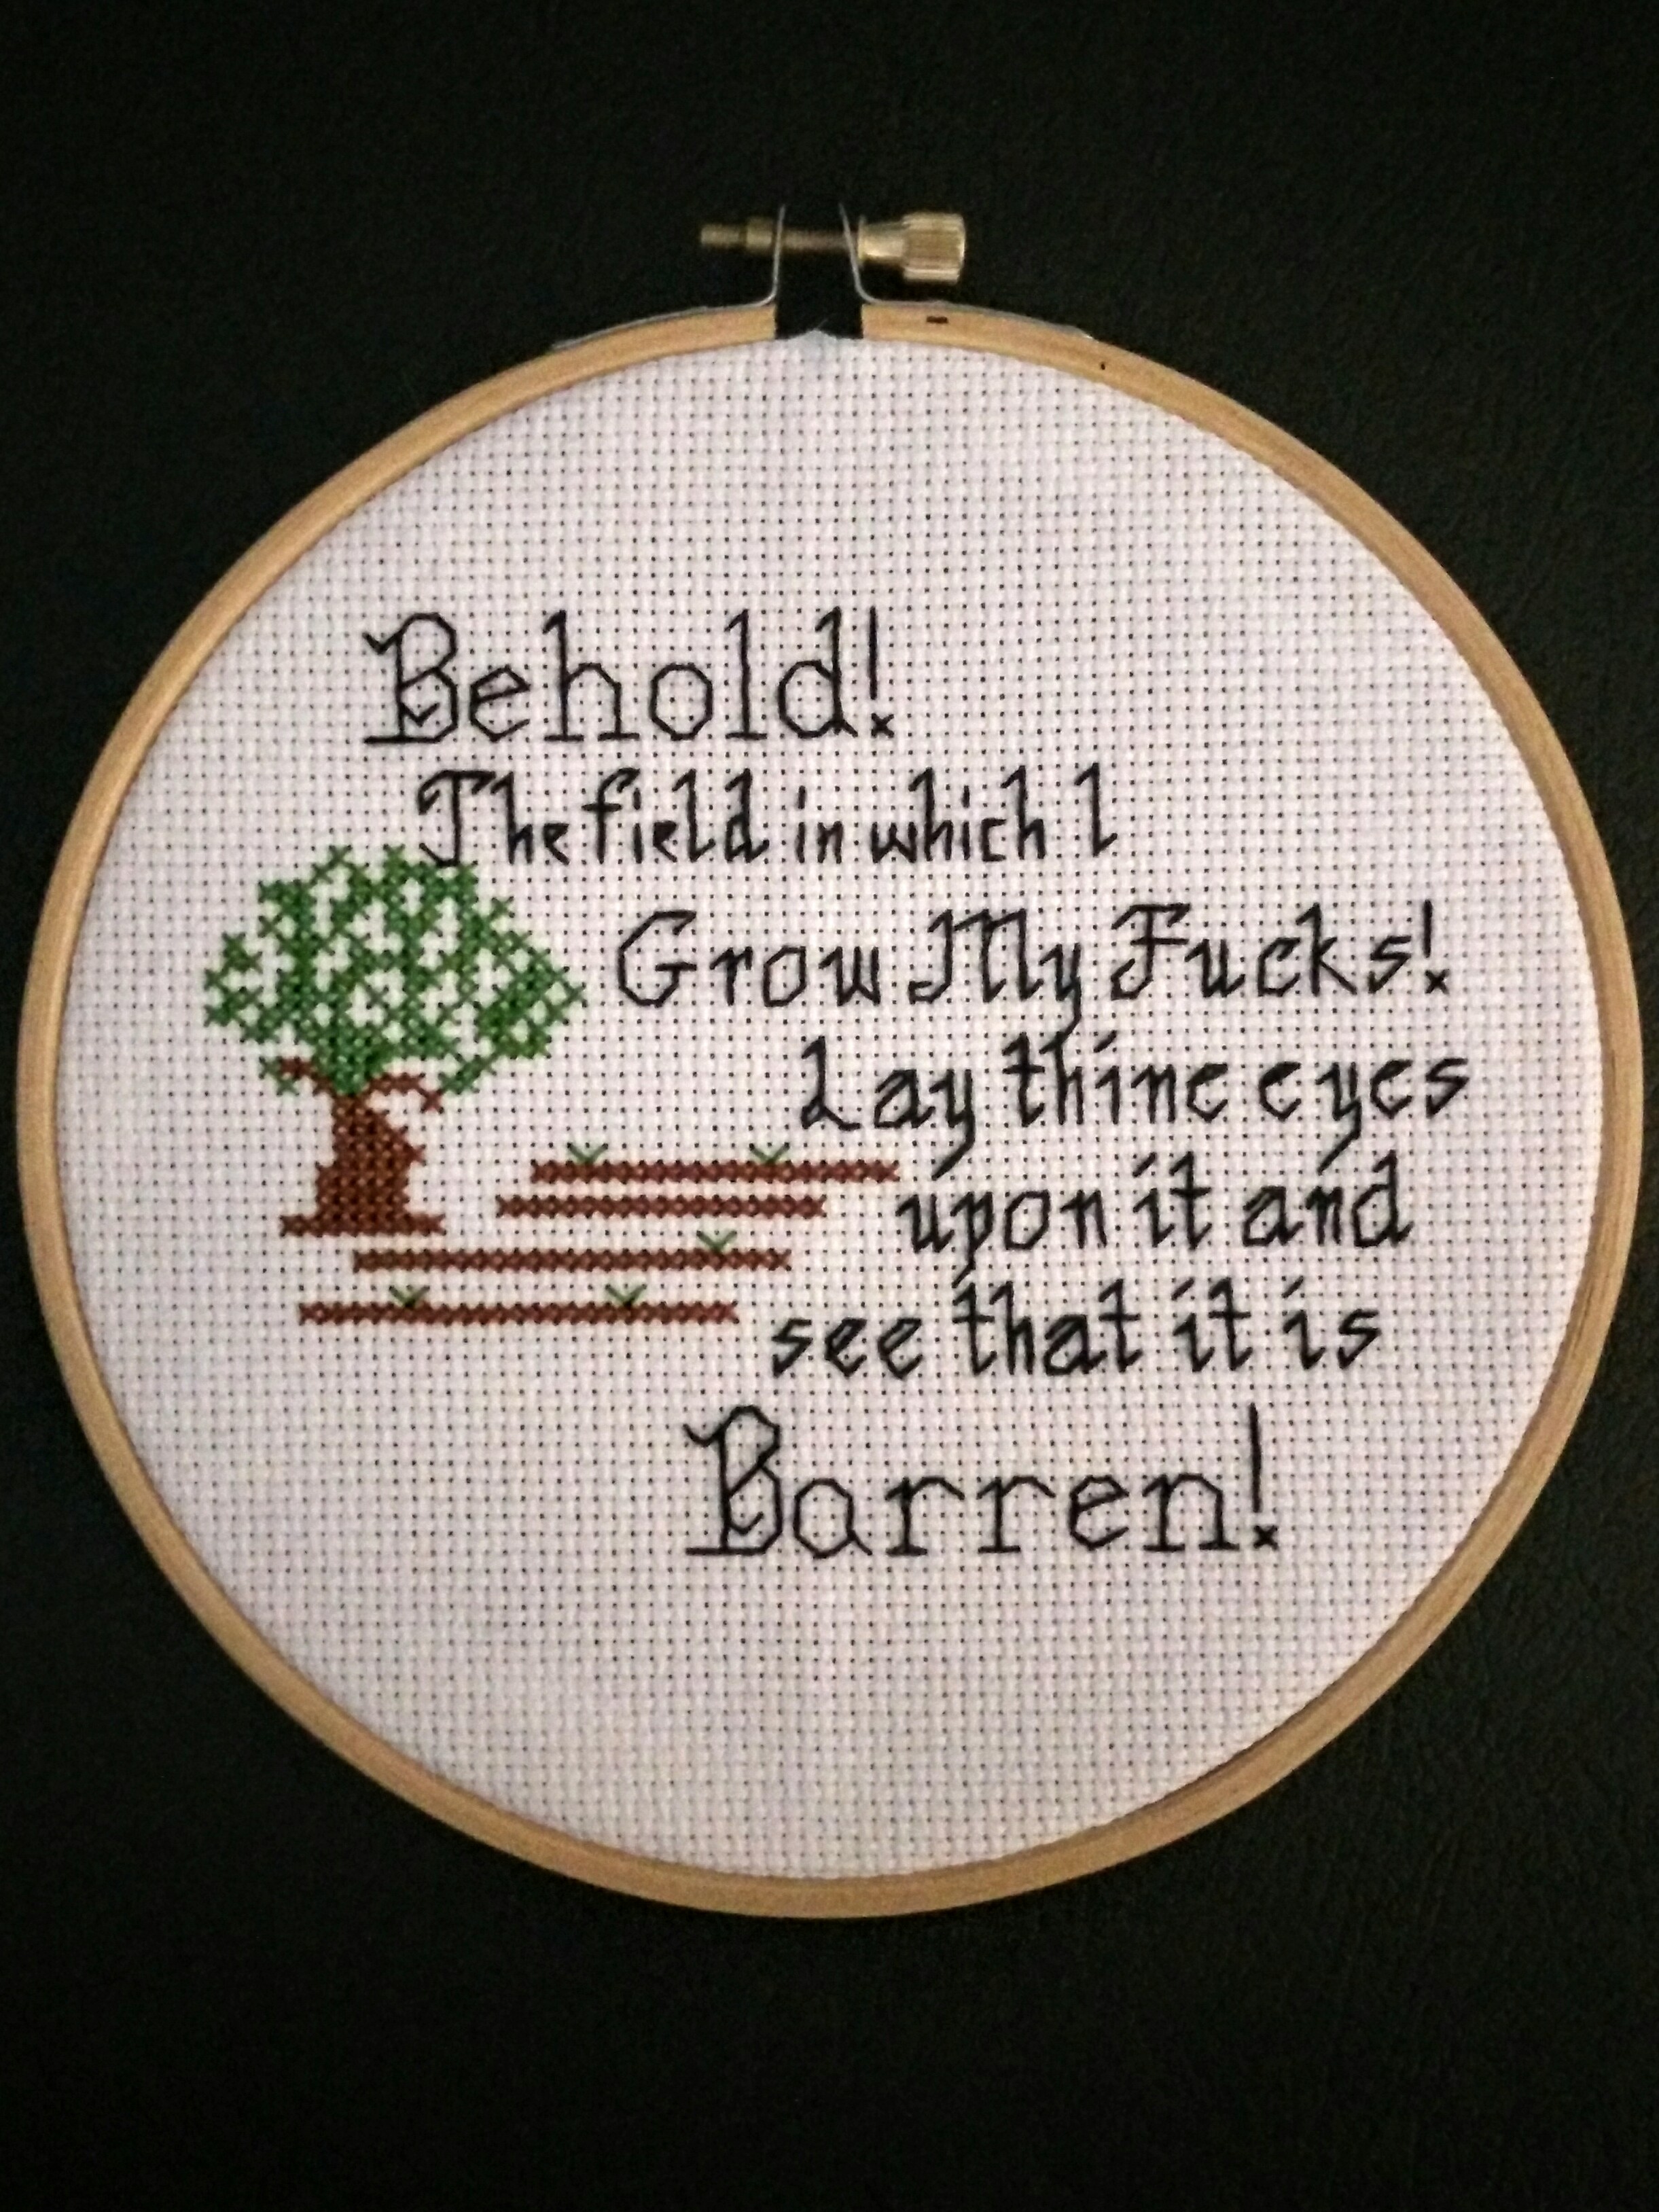
Wait, what? A multidisciplinary hooker? Of course! So many crafts, so little time…
I had seen this wonderful cross-stitch when I was looking at different designs and thought it was hilarious. How could I not? Then I showed it to my husband and since his brother’s birthday was coming up and we knew he would I decided I would go ahead and make this one up. One problem… no free pattern. I certainly wasn’t going to pay the $6 or so for it. Not for just the one. So, one night when I found myself needing something to do I printed off a basic cross-stitch graph paper (memo to self, buy some) and proceeded to make my own version. By no means am I an expert! I’m providing the pdf of what I did in case others want to use it. If you are looking for perfection, this hooker most certainly isn’t it. If you want though, here is the downloadable version I did.
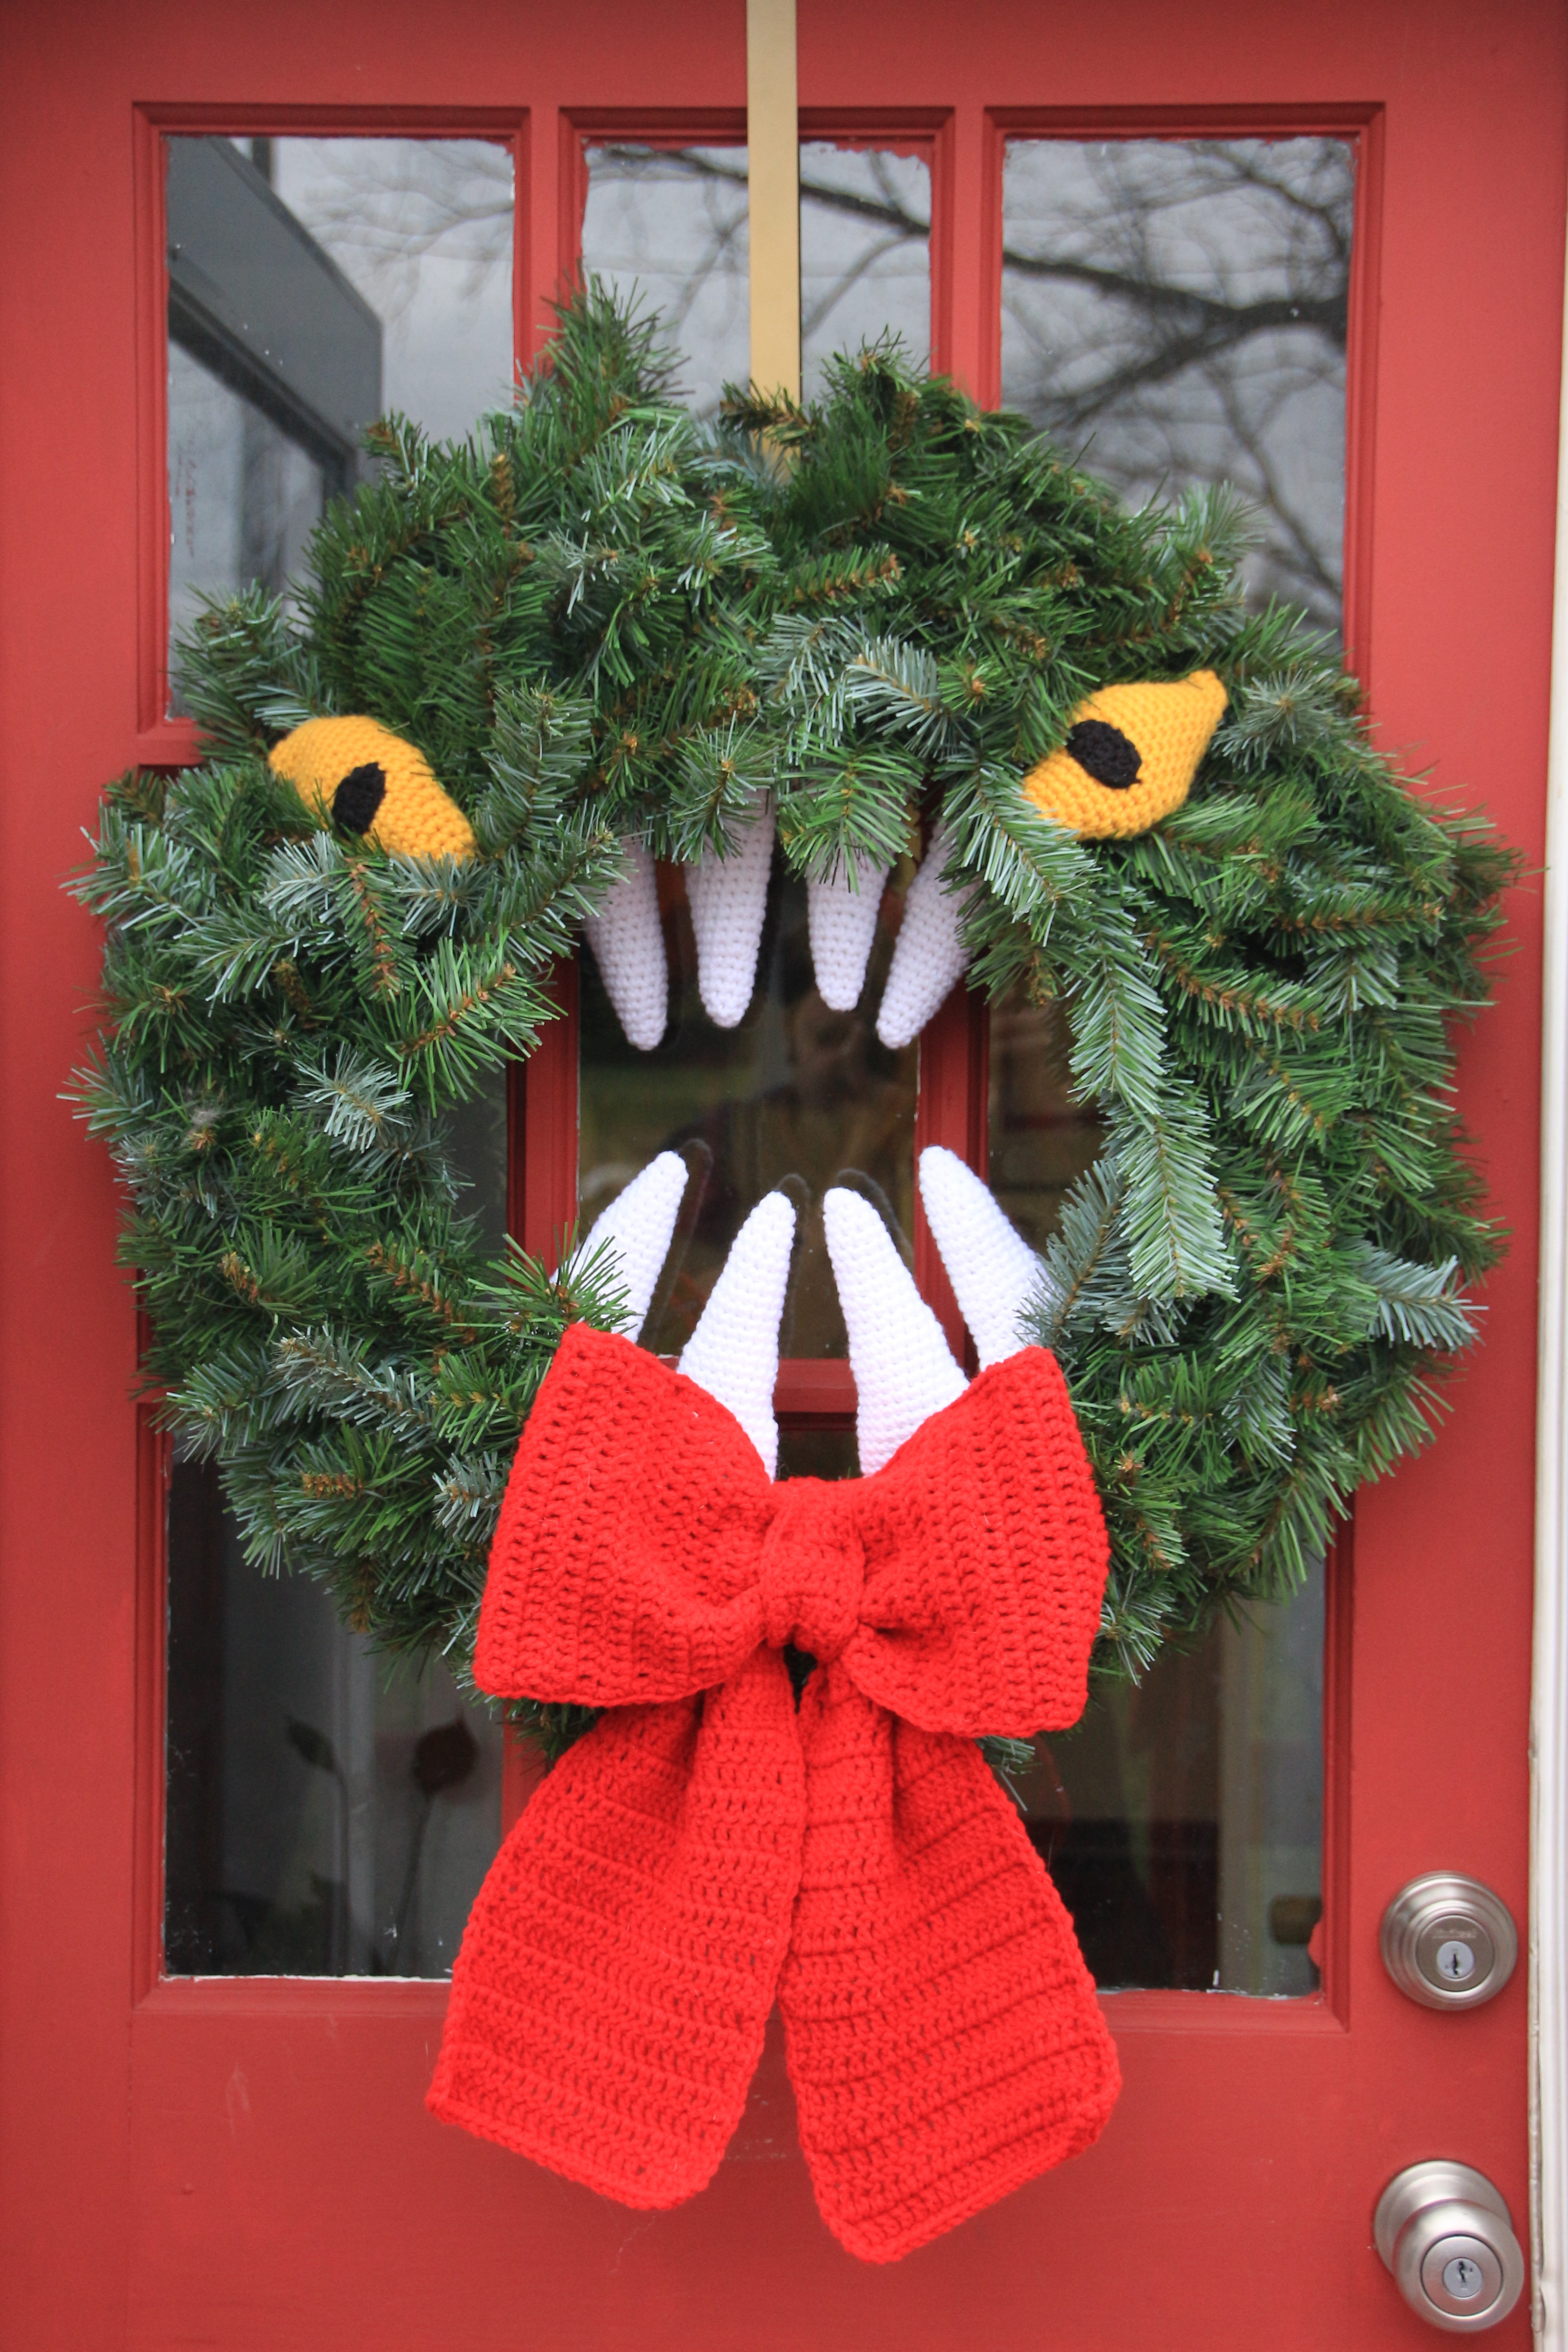
I have wanted to make this wreath for so long (as I have the movie completely memorized) and I am so happy to finally be able to bring it to life using crochet as my art medium. For this pattern I will not use abbreviations so as not to confuse anyone. The pattern is written in US terminology. I hope you enjoy it as well! Due to the number of pictures they will all be thumbnails that you can click to see the full-size image.
Feel free to sell/give away/do whatever with your finished project. Please just make sure you give me credit for the pattern. DO NOT sell or reproduce my pattern without my permission.
Materials: Fake wreath approximately 18″ inner diameter Size H hook Worsted weight yarn in colors red, white, yellow Polyfil Darning needle
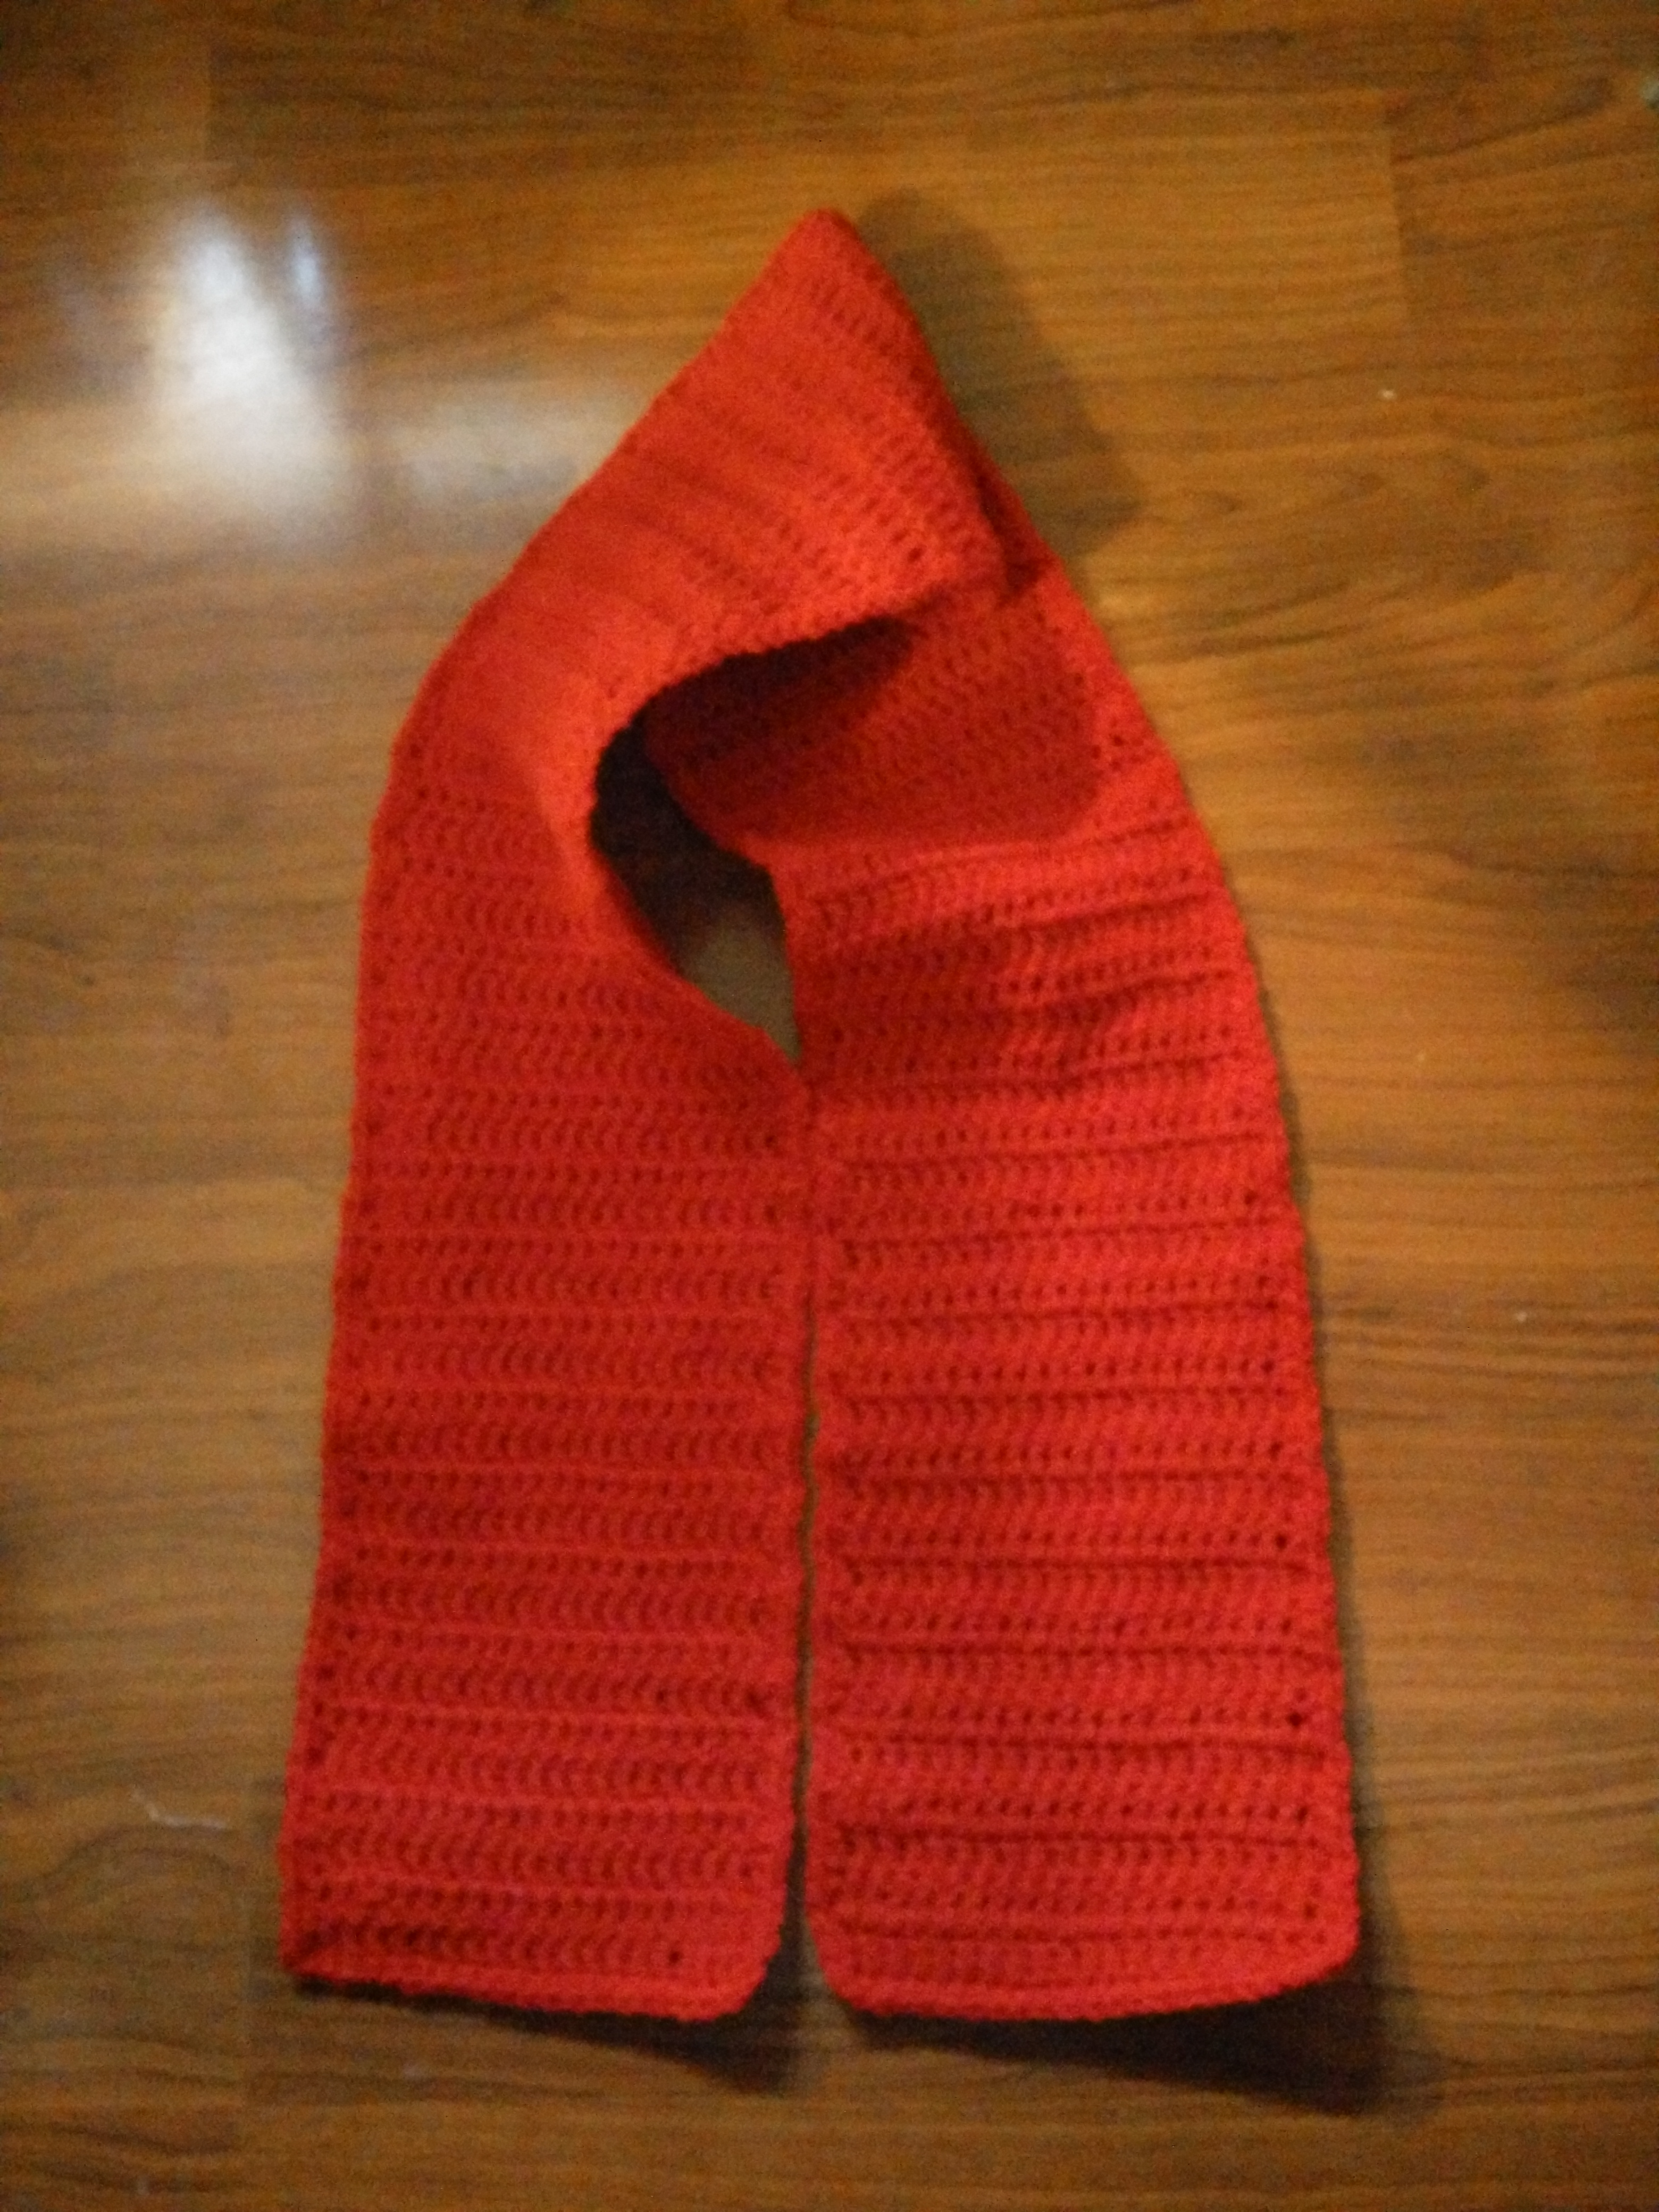
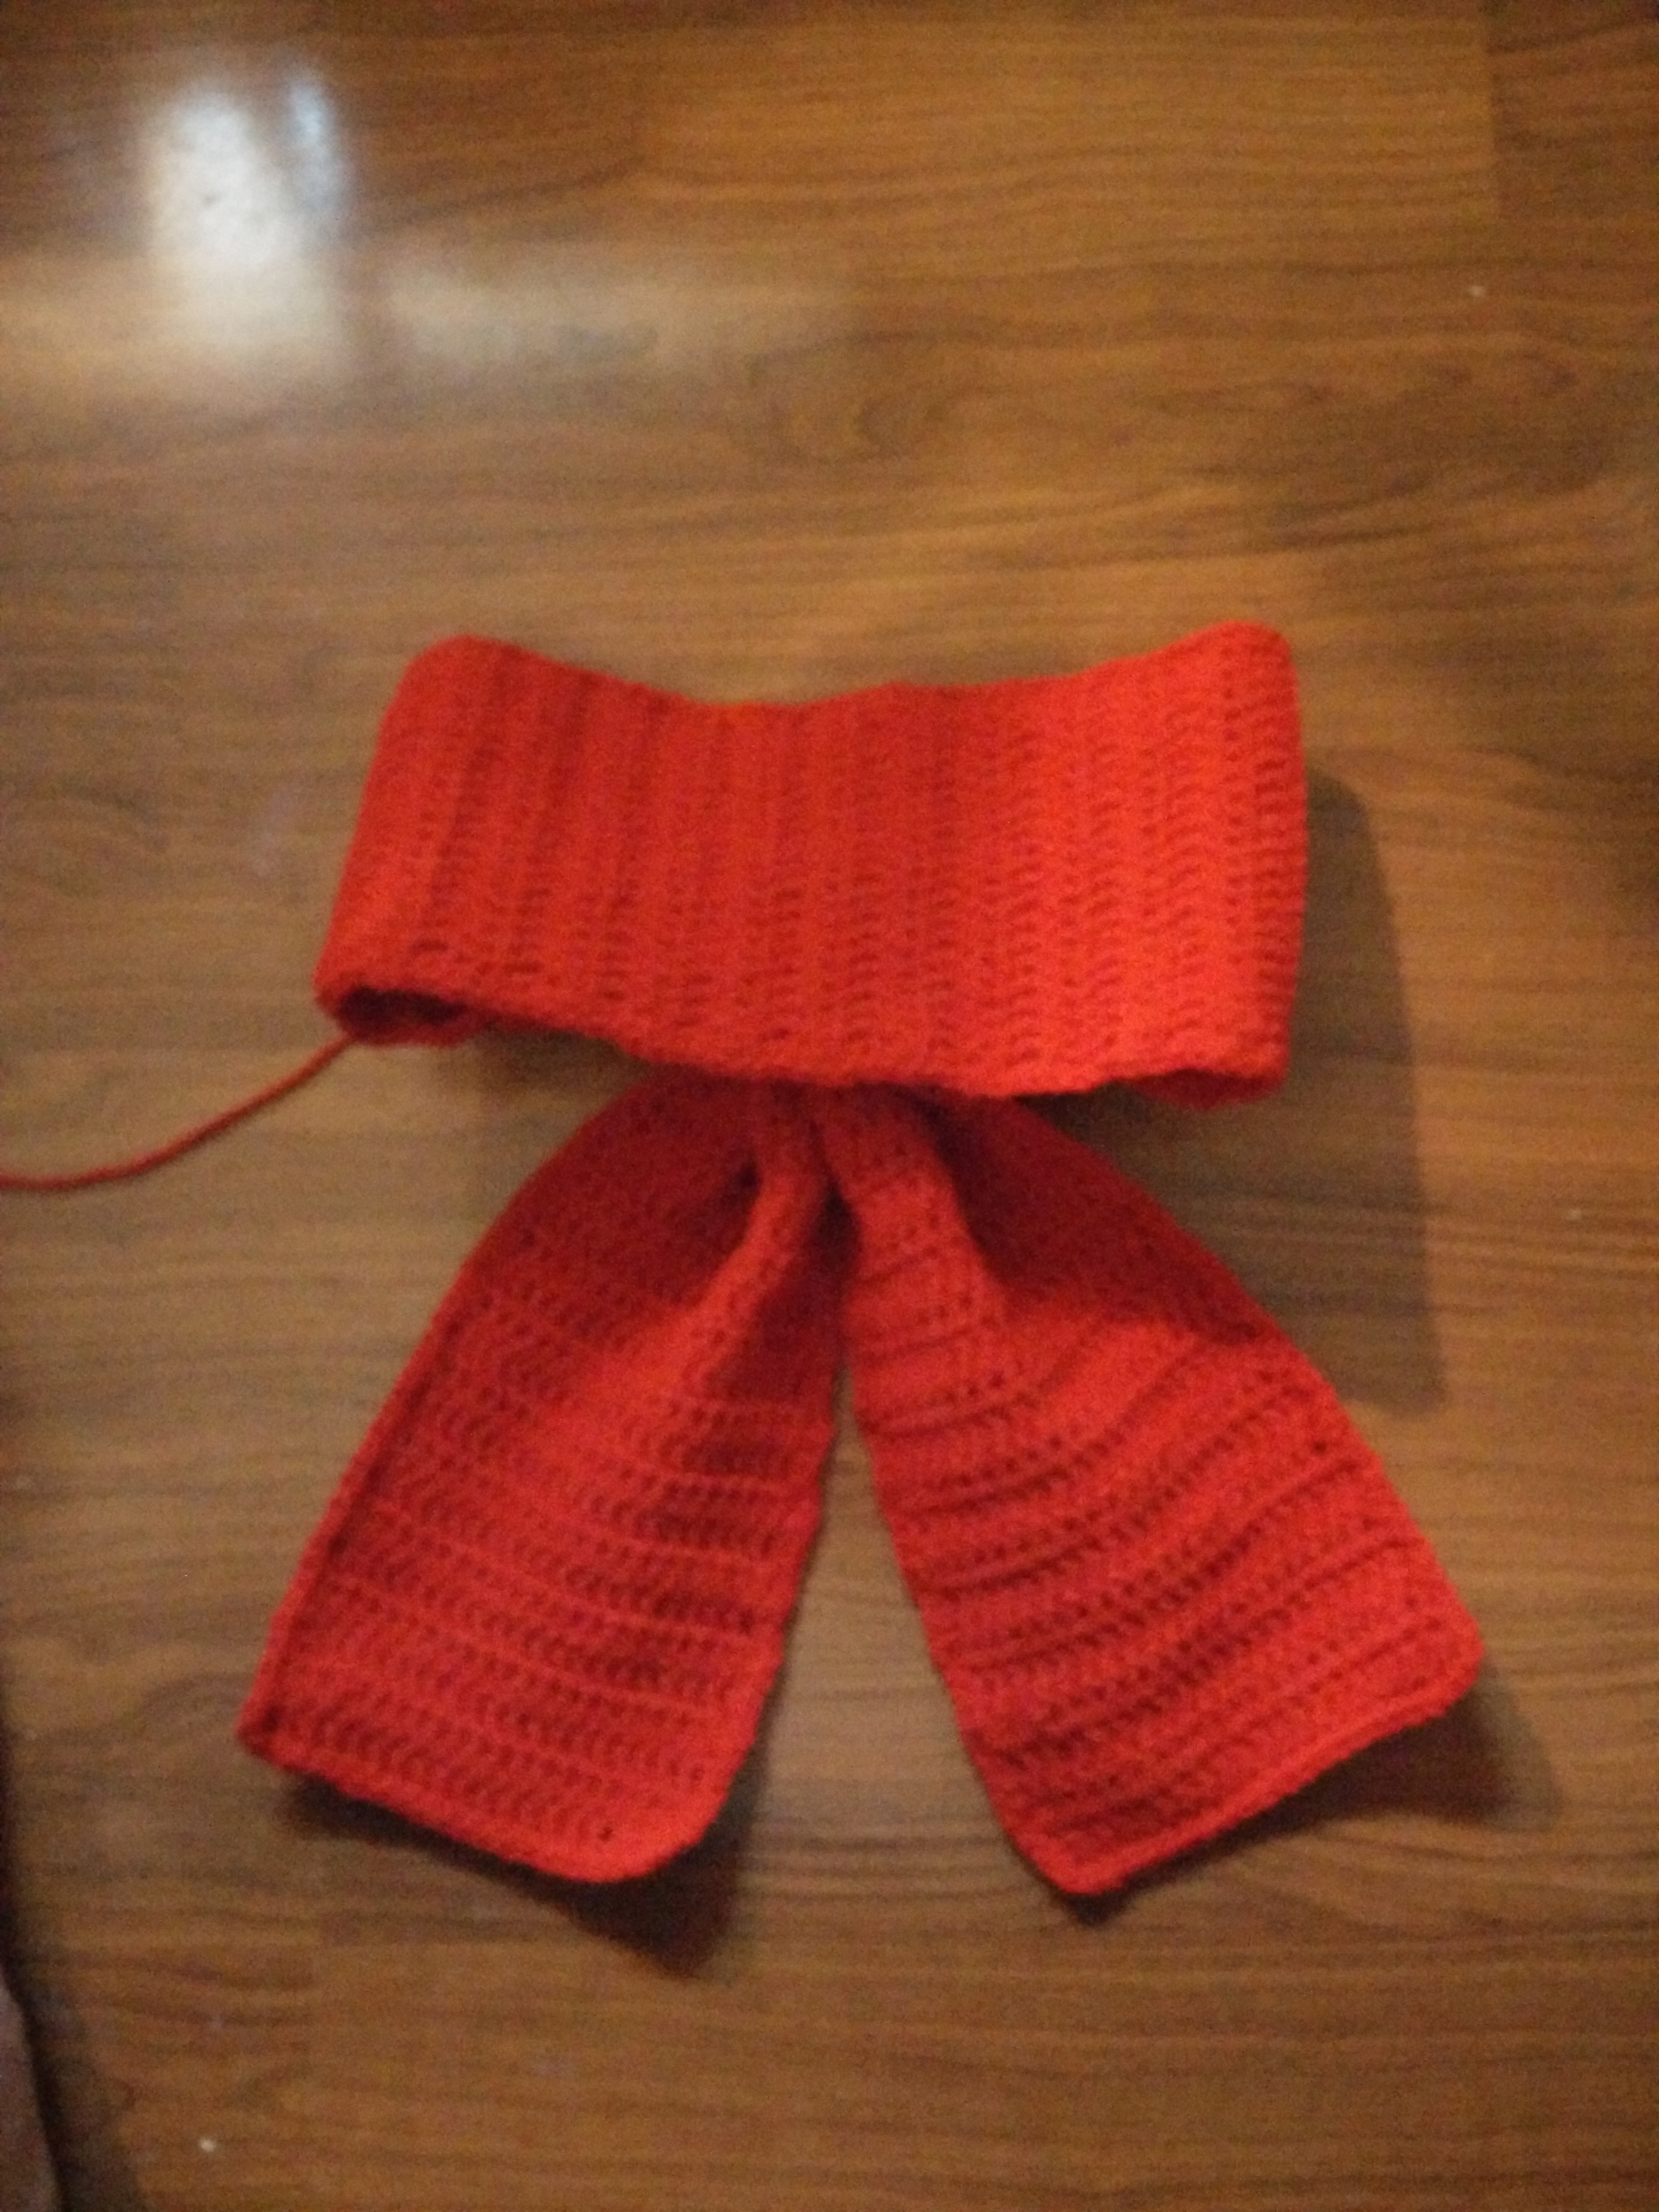
Bow: Row 1: Chain 22 and double crochet in 3rd chain from hook and across for a total of 20 double crochet. Row 2: Now chain 2 (which will not count as a stitch) and double crochet in each stitch across for a total of 20 double crochet. Repeat row 2 until your strip measures 48 inches long. Single crochet evenly around the strip making sure to put 3 single crochet in the corners. Bind off and weave in the end.
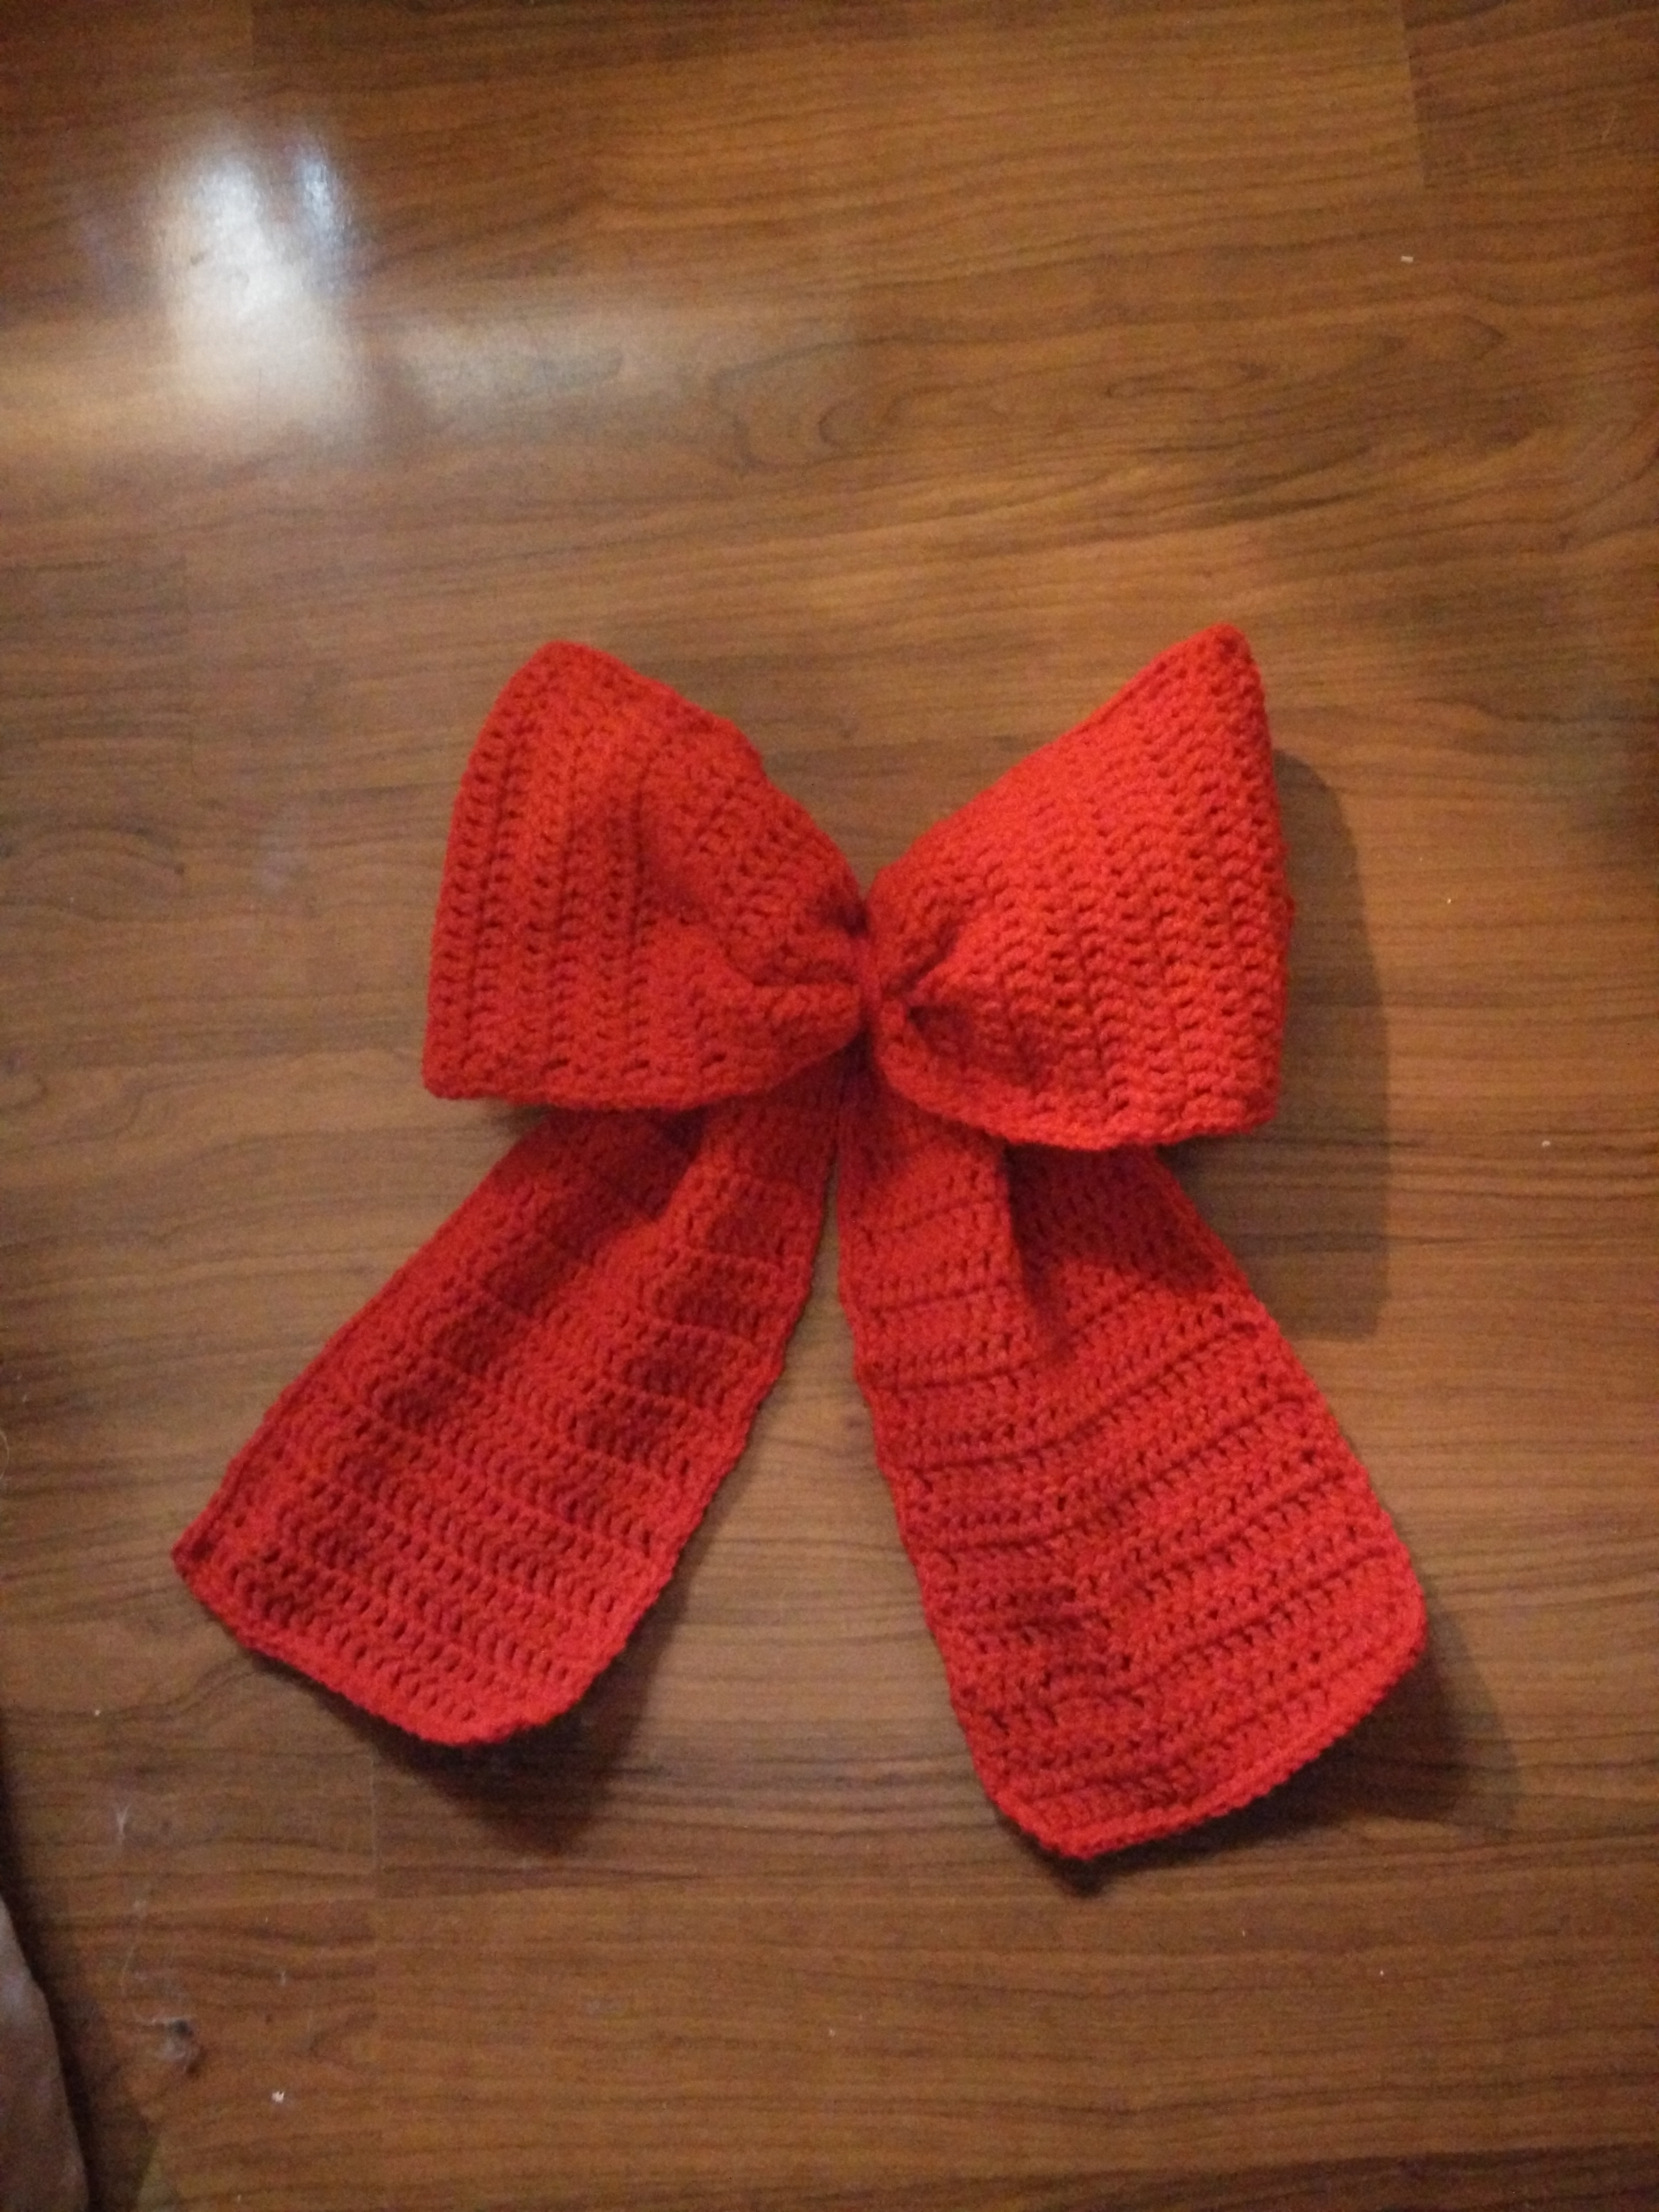
Tying the bow: Fold the strip in half. Lay it down on the floor with the ends right side up. About 10 inches from the ends, gather the strip together. Now take your red yarn and wrap tightly around the gathered strip roughly 10 times. Now bring down the middle of the strip, place it on top of the already gathered spot. Finally wrap the yarn in the middle about 10 more times. Now tie off, weave in ends and arrange the bow.
Middle bow strip: Row 1: chain 7, double crochet in 3rd chain from the hook and across giving you 5 double crochet. Row 2: Chain 2 (which does not count as a stitch) double crochet in each stitch across for a total of 5 double crochet. Repeat row 2 until your strip fits around the middle of the bow. Mine was 8 inches and 15 rows, but this will vary depending upon how you tied your bow. Single crochet around the bow strip, placing 3 single crochet in each corner. Bind off and leave a long tail for sewing.
Wrap the bow strip around the middle, having the ends meet at the back. Now sew the two ends together. Then make another few stitches attaching the bow strip to the bow securely. Do not cut the yarn. You will need this to secure the bow to the wreath.
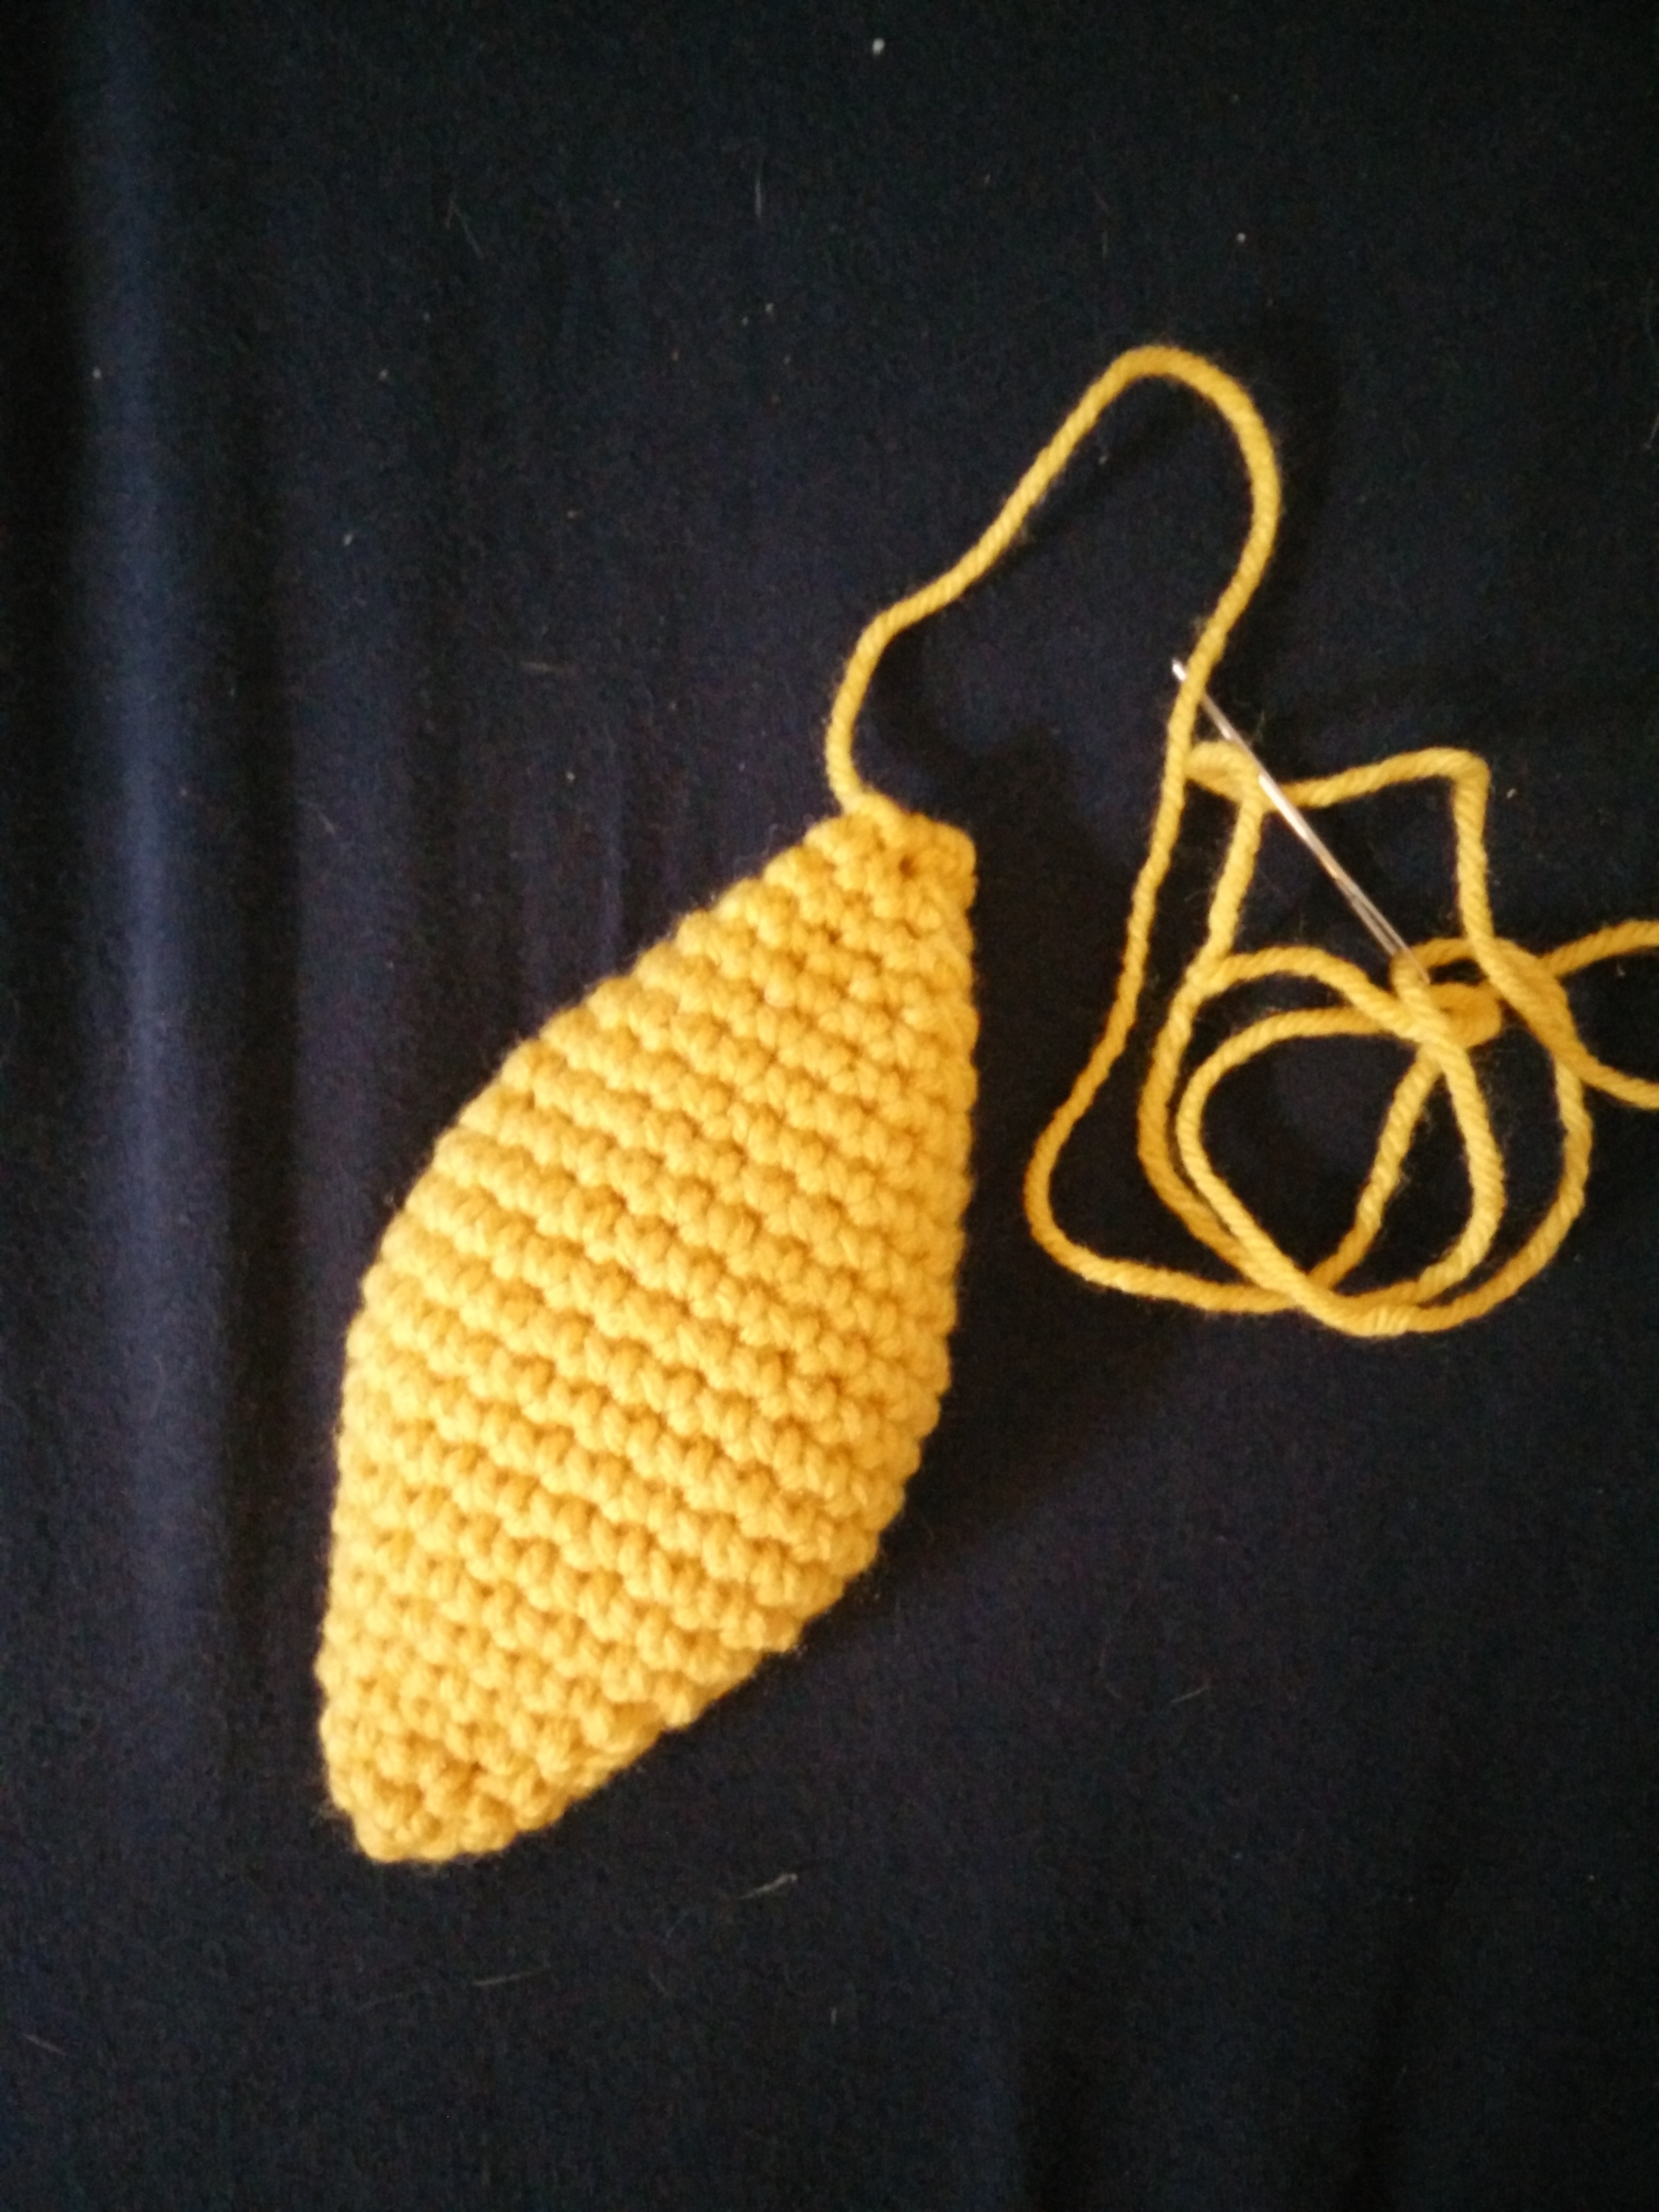
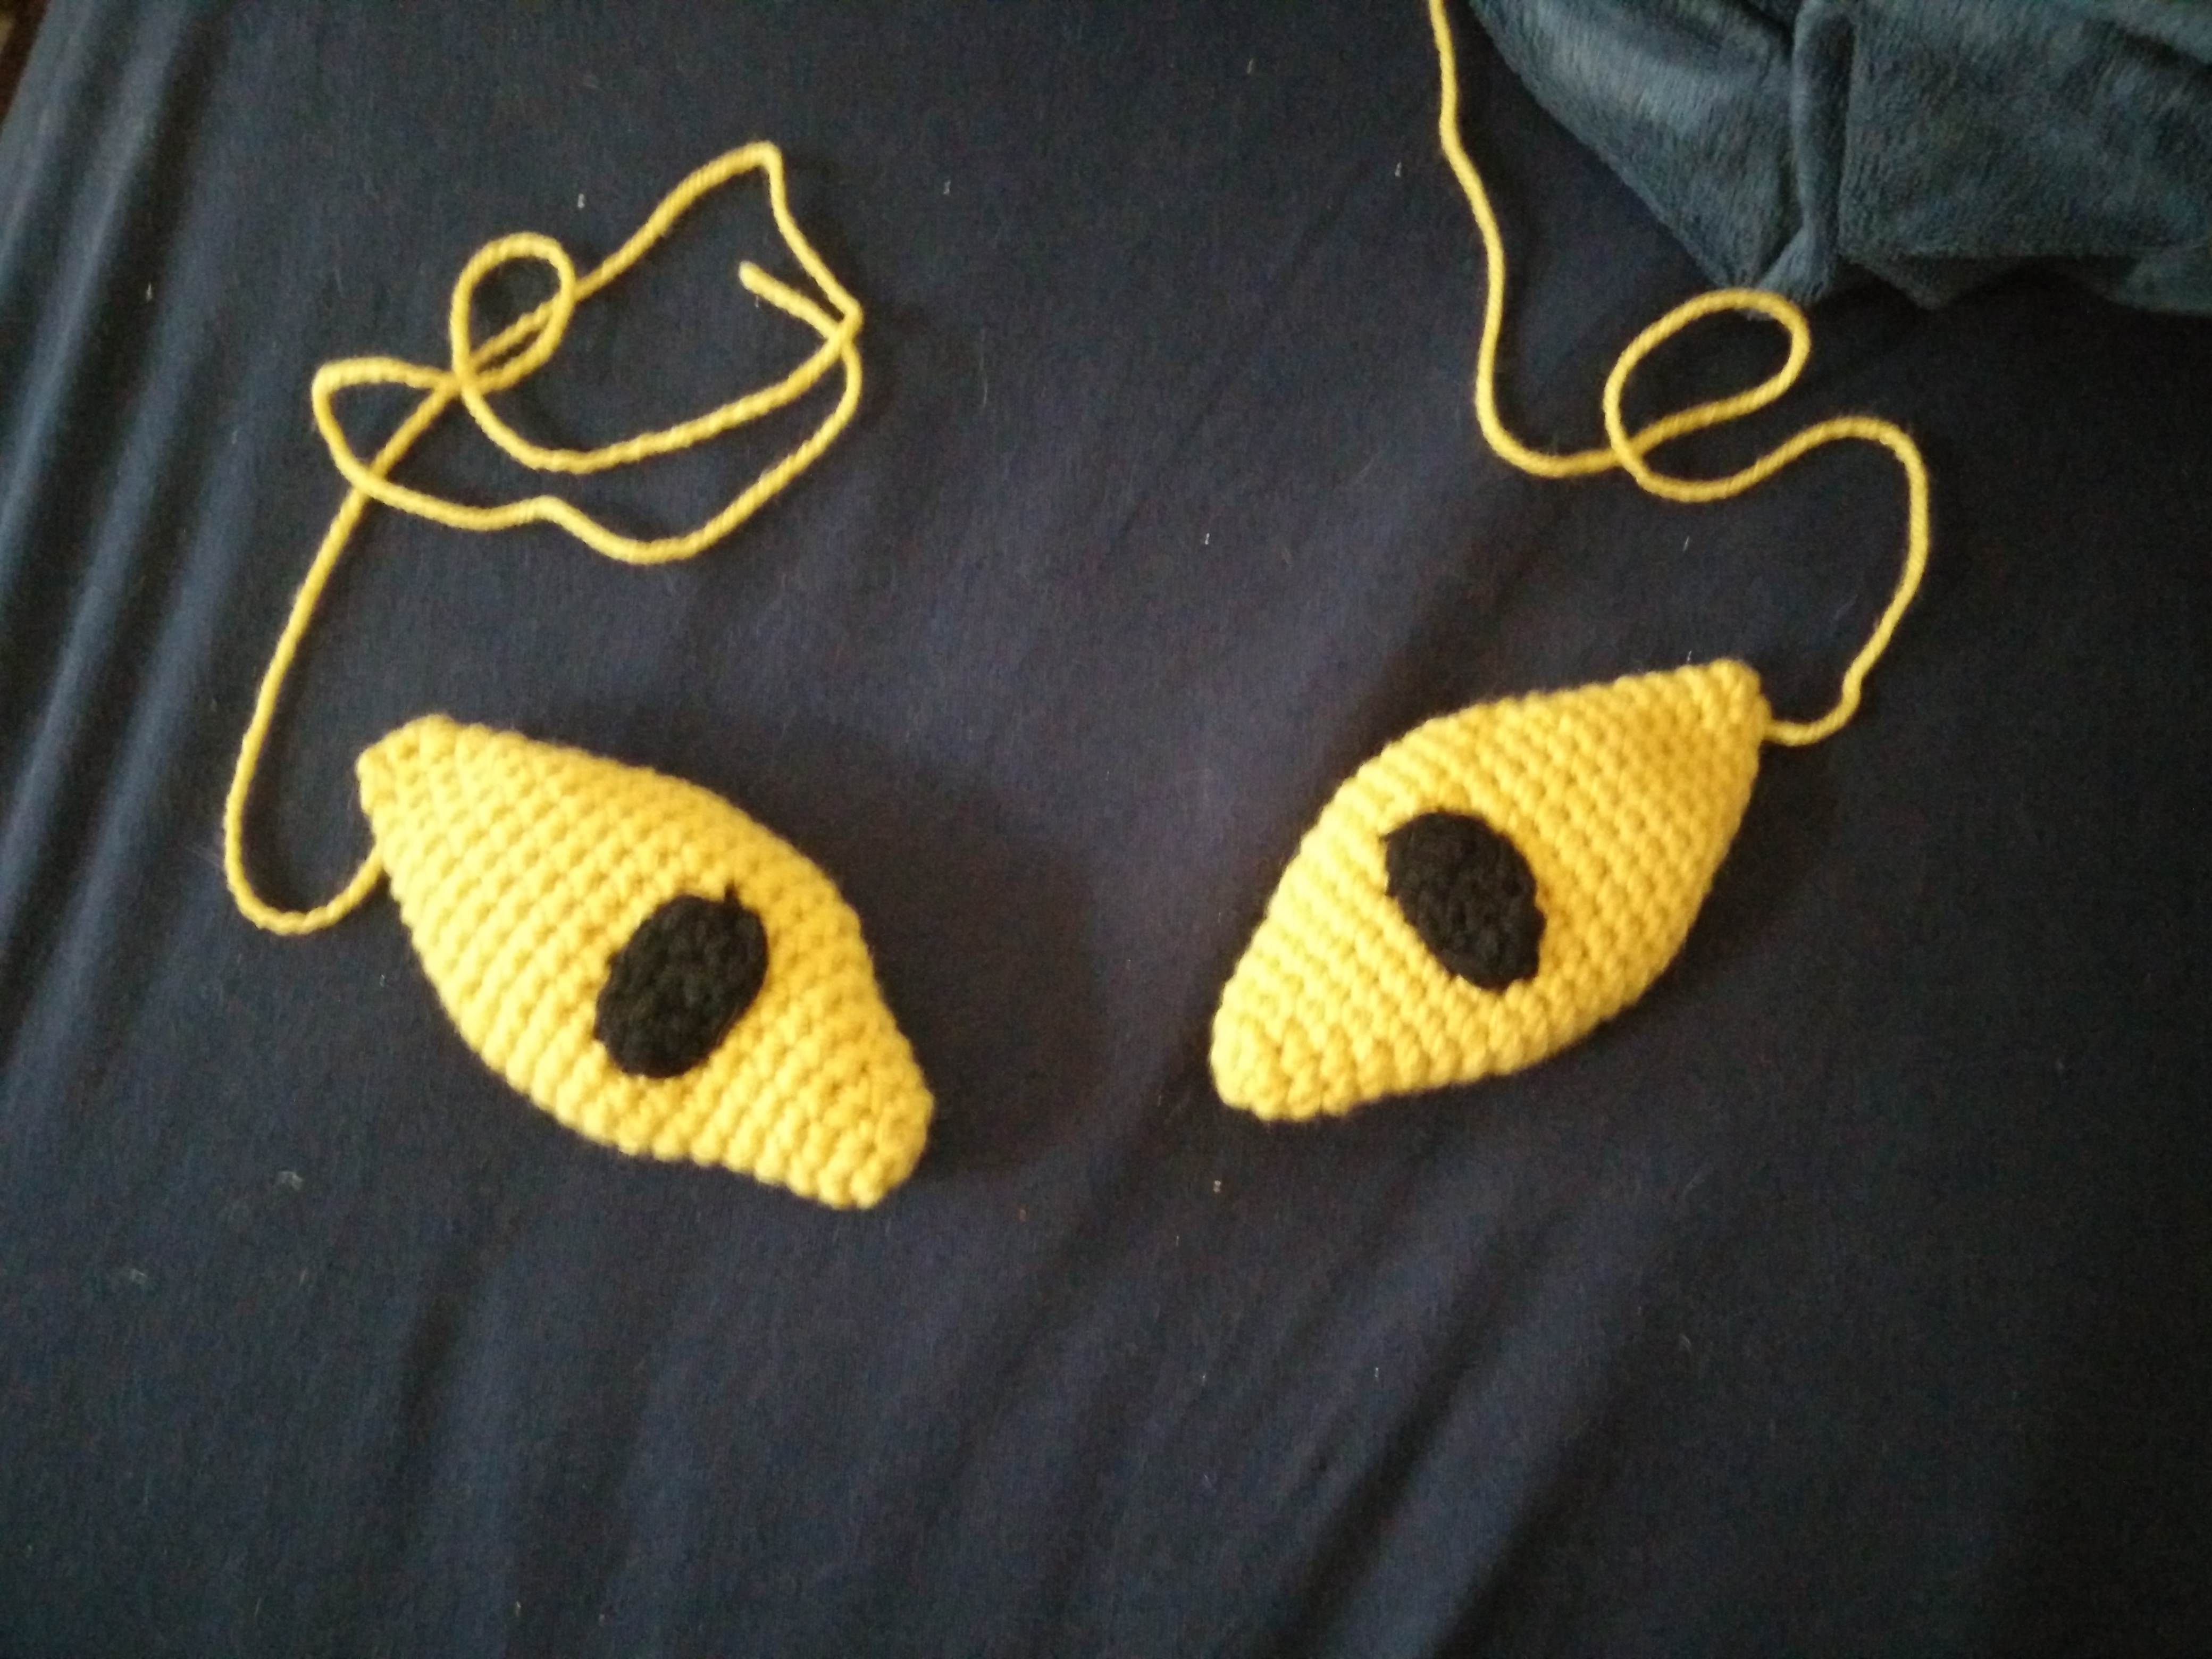
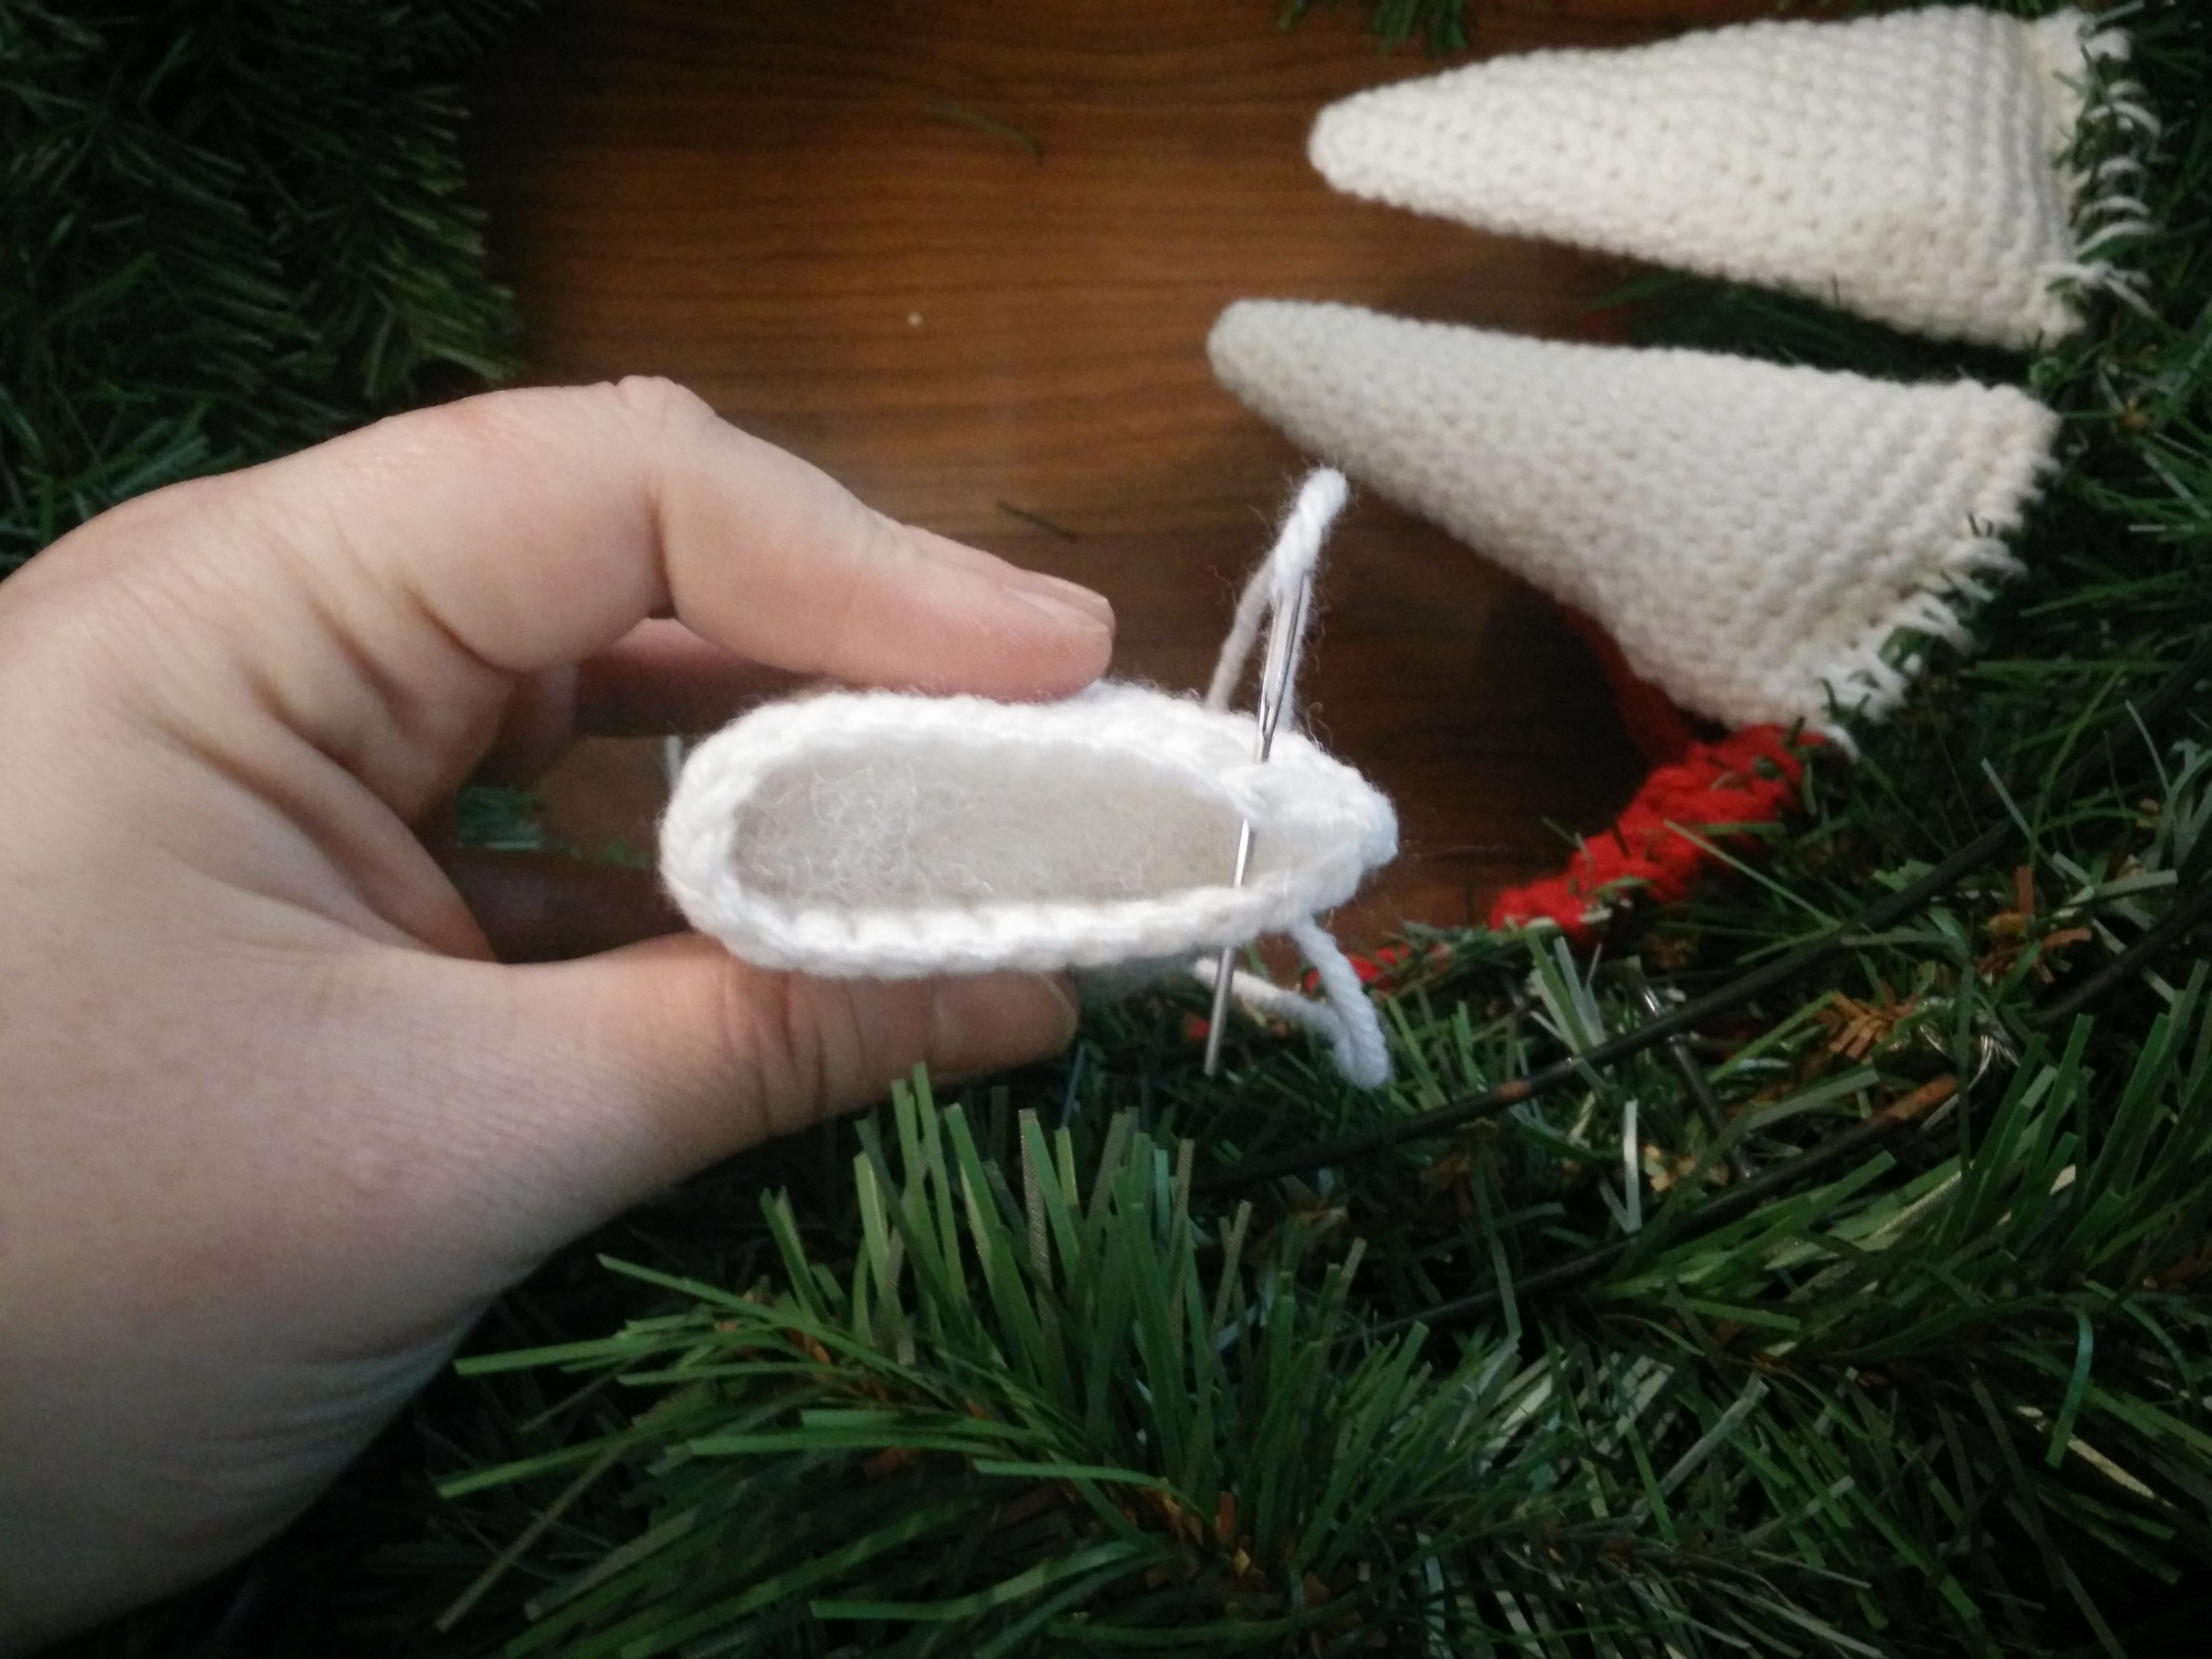
Eyes (make 2) The eyes will be worked in the round, amigurumi style. This will help give it shape and substance in your wreath. They can be done with either yellow or white depending on preference. You will need a stitch marker for each round. Also, I continued to use my H hook since I tend to crochet a bit tightly and this doesn’t have to be quite as tight as when I make amigurumi. If you are a looser crocheter, please feel free to drop down to a G hook. Round 1: start with a magic circle (or a chain 2, working in the 2nd chain from the hook) and place 6 single crochet inside the circle. Round 2: *single crochet increase (2 single crochet in same stitch) in first stitch, single crochet in next 2 stitches* repeat x1. (8 single crochet) Round 3: *single crochet increase, single crochet in next 3 stitches* repeat x1. (10 single crochet) Round 4: *single crochet increase, single crochet in next 4 stitches* repeat x1. (12 single crochet) Round 5: *single crochet increase, single crochet in next 5 stitches* repeat x1. (14 single crochet) Round 6: *single crochet increase, single crochet in next 6 stitches* repeat x1. (16 single crochet) Round 7: *single crochet increase, single crochet in next 7 stitches* repeat x1. (18 single crochet) Round 8: *single crochet increase, single crochet in next 8 stitches* repeat x1. (20 single crochet) Round 9: *single crochet increase, single crochet in next 9 stitches* repeat x1. (22 single crochet) Round 10: *single crochet increase, single crochet in next 10 stitches* repeat x1. (24 single crochet) Rounds 11-14: single crochet evenly around. Round 15: *single crochet decrease (insert hook and pull up a loop through first stitch, insert hook and pull up a loop through second stitch, yarn over and pull through all three loops on hook), single crochet in next 10 stitches* repeat x1. (22 single crochet) Round 16: *single crochet decrease, single crochet in next 9 stitches* repeat x1. (20 single crochet) Round 17: *single crochet decrease, single crochet in next 8 stitches* repeat x1. (18 single crochet) Round 18: *single crochet decrease, single crochet in next 7 stitches* repeat x1. (16 single crochet) Round 19: *single crochet decrease, single crochet in next 6 stitches* repeat x1. (14 single crochet) Round 20: *single crochet decrease, single crochet in next 5 stitches* repeat x1. (12 single crochet) Stuff eye ever so slightly, just enough to hold flattened oval shape. Round 21: *single crochet decrease, single crochet in next 4 stitches* repeat x1. (10 single crochet) Round 22: *single crochet decrease, single crochet in next 3 stitches* repeat x1. (8 single crochet) Round 23: *single crochet decrease, single crochet in next 2 stitches* repeat x1. (6 single crochet) Bind off, leaving a long tail for sewing. Sew opening closed and do not cut yarn.
Iris: (make two) With black and H hook. Note that if you want you could embroider the iris on making them smaller if you prefer. Round 1: start with a magic circle (or a chain 2, working in the 2nd chain from the hook) and place 6 single crochet inside the circle Round 2: *single crochet in the next 2 stitches. In the next stitch do 3 double crochet* repeat x1 slip stitch to first single crochet in round. Bind off, leaving a long tail for sewing. Sew iris onto the eyes. Exact placement isn’t critical as he could be looking around. Play around with how you want your monster to look.
Teeth (make as many as you want and have fun with it! This is the basic tooth pattern, but you can make some longer by adding single crochet rounds or add some increase rounds or increase more early on in the tooth. The tooth pattern is worked top down, slightly stuffed to keep shape.) With white and H hook (or G hook if you crochet loosely) Round 1: start with a magic circle (or a chain 2, working in the 2nd chain from the hook) and place 6 single crochet inside the circle Round 2: single crochet in each stitch (6 single crochet) Round 3: *single crochet increase (2 single crochet in same stitch) in first stitch, single crochet in next 2 stitches* repeat x1. (8 single crochet) Round 4: single crochet in each stitch Round 5: *single crochet increase in first stitch, single crochet in next 3 stitches* repeat x1. (10 single crochet) Round 6: single crochet in each stitch Round 7: *single crochet increase in first stitch, single crochet in next 4 stitches* repeat x1. (12 single crochet) Round 8: *single crochet increase in first stitch, single crochet in next 5 stitches* repeat x1. (14 single crochet) Round 9-11: single crochet in each stitch Round 12: *single crochet increase in first stitch, single crochet in next 6 stitches* repeat x1. (16 single crochet) Round 13: *single crochet increase in first stitch, single crochet in next 7 stitches* repeat x1. (18 single crochet) Round 14-16: single crochet in each stitch Round 17: *single crochet increase in first stitch, single crochet in next 8 stitches* repeat x1. (20 single crochet) Round 18: *single crochet increase in first stitch, single crochet in next 9 stitches* repeat x1. (22 single crochet) Round 19: *single crochet increase in first stitch, single crochet in next 10 stitches* repeat x1. (24 single crochet) Round 20-24: single crochet in each stitch. Bind off, leaving a long tail. Stuff lightly to hold shape and sew opening closed. Do not cut your yarn.
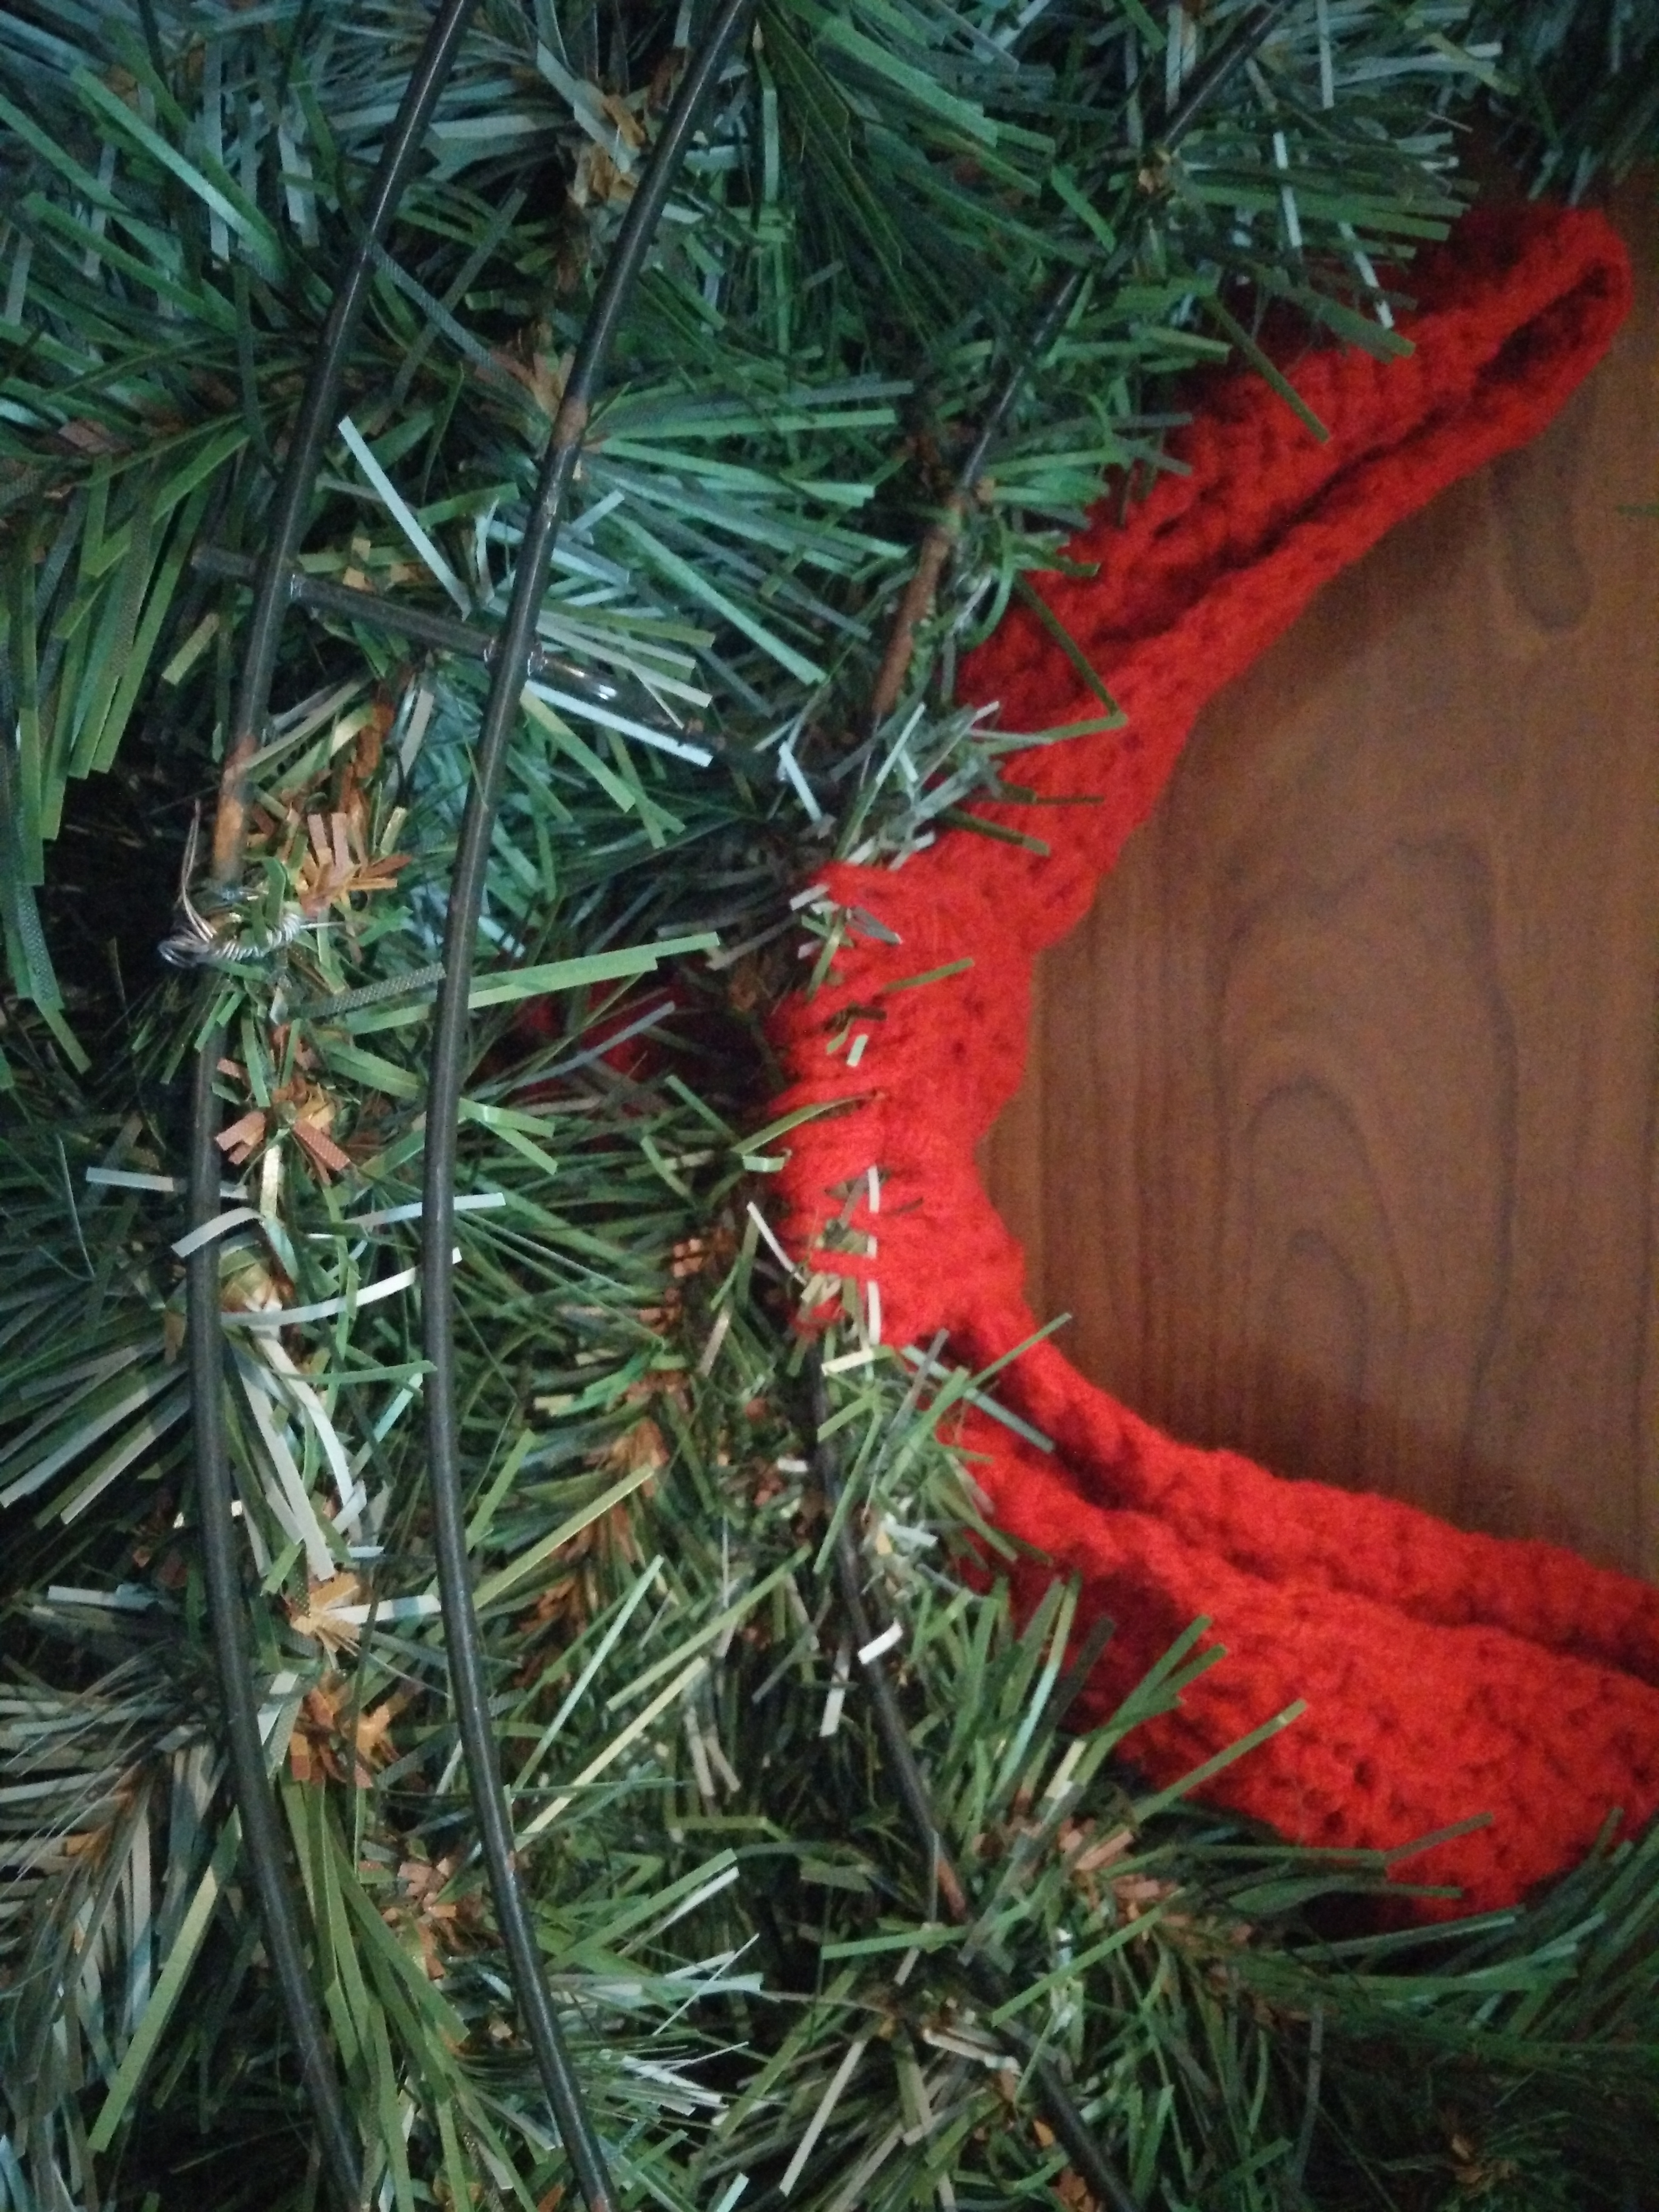
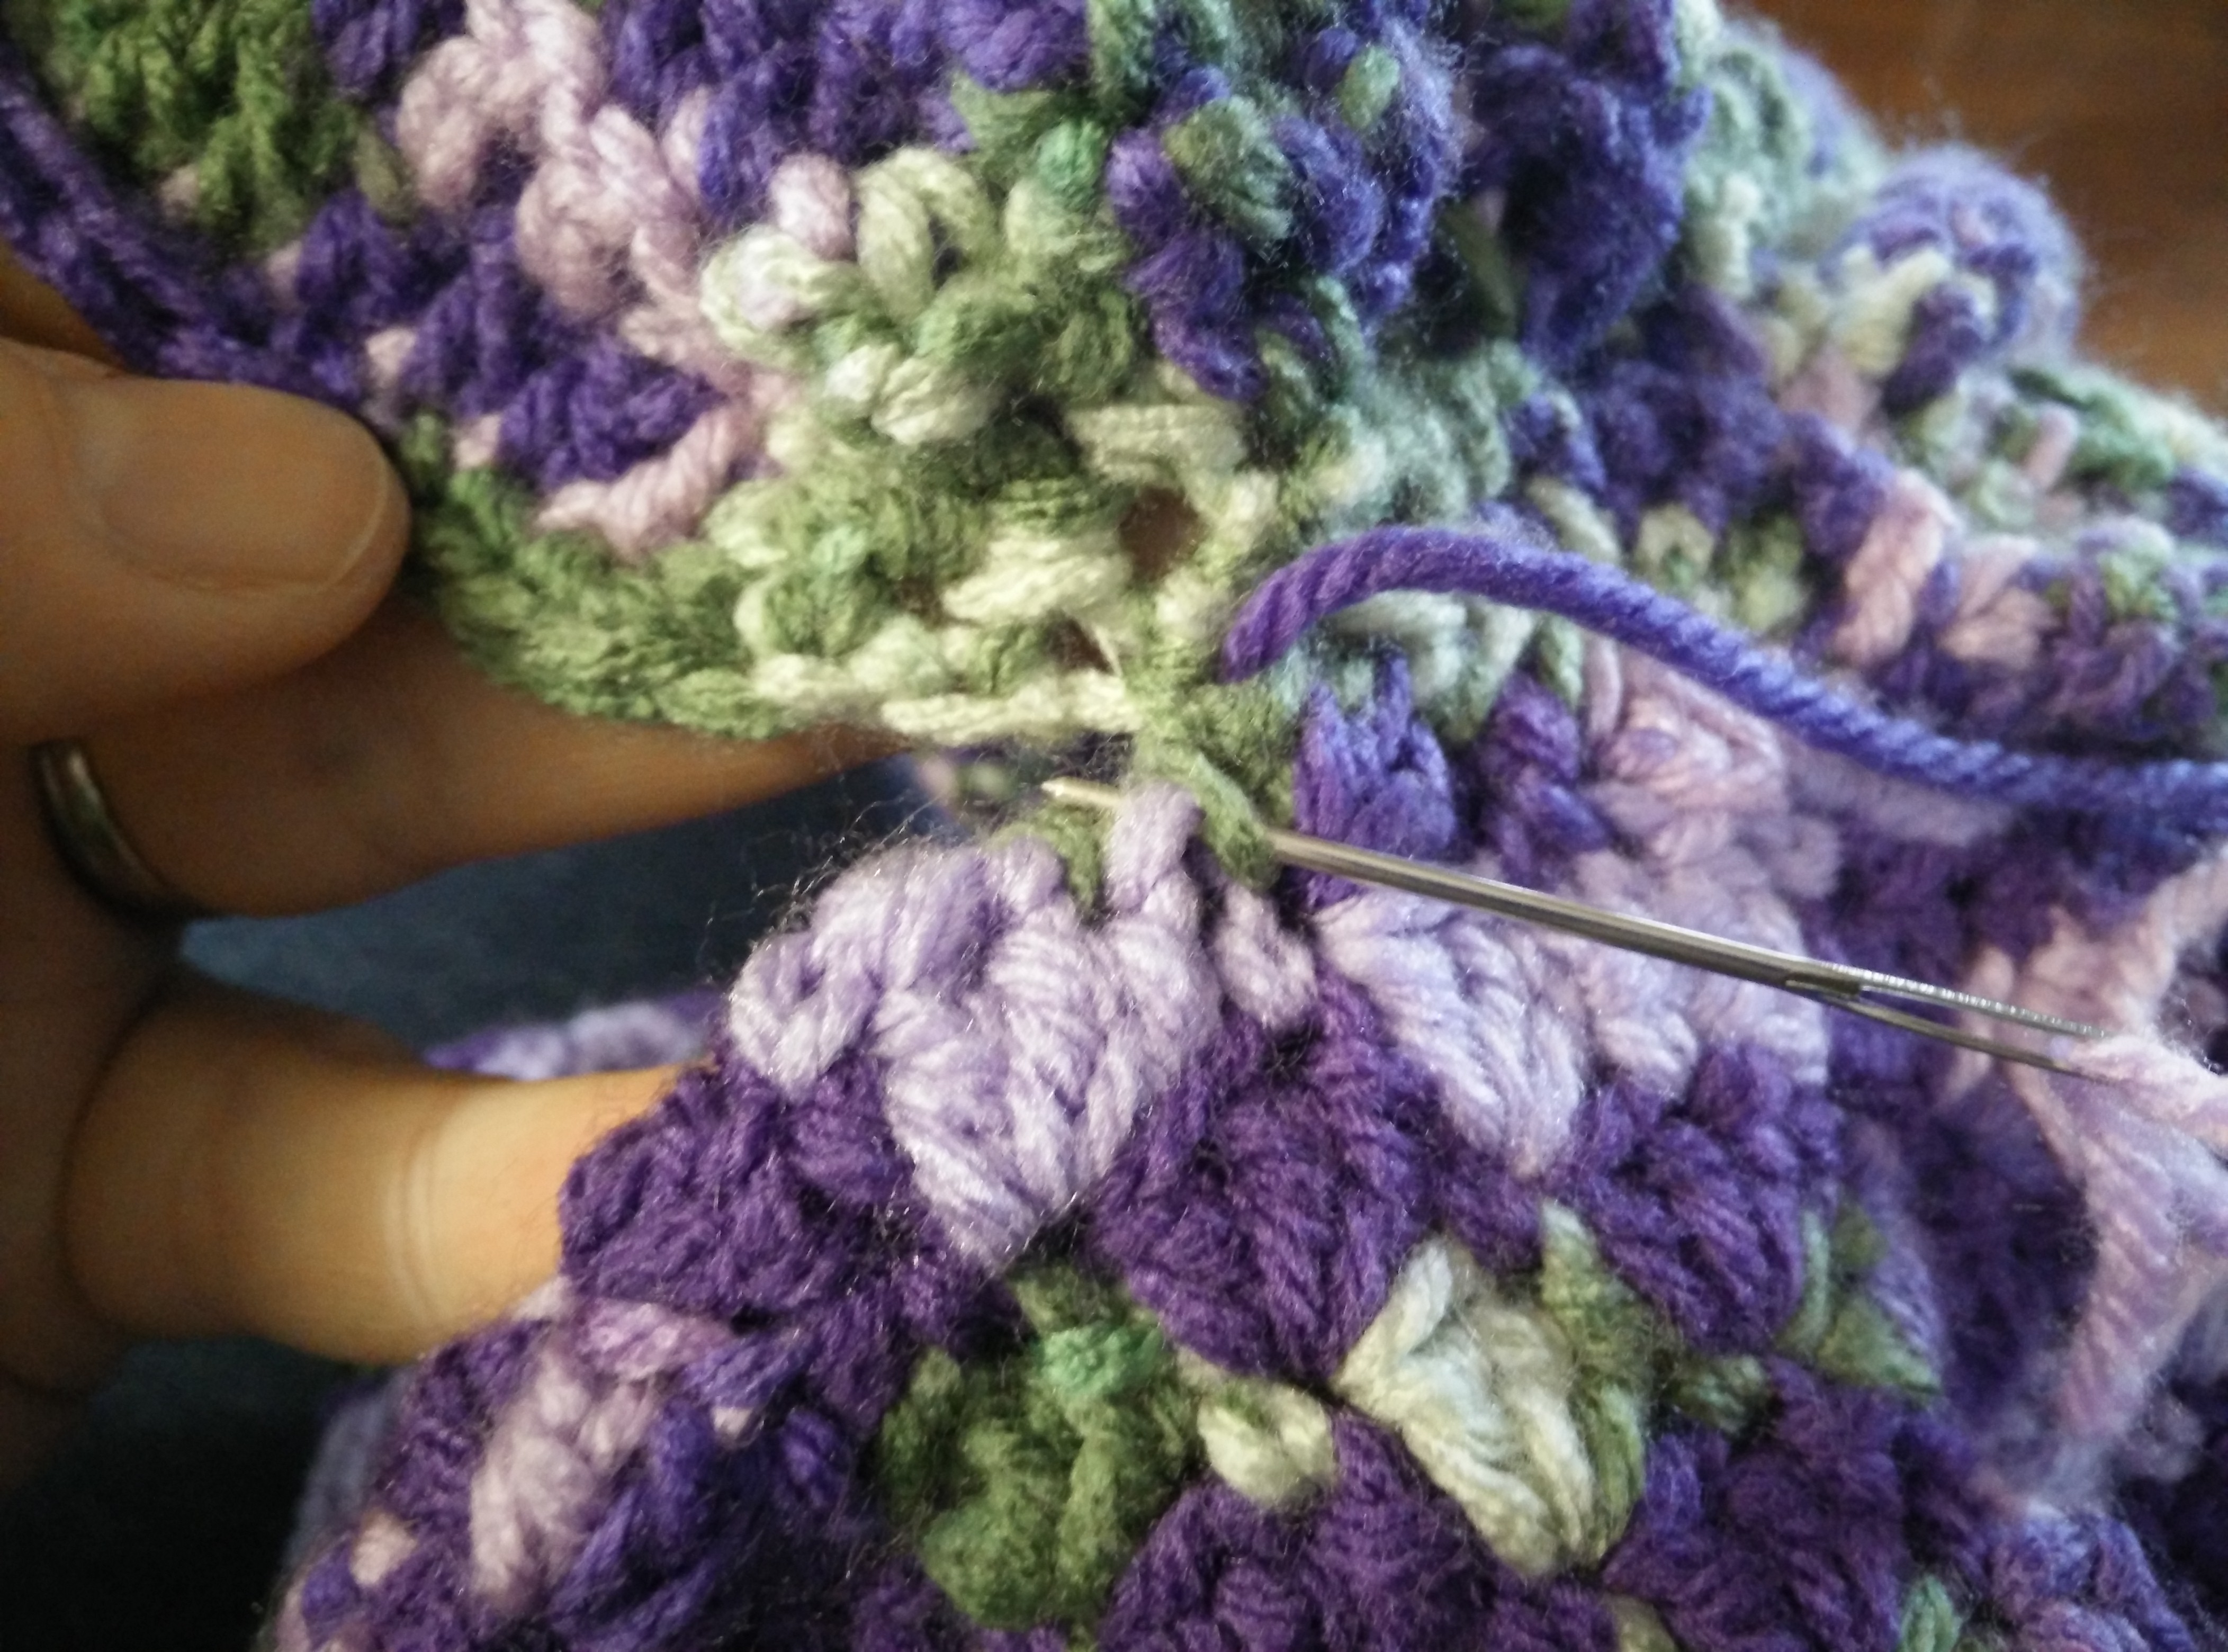
Now, all that is left is to sew the pieces onto your wreath using the tails from your parts. Mine had these nice wire basics to sew onto to. This doesn’t mean it was easy.
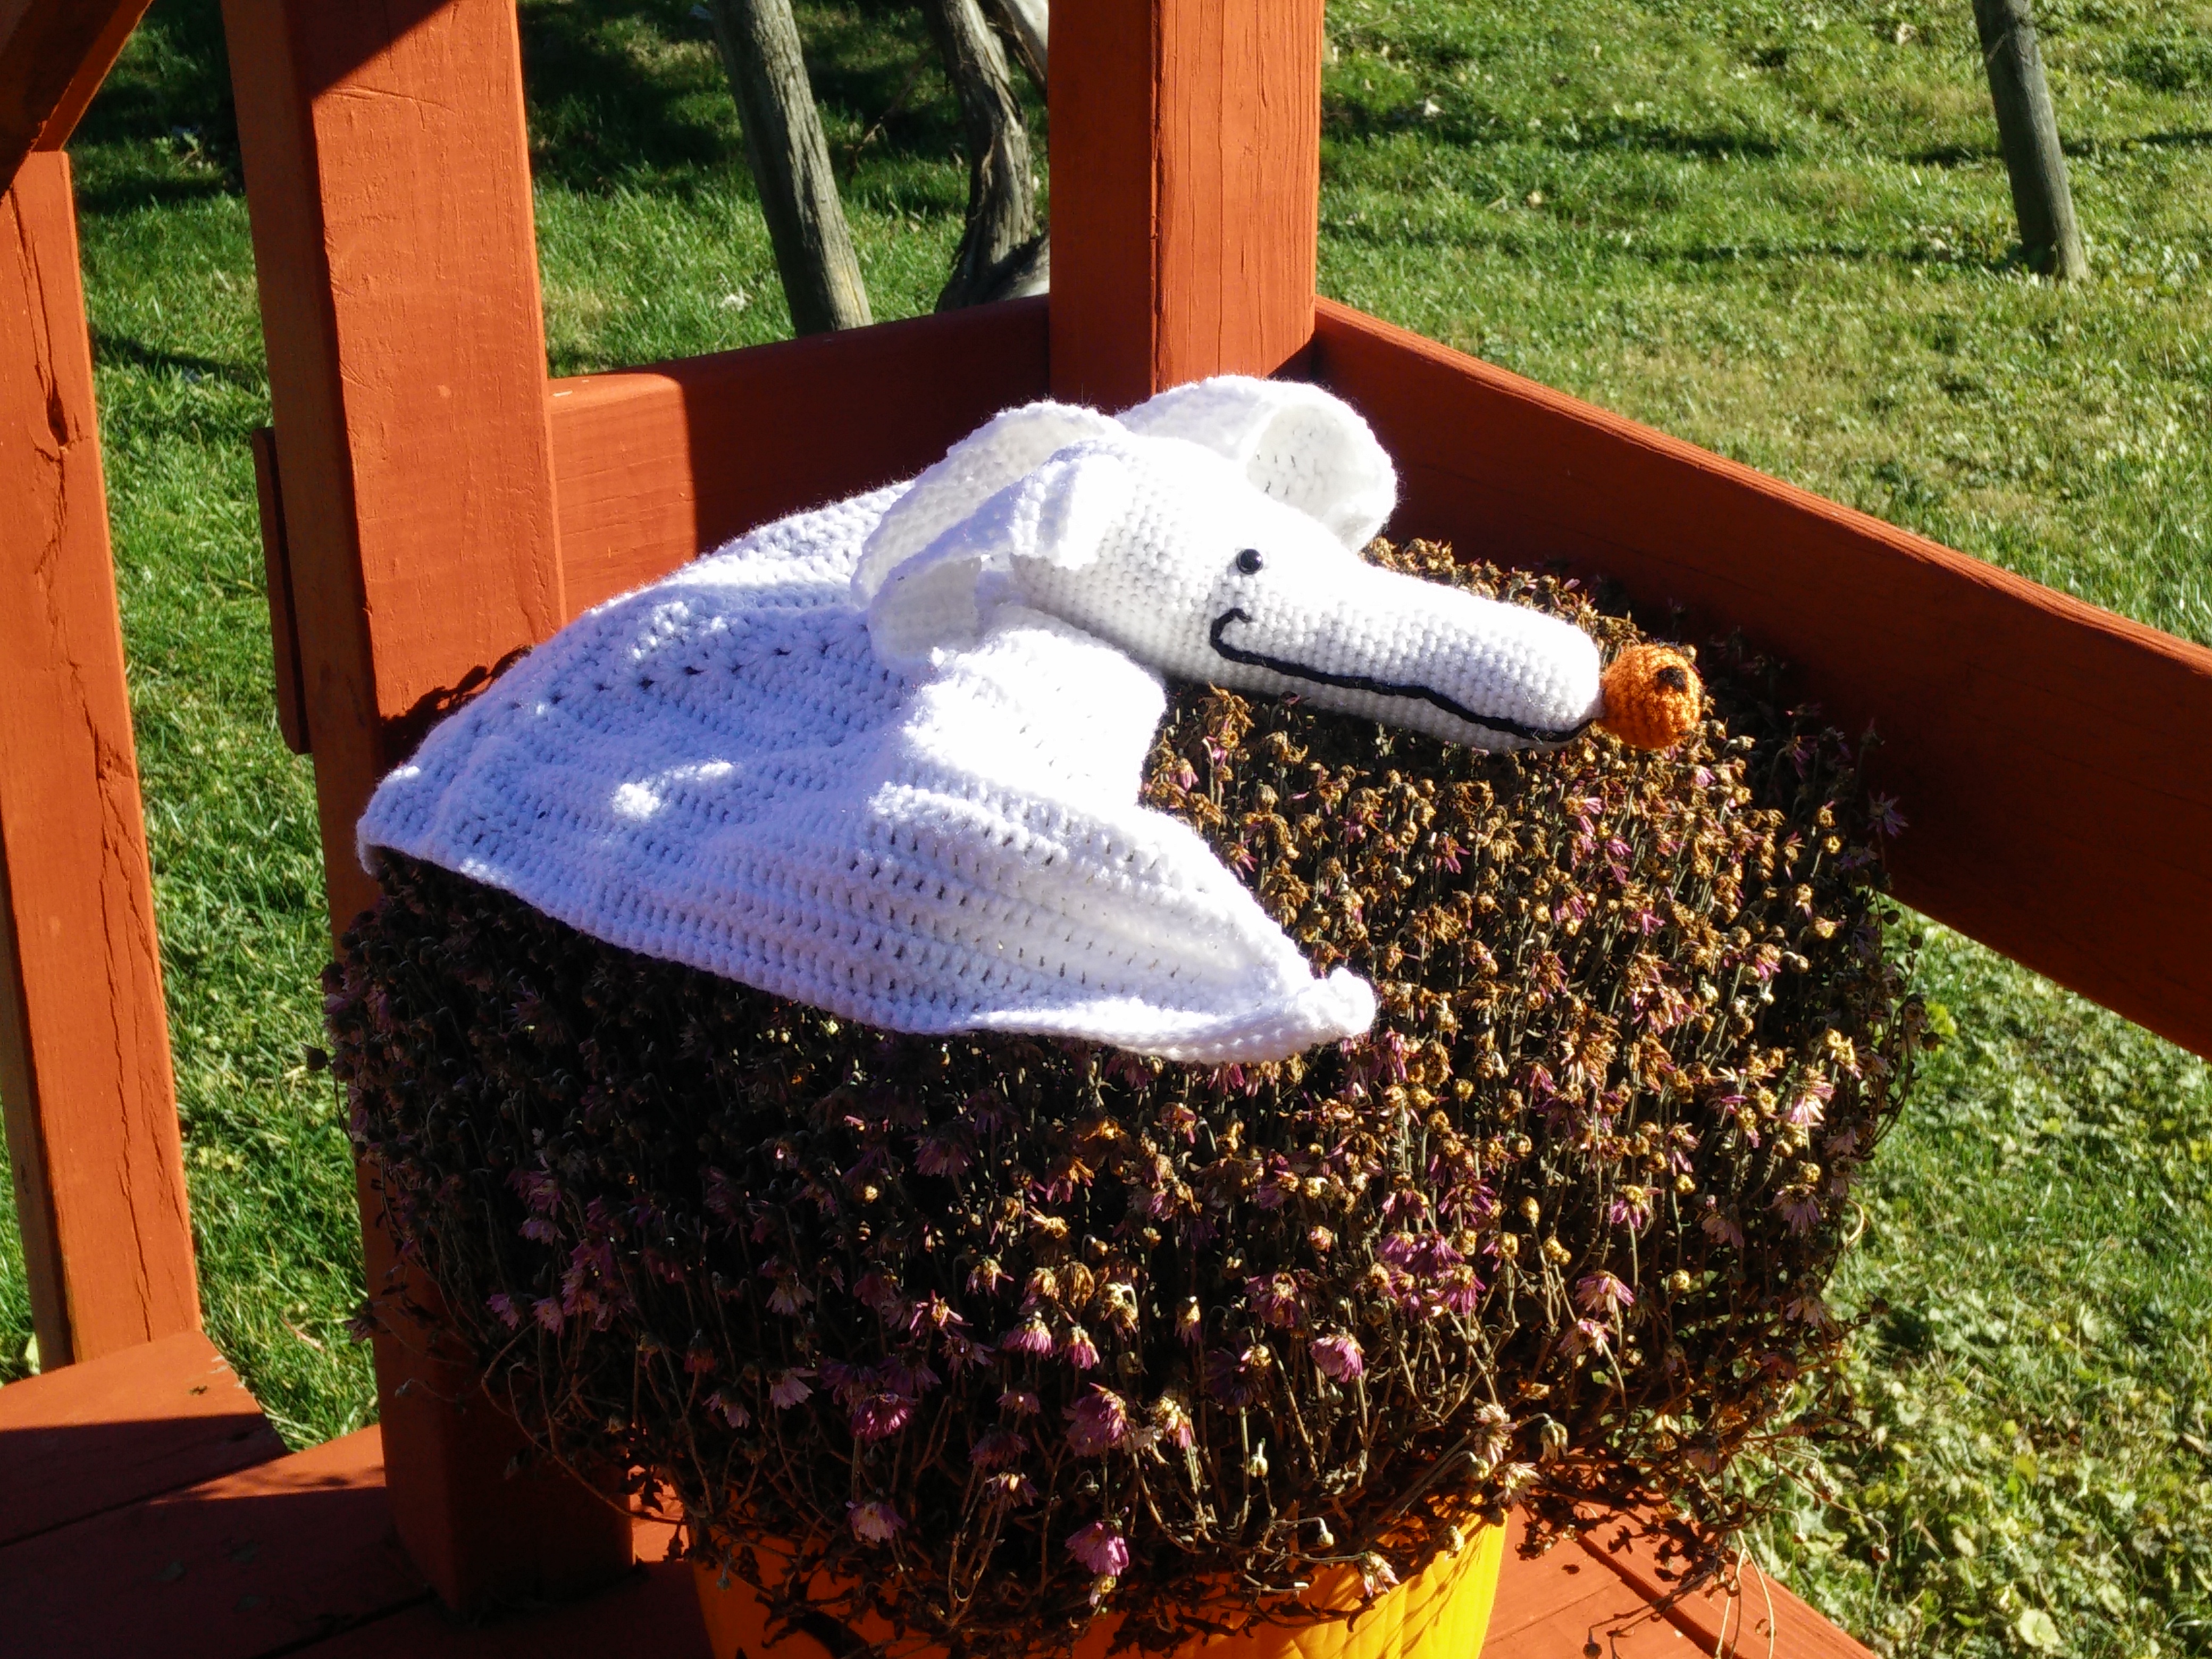
Again, couldn’t find a pattern to quite fit what I wanted so here is my Zero lovey. I wanted to write down the pattern because many people seem to want zero and I forget how I did it before… Also, I’m going to use typical amigurumi method and way of writing the pattern.
G and H hooks Orange, white and a little bit of Black yarn (or black 9mm safety eyes) Polyfil Darning needle Stitch markers
With Orange and the G hook 6sc in mc Round 1: *inc* Round 2: *Inc, sc* Rounds 3-5: *sc* Round 6: *Dec, sc* stuff lightly Round 7: *dec* switch to white on last sc Round 8: *inc* Round 9: *Inc, sc* Round 10: *Inc, 2sc* Round 11-28 : *sc* Round 29: *Inc, sc* x4 then sc in remaining Round 30: *Inc, 2sc* x4 then sc in remaining Round 31-36: sc around Round 37: *Inc, 3sc* x4 then sc in remaining Round 38: *Inc, 4sc* x4 then sc in remaining Round 39-45: sc around Round 46: *Dec, 6sc* Round 47: *Dec, 5sc* Round 48: *Dec, 4sc* Round 49: *Dec, 3sc* If you are using safety eyes they need put in between rounds 42-43 on each side of the head. Stuff the head as well. Round 50: *Dec, 2sc* Round 51: *Dec, 1sc* Round 52: *Dec, sc* Round 53: *dec* bind off and sew closed.
Ears (make 2) Using H hook and white Row 1: (leaving a long tail for sewing later) Ch 6, hdc in 2nd chain from hook and across for a total of 5 hdc Row 2-14: Ch 1, hdc across (5hdc) Row 15: Ch 1, hdc dec, hdc across (4hdc) Row 16: Ch 1, hdc dec, hdc across (3hdc) Row 17: Ch 1, hdc dec, hdc across (2hdc) bind off, weave in end
Sew ears to round 44 with ears flopping down toward the eyes. Top of ear roughly lines up with the eye.
Body Using H hook and white yarn Row 1: Ch 6, sl st in 1st to form ring Row 2: Ch 2 (ch 2 does not count as a stitch), 4 dc in ring, ch 1, 4dc in ring, ch 2 and turn Row 3-10: 2dc in first dc, dc in each dc to ch 1 space. In ch 1 work (2dc, ch 1, 2dc). Dc in each dc, 2 dc in last. Ch 2 and turn. Row 11-19: 3dc in first dc, dc in each dc to ch 1 space. In ch 1 work (2dc, ch 1, 2dc). Dc in each dc, 3 dc in last. Ch 2 and turn. Row 20: 3dc in first dc, dc in each dc to ch 1 space. 5 dc in ch 1 space. Dc in each dc, 3 dc in last. Ch 1. Row 21: 3 sc in first. Sc down to the 5 dc group, sc in first 2 dc, 3 sc in 3rd dc, sc in last 2 dc. Sc to last dc. In last dc place 3sc. Sc across the top.
Sew head onto body. Sew with black a jack o lantern face onto the nose. Sew also a smile on you ghost dog.
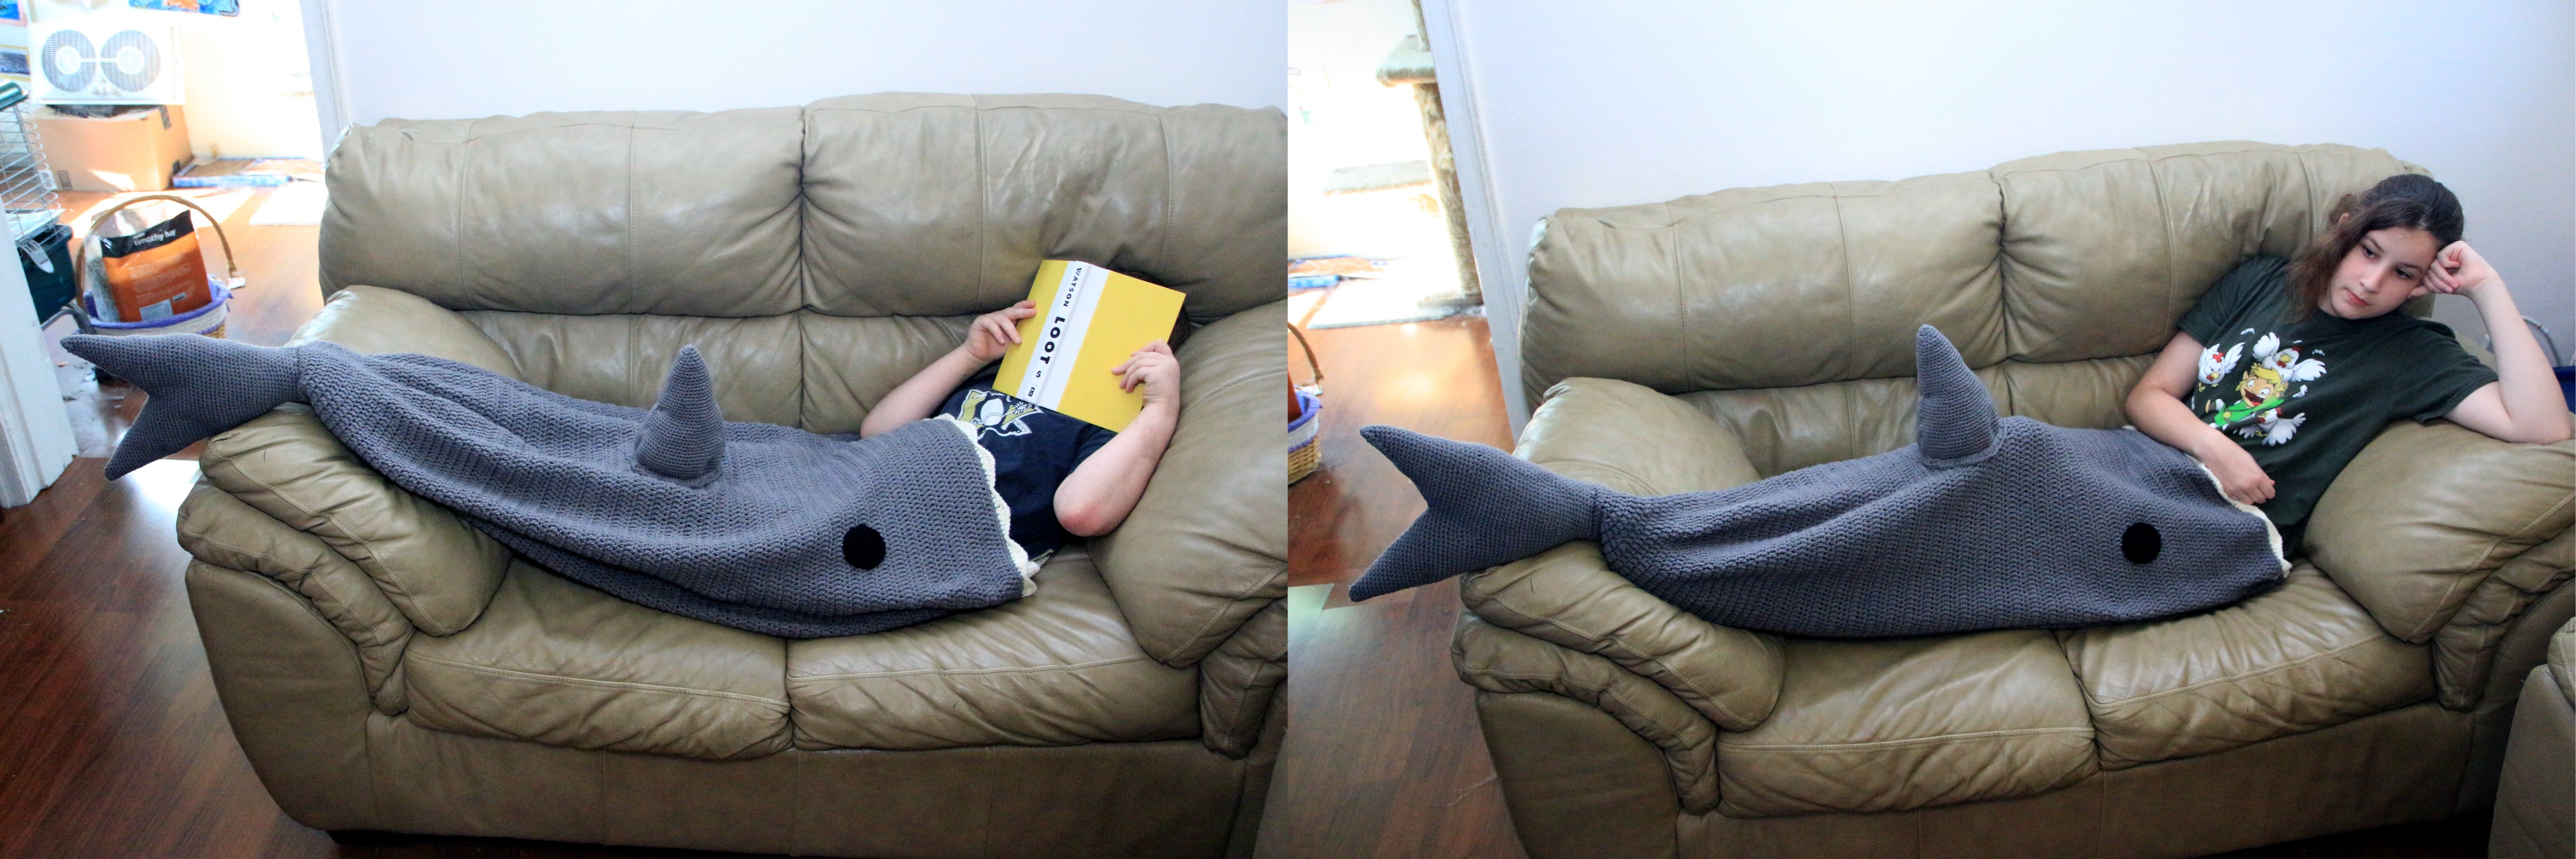
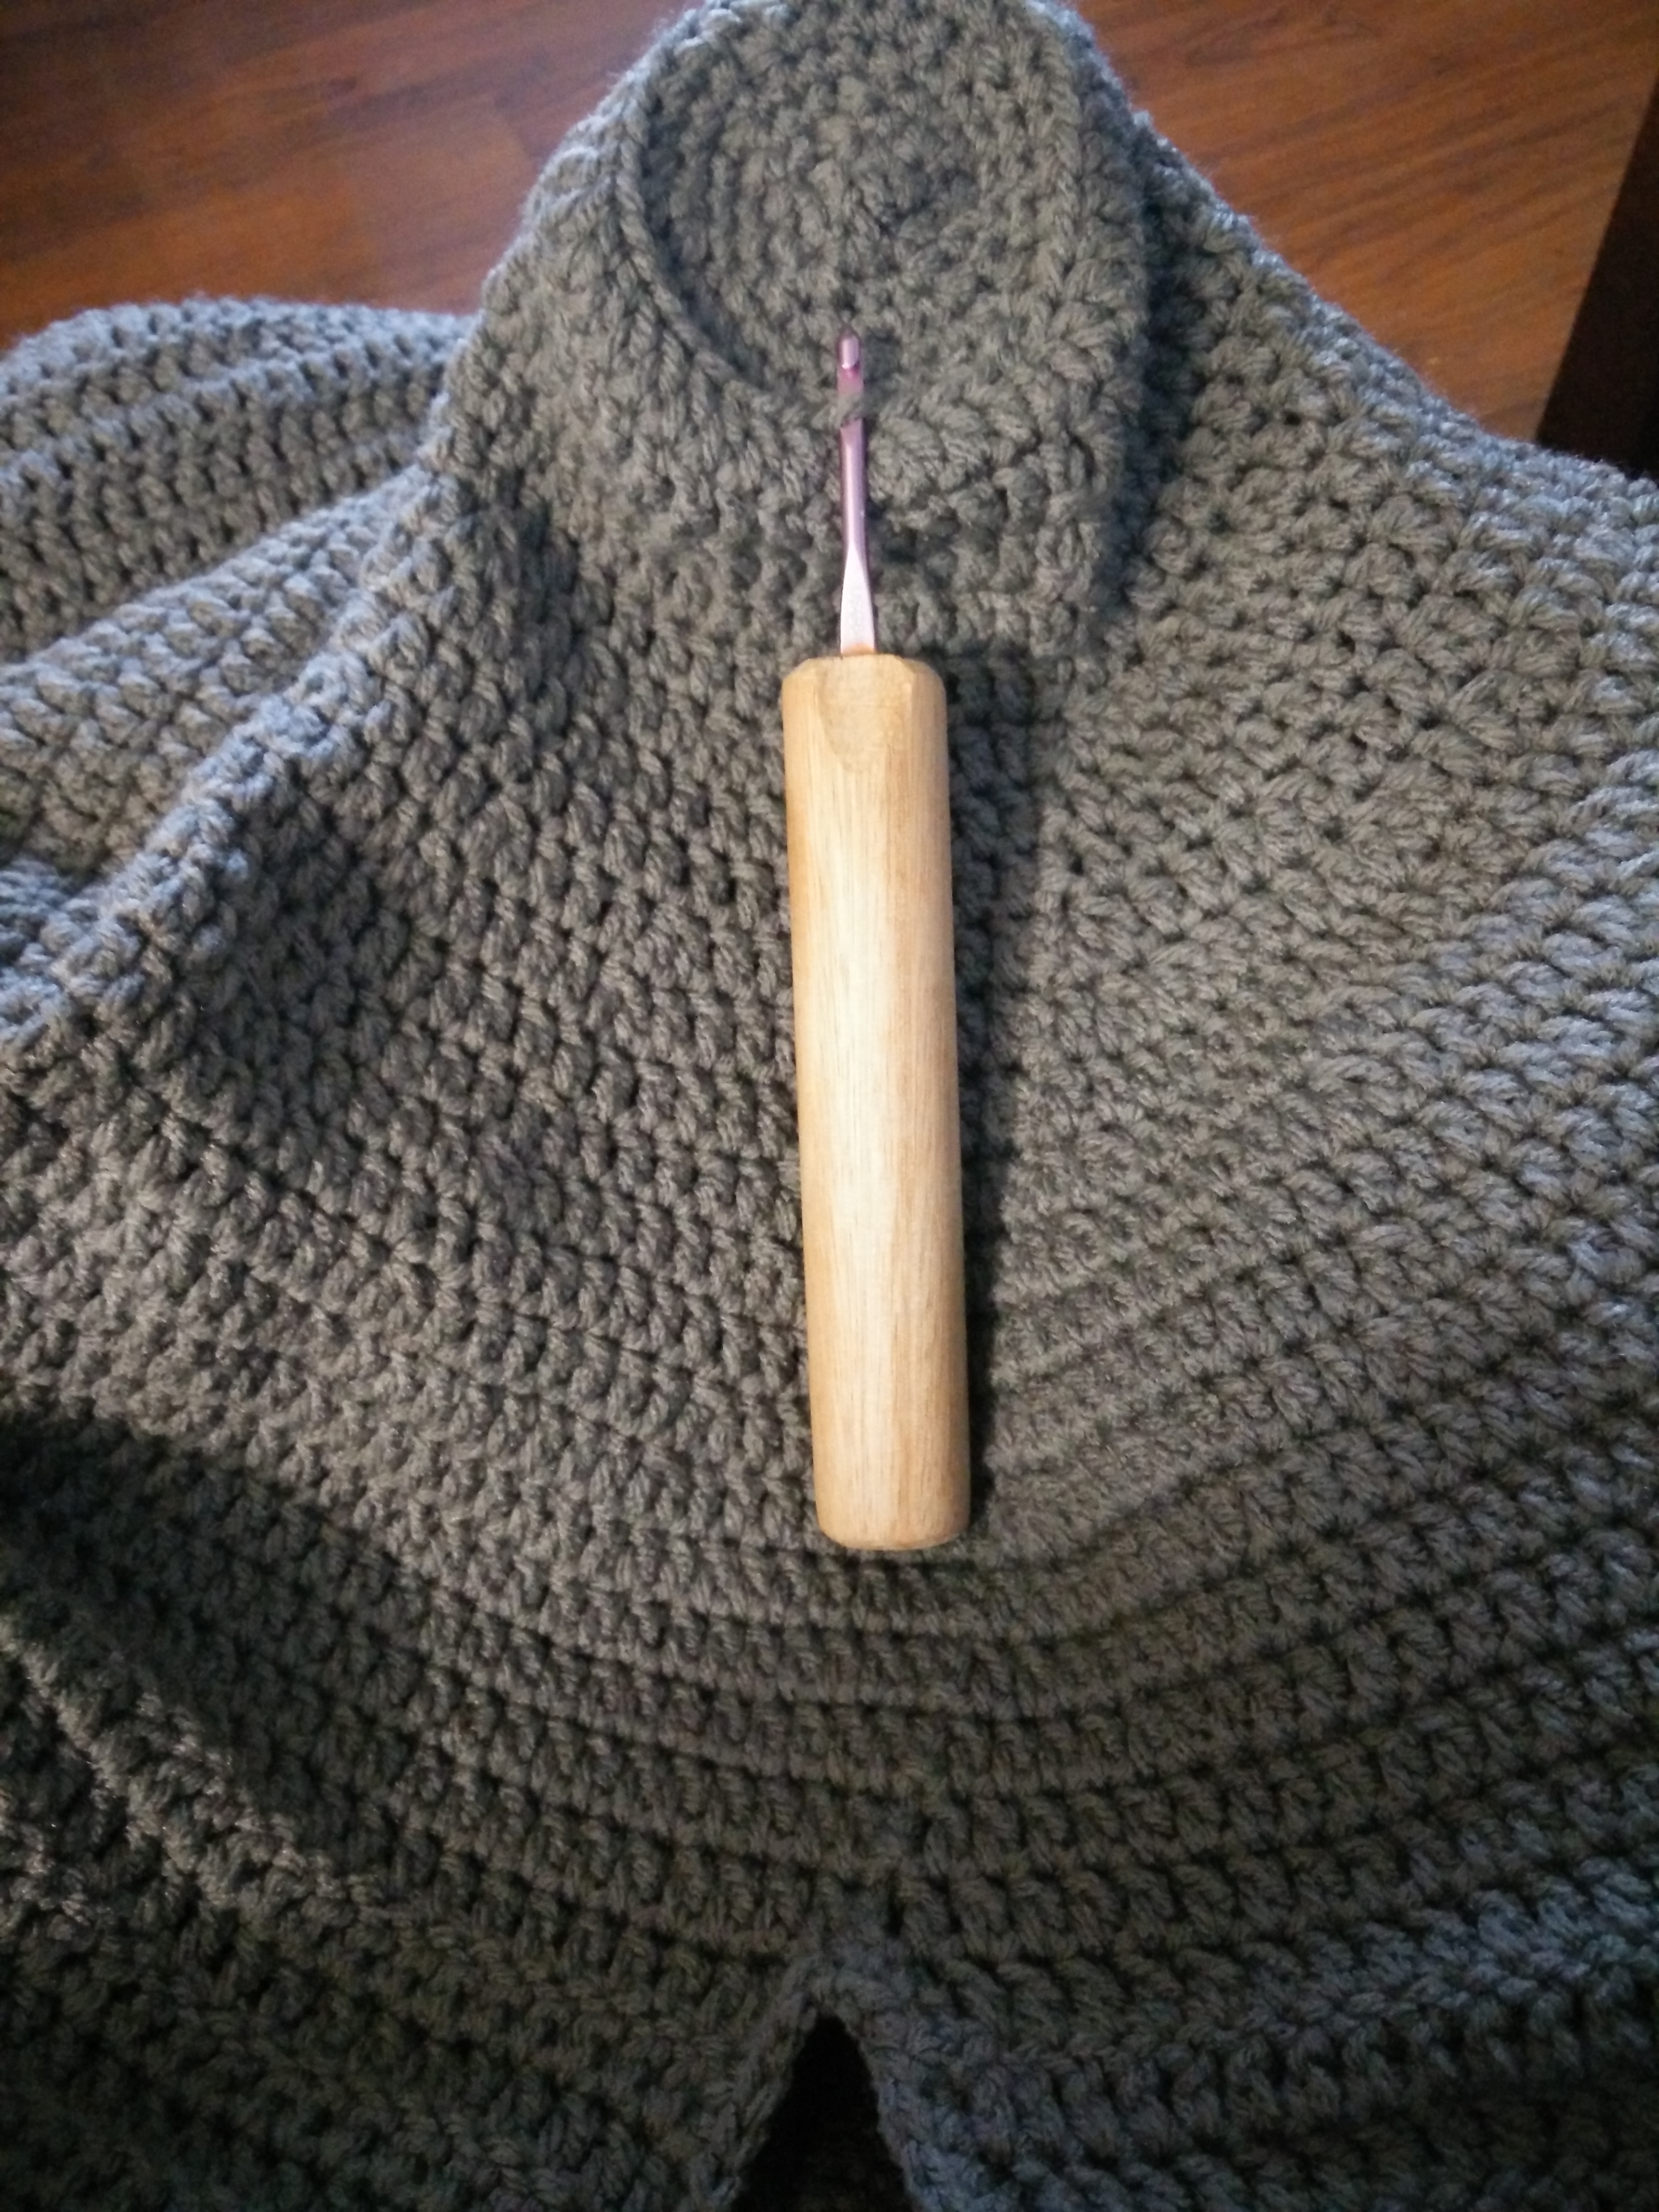
I cannot tell you how many requests I got for one of these. Of course I wasn’t going to revisit my problem from before of buying a pattern, especially when it is so close to my mermaid lapghan… So disclaimer, this was my first run on it and the pattern hasn’t been retested. I hope you like it.
This pattern is for an adult sized shark lapghan. That being said, check the measurements (approximately 41 inches wide by 41 inches long). It is also perfect for a young adult to be able to grow into.
As with all patterns, look ahead and see if this is what you want to do. My take on this one is a little different than some others.
A note on the Polyfil. I used it and the lapghan is still washable. However it can make the tail fin a bit heavier. How it is constructed it will hold its shape decently without it, but I wanted to show it stuffed… And it had been my original thought.
G and H size hooks Grey yarn (I used Red Heart I Love this Yarn. It took roughly 4 skeins of grey.) White yarn (small amount, just for the teeth) Black yarn (really small amount, just for the eyes) Polyfil (if desired) Stitch markers if you like
To start, ch 152 (this gave me a width of 41″)
Row 1: dc in third chain and across, ch 2 (150 dc with ch 2 NOT counting as a stitch)
Row 2-64: dc in each st across (do not skip 1st st), ch 2 and turn (150 dc with a total length of 28″)
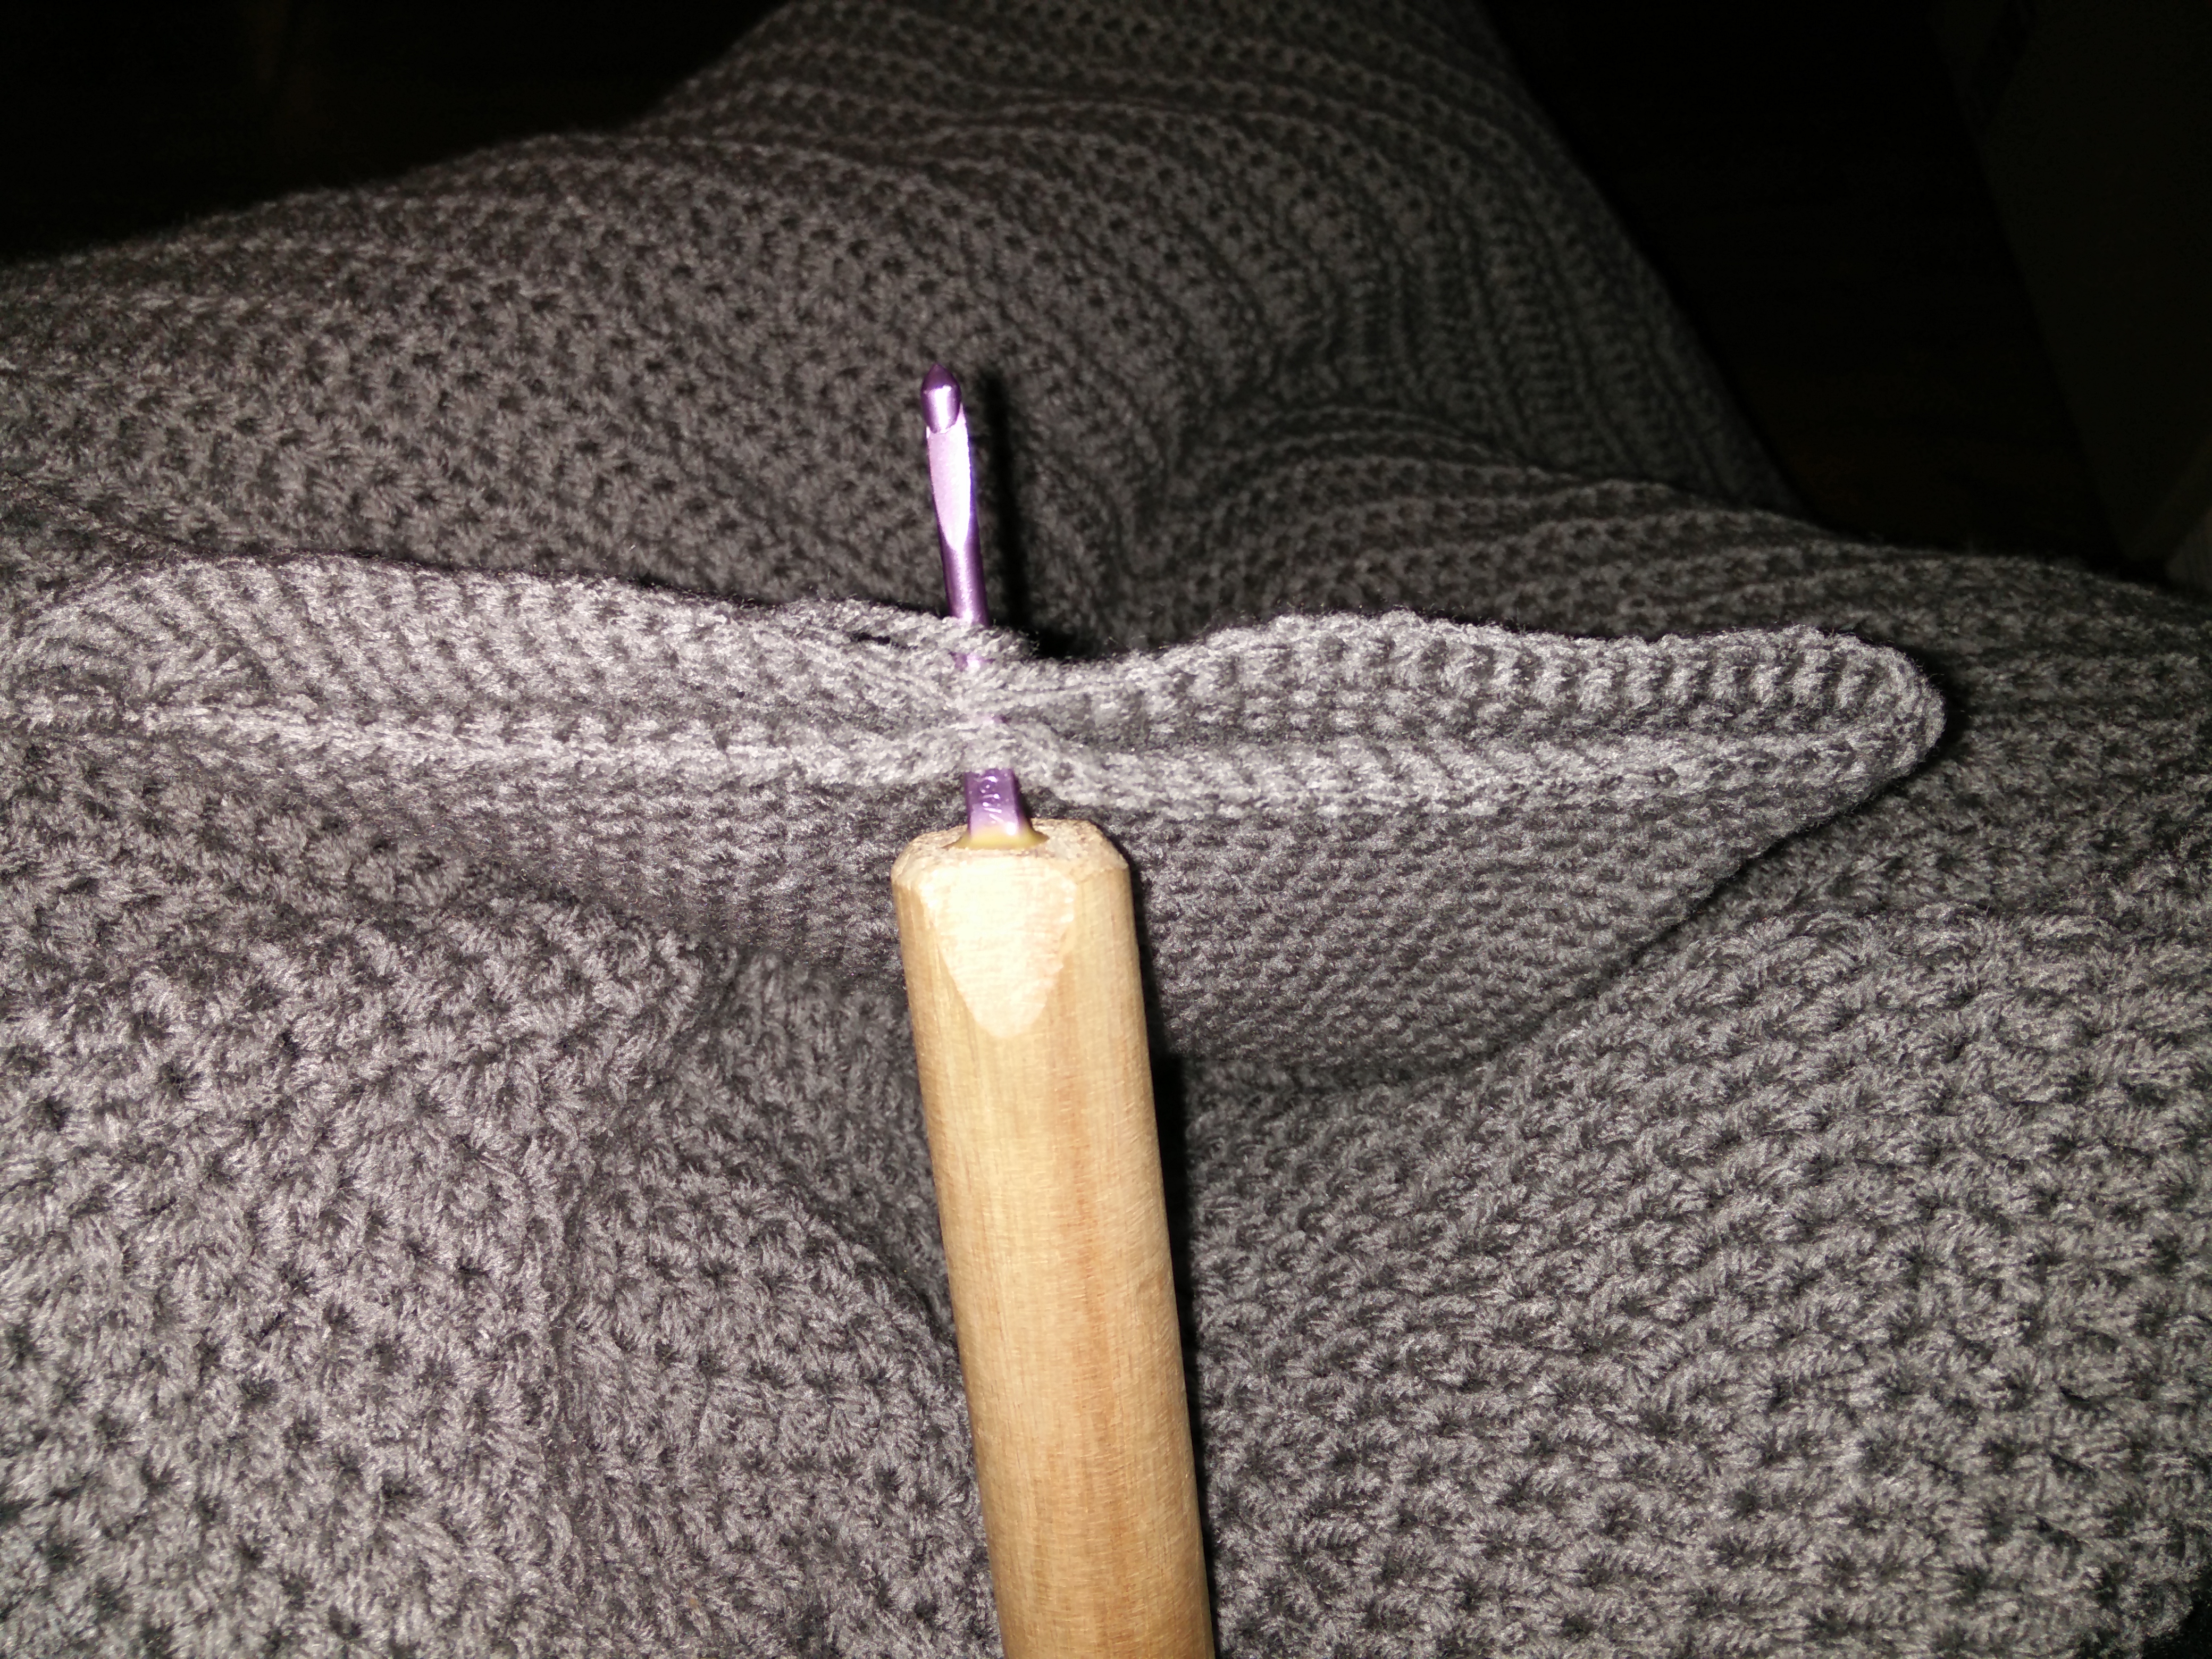
Row 65: dc in each st across but do not turn. Sl st in the first dc of the row, bringing both sides together, ch 2, do not turn.
We will now continue on in rounds. Note: this pattern has only been done once as of right now. Don’t stress about exactness of the decreases. If you need to add a dc or two at the end of the round, meh. It will work out fine. The lapghan will not implode. It will work out just fine.
Round 66-70: dc in same as join and in each dc around, sl st to first dc, ch 2.
Round 71: dc same as join, dc in next 7. Dc2tog (dc decrease), *dc in next 8, dc2tog* sl st to first dc, ch 2.
Round 72: dc same as join, dc in next 6. Dc2tog (dc decrease), *dc in next 7, dc2tog* sl st to first dc, ch 2.
Round 73: dc same as join and around.
Round 74: dc same as join, dc in next 5. Dc2tog (dc decrease), *dc in next 6, dc2tog* sl st to first dc, ch 2.
Round 75: dc same as join, dc in next 4. Dc2tog (dc decrease), *dc in next 5, dc2tog* sl st to first dc, ch 2.
Round 76: dc same as join and around.
Round 77: dc same as join, dc in next 3. Dc2tog (dc decrease), *dc in next 4, dc2tog* sl st to first dc, ch 2.
Round 78: dc same as join, dc in next 2. Dc2tog (dc decrease), *dc in next 3, dc2tog* sl st to first dc, ch 2.
Round 79-80: dc same as join and around.
Round 81: dc same as join, dc in next st. Dc2tog (dc decrease), *dc in next 2, dc2tog* sl st to first dc, ch 2.
Round 82-83: dc same as join and around.
Round 84: dc same as join, dc in next 2. Dc2tog (dc decrease), *dc in next 3, dc2tog* sl st to first dc, ch 2.
Round 85-86: dc same as join and around.
NOTE: At the end of round 86 you should have 36 stitches. What if you don’t? Either add (increase) how many you need or subtract (decrease) so you are at this number. You should be close if not dead on, so it will be fine. Truly, it will be. Don’t worry.
Switch to a size G hook. Use a stitch marker for the beginning of the rounds if needed. Round 87: in BACK LOOPS ONLY, sc in same as join, sc in next 4. Sc2tog (sc decrease), *Sc in next 5, sc2tog* around. Do NOT sl st, we are going to spiral the rest of the way close.
Round 88: working in both loops and starting in the first sc from the previous round, *sc in next 4, sc2tog*around.
Round 89: *sc in next 3, sc2tog*around.
Round 90: *sc in next 2, sc2tog*around.
Round 91: *sc in next 1, sc2tog*around.
Round 92: sc2tog around. Bind off, leave a long tail to sew close.
Join grey at the ‘v’ in the back of the lapghan, where you switched from rows to rounds and with your H hook, sc around the entire opening placing 3 sc in the top corners. Bind off and weave in your ends.
Teeth White yarn H hook
Attach yarn to top corner.
Row 1: *Sc, hdc, hdc, dc and tc in next, tc and dc in next, hdc, hdc, sc, sl st, sl st* across. Bind off, weave in ends.
Row 2: attach yarn to first sc and sc in each st until the tc. In first tc, sc, ch 1. sc until the sl st then sl st in those. Continue down the line and then bind off, weaving in the ends.
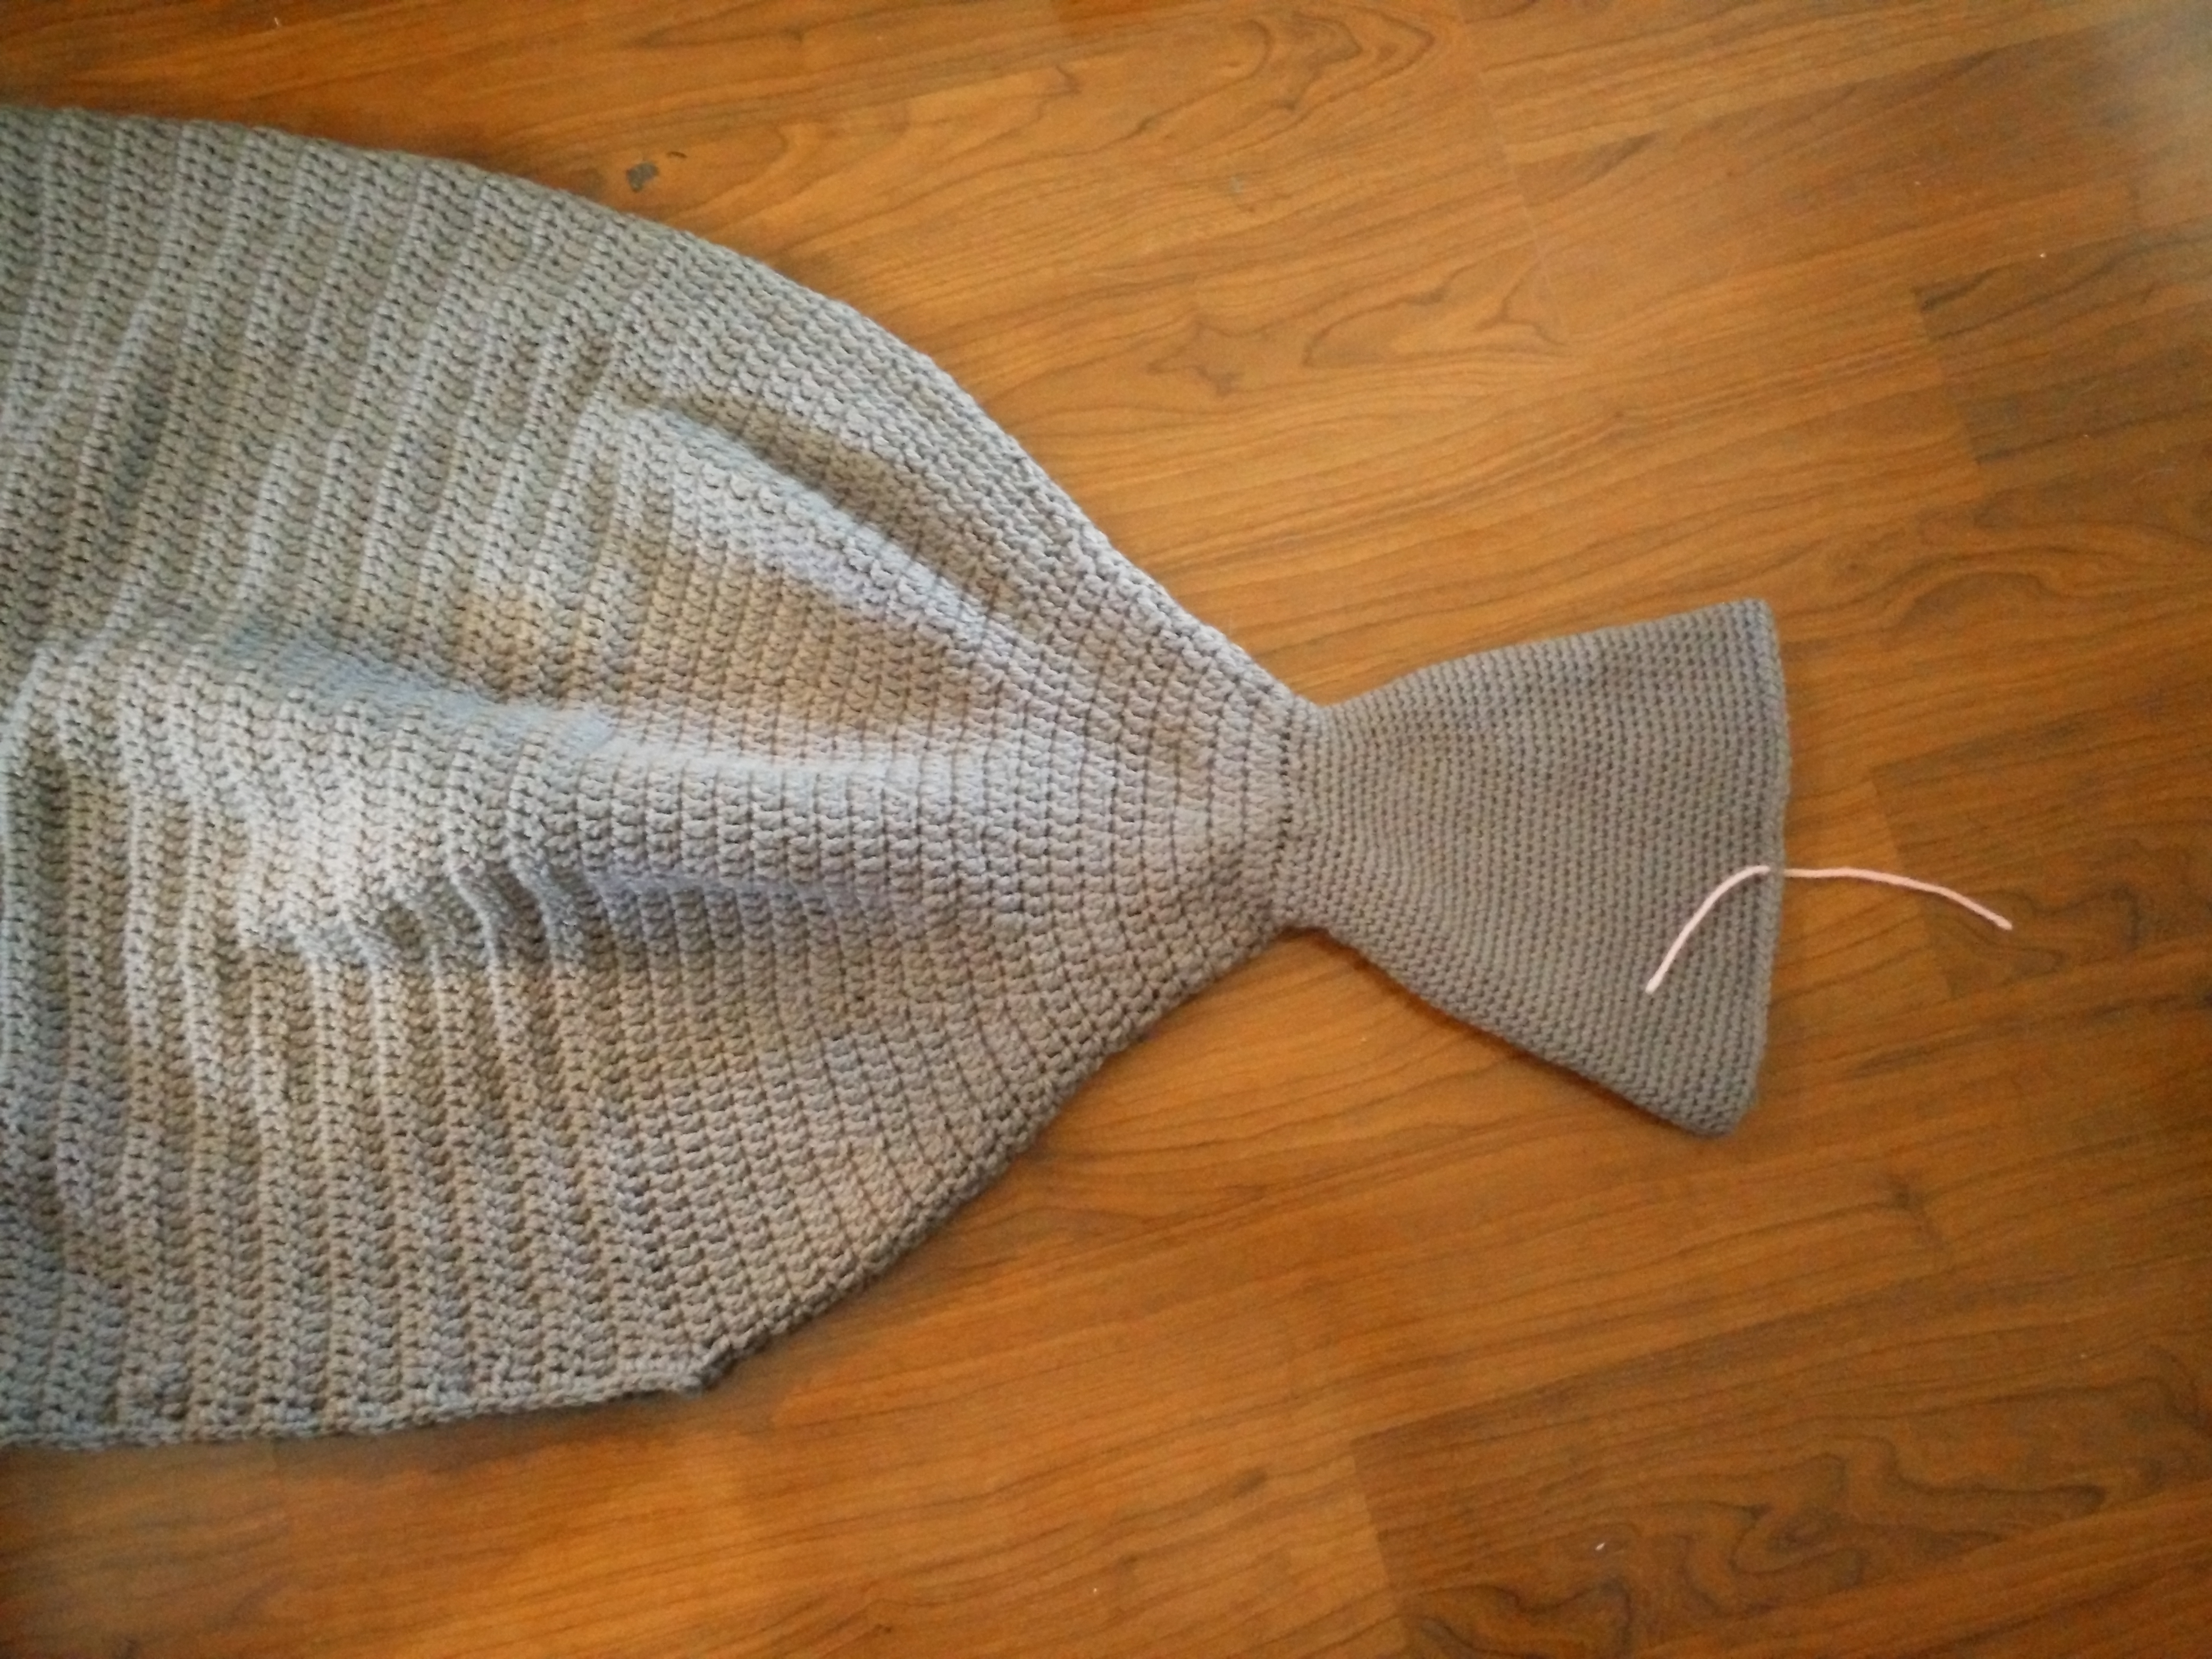
Now on to the fins. This is where I have made up about twenty different styles and decided on these. I wanted to be able to add some polyfil to keep the shape, but keep them washable. That made me decide on making them like amigurumi so bear with me on this one.
Tail fin G hook Grey yarn Polyfil (if desired) Stitch markers
Now I made these so that once you saw the stitch pattern repetition you could adjust as needed if you want. Adding rounds or doing less rounds… That sort of thing.
Attach your yarn to the front loops of round 87.
Round 1-5: sc around do NOT join at the end of every round. We will be working in a spiral. Use stitch markers if needed. Also, you should have 36 sc in each round. If not, just decrease or increase as needed.
Round 6: *2 sc in next, sc in next 6* around
Round 7: sc around
Round 8: *2 sc in next, sc in next 7* around
Round 9: sc around
Round 10: *2 sc in next, sc in next 8* around
Round 11: sc around
Round 12: *2 sc in next, sc in next 9* around
Round 13-15: sc around
Round 16: *2 sc in next, sc in next 10* around
Round 17-19: sc around
Round 18: *2 sc in next, sc in next 11* around
Round 19-21: sc around
Round 22: *2 sc in next, sc in next 12* around
Round 23-25: sc around
Round 26: *2 sc in next, sc in next 13* around
Round 27-29: sc around
Round 30: *2 sc in next, sc in next 14* around
Round 31-33: sc around
Round 34: *2 sc in next, sc in next 15* around
Round 35-37: sc around, bind off.
Now, fold your lapghan in half (bringing the edges of the V together) on the floor. Smooth out the tail fin so it is flat as well and mark the roughly half way spot. This is where you are going to attach your yarn through both thickness.
Round 38: sc in same as join and sc around until you get back to the stitch before the join. Now sc2tog the last stitch and the first stitch you made. Mark this stitch.
Round A 39-close: sc around until last stitch before join then sc3tog. Note the 3. It is the stitch before the tog stitch, tog stitch and the 1st sc of the next round. Also, when I say close it is to keep going in spirals until you only have 6 st left. Then you cut your yarn and sew the rest close. Stuff the fin if desired.
Round B 39-close: do the exact same as Round A. Continue to stuff if needed.
Dorsal (top) fin
G hook Grey yarn Polysilicon (if desired) Stitch markers
Round 1: 6 sc in a magic circle
Round 2: sc around
Round 3: 2 sc in each st around
Round 5-6: sc around
Round 7: *2 sc in next st, sc next* around
Round 8-9: sc around
Round 10: *2 sc in next st, sc next 2* around
Round 11-13: sc around
Round 14: *2 sc in next st, sc next 3* around
Round 15-17: sc around
Round 18: *2 sc in next st, sc next 4* around
Round 19-21: sc around
Round 22: *2 sc in next st, sc next 5* around
Round 23-25: sc around
Round 26: *2 sc in next st, sc next 6* around
Round 27-30a: sc around
Round 31: hdc in next st, dc in next 2, *2 dc in next st, dc in next 3* around. Sl st to first hdc, bind off leaving a LONG tail for sewing. (Now don’t worry if this row doesn’t come out perfect. It is only to make it easier to attach the fin to the lapghan. Technically you don’t have to have it, but it makes life easier.)
Round 32: attach your yarn to the unworked (back loops) of round 31. *Sc in the next 6, sc2tog* around (note: I didn’t keep exact count because I forgot to honestly. Working nights does that to you. Don’t stress if the rounds don’t work up perfectly. It’s just to help keep the stuffing in.)
Round 33: *Sc in the next 5, sc2tog* around
Round 34: *Sc in the next 4, sc2tog* around
Round 35: *Sc in the next 3, sc2tog* around
Round 36: *Sc in the next 2, sc2tog* around
Round 37: *Sc in the next 2, sc2tog* around. Go ahead and stuff the fin if desired.
Round 38: *Sc in the next 1, sc2tog* around
Round 39: *Sc in the next 1, sc2tog* around
Round 40: *sc2tog* around. Bind off and sew close. Now I then placed about 5 stitches in the middle of the fin to make it angle back more. Not strictly necessary, but it made sense to me.
Sew the top fin in the middle top of blanket. Pin in place before sewing to make your life a little easier.
Eyes Black yarn H hook
Round 1: 12 dc in a magic circle, sl st to first dc, ch 2
Round 2: 2 dc in first dc and in every dc around, sl st to first, bind off and leave a long tail for sewing.
Sew eyes on either side of the top fin, about halfway from the top to the fin.
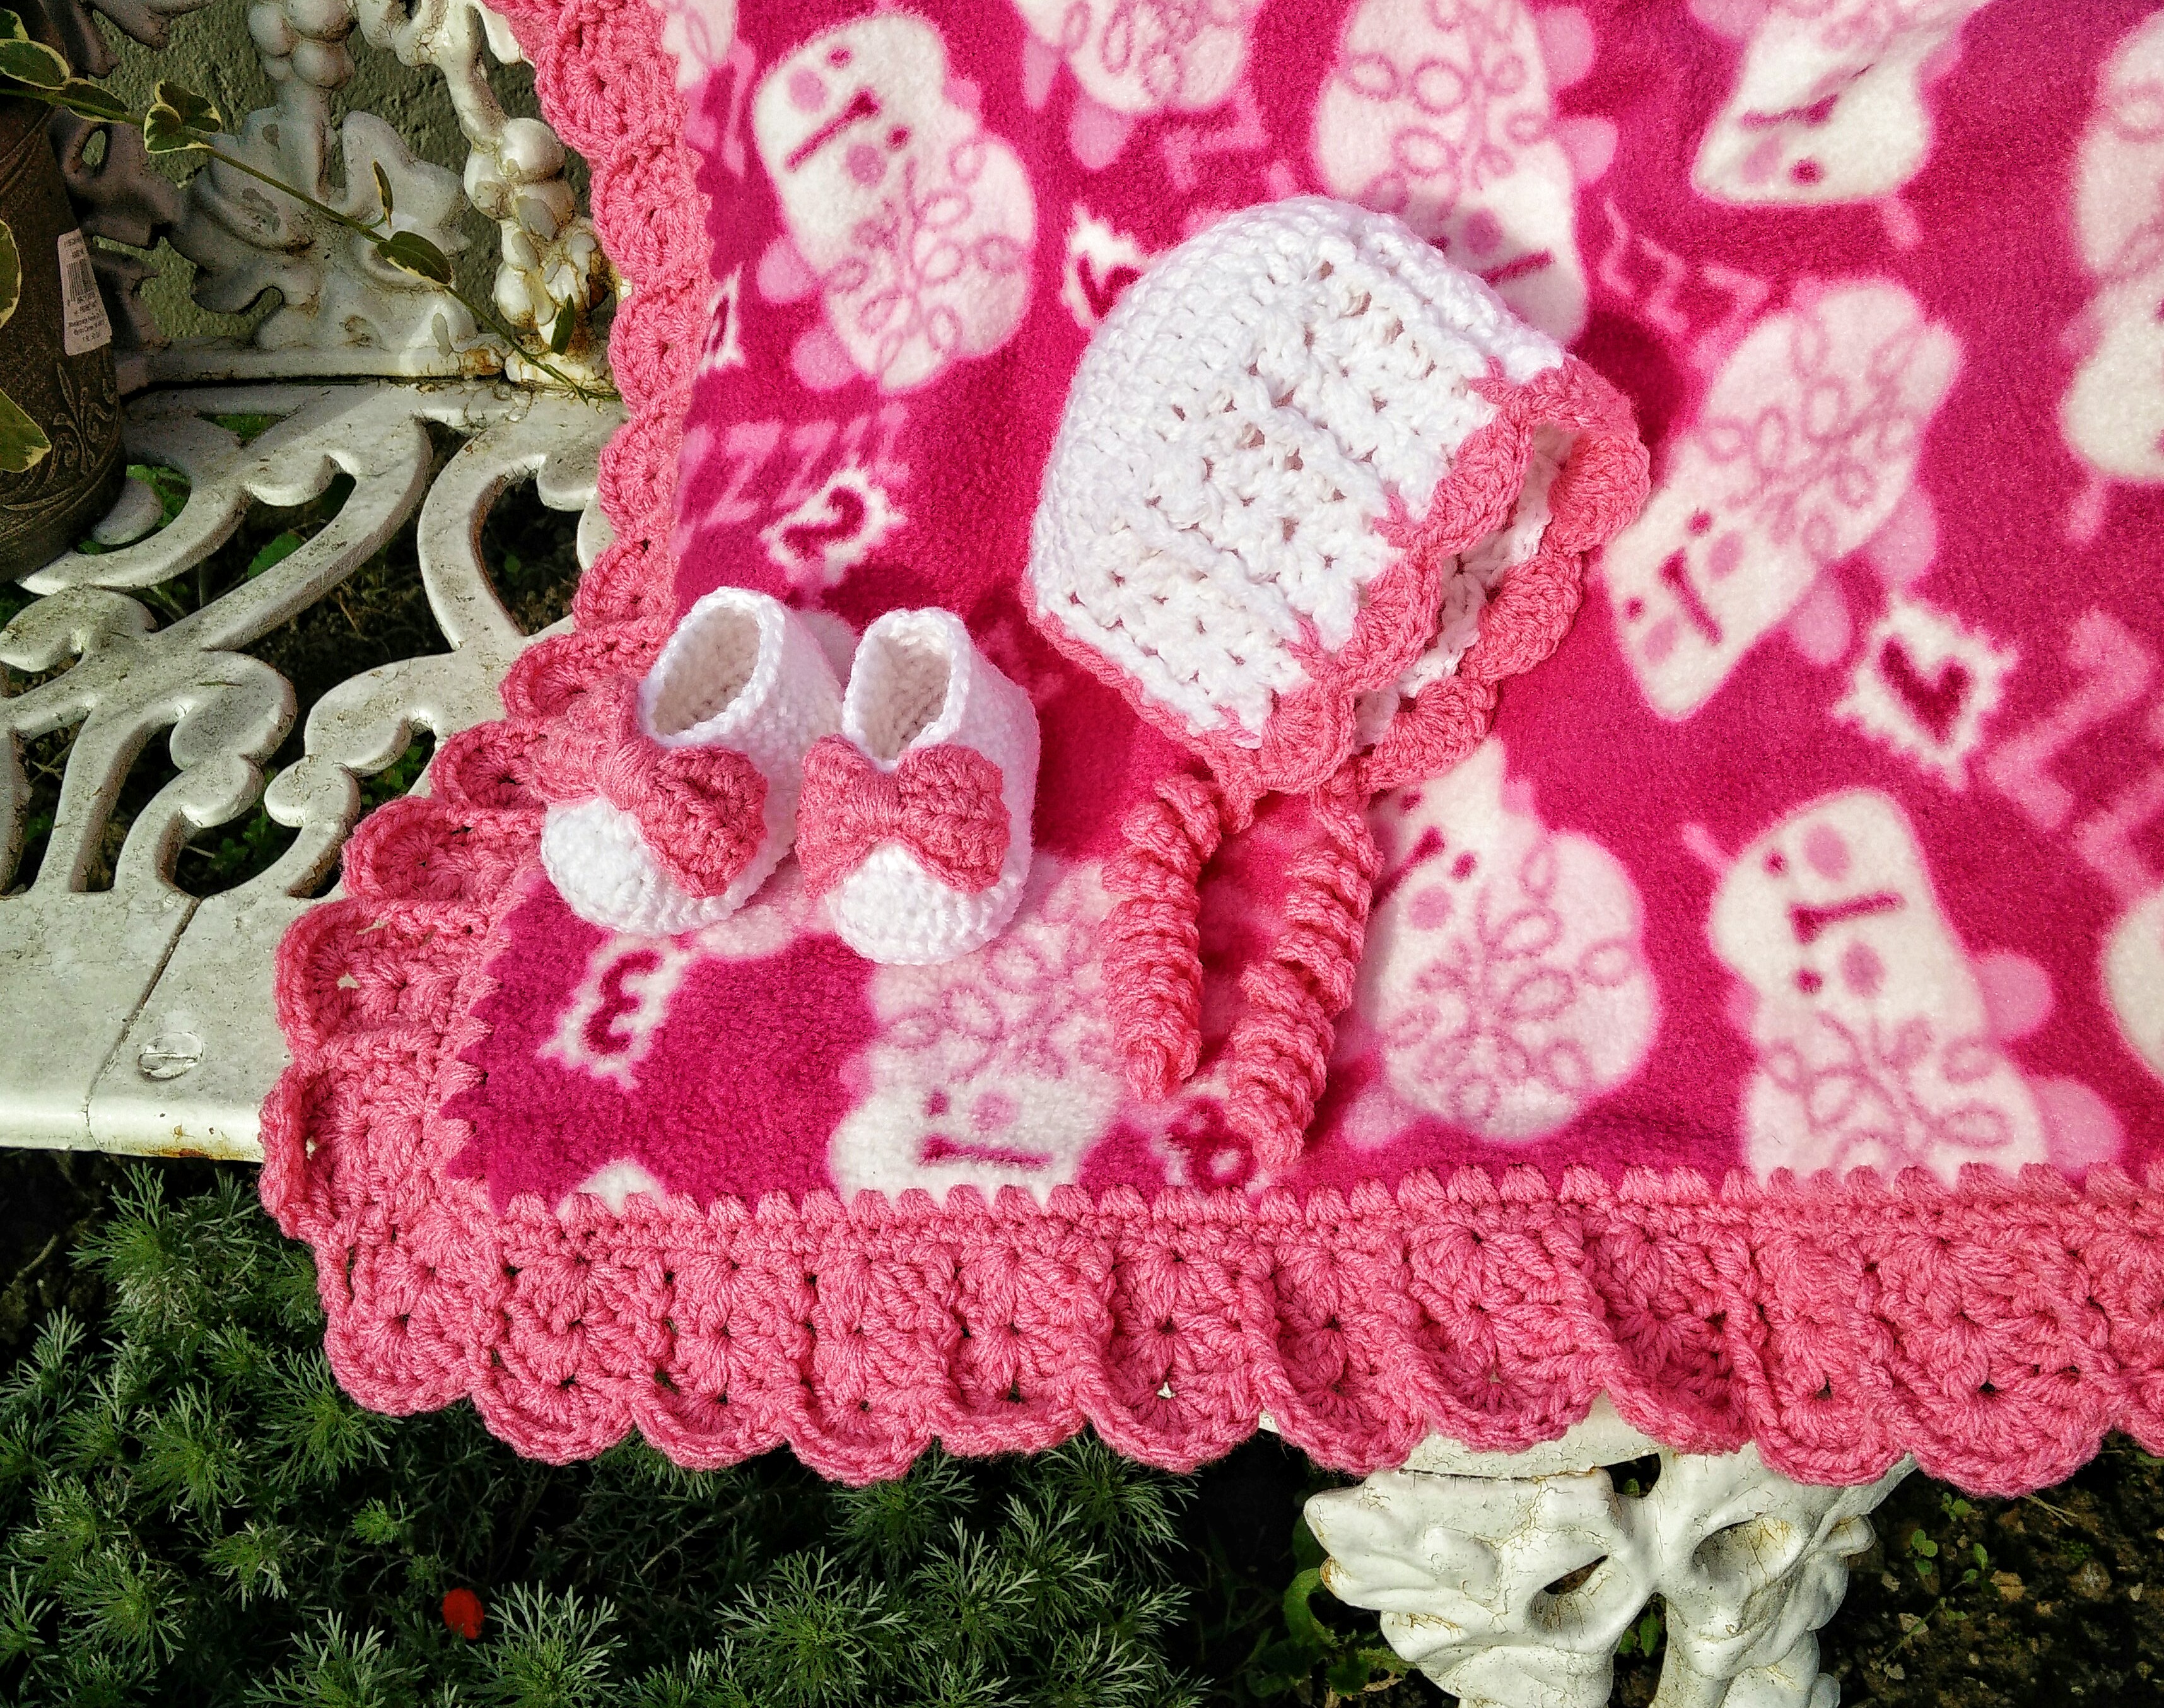
I have to admit, I love the edging I wrote for the Granny Square and Ribbon Blanket. I use it so very often anymore as a go to for a statement, lacy edging on fleece blankets and it never fails to make the recipients of the blanket happy. I recently used it on a baby blanket for my brother/sister-in-law coming soon little girl and I wanted a matching hat and shoes. I couldn’t find what I wanted, so what follows is the pattern for the edging and the bonnet. The shoes, if you want that pattern as well, can be found here (http://www.ravelry.com/patterns/library/baby-bootie-slippers) for free even if I did my bow a little different…
As with all my patterns feel free to use and sell what you make if you want. I would ask that you link back to where you found the pattern when possible. However do not reproduce my pattern in any format. Essentially, don’t be a troll.
Edging:
Size H hook.
The yarn I used in the picture was Red Heart with Love in Bubblegum. To make the holes I use this nifty little tool I got from Kay’s Crochet (http://kayscrochetpatterns.com/) but I ordered mine off of their Amazon store because me and Amazon have a tight relationship like that…
Round 1: sc into the holes you made into your fleece. Depending on how spaced apart your holes are you might do 2 sc in each hole like I do, just so you aren’t bunching up the fleece.
Round 2: sc around, placing 3 sc in the corner sc. Don’t worry, this isn’t an exact science. Truly don’t worry, just roughly where the corner is, throw in the 3 sc in one sc.
Round 3: Ch 3, (2 dc, ch 1, 3 dc) in same st as joining. Skip 1 st, *dc in next, skip 2 st then (3dc, ch 1, 3dc) in next st, skip 2 st* around. Corners: When you get to the corners though you will only be skipping 1 st instead of the 2. Sl st into top of beginning ch 3.
Round 4: Sl st in the first two dc and into the space. Ch 3, (2 dc, ch 1, 3 dc) in same space. *fpdc (front post double crochet) around the dc in middle of groups, (3dc, ch 1, 3dc) in next ch 1 space* around. Corners: Nothing special to do in the corners for a change. Sl st into top of beginning ch 3.
Round 5: Sl st in the first two dc and into the space like last round. Ch 3 and do 6 dc in same space. *fpdc around previous round fpdc, 7 dc in ch 1 space* around. Corners: Again, nothing special to do in the corners. Sl st into top of beginning ch 3. Bind off and weave in your ends and that’s it for the edging.
Bonnet:
Size H hook.
I used Red Heart with Love in White (I had this in my stash without the label so I’m not exactly sure of the name) and Bubblegum for this and according to my chart it should be for a 3 month old babe. So, depending on your yarn it could change the size of your hat. I have found this blog/sizing chart to be helpful (http://anniespictureperfect.blogspot.com/2013/01/how-to-properly-size-crochet-hats-chart.html?m=1)
With white, create a magic circle then ch 2
Round 1: 10 dc in the magic circle ,sl st to first then ch 2
Round 2: 2 dc in each dc around, sl st to first then ch 2
Round 3: *2 dc in first dc, 1 dc in next* around, sl st to first then ch 2
Round 4: *2 dc in first dc, 1 dc in next 2* around, sl st to first then ch 2
Round 5: *2 dc in first dc, 1 dc in next 3* around, sl st to first then ch 2
Round 6: dc in each of the next 45 st leaving the last 5 unworked, ch 3 and turn
Round 7: *dc in next, skip 2 st then (3dc, ch 1, 3dc) in next st, skip 2 st* across until the last 2 dc. Dc in the last 2, ch 3 and turn
Round 8: fpdc (front post double crochet) around the second dc, *(3dc, ch 1, 3dc) in next ch 1 space, fpdc around next dc* then dc in top of ch 3, ch 3 and turn.
Round 9: bpdc (back post double crochet) around the second dc, *(3dc, ch 1, 3dc) in next ch 1 space, bpdc around next dc* then dc in top of ch 3, ch 3 and turn.
Round 10: fpdc (front post double crochet) around the second dc, *(3dc, ch 1, 3dc) in next ch 1 space, fpdc around next dc* then dc in top of ch 3, ch 3 and turn.
Round 11: bpdc (back post double crochet) around the second dc, *(3dc, ch 1, 3dc) in next ch 1 space, bpdc around next dc* then dc in top of ch 3 changing to pink, ch 3 and turn.
Round 12: fpdc (front post double crochet) around the second dc, *7 dc in next ch 1 space, fpdc around next dc* then dc in top of ch 3 do NOT cut yarn.
Round 13: ch 20, 3 sc in 2nd ch from hook and in each ch back to the bonnet. Sc evenly along the side and back until you get to the beginning of round 12. Ch 20, 3 sc in 2nd ch from hook and each ch back up to the bonnet. Cut and weave in your yarn.
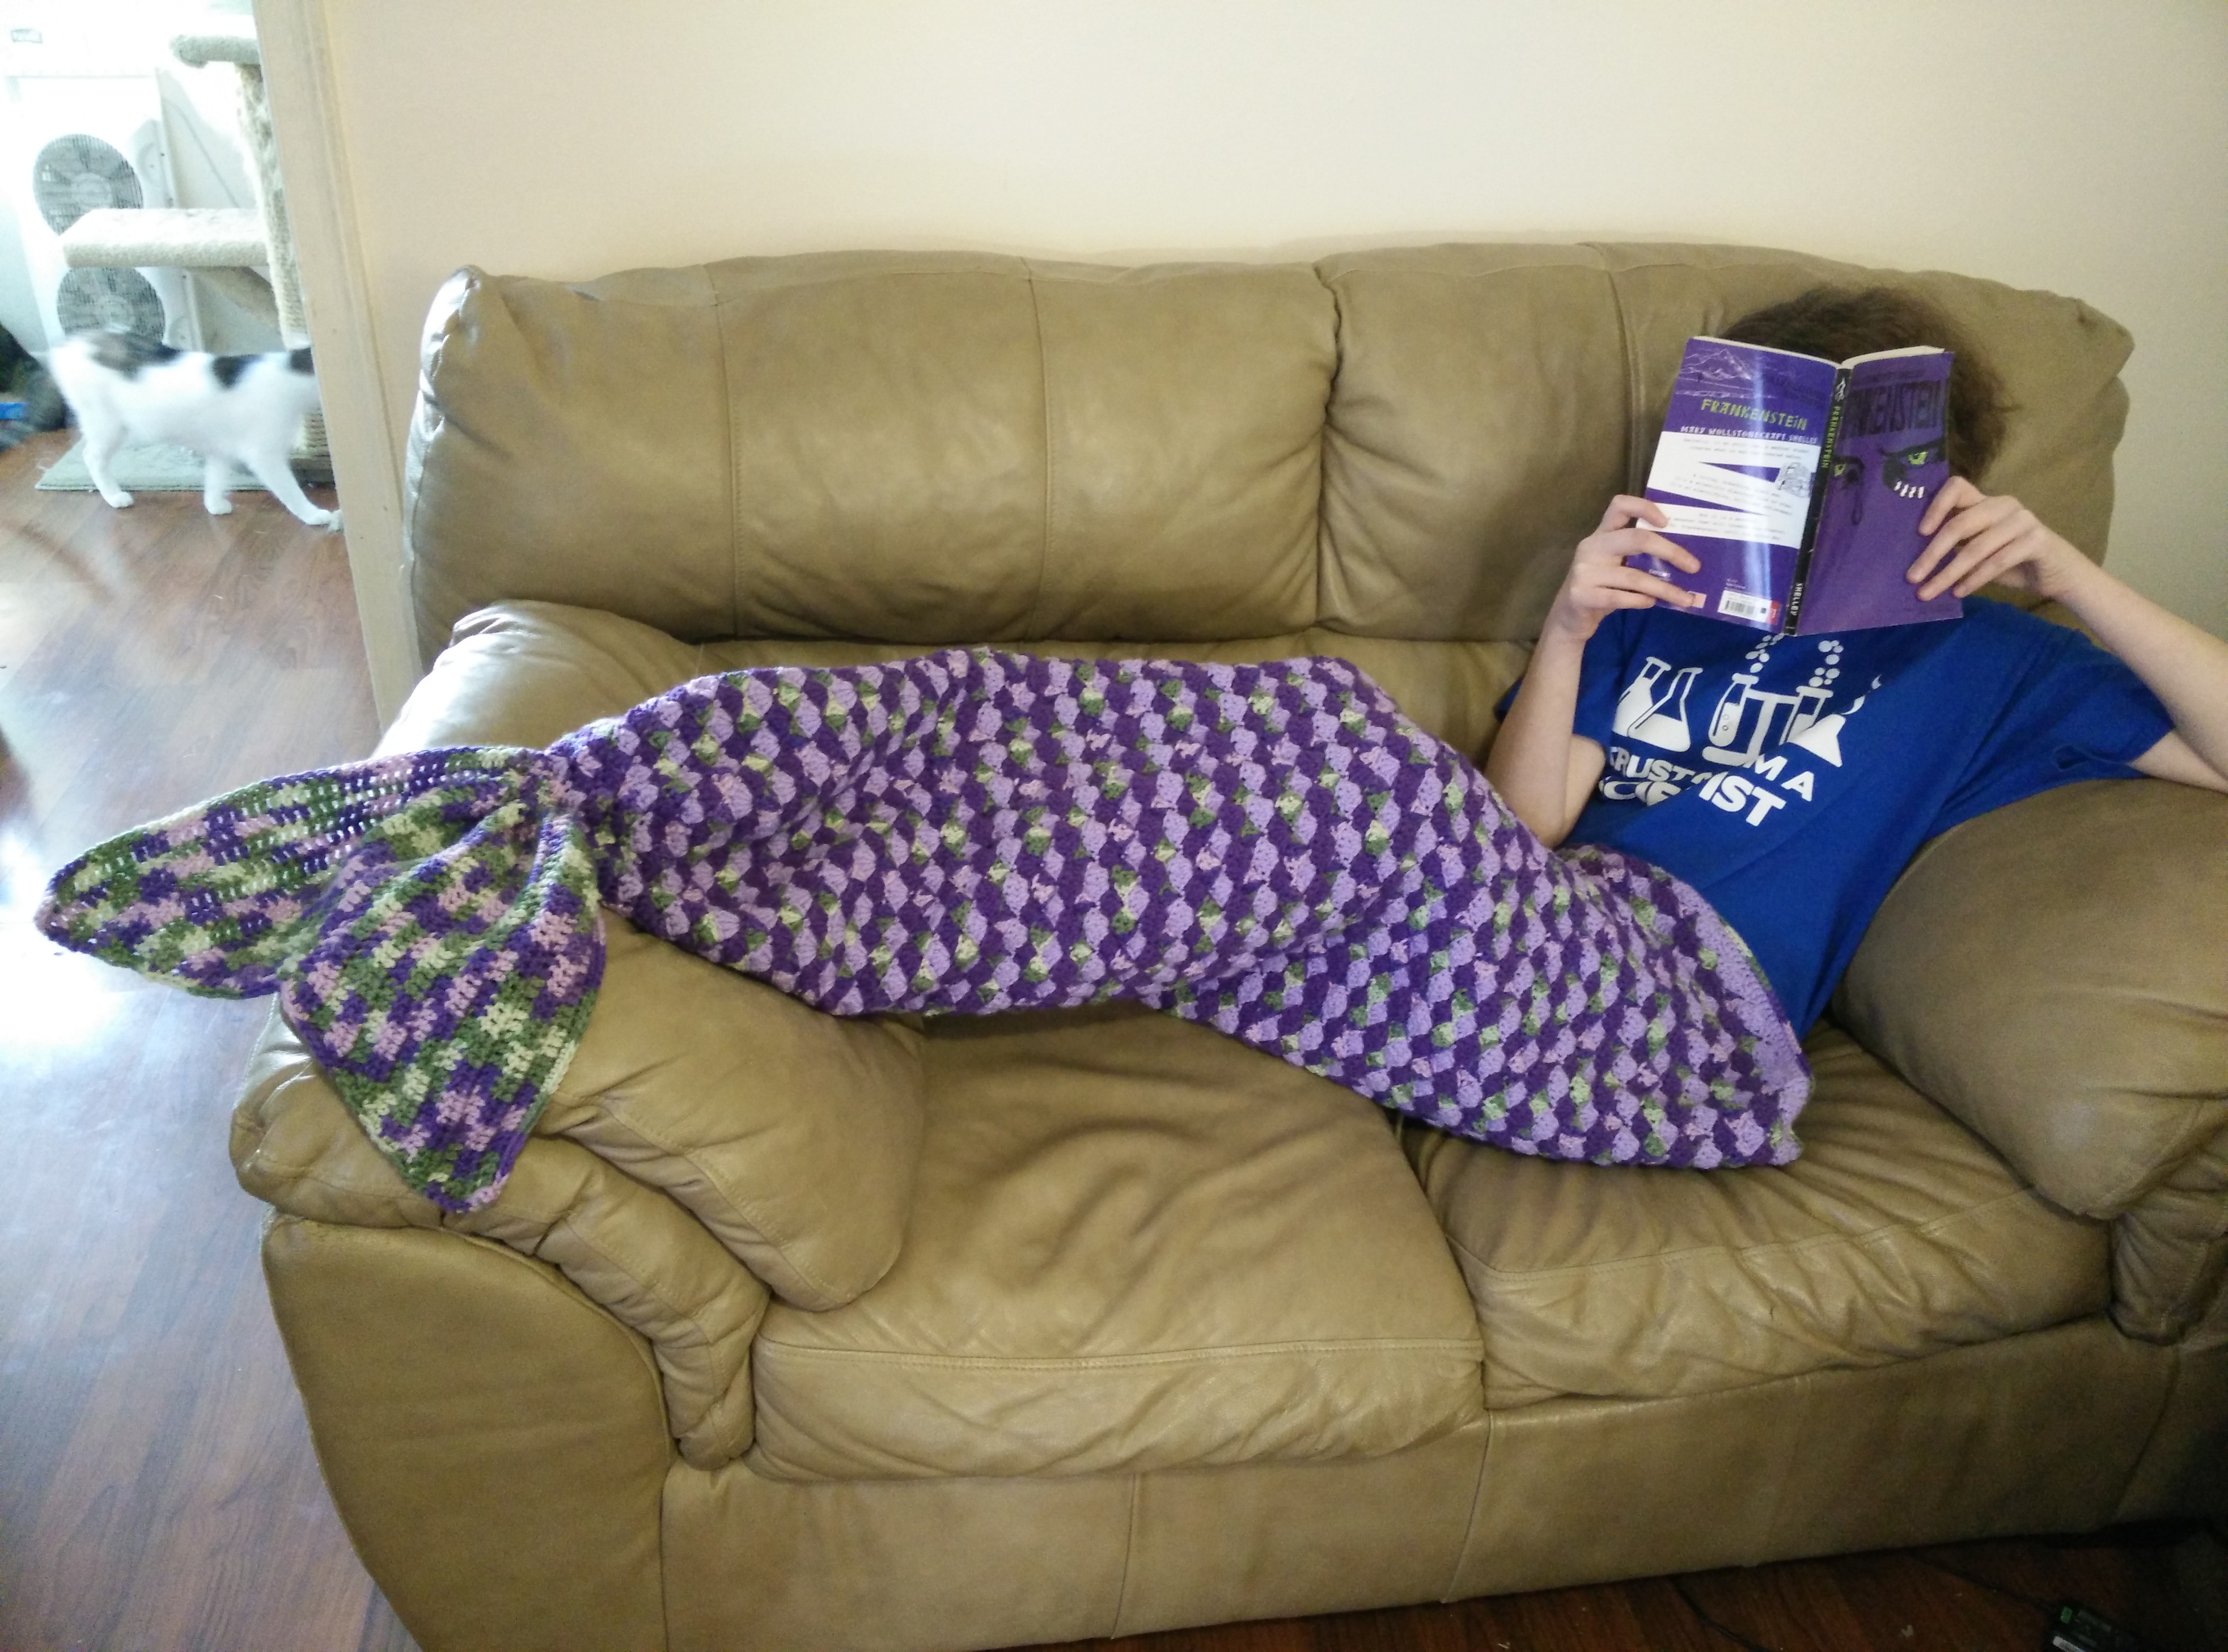
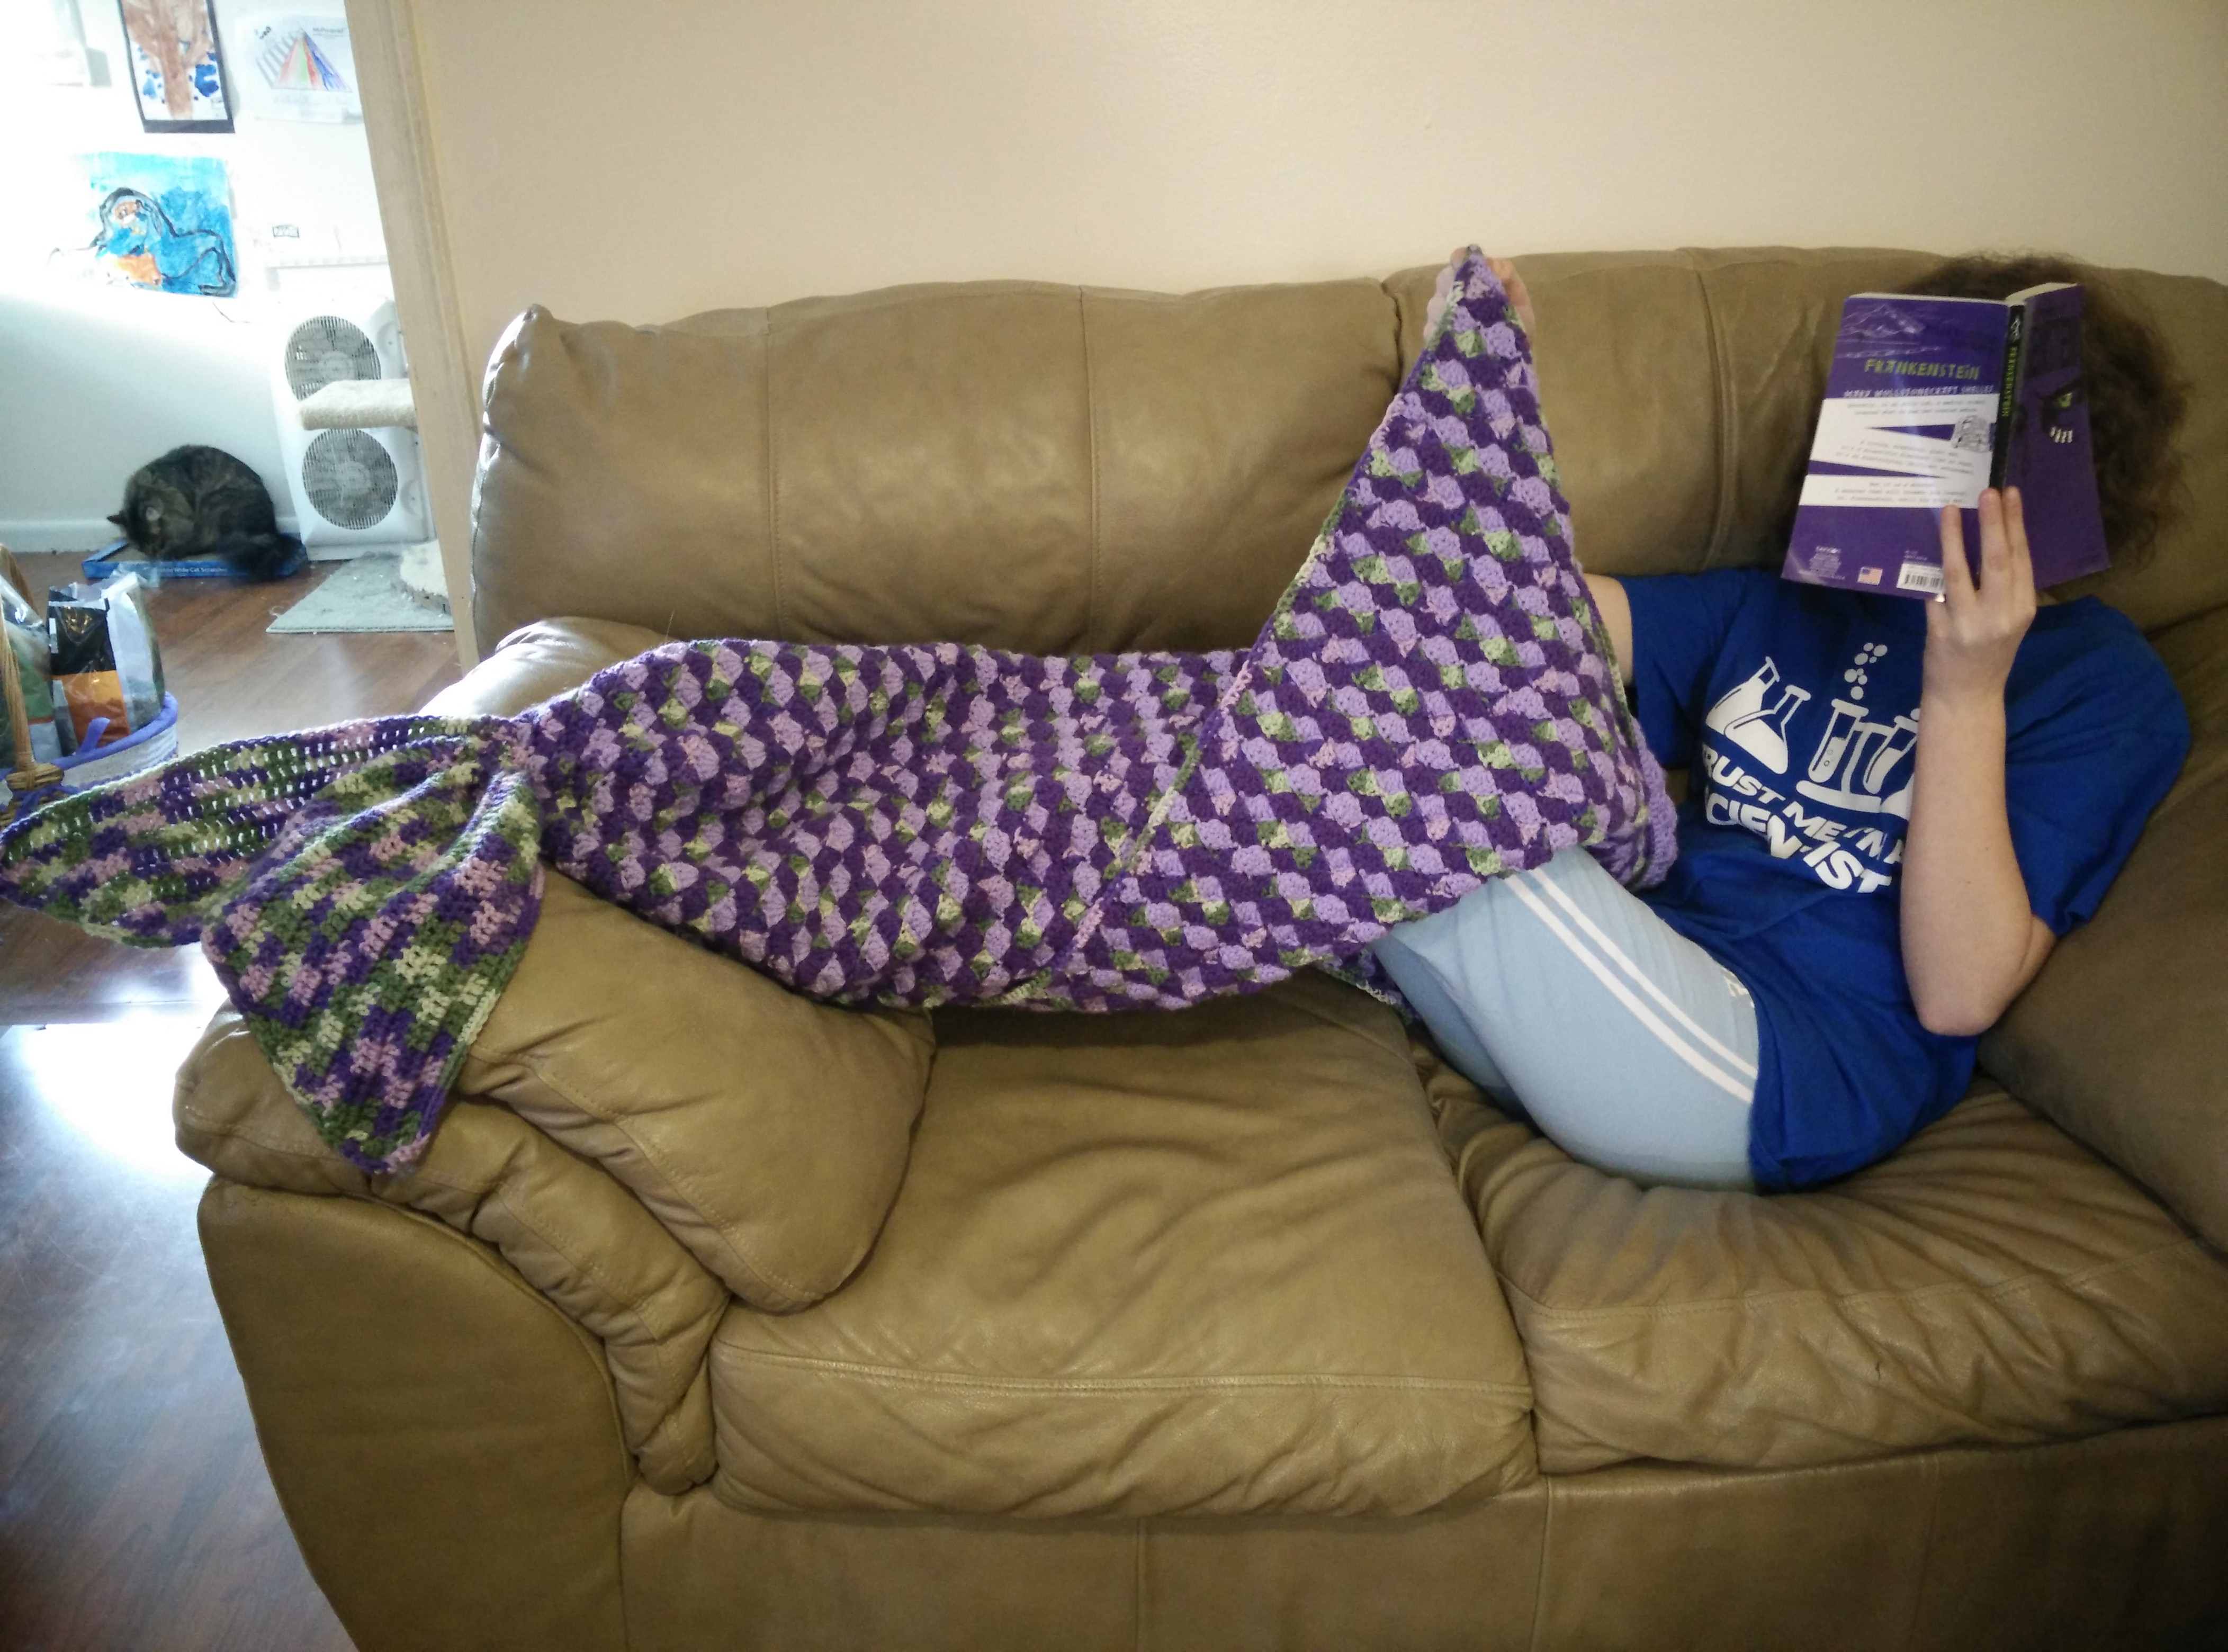
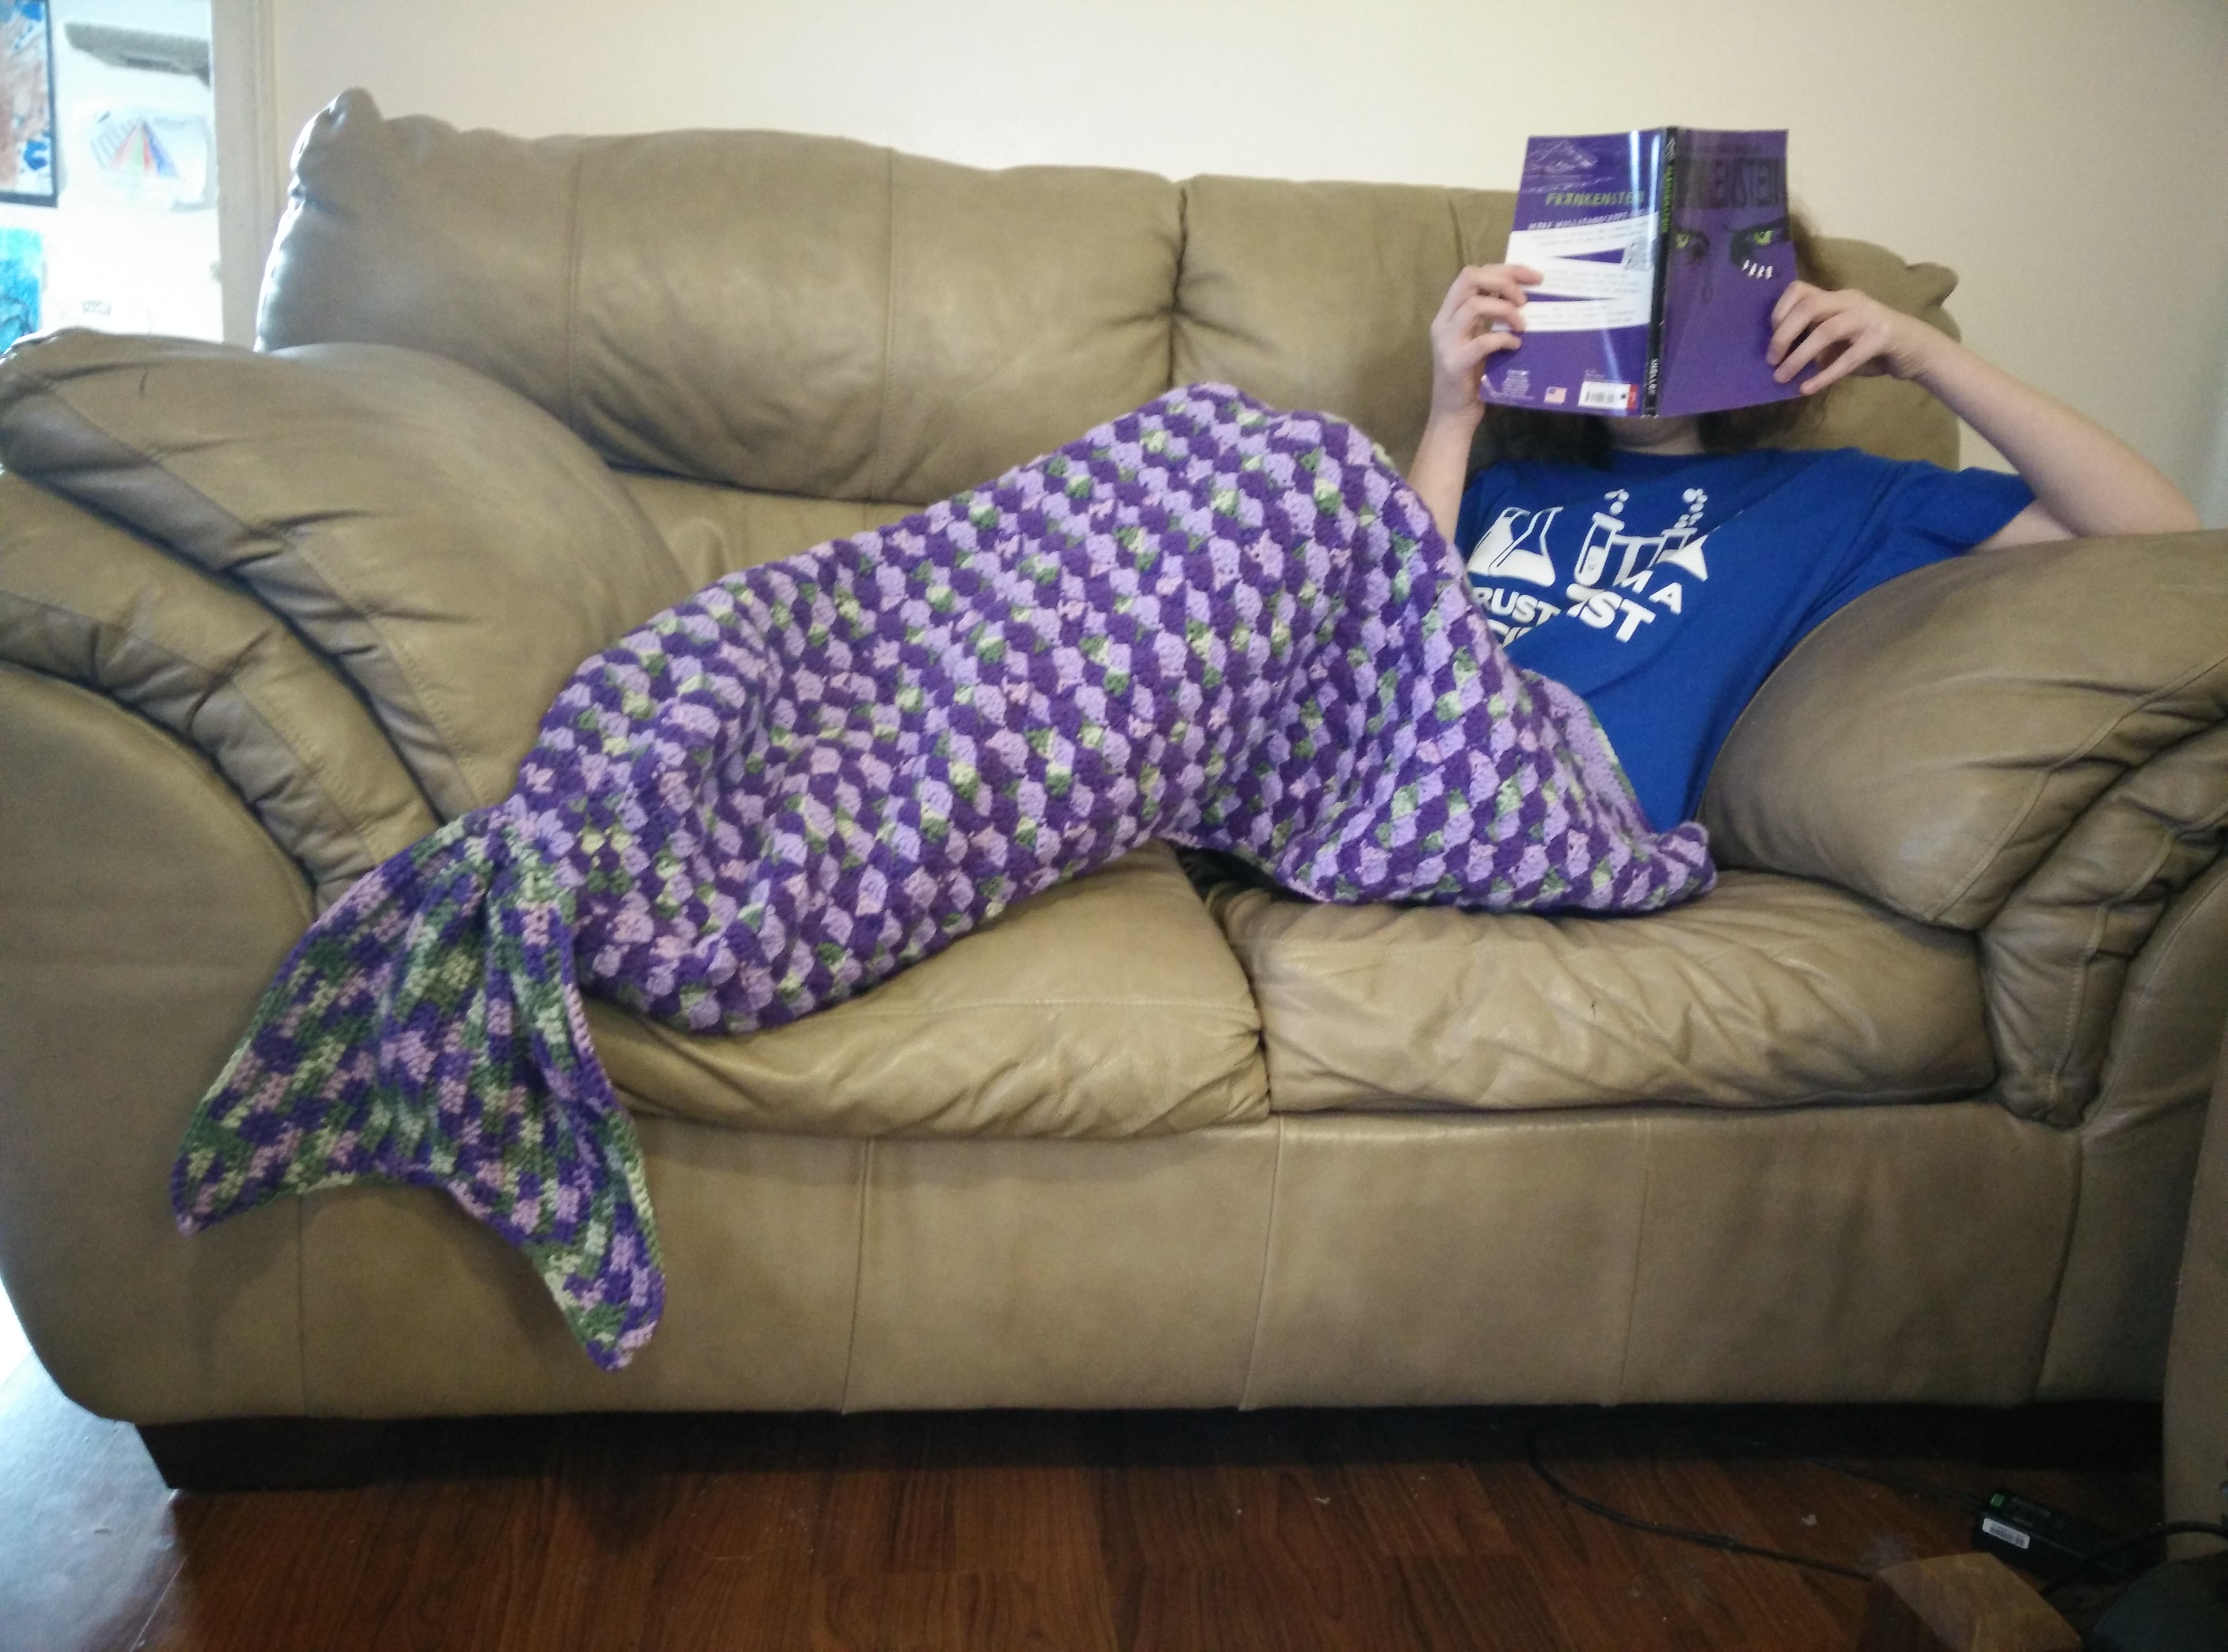
As with a lot of things I make, this started with an idea from someone. They had an idea of what they wanted because they saw a picture… Of a paid pattern. Now, I typically stay away from paid patterns on general principal, but I had a weak moment. I bought the rather pricey pattern… I knew I shouldn’t, but I did. It was absolutely dreadful! It had good reviews and was written decently, but I found it just awful. It was made of motifs that you connected as you went… OK, I can do that. However when you did connect them it left gaping holes in the pattern and did not look like scales at all! Just not for me… so here is what I came up with after I got rid of that hideous attempt.
Measurements: Tail to top 42 inches Tail to tip of fin 12 inches Top width 38 inches
size H hook
worsted weight yarn: The best estimate I have on how much I used until I duplicate this more is a total of 1600 yds. Now the one pictured I used Bernat super value (426 yds per skein) in lilac and light damson. Then the variegated yarn was 2 skeins (since they come in 275 yd skeins) in fresh lilac. As always though everyone can use different amounts of yarn depending on how tight or loose you crochet. Please err on the side of having extra yarn. As I have made more this is roughly accurate. Notice though I find I need extra yarn of the two solid colors (not just one skein of the super value) and so I can do a two stranded fin.
Edit: So I’ve been grabbing 2 skeins each of the solid color and 2 of the variegated yarn. I swear every time I make this I have different amount of yarn leftover… The last two I’ve made the fin out of the solid colors because the variegated almost ran out. The solid colors I am left with over a half of one and all over 3/4 of the other… Trying to get down the yardage for this has been tearing my hair out. The yarns are not exactly the same is my thought.
Also for those who need to resize the pattern, Rachel Z. Commented this:
“Thanks for the great pattern. I just finished a child size one and I’ve seen a lot of request for the modifications… my top chain was 128 (includes 2 turning chains). If you work in multiples of 6 and add 2 for turning, it always works out. I did 42 5dc rows then joined it together. After joining, I did 15 5dc rows. When reducing to a 3dc pattern, I followed the remaining instructions until I had 14 st at the close. I made the same fin, which the top reduces to 7 st and it attaches to the tail perfectly. I hope this helps others wanting to make a child sized blanket :)”
Also for those with problems understanding the crochet language a fellow hooker named HAB posted this: “For instructions of terminology you don’t understand, use Google search engine to ask or go to a yarn website and search for abbreviations. At the very least buy a basic crochet book. sctog = single crochet two together. http://www.lionbrand.com/faq/217.html
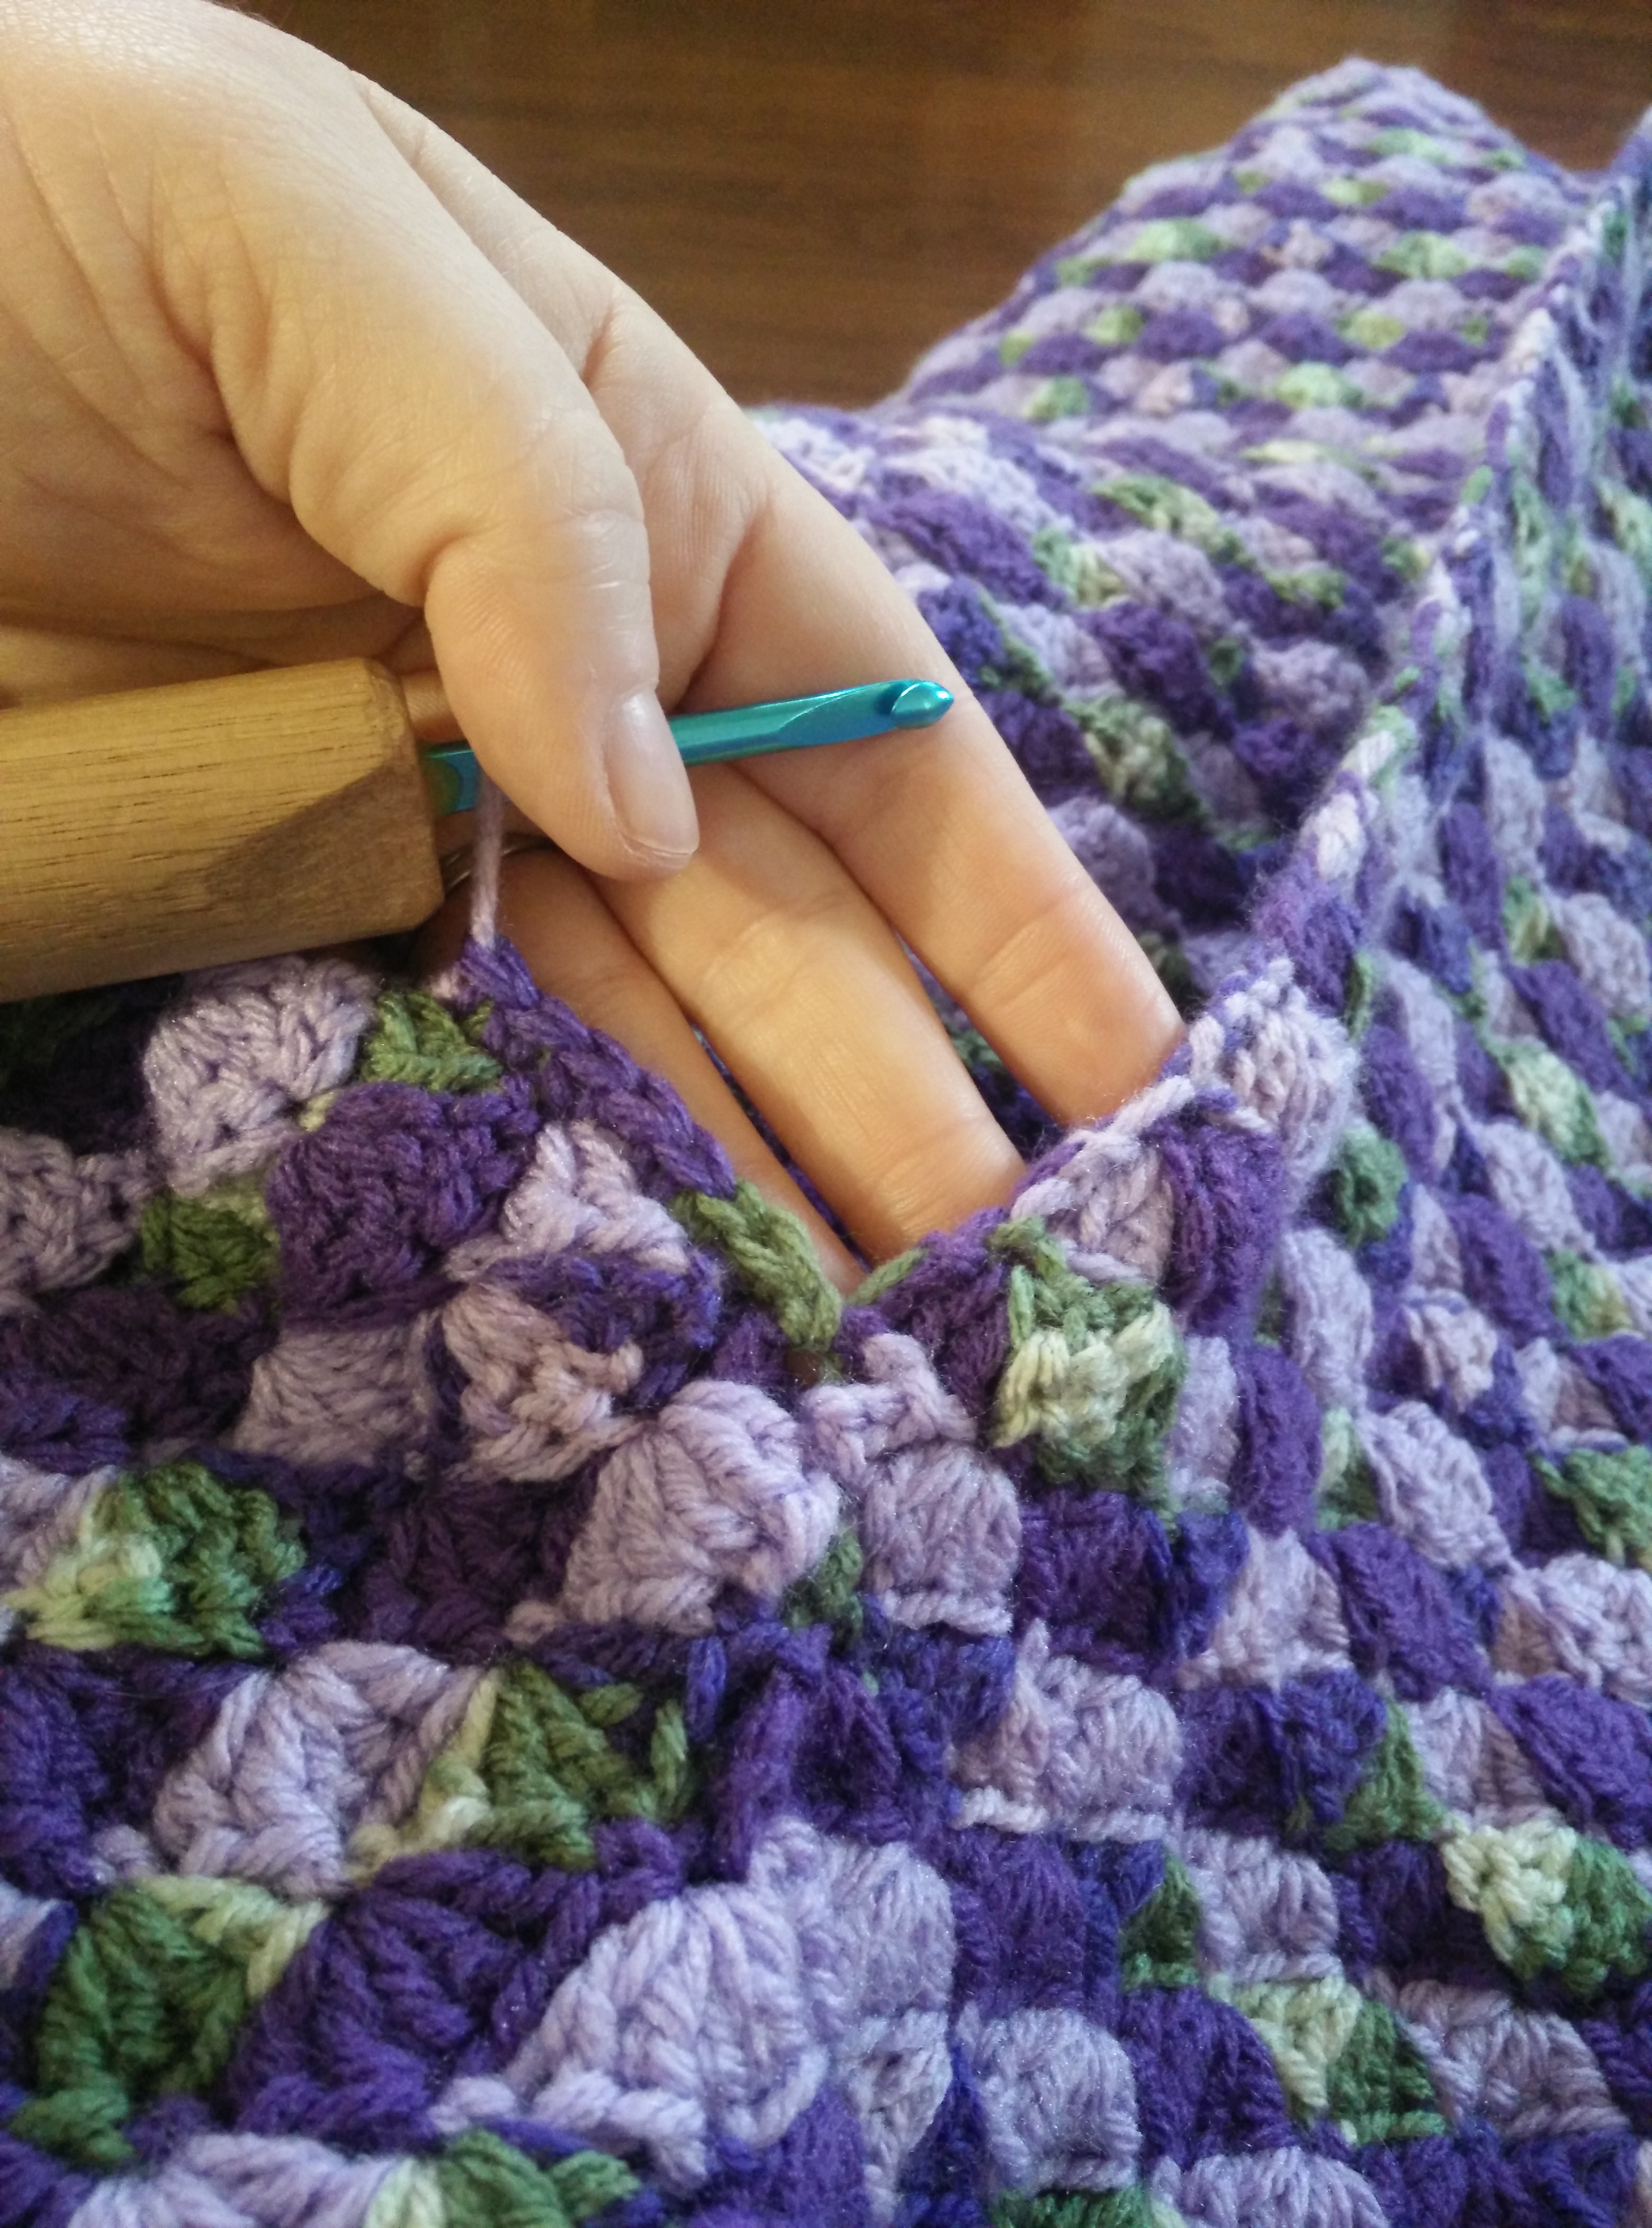
This free pattern is written by someone who is not a professional pattern writer. I applaud her efforts. To understand how she writes her pattern requires being very familiar with crochet terminology and patterns in general. Or locating instructions/terms unfamiliar to you in a crochet book or online crochet information source. Here is a great one:http://www.craftyarncouncil.com/crochet.html To help you decipher her instructions I suggest you copy and paste into a word processor and then begin labeling rows and rounds. Make sure you understand *the stitch pattern* (the crocodile stitch) as noted in the first paragraph following the initial chains: *sc in first dc, sk 2 dc, 5 dc in next, sk 2 dc* (this makes what I will call 5dc (stitch) pattern for the rest of the (mermaid) pattern) My (stitch) pattern ended on a sc. ch 2 and turn”
Note on the color changes. I started changing color after the first 5dc pattern row and changed color after each row. Being that I was using 3 different yarns that made things easier and less ends to weave in because I never bound off at the end of the row. I simply dropped one color, picked up the next and went. Now, I did NOT carry behind the work. I truly just let it stay there. Believe it or not, it works and doesn’t mess up the color pattern you are doing. After you have all three colors joined in you will see that when you end a row you just pick up the strand you had left before. Sounds so much more difficult than it really is, but so much a time saver not having to weave in all those ends.
Also note. Your work might not be the exact same counts as mine. That’s cool. It might end on a sc where I had 3dc. That’s cool. It is really just that 5 dc shell pattern you want for the scales. If your row ends on a sc, ch 2 turn, 2dc in first then go with the pattern. If your row ends on a dc group, sc in last st, ch 1 turn and sc in first the go with the pattern. It is really simple once you get used to it.
To start, ch 153 (this gave me the width I was looking for, so if you are altering for a different size start with a chain that works for your project)
dc in third chain and across, chain 1
*sc in first dc, sk 2 dc, 5 dc in next, sk 2 dc* (this makes what I will call 5dc pattern for the rest of the pattern) My pattern ended on a sc. ch 2 and turn
2dc in first st (that last sc), sk 2 st, sc in the 3rd dc of the 5 dc shell, sk 2 st, then follow the 5dc pattern until last sc where you only do 3dc, ch 1 and turn
sc in first st, sk 2 st, then follow the 5dc pattern until the end where you sc in that last st/dc. ch 2 and turn
Now you just do those last two rows for 72 5dc pattern rows. This made the lapghan go down to about the calf length (in case you are re-sizing the pattern).
Now we are going to start going in rounds instead of rows. How you might ask? Very carefully… Make sure when you pull the ends together the right side of the first row of dc is facing out. Or not, either way would be fine I imagine honestly. Just keep the strands of the none working yarn to the back/inside of the tail and change colors where it looks best to you.
What follows is how I brought the two sides together so I could work more of a spiral because that made things easier on me and doesn’t leave a seam. Truly, you could just do what makes sense to you as you look at the work in your hands. As long as you are still doing the 5dc pattern, it will all be good. Just relax and have a drink and go with it.
Sl st to the 1st dc of the row, ch 1, sc in joining, then proceed on with 5 dc pattern.
Sl st to 1st sc, changing colors, ch 2 and 4dc in same as join. 5 dc pattern to last sc. Now sc tog last sc to the 2nd dc from the beginning, make sure to change color.
Ch 1, sc in same as join then go on with the 5 dc pattern.
From here you should be able to just go in a spiral, changing colors as you get back to the start of the spiral. I did a total of 20 rounds counting from the beginning of the original join. This took the me down to about covering the foot when the foot is pointed.
Now you get to start bringing it in to a close. So that means you are almost done!
Keep doing the pattern and color changing around, but instead of the 5dc, do only 3dc, still skipping 2 stitches. On the 2nd, 3rd and 4th round only sk 1 st in-between the dc and the sc. Do this for a total of 4 3dc pattern rounds.
Then you are going to 3dc, sc tog (tog is also known as a decrease) where the next 2 sc would go (in the 2nd dc of the 3 dc group). Do your 3dc pattern until every 3rd sc spot, then sc tog.
Next round, change colors in the first sc spot, 3dc then sc tog (in the 2nd dc of the 3 dc group). Do your 3dc patten until every 3rd sc spot, then sc tog.
This next round 3dc, sc tog over the next 2 sc spot. Do your 3rd dc patten until every 3rd sc spot, then sc tog.
This should leave it almost closed up and you tired of turning your work around and around. So go ahead and change colors in the first sc, then sc tog where every sc spot should be for 2 rounds.
Bind off, and leave a tail so you can go ahead and sew the tail closed.
Join your yarn on the outside of the opening where you joined the rounds and sc around the opening. Placing 3 sc in the corners. Bind off and weave in the end.
Feels great to be done with that part doesn’t it? Now on to the much easier to do fin. Again, I sized it for the lapghan I was working on.
Fin
I did the fin in the variegated yarn. If you want a thicker fin, use two strands held together. The fin shape will have a straight side with the opposite side decreasing in, then increasing back out. The straight side will be the top where you do your sc tog to then sew it on the tail.
Another option on the tail can be found here (https://handcraftsofjoy.com/2015/10/14/handcrafts-of-joys-mermaid-tail-fin-pattern/) it works up well and it is a bigger version of what I did.
Ch 43
dc in 4th chain and dc across, ch 2 and turn
*dc tog, dc in rest of stitches, ch 2 and turn
dc across, dc tog in last two dc, ch 2 and turn*
repeat this pattern for a total of 5 times
now do 2 dc tog, dc in rest of stitches, ch 2 and turn
dc across and do 2 dc tog in last 4 st, ch 2 and turn
2 dc in each of the next 2 st, dc across, ch 2 and turn
dc across, put 2 dc in each of the last 2 dc, ch 2 and turn
*2 dc in first dc, dc across, ch 2 and turn
dc across, 2 dc in last st, ch 2 and turn*
repeat this pattern for a total of 5 times
dc across, ch 1 and turn
sc around, making sure to put 3 sc in the corners except the last corner you come to. Ch 1 and turn so that now you are working on the top of the fin (where you just have a bunch of dc, not the dc tog or 2dc)
sc tog across, ch 1
sc tog across, ch 1
*sc tog, sc* ch 1
*sc tog, sc * ch 1
bind off, leaving a long tail for sewing.
Now you are going to sew this where the bottom of your fin is… where you sewed it close. It is worth noting that I sewed the sides of the sc rows to the tail as well as the sc. I thought it looked better and helped hold the fin out.
Operating this blog takes money and with thousands of hits a day it's not an insubstantial cost. This site will always remain ad-free but if you are able we appreciate any support you can offer!!


Recent Comments