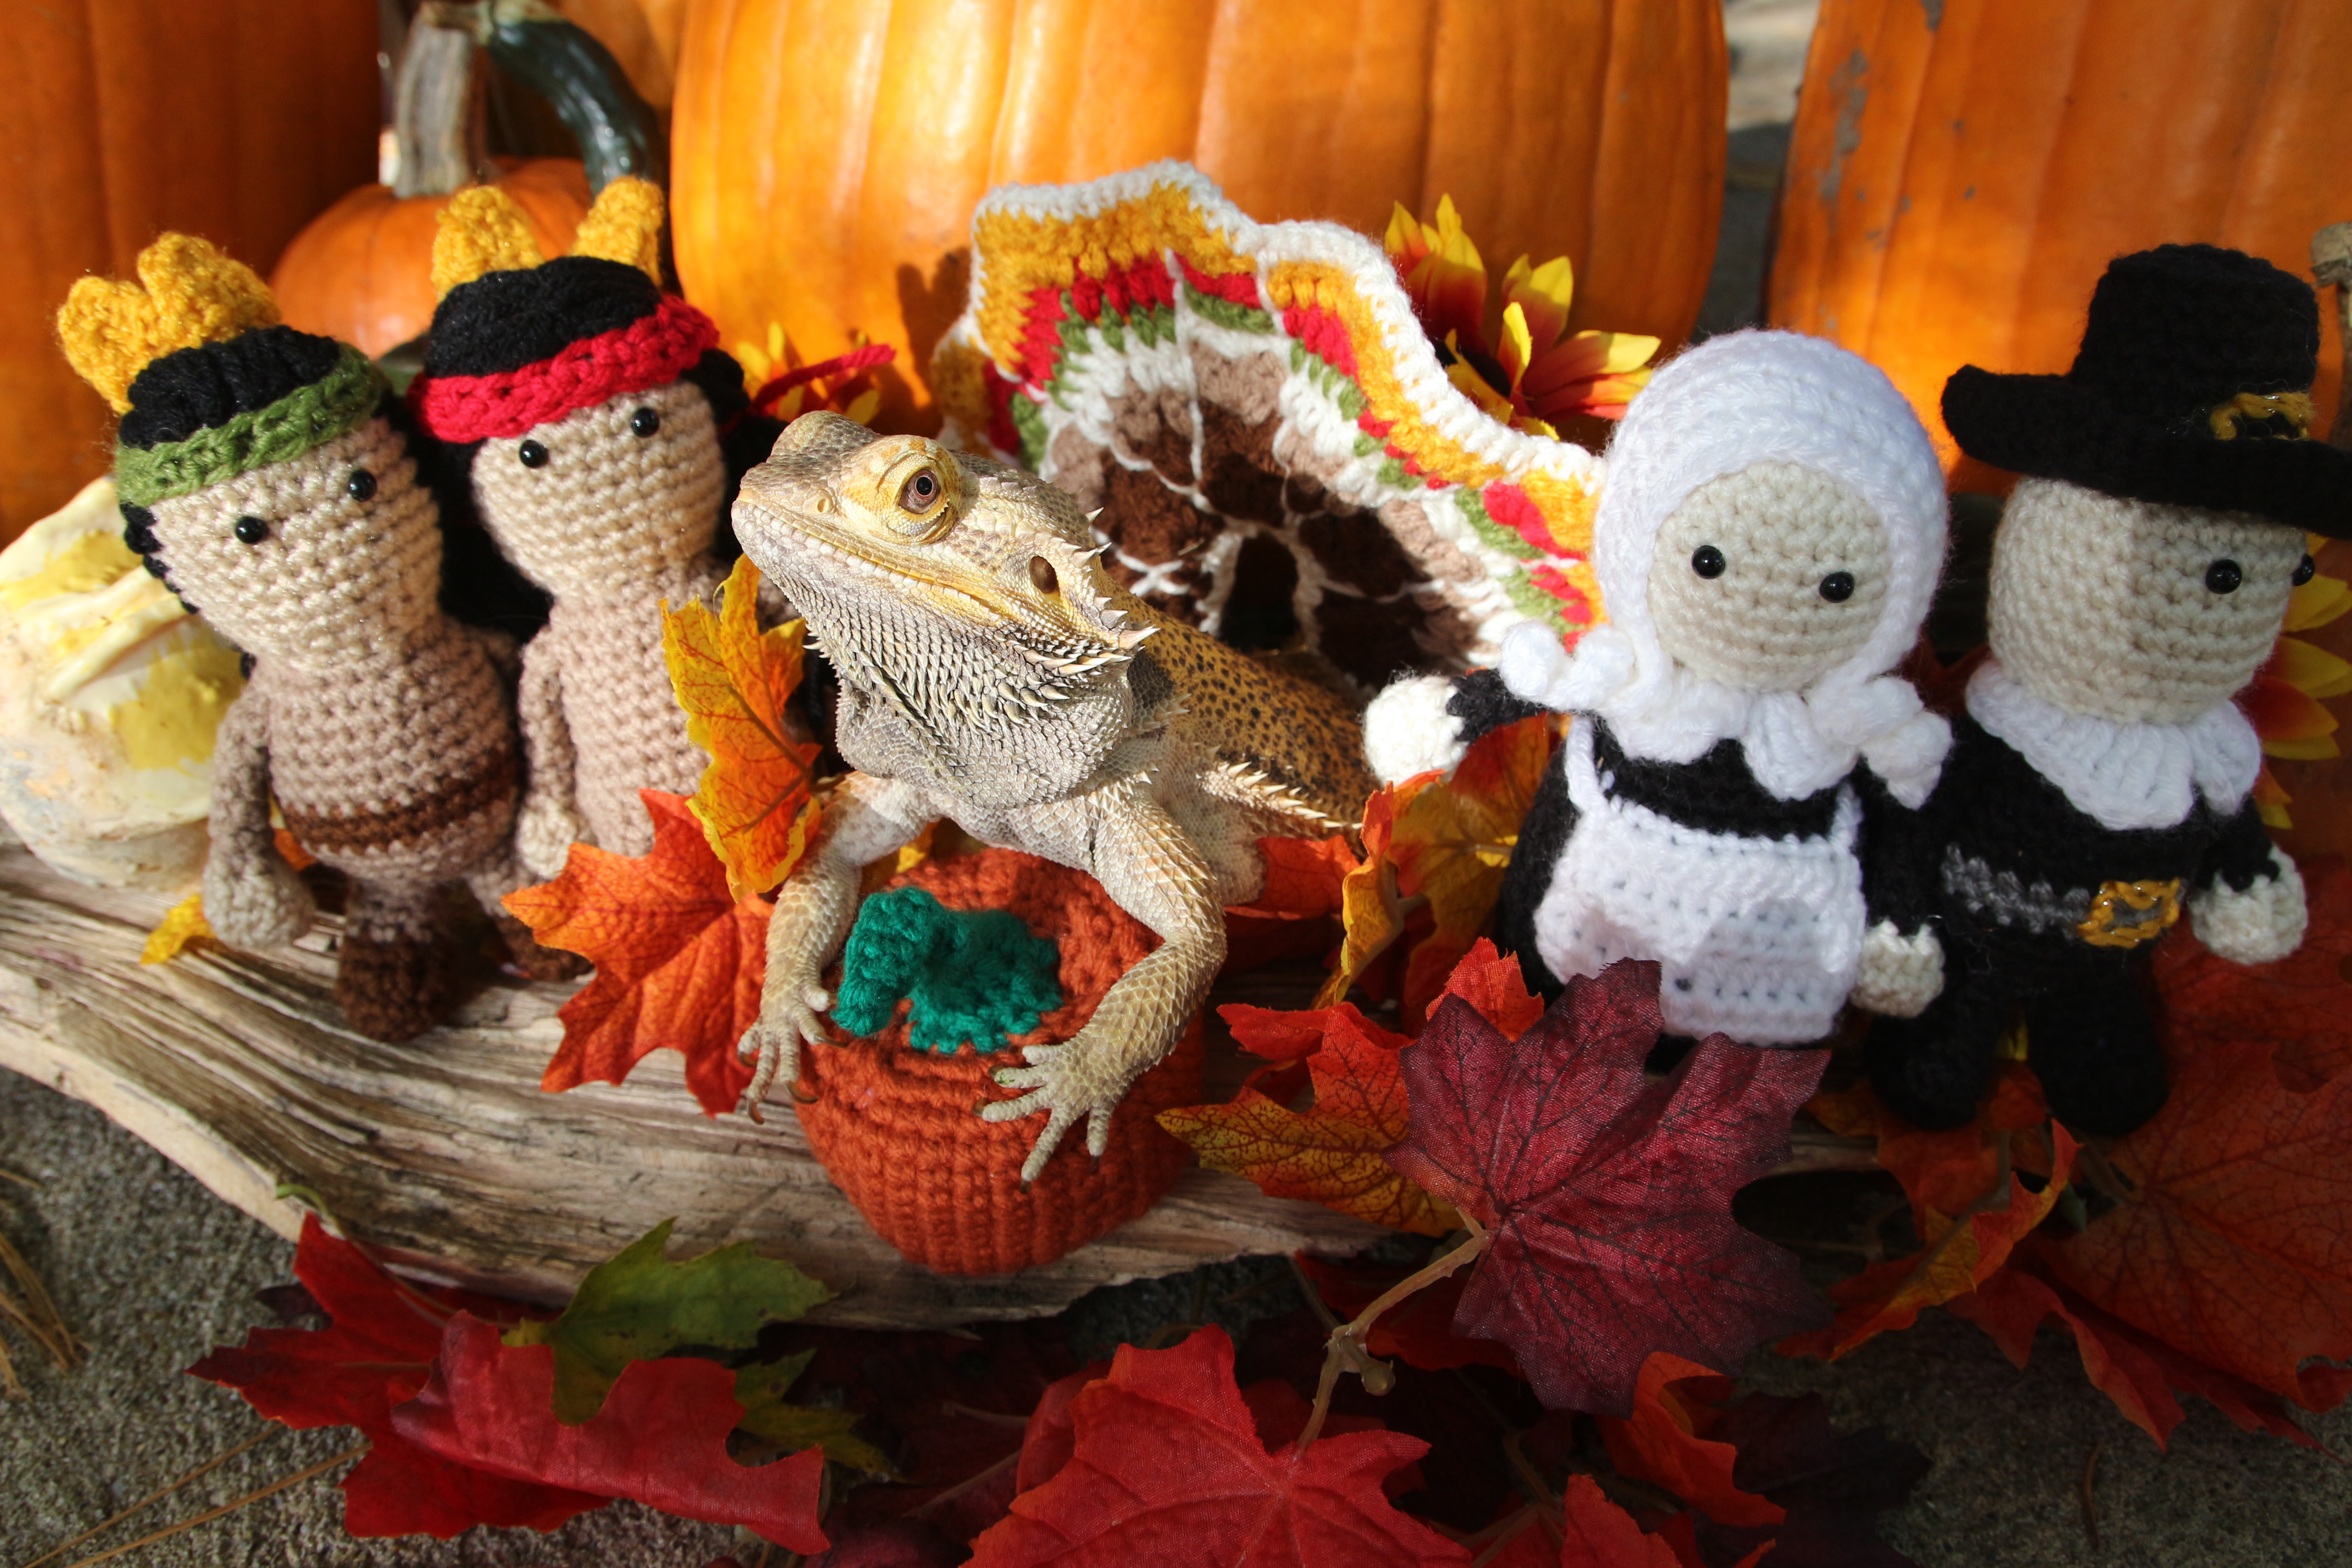
So as some of you know I have been working on a Norbert Calendar of sorts… essentially our bearded dragon dressed up in crochet with other crochet items around him. Silly, yes, but it has been so fun honestly. Well I was on to month November and could not find a set of Pilgrims and Indians (those being the hardest) that would work. In typical fashion then here goes my own pattern in case others need or want to make up some. They should be roughly 6 inches tall, but the hats make them a little bigger… Also, no, these are not historically correct, they are simple little patterns for what I had in my head as a typical set from when I was growing up. Also, yes, I know I should say Native Americans and no, I’m not going to enter in that debate…
For the base of the body I turned to a wonderful pattern already done since it met my needs for the most part. You can find the basic pattern here in case you want to use it (http://www.amigurumitogo.com/2015/08/wee-ones-basic-body-pattern.html). Also, check out the other patterns she has listed… very nice work!
Using a G hook with some miscellaneous worsted weight yarn I had around and poly fil for stuffing. I went with 6mm safety eyes as well.
Starting with the Pilgrims
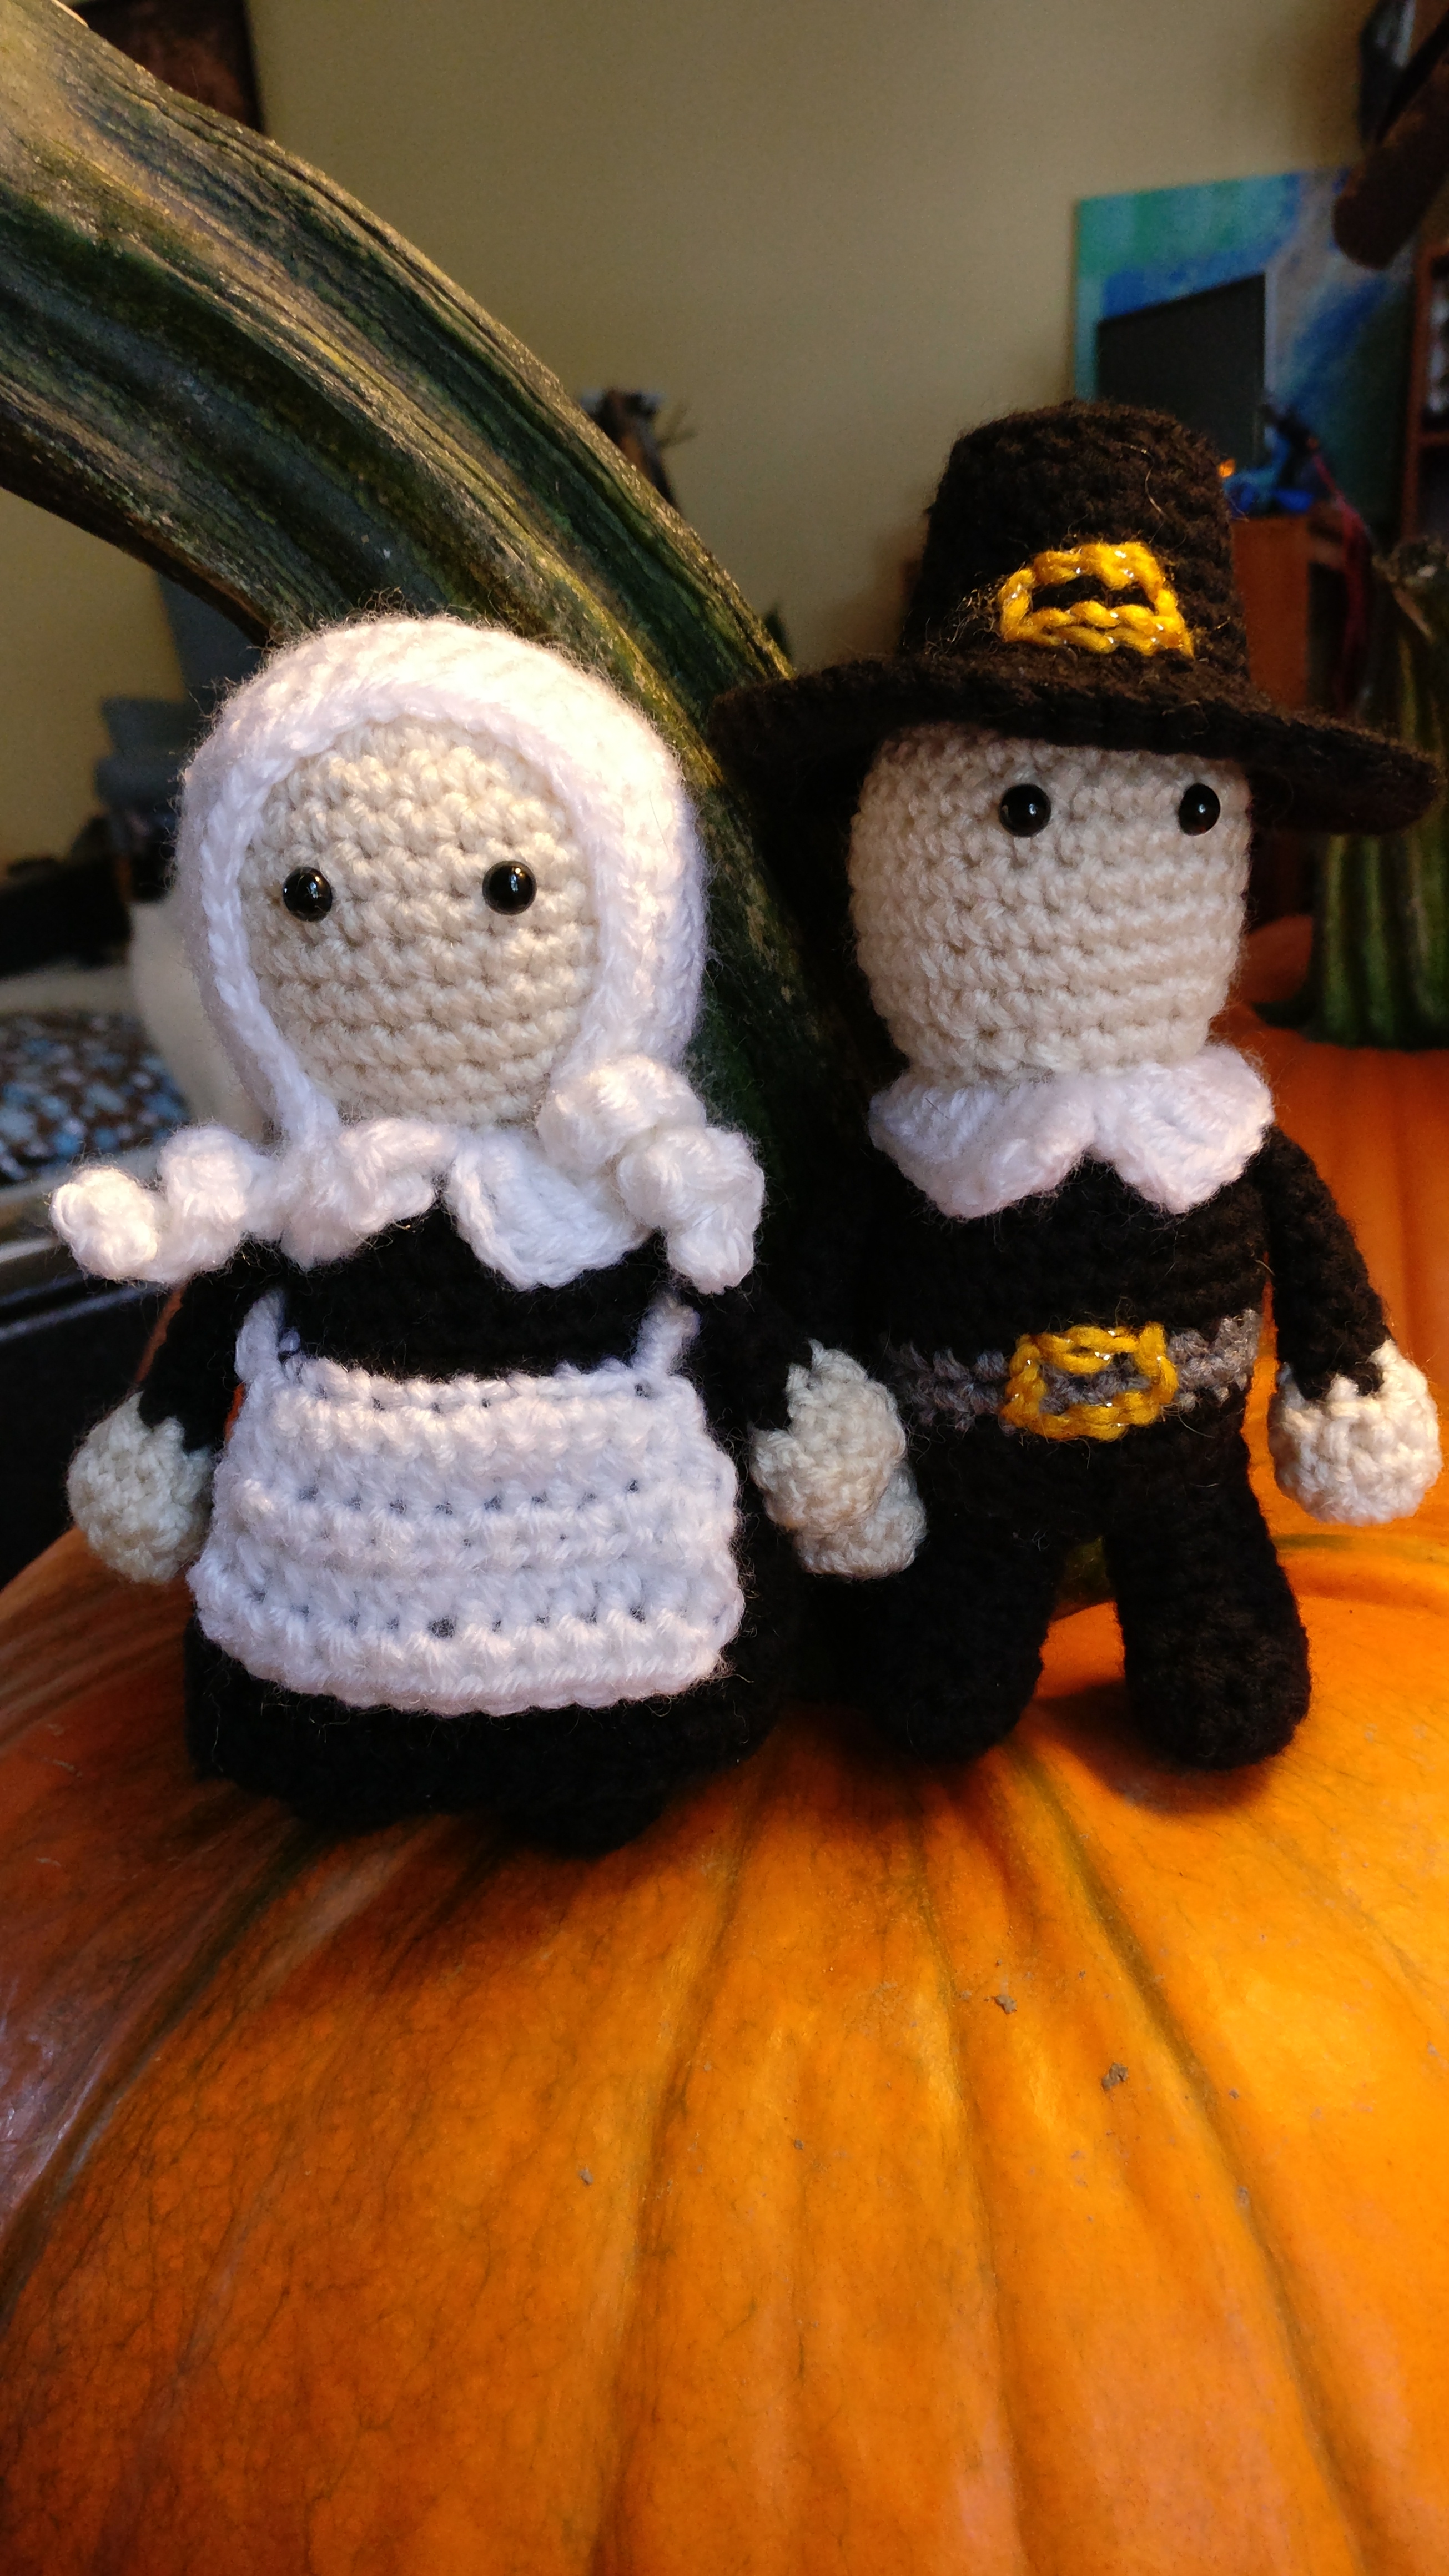
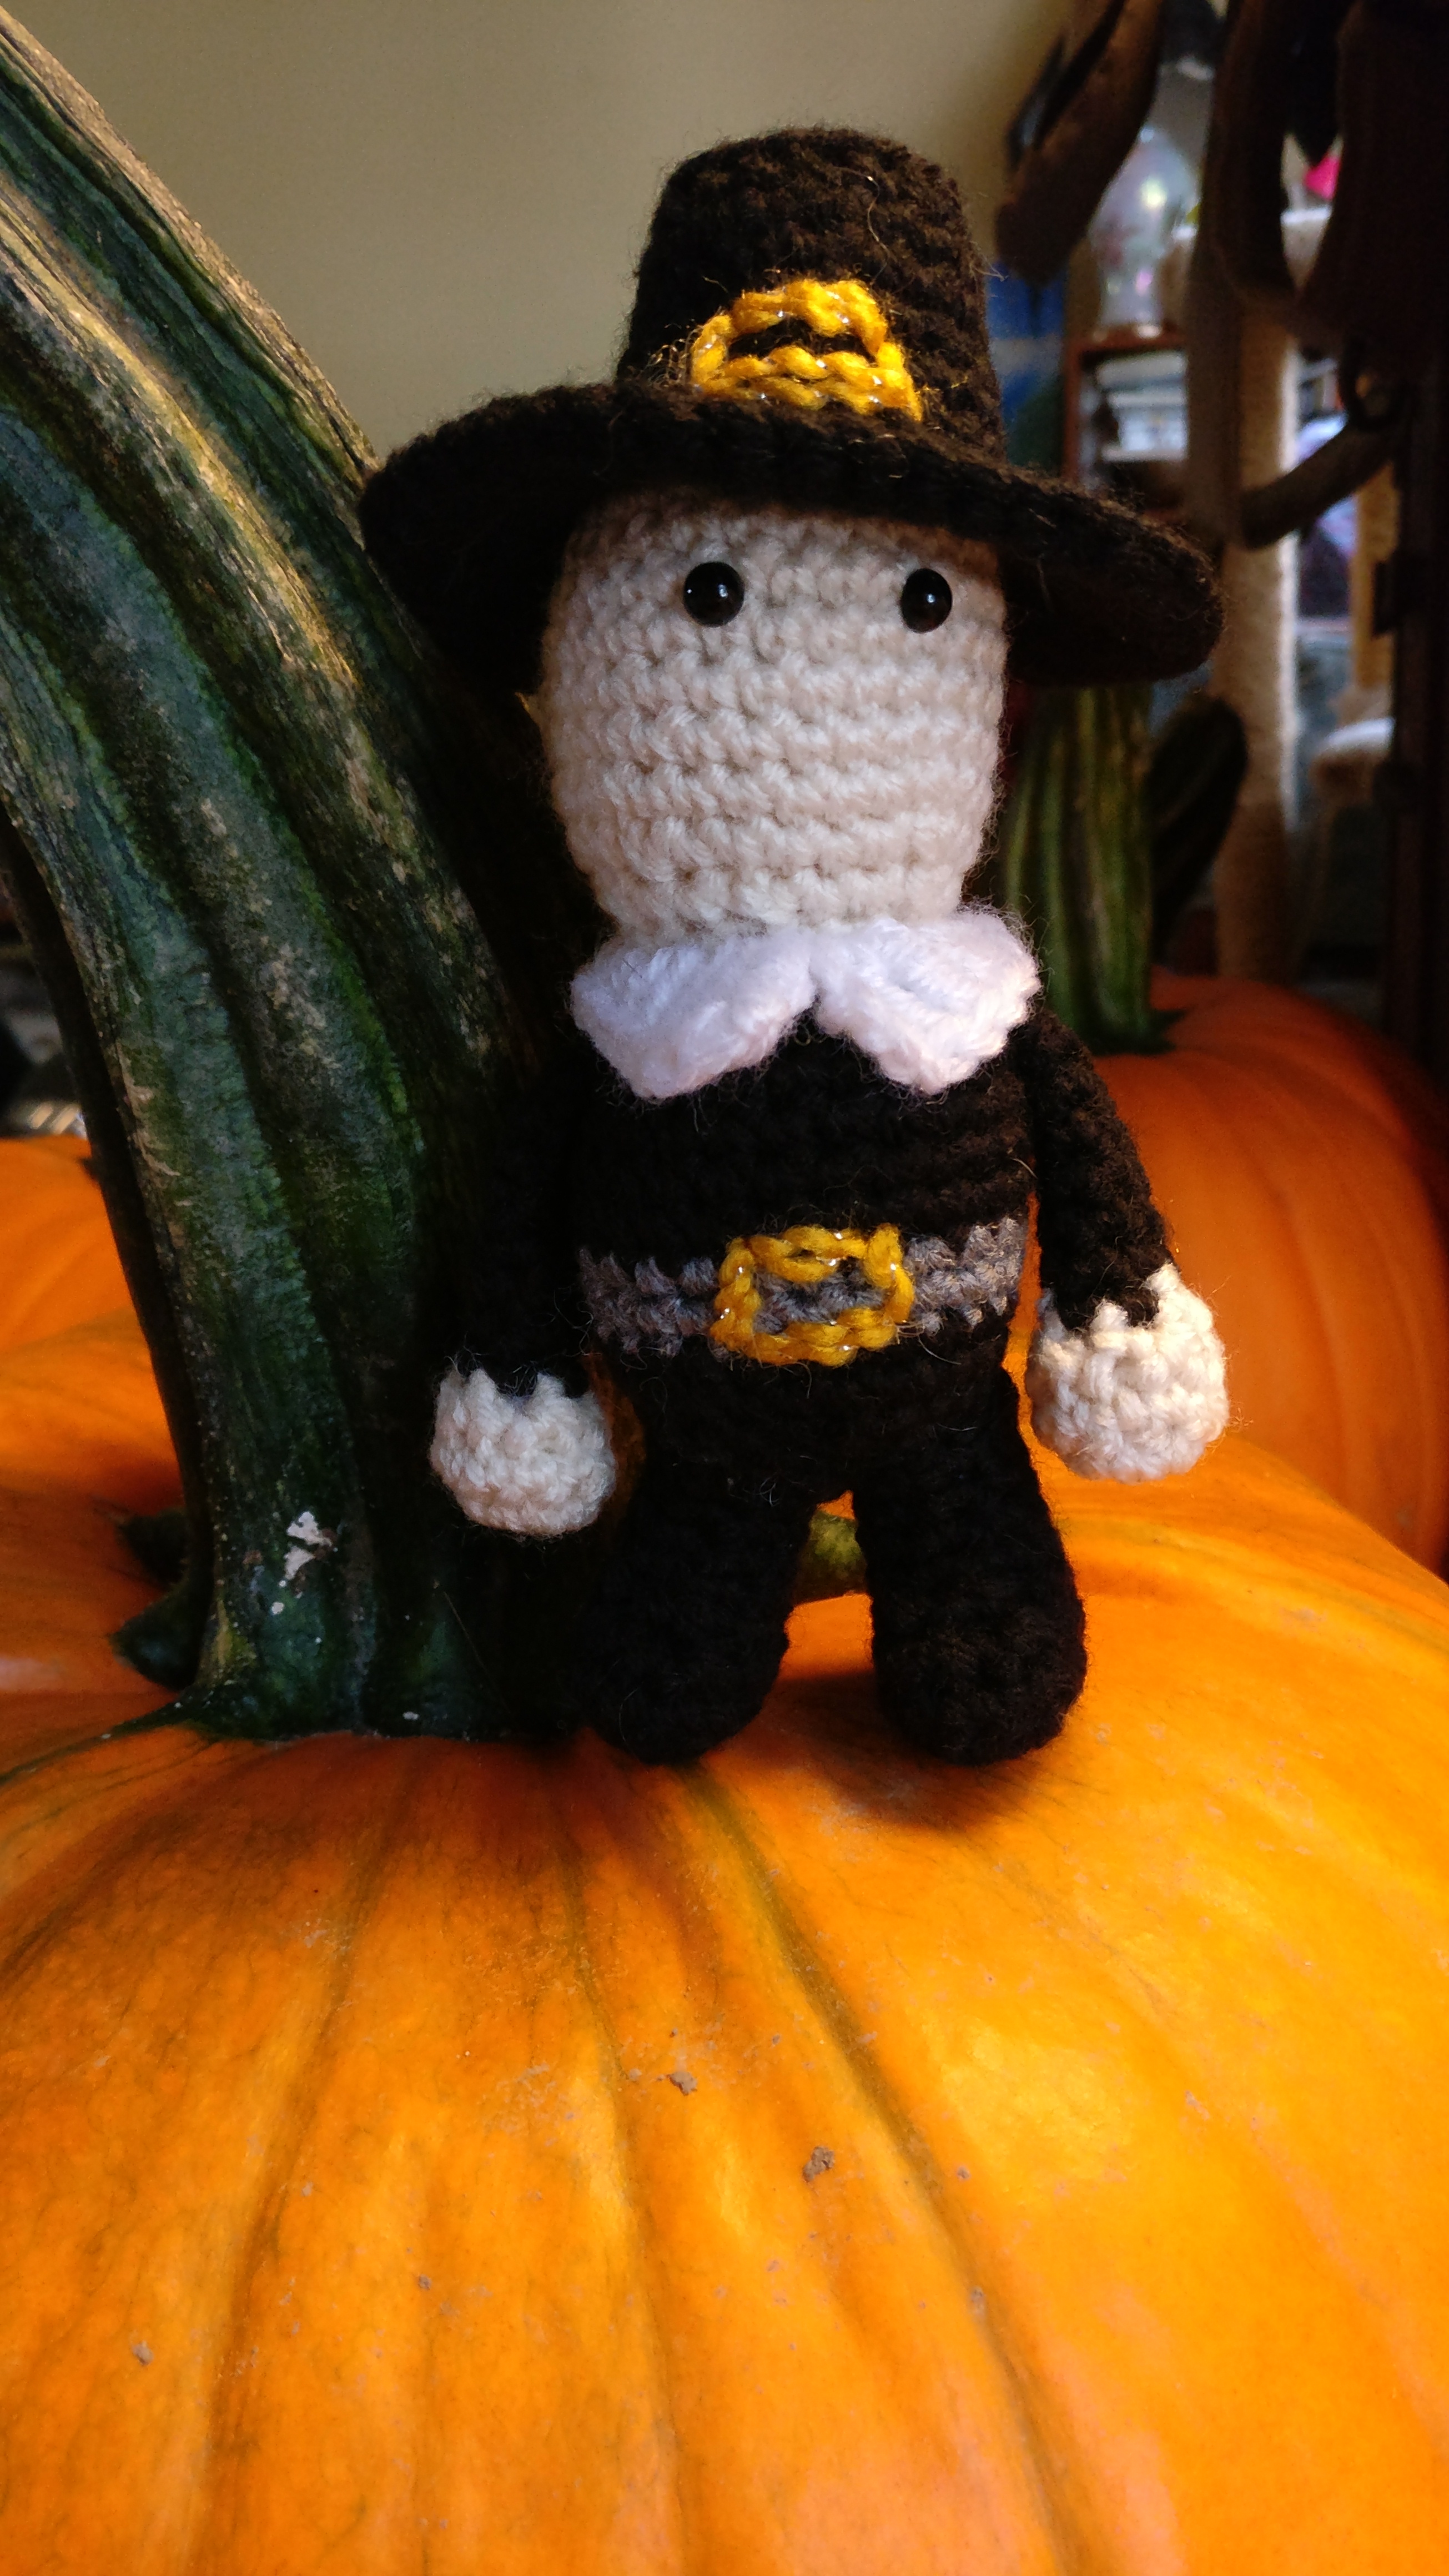
Pilgrim Boy
start with skin color
1) magic circle with 6st (6)
2) 2sc in each st (12)
3) 1sc then 2sc in next st (18)
4) 1sc in next 2st then 2sc in next st (24)
5) 1sc in next 5st then 2sc in next st (28)
6-11) 1sc in each st for 6 rows
go ahead and insert safety eyes roughly between rows 7 and 8 about 3 stitches apart
12) 1sc in next 5st then 2tog (24)
13) 1sc in next 2st then 2tog (18)
14) 1sc then 2tog (12)
switch to black
15) IN BLO, 1sc then 2sc in next st (18)
16) 1sc in next 2st then 2sc in next st (24)
17-20) 1sc in each st for 4 rows
change to grey
21-22) 1sc in each st for 2 rows
change back to black
23-24) 1sc in each st for 2 rows
*stuff head, shape while stuffing
25) 1sc in next 2st then 2tog (18)
26) 1sc then 2tog (12)
*stuff body, make sure to stuff more into the head and neck area as needed.
27) 2tog around (6) bind off and sew opening closed.
Legs, make two in black, stuff as you go and sew to bottom of body
1) magic circle or an adjustable loop with 6st (6)
2) 2sc in each st (12)
3) 1sc in each st for 1 row
4) 2tog twice then 1sc in next 8st (10)
5) 2tog twice then 1sc in next 6st (8)
6-8) 1sc in each st for 3 rows
9) 1sc in next st, 2sc in next st
f/o leaving a tail for sewing.
Arms, make two starting with skin color and lightly stuff in skin color part only. You will be sewing it to the sides of the body roughly between rows 16/17.
1) magic circle or an adjustable loop with 6st (6)
2) 2sc in each st(12)
3) sc in each st
4) 2tog 6 times
switch to black
5-10) 1sc in each st for 6 rows
sc through both thickness for 3 sc, f/o and leave a tail for sewing.
Pilgrim Collar
So for this it is going to be a bit tricky at first. With the body of the pilgrim facing head down attach your yarn in the FLO at the neck where you worked in the BLO. Your first st will be just to the right of the right eye (when the pilgrim is right side up).
1) ch 4 and 2 tc in the same st
do 2dc in next st
2hdc in each st until the last 2 st
then 2 dc in next st
3tc in the next st, bind off and weave in the end
Pilgrim Hat
In black
1) magic circle or an adjustable loop with 6st (6)
2) 2sc in each st (12)
3) 1sc then 2sc in next st (18)
4) in BLO sc around
5-6) sc around
7) 1 sc in next 2 then 2sc (24)
8-9) sc around
10) in FLO 1sc in next 3 then 2sc (30)
11) 1sc in next 4 then 2sc (36)
12) 1sc in next 5 then 2sc (42)
13) 1sc in next 6 then 2sc (48)
14) sc around
Bind off, leaving a tail for sewing. Weave the tail back to row 10 and sew on top of your Pilgrim’s head, making sure to stuff lightly before completely sewing close.
Lastly go ahead and sew on a belt buckle and a buckle on the hat… then a nose and mouth if you wish.
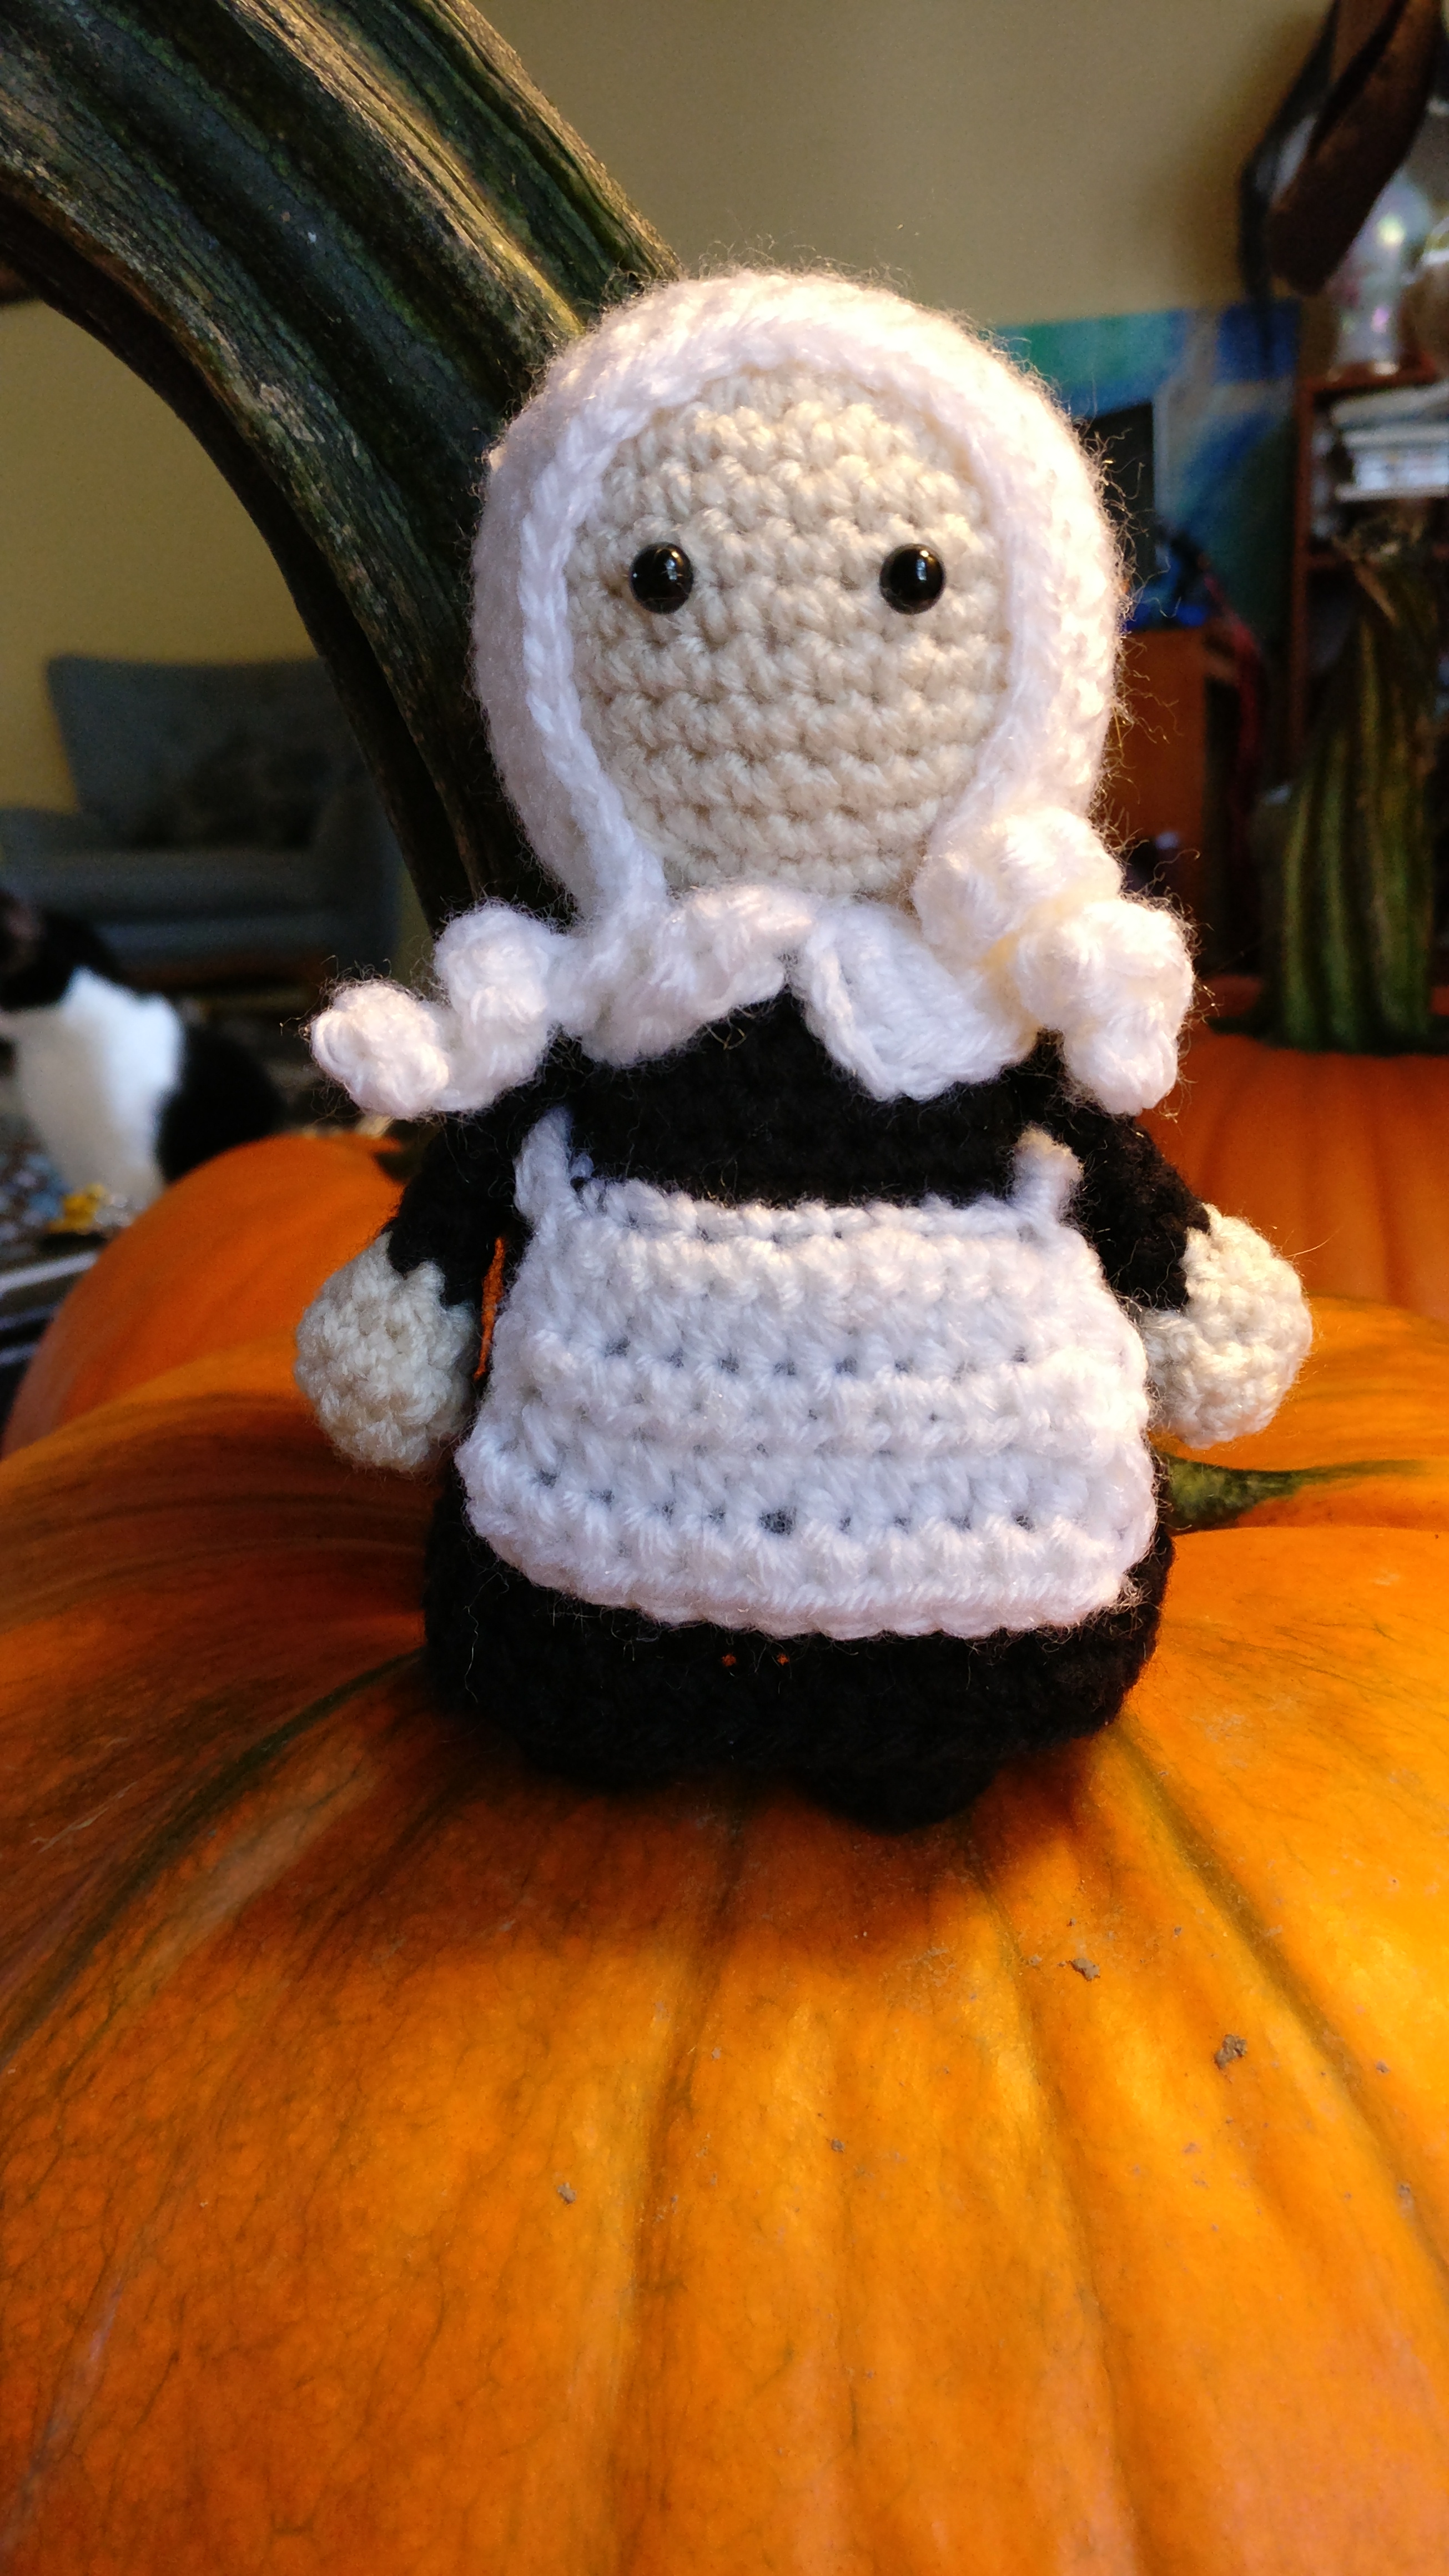
Pilgrim Girl
start with skin color
1) magic circle with 6st (6)
2) 2sc in each st (12)
3) 1sc then 2sc in next st (18)
4) 1sc in next 2st then 2sc in next st (24)
5) 1sc in next 5st then 2sc in next st (28)
6-11) 1sc in each st for 6 rows
go ahead and insert safety eyes roughly between rows 7 and 8 about 3 stitches apart
12) 1sc in next 5st then 2tog (24)
13) 1sc in next 2st then 2tog (18)
14) 1sc then 2tog (12)
switch to black
15) IN BLO, 1sc then 2sc in next st (18)
16) 1sc in next 2st then 2sc in next st (24)
17) In BLO 1 sc in each
18-24) 1sc in each st for 7 rows
*stuff head, shape while stuffing
25) 1sc in next 2st then 2tog (18)
26) 1sc then 2tog (12)
*stuff body, make sure to stuff more into the head and neck area as needed.
27) 2tog around (6) bind off and sew opening closed.
Legs, make two in black, stuff as you go and sew to bottom of body
1) magic circle or an adjustable loop with 6st (6)
2) 2sc in each st (12)
3) 1sc in each st for 1 row
4) 2tog twice then 1sc in next 8st (10)
5) 2tog twice then 1sc in next 6st (8)
6-8) 1sc in each st for 3 rows
9) 1sc in next st, 2sc in next st
f/o leaving a tail for sewing.
Arms, make two starting with skin color and lightly stuff in skin color part only. You will be sewing it to the sides of the body roughly between rows 16/17.
1) magic circle or an adjustable loop with 6st (6)
2) 2sc in each st(12)
3) sc in each st
4) 2tog 6 times
switch to black
5-10) 1sc in each st for 6 rows
sc through both thickness for 3 sc, f/o and leave a tail for sewing.
Pilgrim Collar
So for this it is going to be a bit tricky at first. With the body of the pilgrim facing head down attach your yarn in the FLO at the neck where you worked in the BLO. Your first st will be just to the right of the left eye (when the pilgrim is right side up), essentially in the middle.
1) ch 4 and 2 tc in the same st
do 1 tc and 1dc in next st
2hdc in each st until the last 2 st
then 2 dc and 1tc in next st
3tc in the next st, bind off and weave in the end.
Pilgrim Dress
So with doll facing you count 4 st to the left from center of the FLO of row 17 and place a marker here. Now attach your black yarn at the back of the doll (doll now head down) in the FLO of the BLO only row from the body.
1) sc around, move your marker up to this row, Sl st to first hdc
2) hdc around until you get to your marker. At the marker hdc in BLO for the next 8 st (you don’t need the marker anymore unless you want to leave it so it is easier to find this spot again for the apron part). Hdc in the rest of the st using both loop around, Sl st to first hdc
3) 3 hdc, 2 hdc in next st around . Sl st to first hdc.
4-7) hdc around, Sl st to first hdc. Bind off and weave in ends.
Apron
1) ch 22 then attach your yarn to the FLO of the 2nd row of the dress and sc in the 8 st. ch1 and turn
2) 1 hdc then 2 hdc in next across, ch1 and turn
3-6) hdc across, ch 1 and turn. After last row bind off and weave in ends. The beginning ch should be sewn around the back of the body to the other side of the apron.
Pilgrim Bonnet
done in white
1) magic circle with 6st (6)
2) 2sc in each st (12)
3) 1sc then 2sc in next st (18)
4) 1sc in next 2st then 2sc in next st (24)
5) 1sc in next 3st then 2sc in next st (30)
6) 1 sc in next 24 st, ch 1 and turn
7-10) hdc in next 24 st, ch 1 and turn
11) ch 10 then starting in 2nd ch, 2sc in each ch going back up to the bonnet. Sc around the bottom of the bonnet to the other side then ch 10 then starting in 2nd ch, 2sc in each ch going back up to the bonnet. Sc around the front to the other tie then bind off, leaving a tail to sew on to the Pilgrim head. Now, to note, I did design the hat a little bit bigger than absolutely necessary. This I did in case I wanted to add hair, but I choose not to. Just know that it might be a little loose or you can add hair if you want.
Now for the Indians
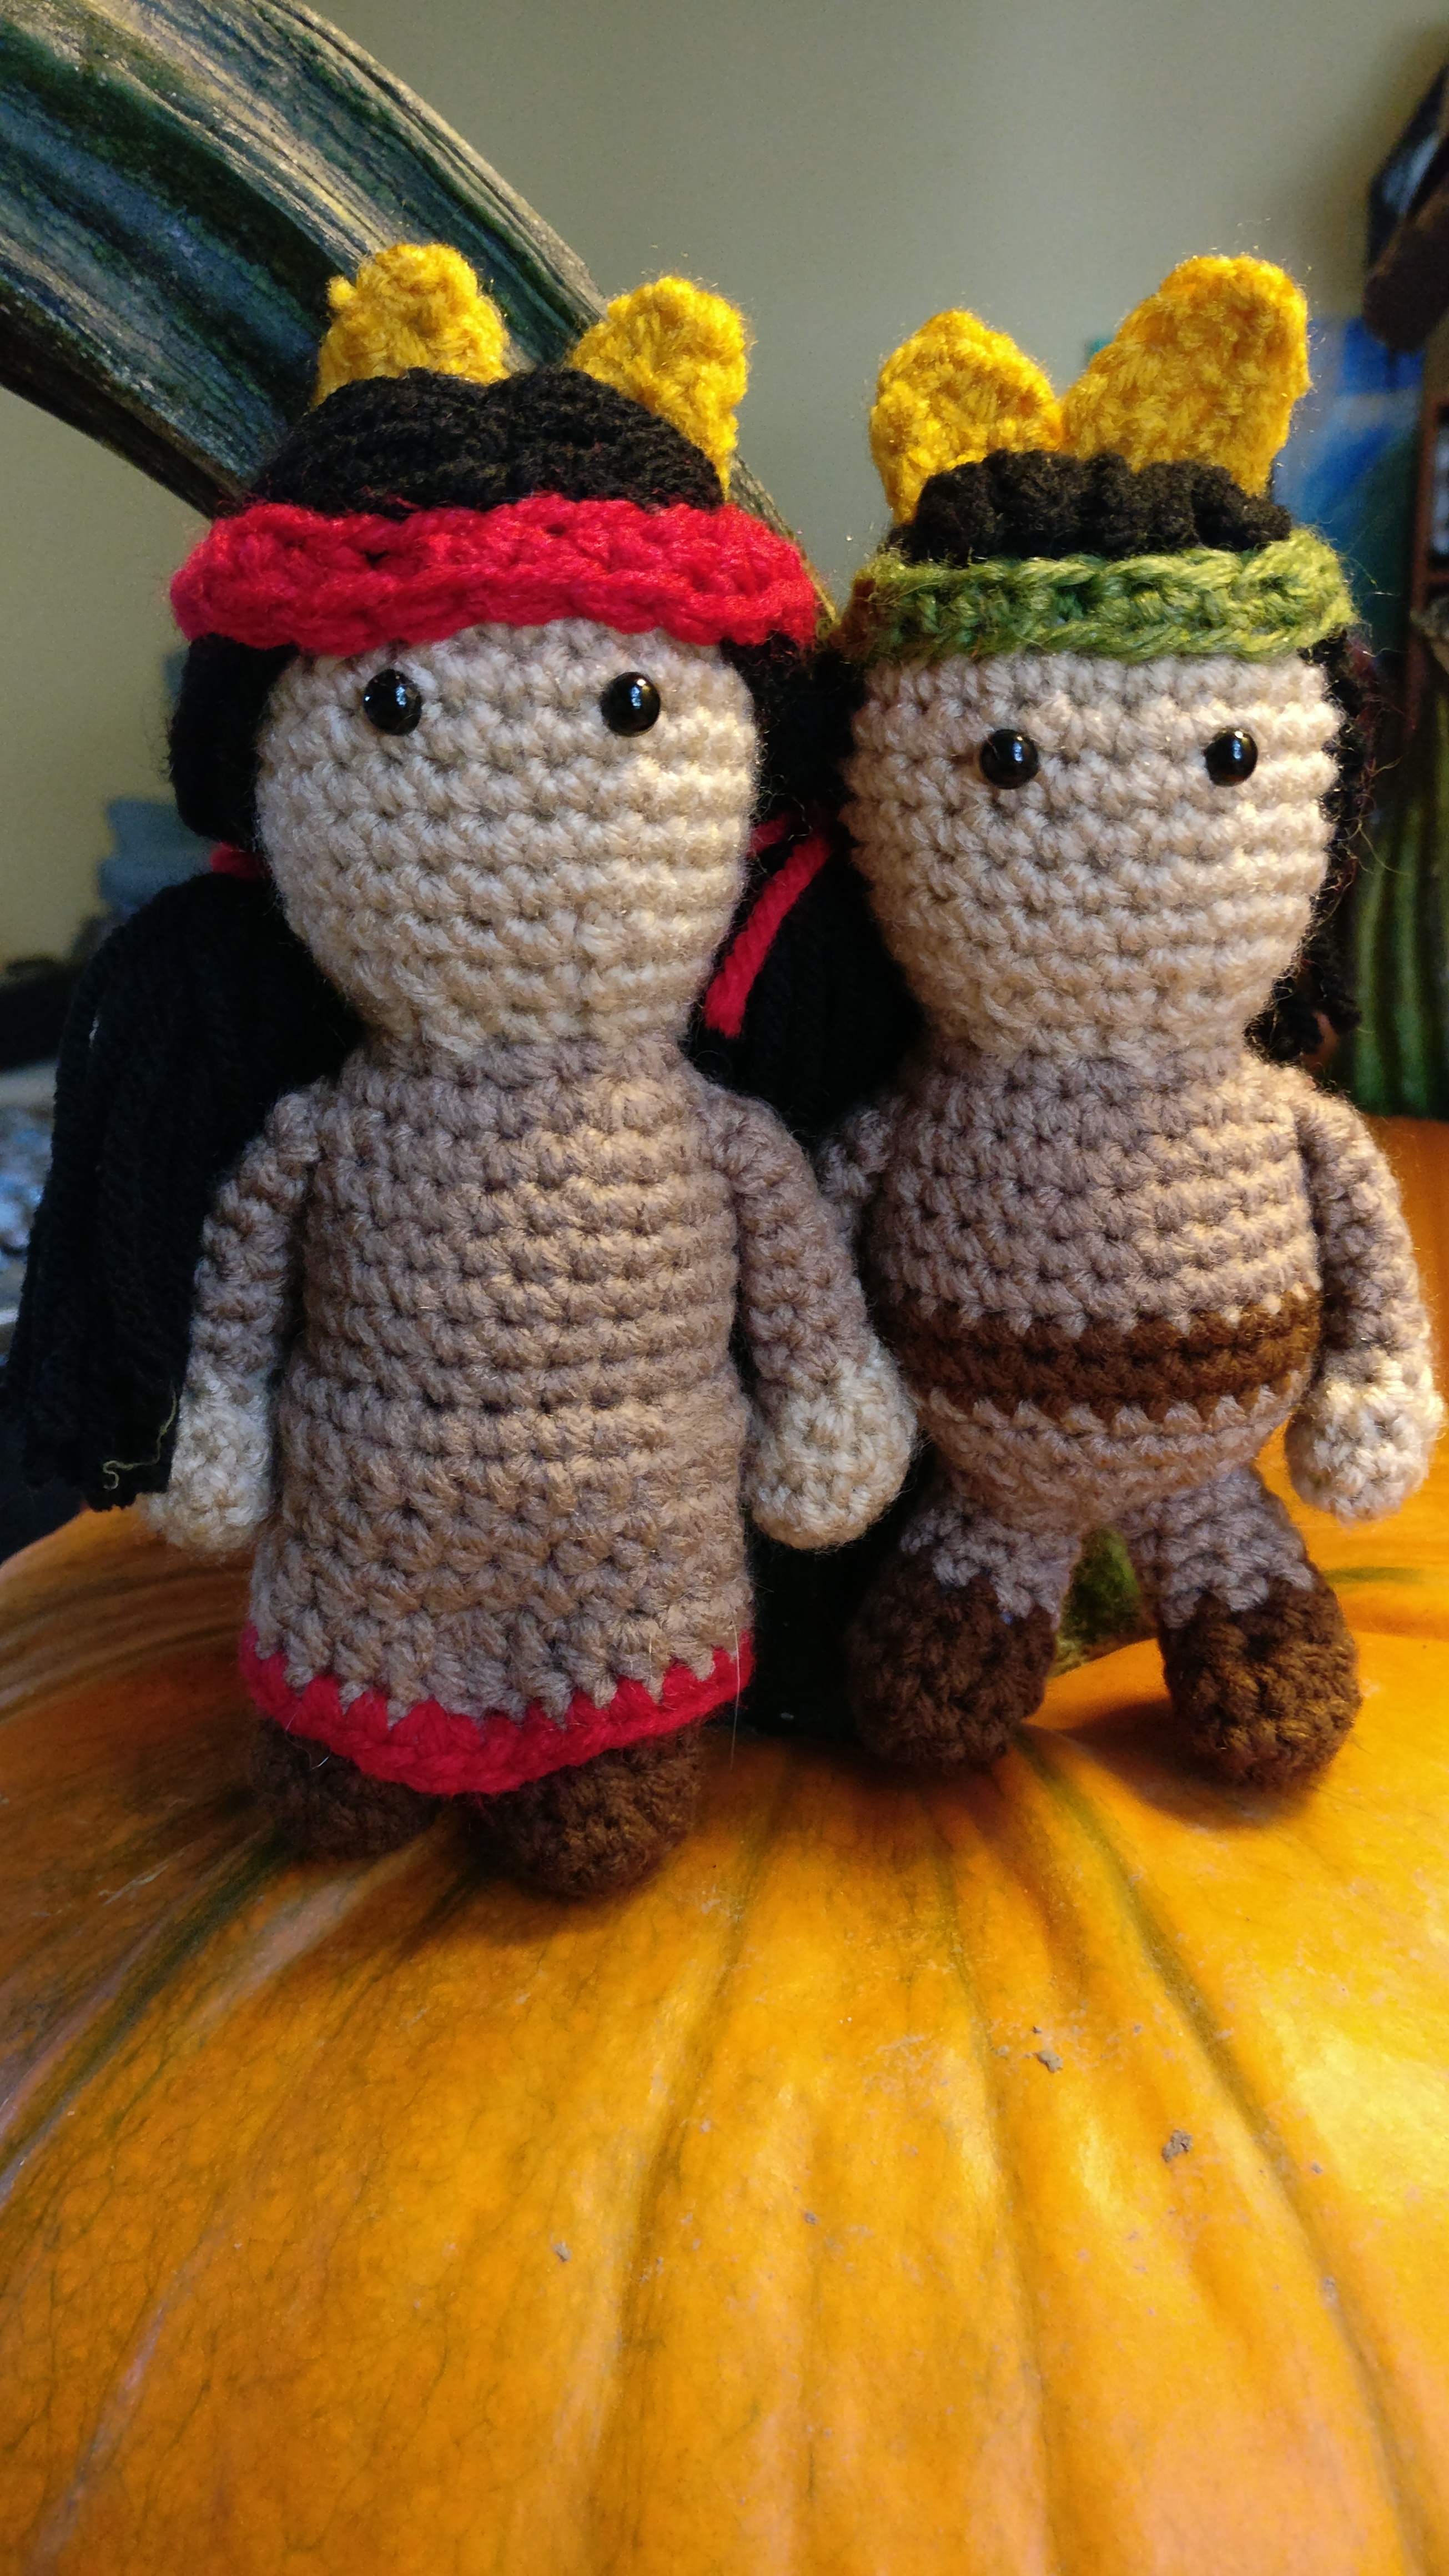
Indian Boy
start with skin color
1) magic circle with 6st (6)
2) 2sc in each st (12)
3) 1sc then 2sc in next st (18)
4) 1sc in next 2st then 2sc in next st (24)
5) 1sc in next 5st then 2sc in next st (28)
6-11) 1sc in each st for 6 rows
go ahead and insert safety eyes roughly between rows 7 and 8 about 3 stitches apart
12) 1sc in next 5st then 2tog (24)
13) 1sc in next 2st then 2tog (18)
14) 1sc then 2tog (12)
switch to medium brown
15) 1sc then 2sc in next st (18)
16) 1sc in next 2st then 2sc in next st (24)
17-20) 1sc in each st for 4 rows
change to dark brown
21-22) 1sc in each st for 2 rows
change back to medium brown
23-24) 1sc in each st for 2 rows
*stuff head, shape while stuffing
25) 1sc in next 2st then 2tog (18)
26) 1sc then 2tog (12)
*stuff body, make sure to stuff more into the head and neck area as needed.
27) 2tog around (6) bind off and sew opening closed.
Legs, make two starting with the dark brown, stuff as you go and sew to bottom of body
1) magic circle or an adjustable loop with 6st (6)
2) 2sc in each st (12)
3) 1sc in each st for 1 row
4) 2tog twice then 1sc in next 8st (10)
5) 2tog twice then 1sc in next 6st (8)
switch to light brown
6-8) 1sc in each st for 3 rows
9) 1sc in next st, 2sc in next st
f/o leaving a tail for sewing.
Arms, make two starting with skin color and lightly stuff in skin color part only. You will be sewing it to the sides of the body roughly between rows 16/17.
1) magic circle or an adjustable loop with 6st (6)
2) 2sc in each st(12)
3) sc in each st
4) 2tog 6 times
switch to medium brown
5-10) 1sc in each st for 6 rows
sc through both thickness for 3 sc, f/o and leave a tail for sewing.
Hair
So I decided the hair was the next step. I simply cut some black yarn about 10-12 inches long and latch hooked them in the head just at the front hair line. I didn’t have a reason to do the whole head, but if you want have fun. I then tied the hair at the nape of the neck with a piece of red yarn. Gave him a slight trim and that was his hair…
Headdress
With a green I simply did a chainless sc foundation row (or if you want a chain then go back and sc the length of the chain) the length that would fit his head. This will depend slightly on how thick his hair is and your crochet style. For me, it was a total of 22.
Now for the feathers. This is really just like a simple leaf pattern. Make as many as you want to decorate the back of the headdress and in your chosen colors.
1) ch 7, then sc, sc, hdc, dc,hdc, sc
2) now working in the opposite side of the chain, sc, hdc, dc, hdc, sc, sl st. Leave a long tail, weave it back to the bottom of the feather (gives it more stability and helps to close up any spaces) and sew it to the beginning of the chainless sc foundation row. This is going to be the back of the headdress with the feathers against the hair when you sew it on the head.
Go ahead and finish sewing the headdress on around his head.
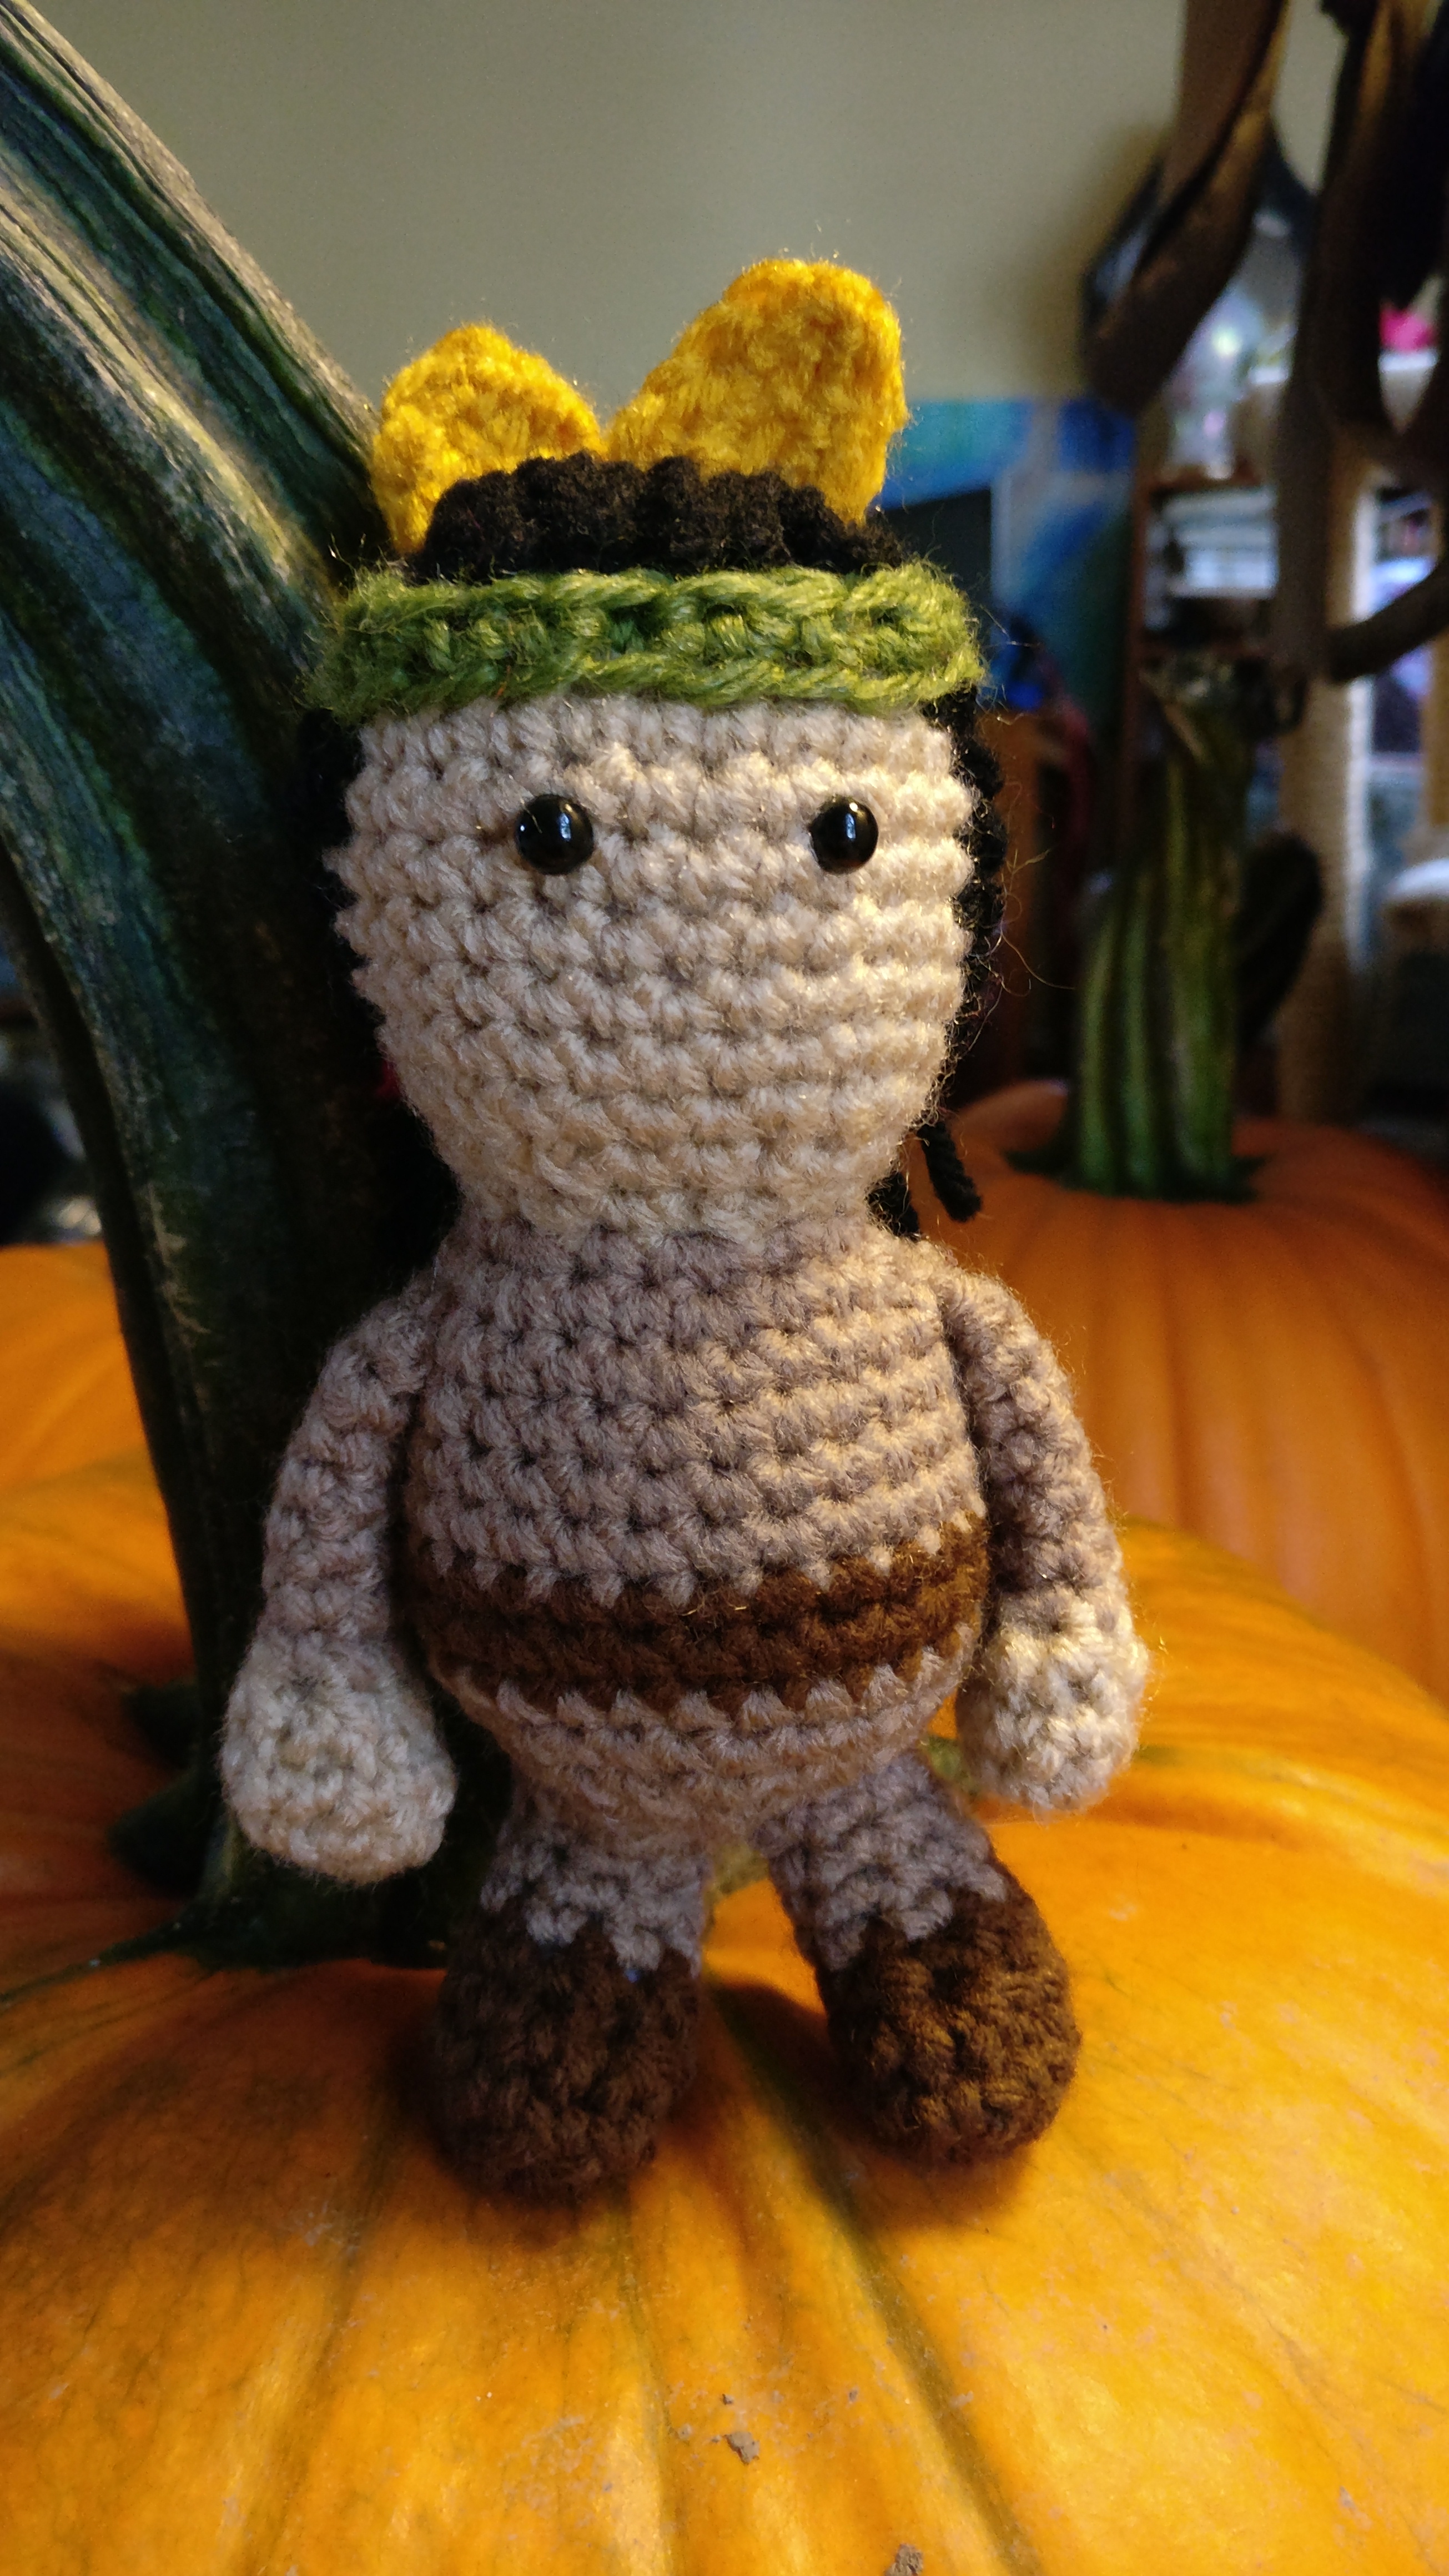
Indian Girl

start with skin color
1) magic circle with 6st (6)
2) 2sc in each st (12)
3) 1sc then 2sc in next st (18)
4) 1sc in next 2st then 2sc in next st (24)
5) 1sc in next 5st then 2sc in next st (28)
6-11) 1sc in each st for 6 rows
go ahead and insert safety eyes roughly between rows 7 and 8 about 3 stitches apart
12) 1sc in next 5st then 2tog (24)
13) 1sc in next 2st then 2tog (18)
14) 1sc then 2tog (12)
switch to medium brown
15) 1sc then 2sc in next st (18)
16) 1sc in next 2st then 2sc in next st (24)
17-22) 1 sc in each for 6
23) In BLO 1 sc in each
24) 1sc in each st
*stuff head, shape while stuffing
25) 1sc in next 2st then 2tog (18)
26) 1sc then 2tog (12)
*stuff body, make sure to stuff more into the head and neck area as needed.
27) 2tog around (6) bind off and sew opening closed.
Legs, make two starting with dark brown, stuff as you go and sew to bottom of body
1) magic circle or an adjustable loop with 6st (6)
2) 2sc in each st (12)
3) 1sc in each st for 1 row
4) 2tog twice then 1sc in next 8st (10)
5) 2tog twice then 1sc in next 6st (8)
switch to medium brown
6-8) 1sc in each st for 3 rows
9) 1sc in next st, 2sc in next st
f/o leaving a tail for sewing.
Arms, make two starting with skin color and lightly stuff in skin color part only. You will be sewing it to the sides of the body roughly between rows 16/17.
1) magic circle or an adjustable loop with 6st (6)
2) 2sc in each st(12)
3) sc in each st
4) 2tog 6 times
switch to medium brown
5-10) 1sc in each st for 6 rows
sc through both thickness for 3 sc, f/o and leave a tail for sewing.
Indian dress
With the doll head facing down, attach your yarn anywhere really in the FLO only of round 23 with the medium brown.
1) sc around in the FLO, no need to join, just go in a spiral
2-4) hdc around
Now, locate the rough middle of the front and back, then mark them with a stitch marker or another color yarn.
5) hdc until 1 st before the marker, dc in next st, 2 tc in next, dc in next then hdc around until 1 st before the marker, dc in next st, 2 tc in next, dc in next then hdc around to end of row. Switch to red
6) sc around, bind off and weave in end
Hair
So I decided the hair was the next step. I simply cut some black yarn about 12-13 inches long and latch hooked them in the head just at the front hair line, back and down the middle. I didn’t have a reason to do the whole head, but if you want have fun. I then tied the hair at the sides of the neck with a piece of red yarn. Gave her a slight trim and that was her hair…
Headdress
With a green I simply did a chainless sc foundation row (or if you want a chain then go back and sc the length of the chain) the length that would fit her head. This will depend slightly on how thick his hair is and your crochet style. For me, it was a total of 22.
Now for the feathers. This is really just like a simple leaf pattern. Make as many as you want to decorate the back of the headdress and in your chosen colors.
1) ch 7, then sc, sc, hdc, dc,hdc, sc
2) now working in the opposite side of the chain, sc, hdc, dc, hdc, sc, sl st. Leave a long tail, weave it back to the bottom of the feather (gives it more stability and helps to close up any spaces) and sew it to the beginning of the chainless sc foundation row. This is going to be the back of the headdress with the feathers against the hair when you sew it on the head.
Go ahead and finish sewing the headdress on around her head.
Mad Hooking!

Thanks so much for sharing with me your pattern.
Thank you for sharing your patterns! I too, have been looking for good pilgrim patterns. Now I have one for Indians too.
I am using these to make into a door ornament that I will be entering in the Dixie Classic Fair. They were so perfect for it. Thank you!
These are great patterns but I wish they were knitting patterns.
Thanks for sharing your talent. I am looking forward to crocheting the Pilgrims and Indians. Happy Holidays!