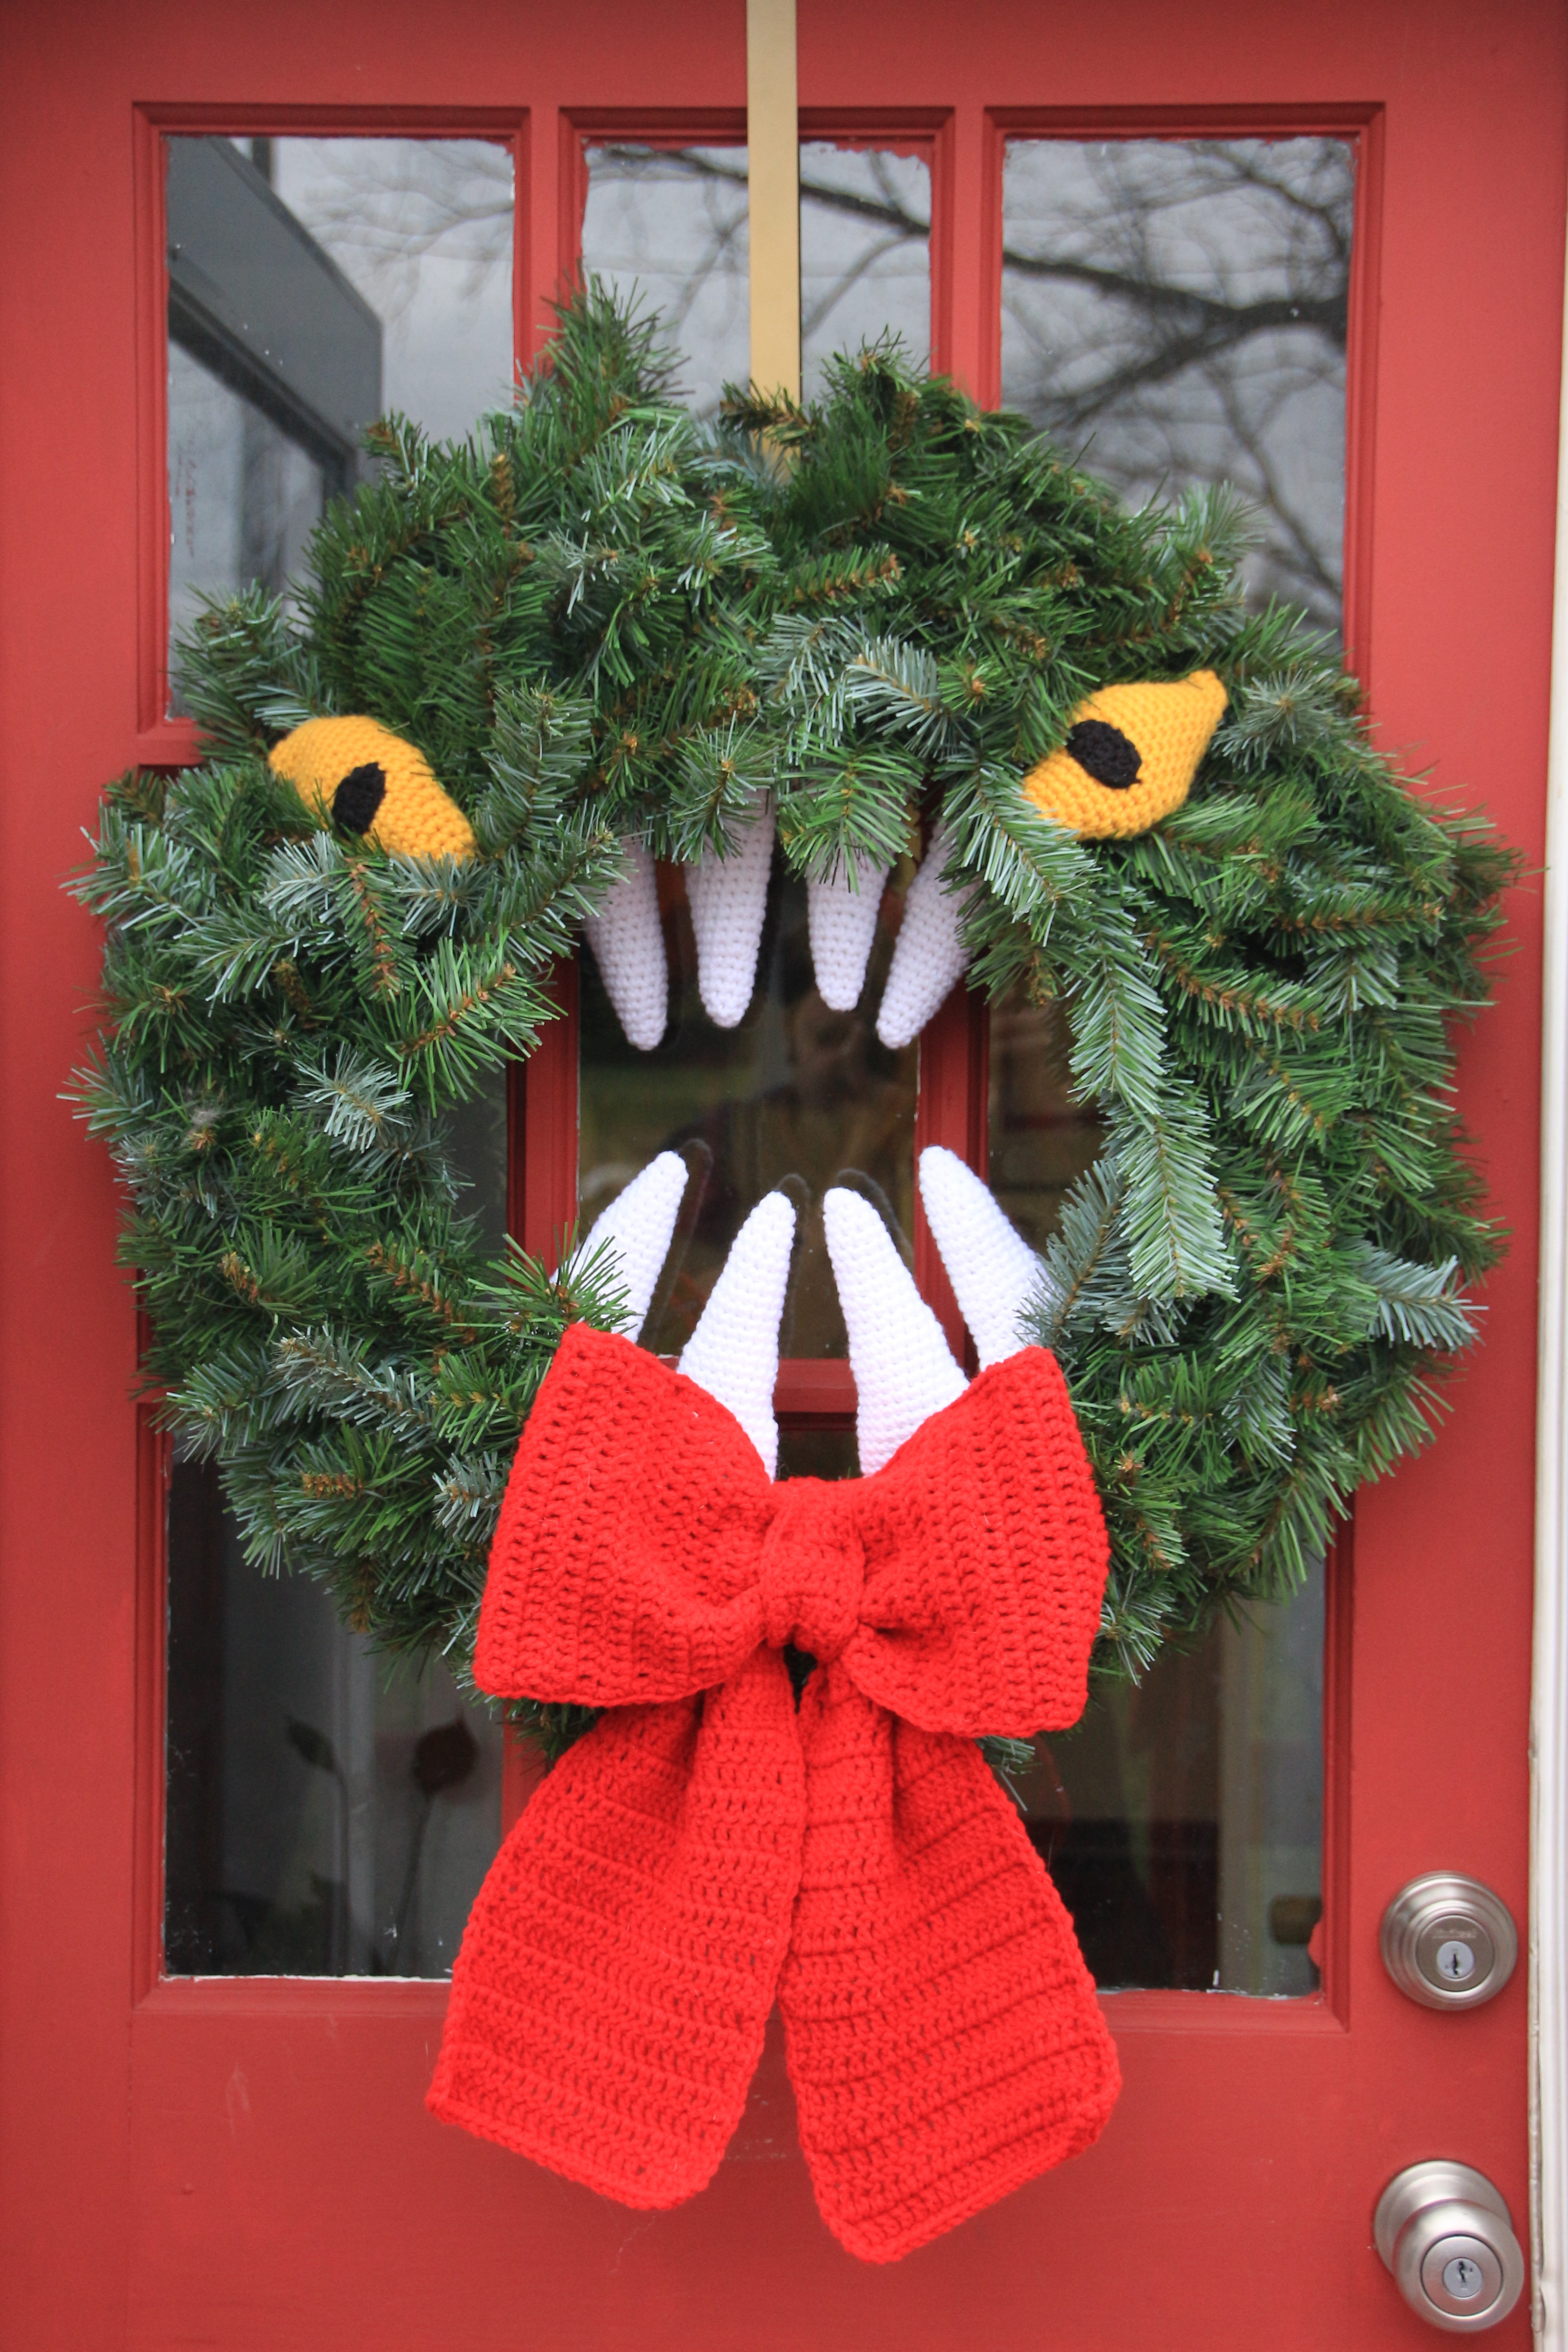
I have wanted to make this wreath for so long (as I have the movie completely memorized) and I am so happy to finally be able to bring it to life using crochet as my art medium. For this pattern I will not use abbreviations so as not to confuse anyone. The pattern is written in US terminology. I hope you enjoy it as well! Due to the number of pictures they will all be thumbnails that you can click to see the full-size image.
Feel free to sell/give away/do whatever with your finished project. Please just make sure you give me credit for the pattern. DO NOT sell or reproduce my pattern without my permission.
Materials:
Fake wreath approximately 18″ inner diameter
Size H hook
Worsted weight yarn in colors red, white, yellow
Polyfil
Darning needle
Bow:
Row 1: Chain 22 and double crochet in 3rd chain from hook and across for a total of 20 double crochet.
Row 2: Now chain 2 (which will not count as a stitch) and double crochet in each stitch across for a total of 20 double crochet.
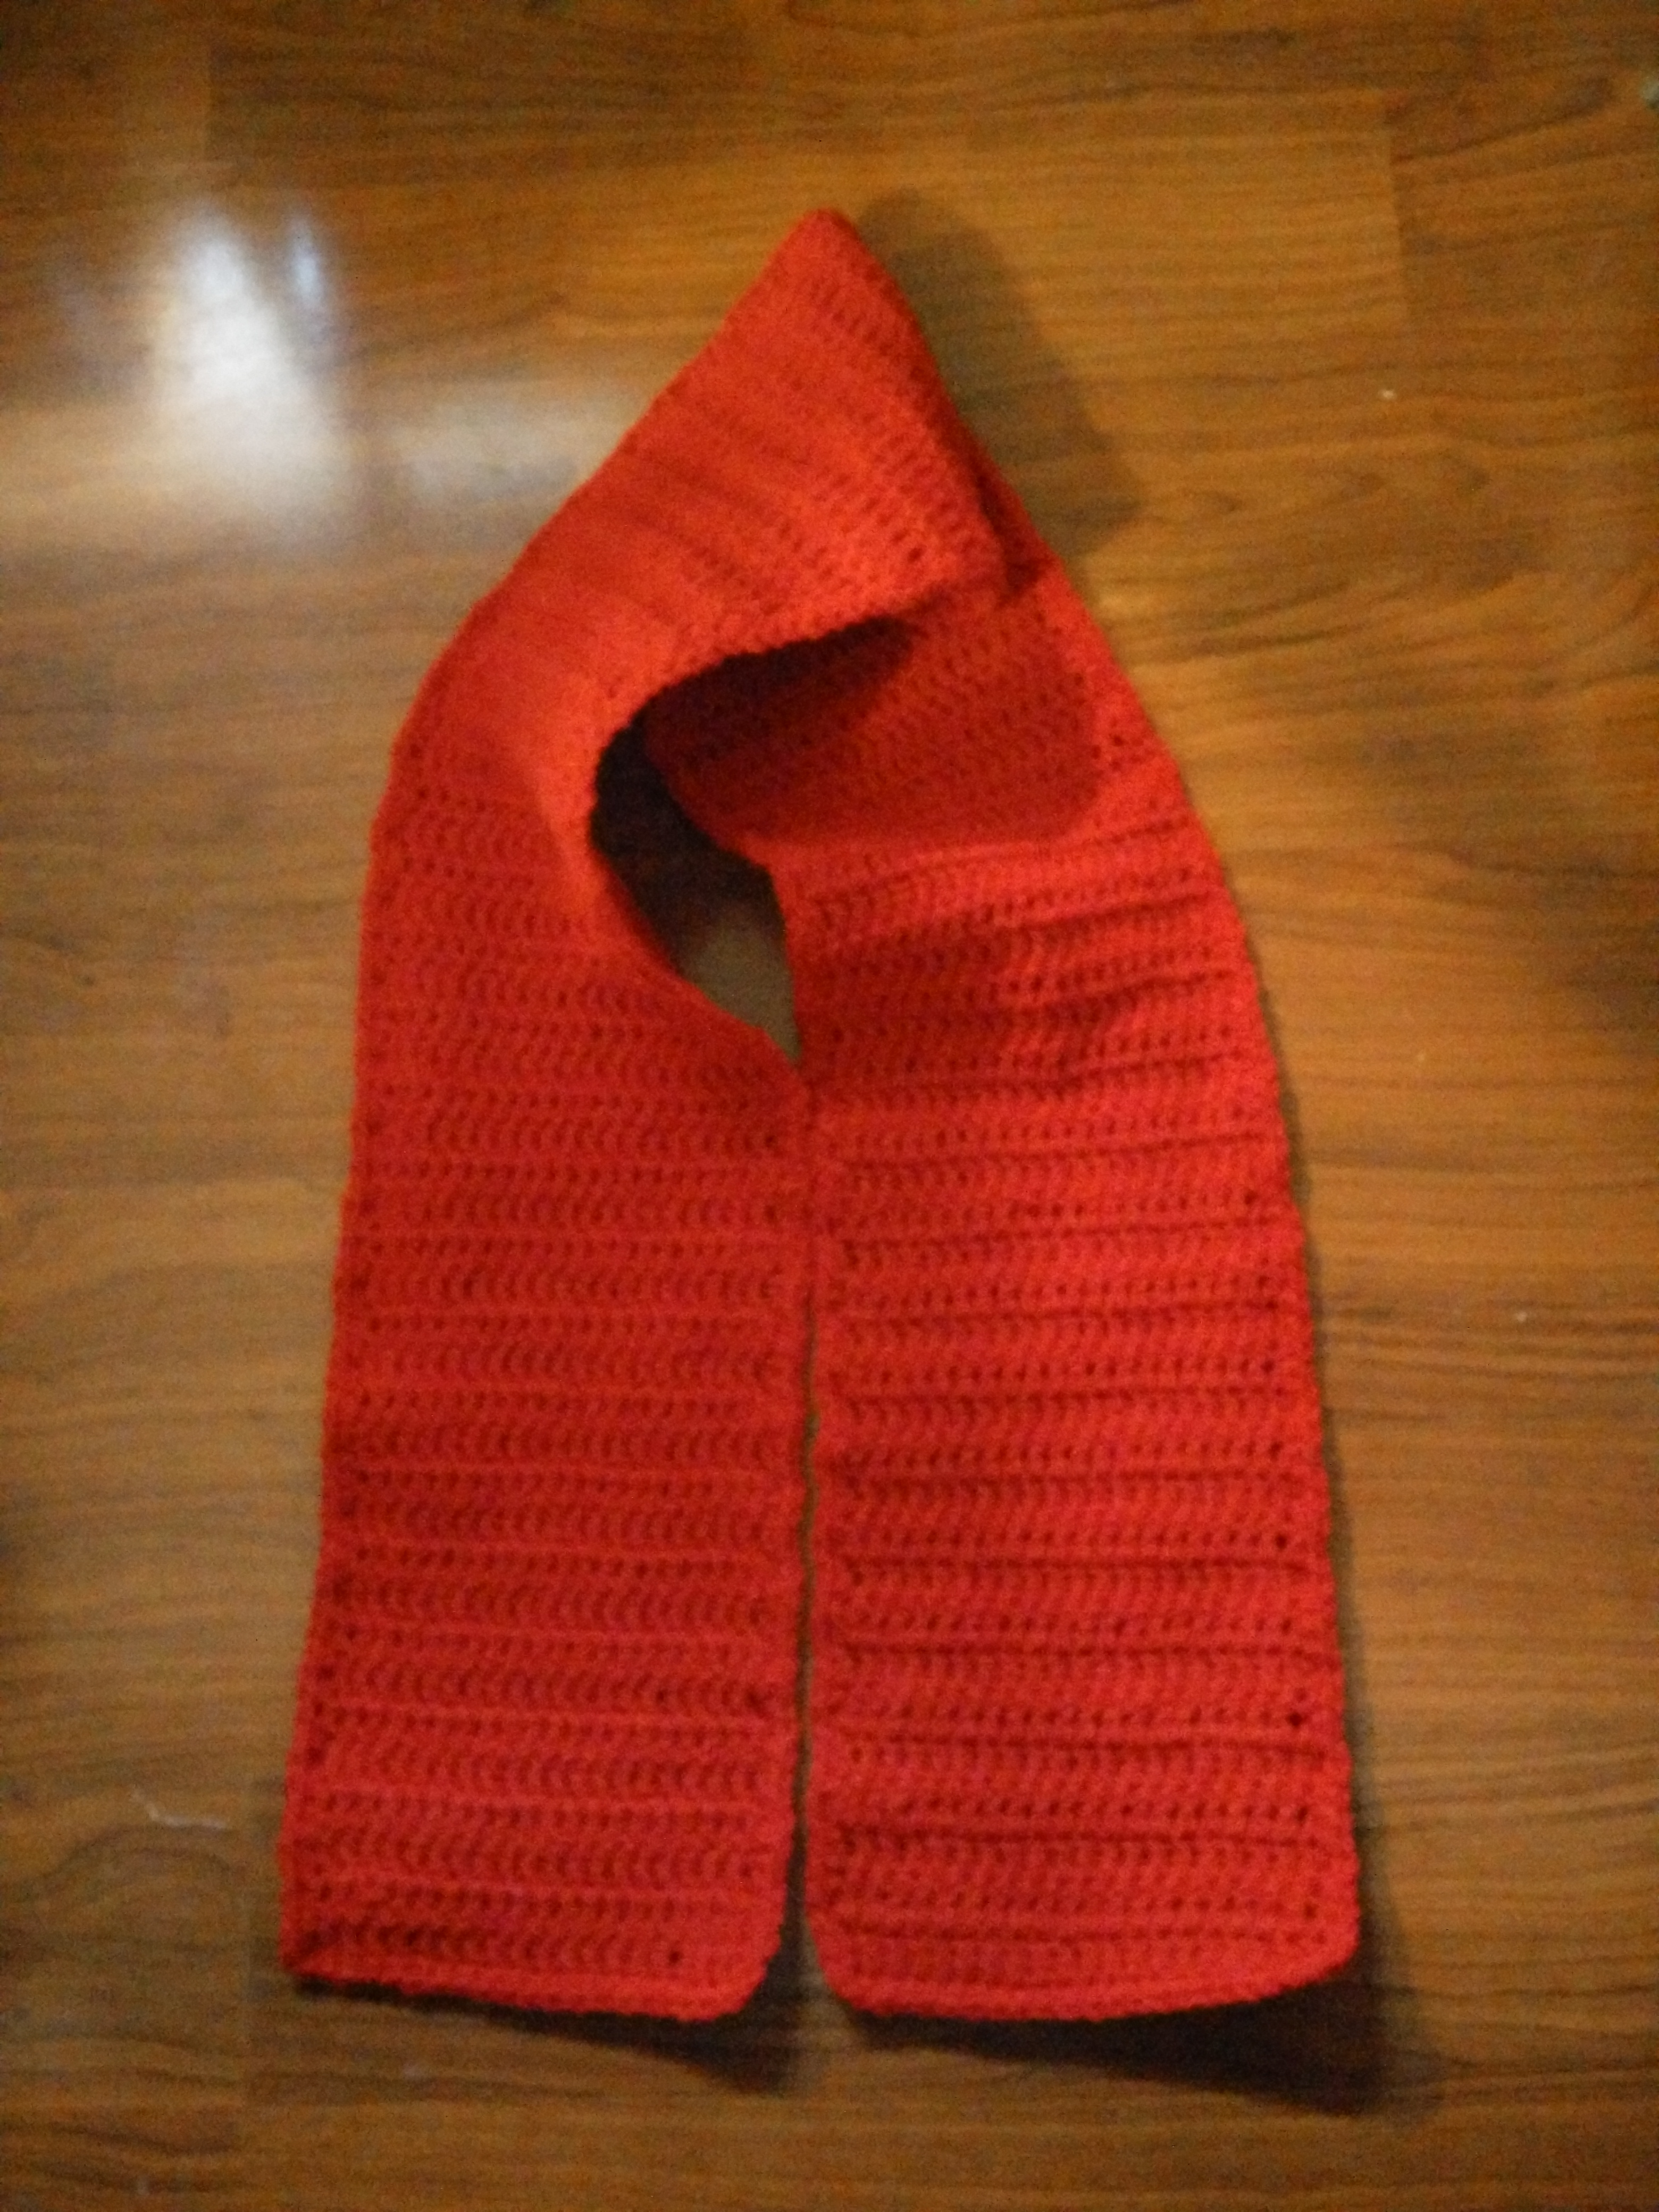
Repeat row 2 until your strip measures 48 inches long. Single crochet evenly around the strip making sure to put 3 single crochet in the corners. Bind off and weave in the end.
Tying the bow:
Fold the strip in half. Lay it down on the floor with the ends right side up.
About 10 inches from the ends, gather the strip together. Now take your red yarn and wrap tightly around the gathered strip roughly 10 times.

Now bring down the middle of the strip, place it on top of the already gathered spot.
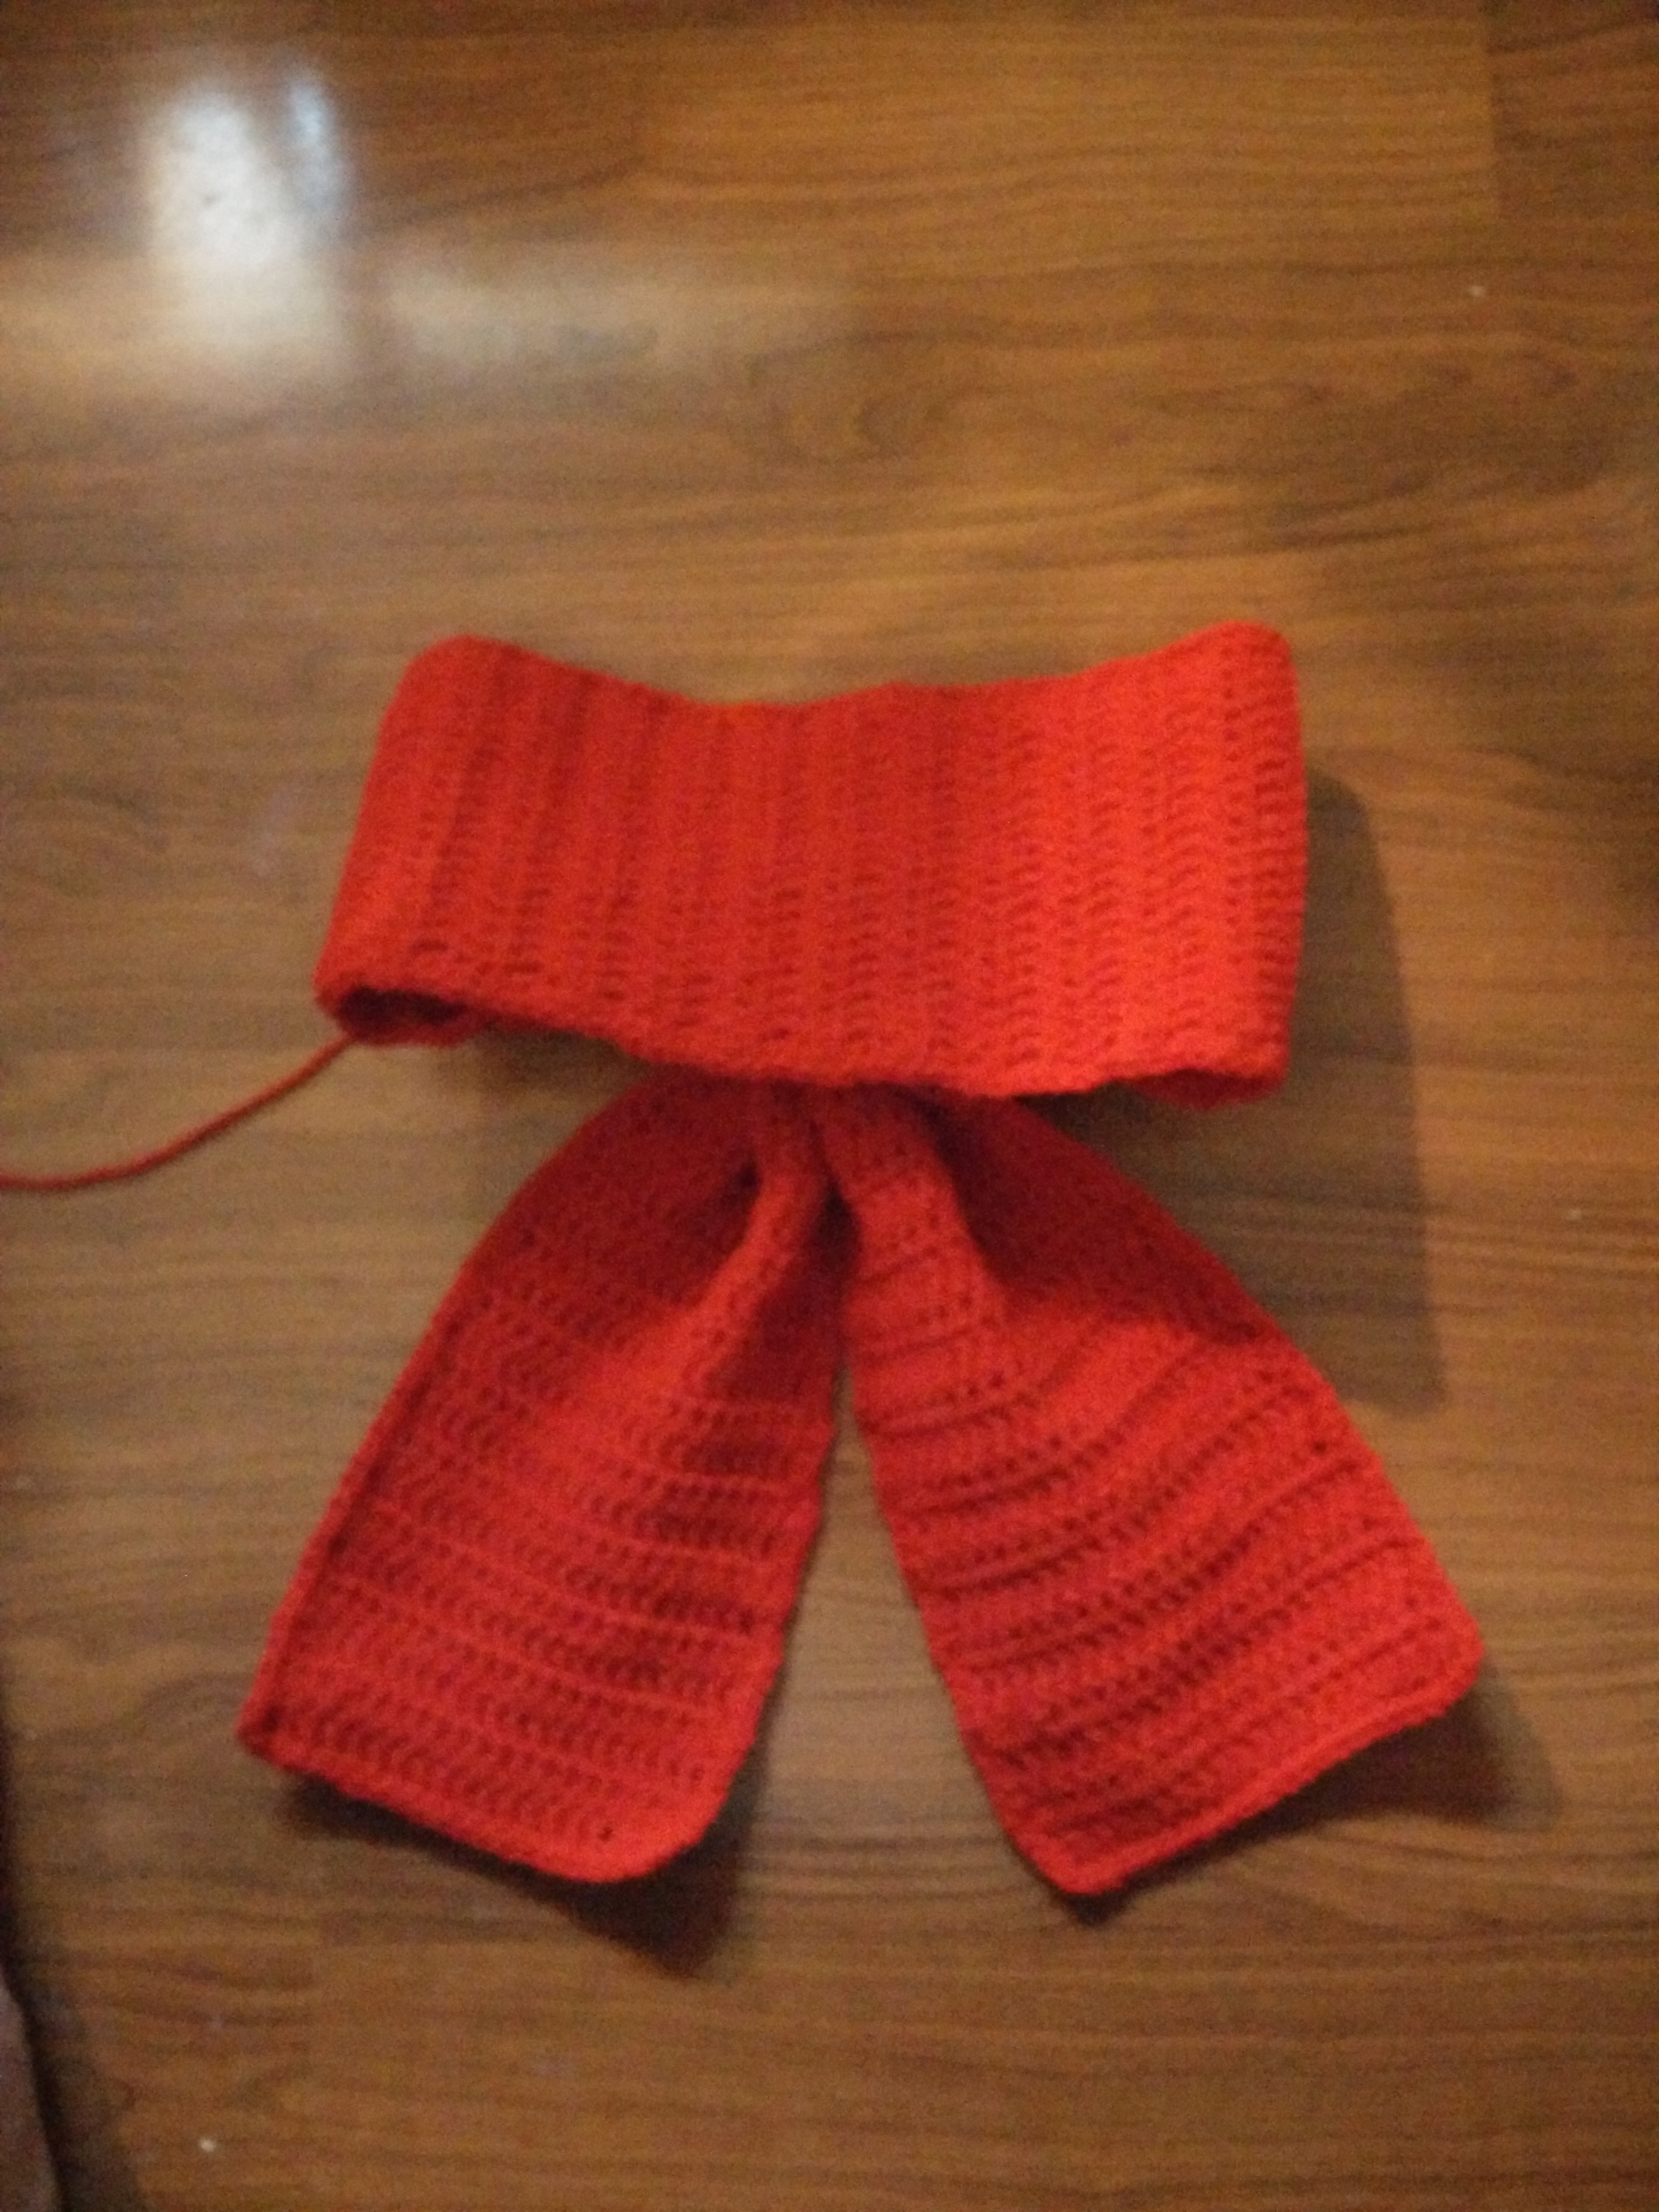
Finally wrap the yarn in the middle about 10 more times. Now tie off, weave in ends and arrange the bow.
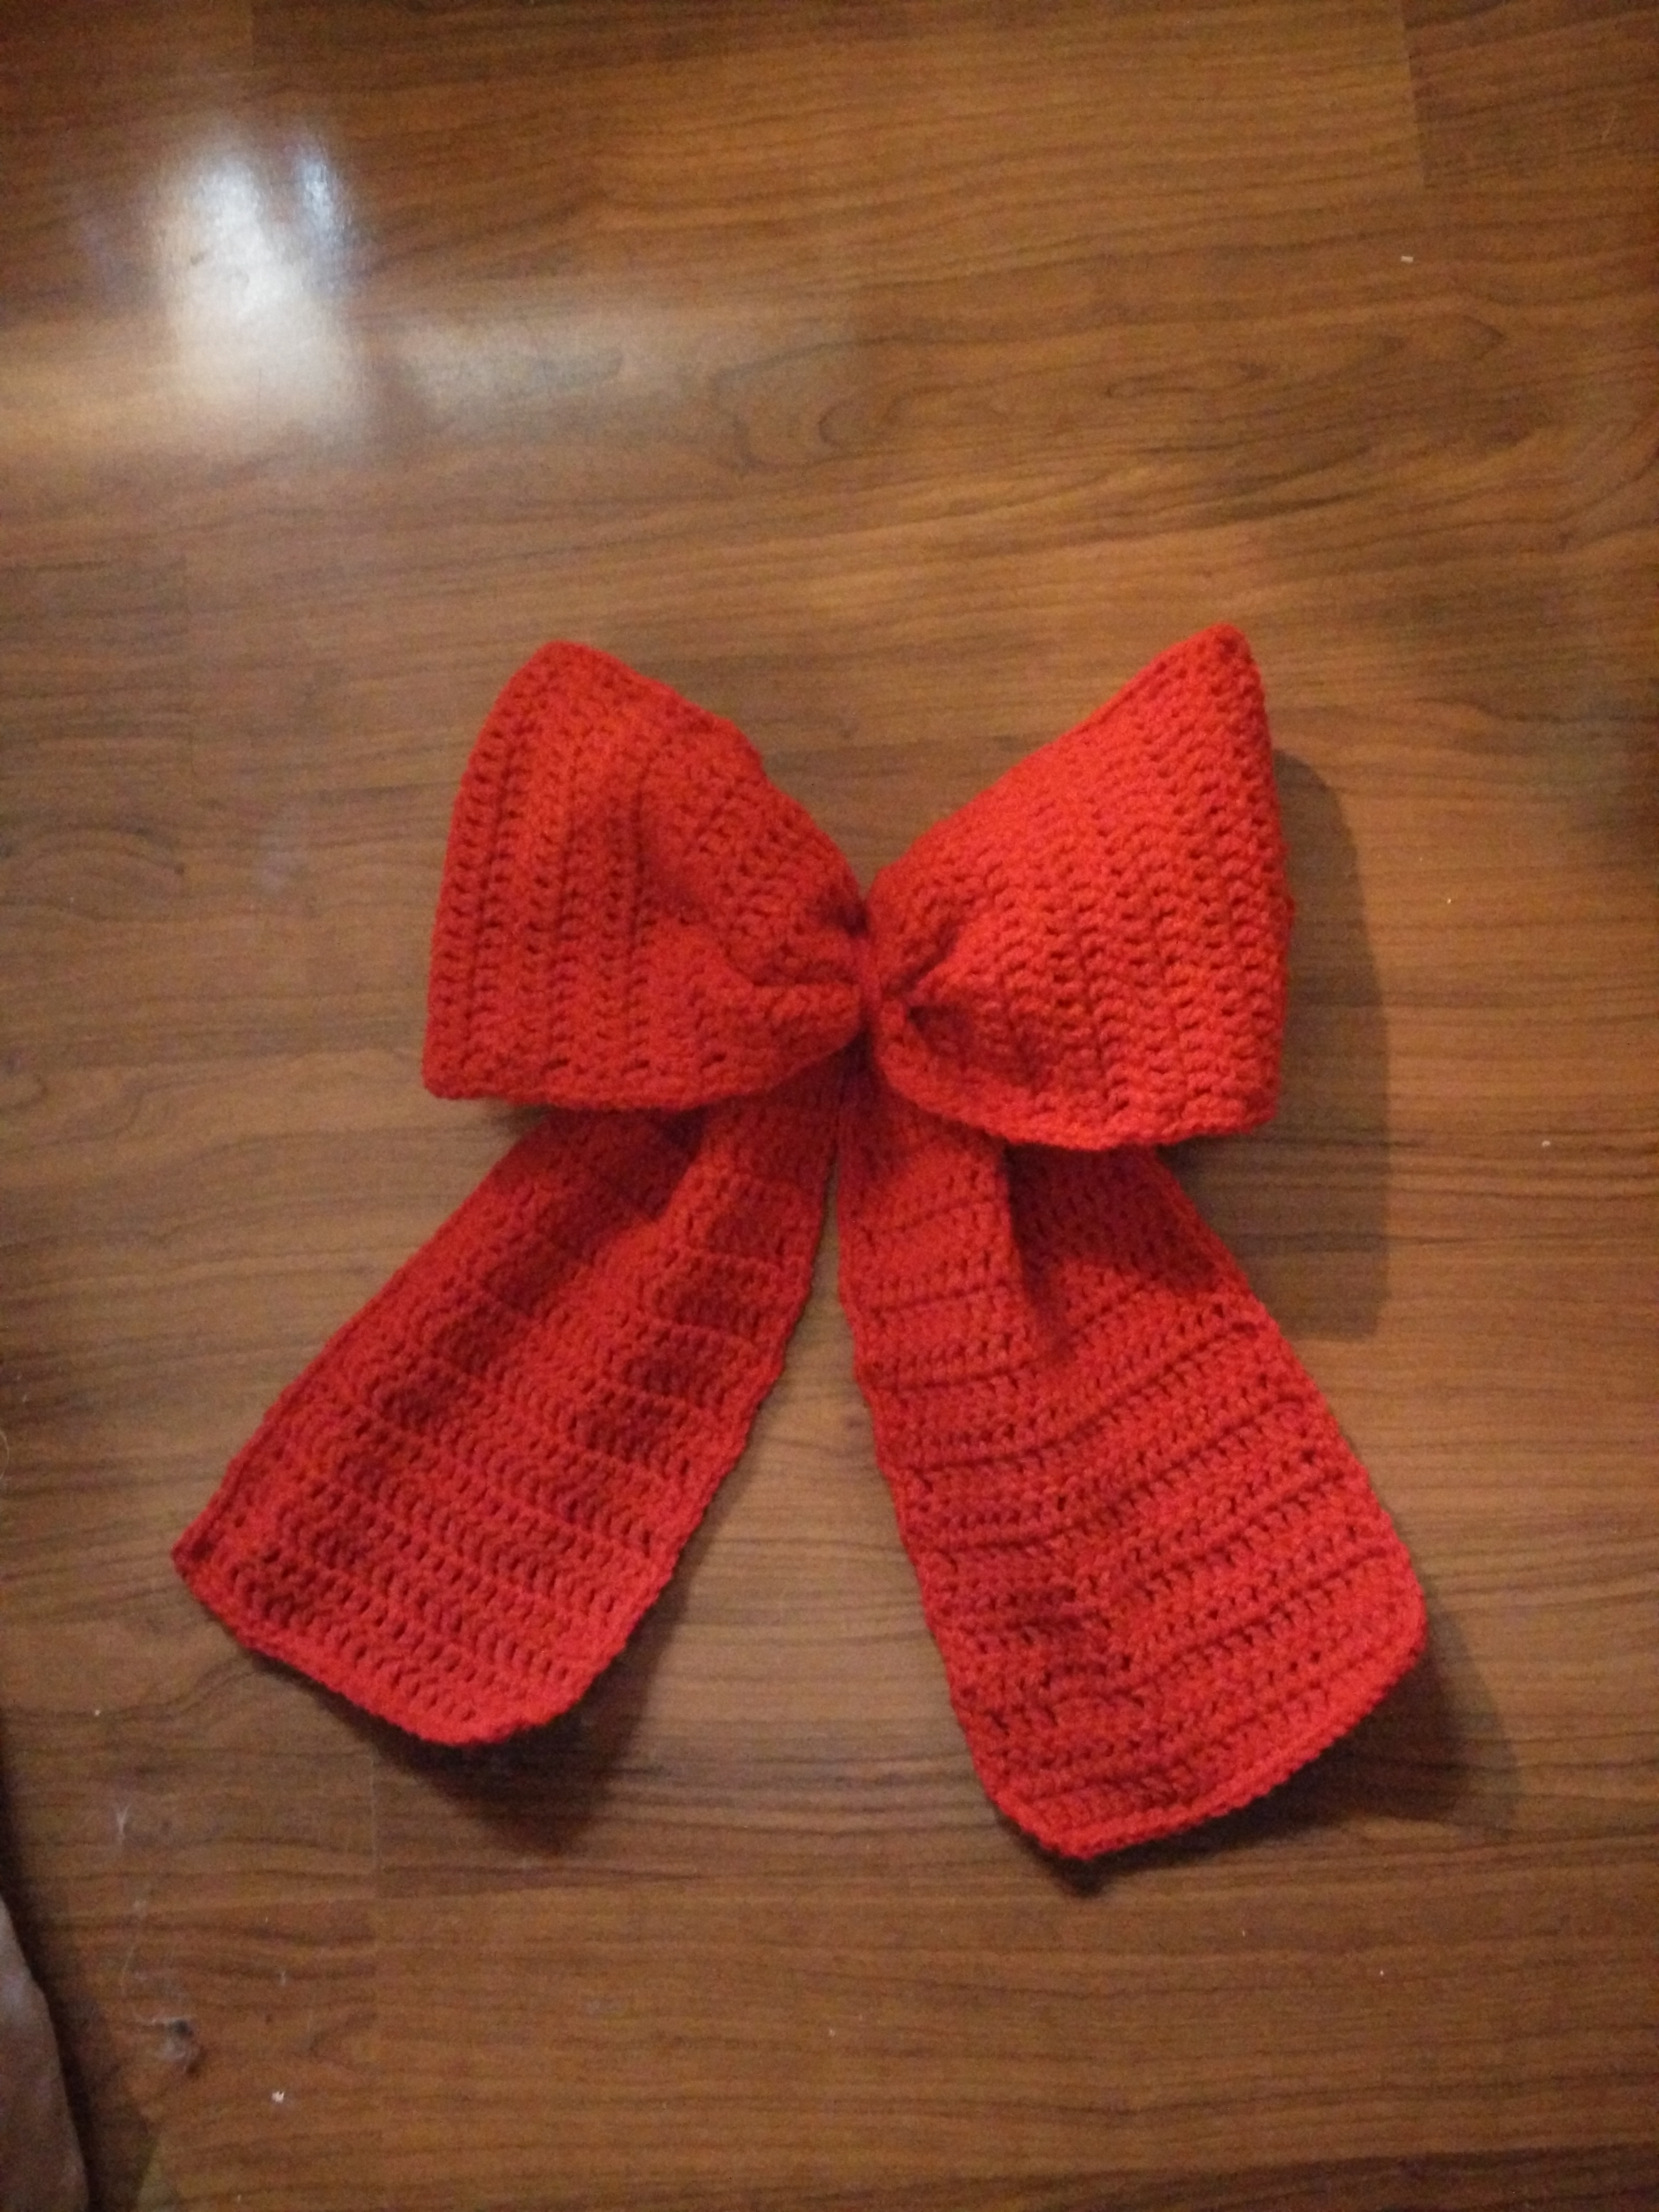
Middle bow strip:
Row 1: chain 7, double crochet in 3rd chain from the hook and across giving you 5 double crochet.
Row 2: Chain 2 (which does not count as a stitch) double crochet in each stitch across for a total of 5 double crochet.
Repeat row 2 until your strip fits around the middle of the bow. Mine was 8 inches and 15 rows, but this will vary depending upon how you tied your bow.
Single crochet around the bow strip, placing 3 single crochet in each corner. Bind off and leave a long tail for sewing.
Wrap the bow strip around the middle, having the ends meet at the back. Now sew the two ends together. Then make another few stitches attaching the bow strip to the bow securely. Do not cut the yarn. You will need this to secure the bow to the wreath.
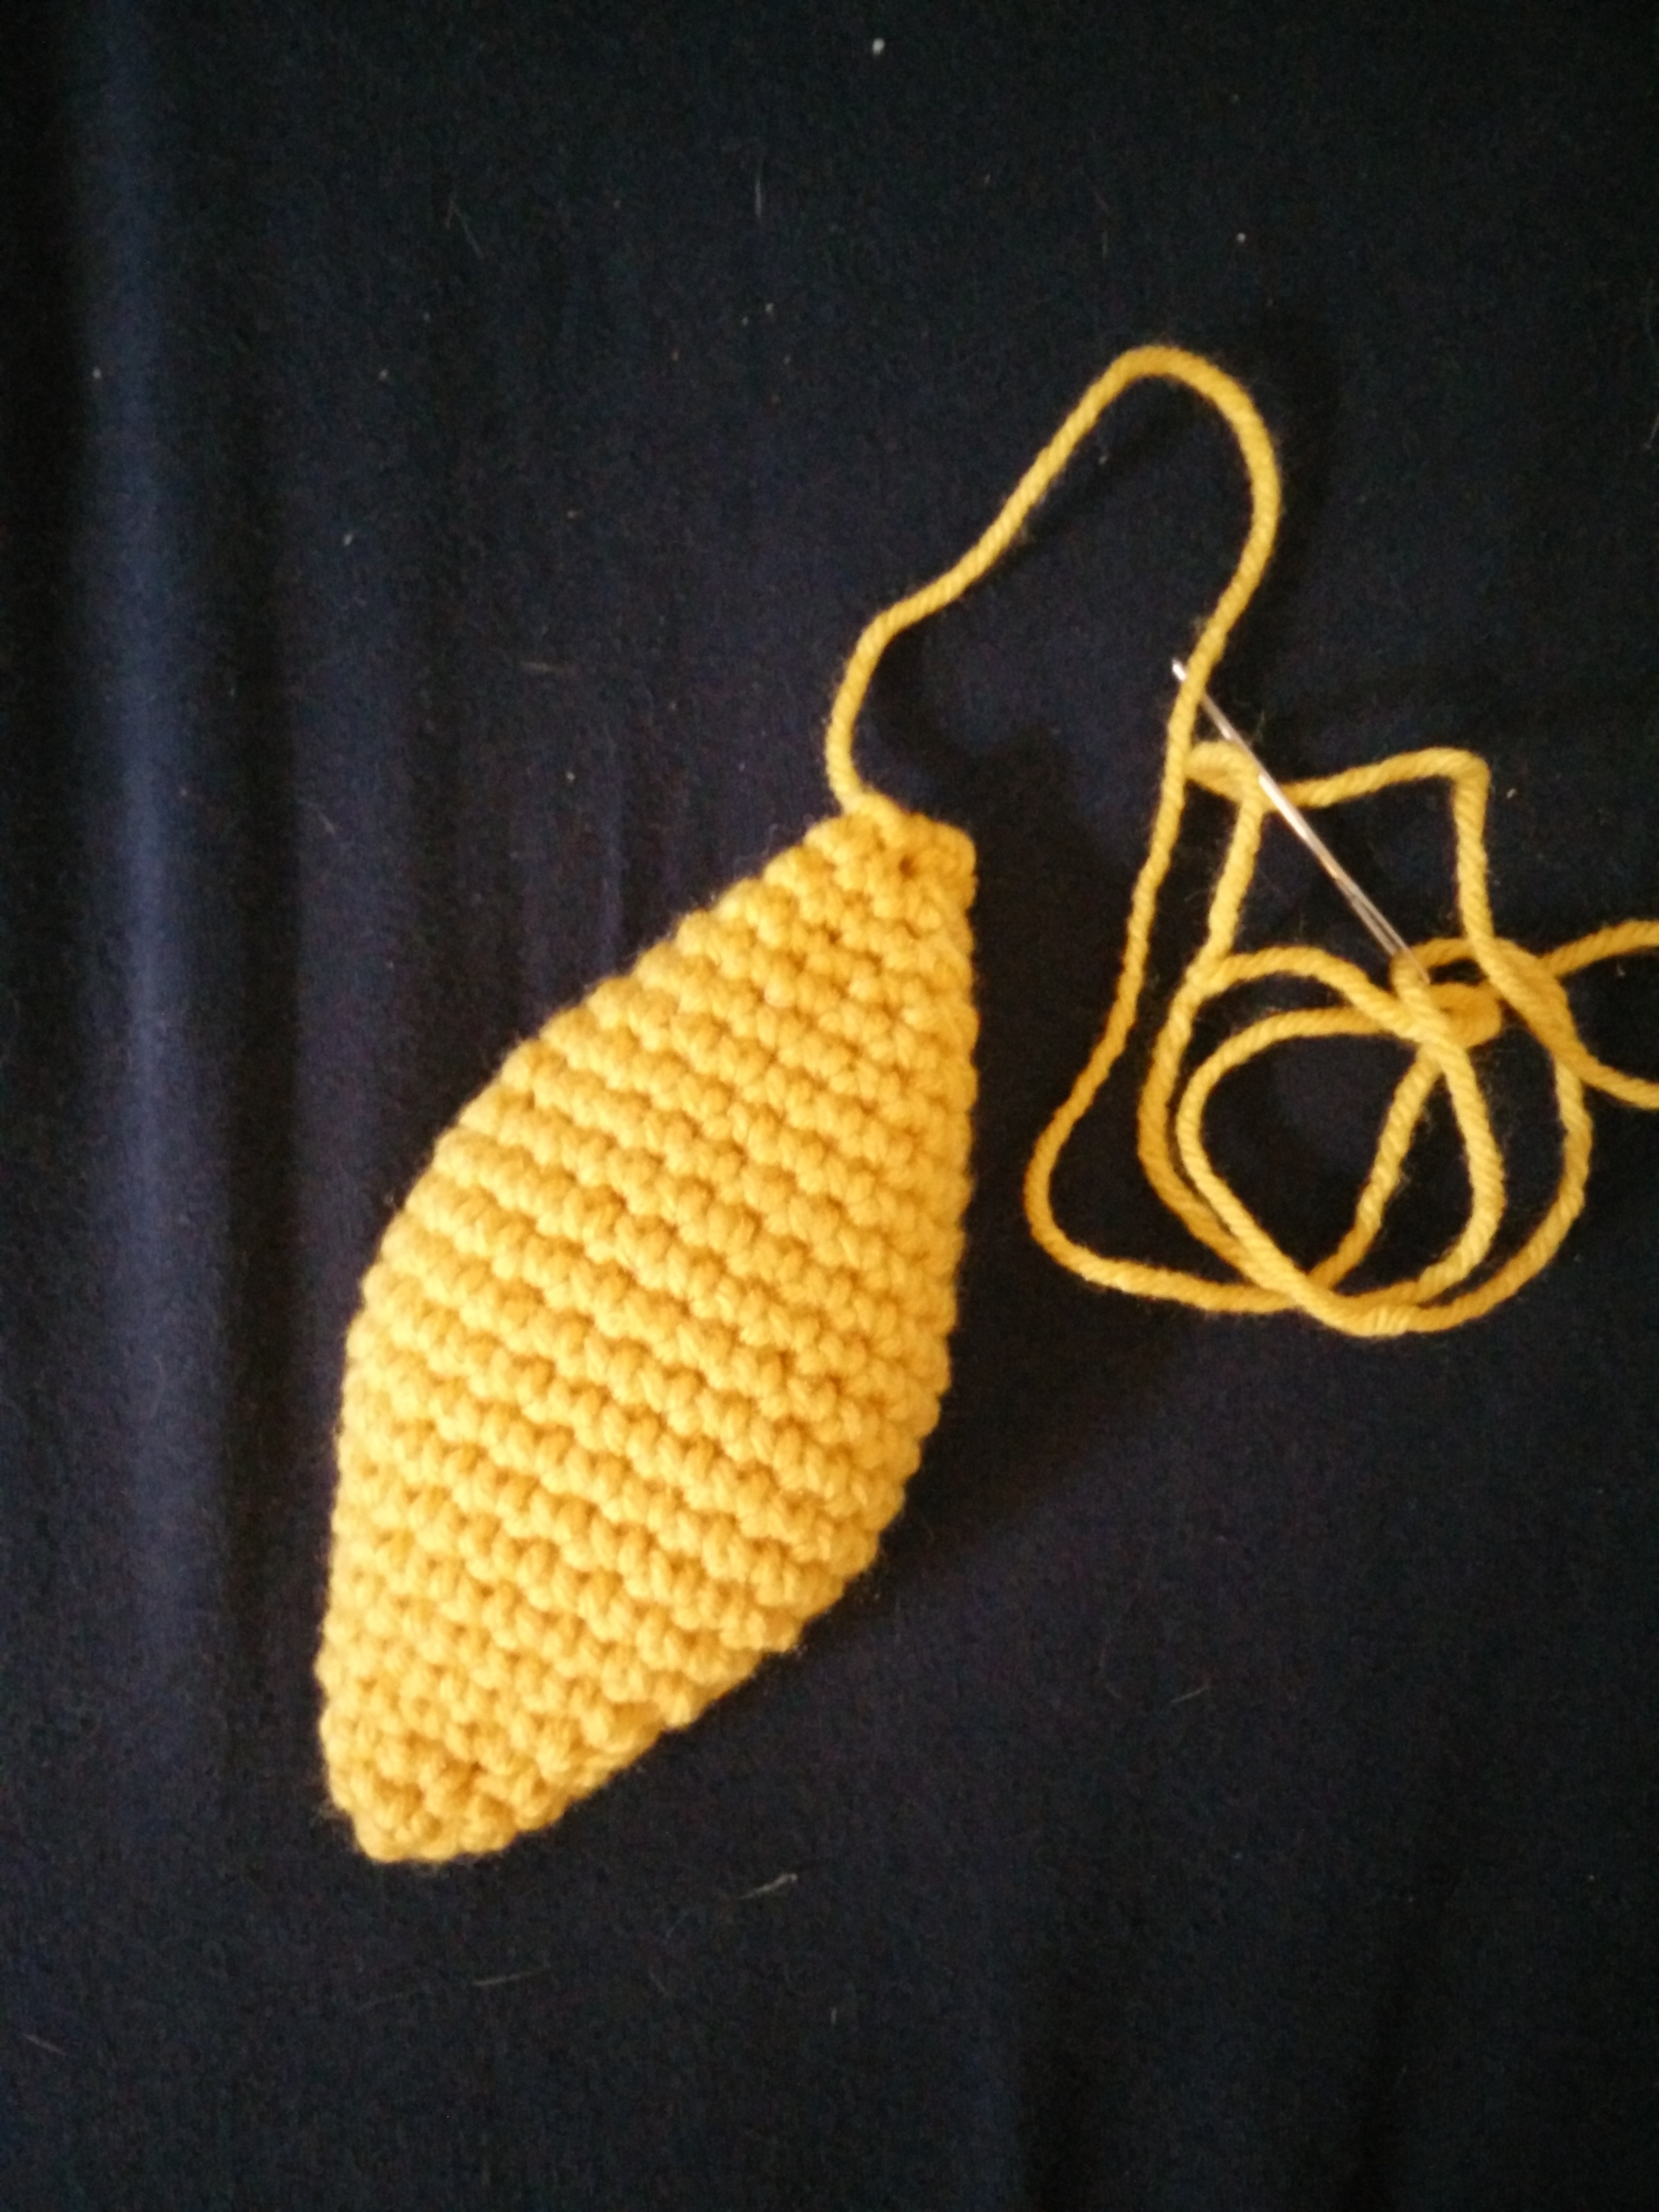
Eyes (make 2)
The eyes will be worked in the round, amigurumi style. This will help give it shape and substance in your wreath. They can be done with either yellow or white depending on preference. You will need a stitch marker for each round. Also, I continued to use my H hook since I tend to crochet a bit tightly and this doesn’t have to be quite as tight as when I make amigurumi. If you are a looser crocheter, please feel free to drop down to a G hook.
Round 1: start with a magic circle (or a chain 2, working in the 2nd chain from the hook) and place 6 single crochet inside the circle.
Round 2: *single crochet increase (2 single crochet in same stitch) in first stitch, single crochet in next 2 stitches* repeat x1. (8 single crochet)
Round 3: *single crochet increase, single crochet in next 3 stitches* repeat x1. (10 single crochet)
Round 4: *single crochet increase, single crochet in next 4 stitches* repeat x1. (12 single crochet)
Round 5: *single crochet increase, single crochet in next 5 stitches* repeat x1. (14 single crochet)
Round 6: *single crochet increase, single crochet in next 6 stitches* repeat x1. (16 single crochet)
Round 7: *single crochet increase, single crochet in next 7 stitches* repeat x1. (18 single crochet)
Round 8: *single crochet increase, single crochet in next 8 stitches* repeat x1. (20 single crochet)
Round 9: *single crochet increase, single crochet in next 9 stitches* repeat x1. (22 single crochet)
Round 10: *single crochet increase, single crochet in next 10 stitches* repeat x1. (24 single crochet)
Rounds 11-14: single crochet evenly around.
Round 15: *single crochet decrease (insert hook and pull up a loop through first stitch, insert hook and pull up a loop through second stitch, yarn over and pull through all three loops on hook), single crochet in next 10 stitches* repeat x1. (22 single crochet)
Round 16: *single crochet decrease, single crochet in next 9 stitches* repeat x1. (20 single crochet)
Round 17: *single crochet decrease, single crochet in next 8 stitches* repeat x1. (18 single crochet)
Round 18: *single crochet decrease, single crochet in next 7 stitches* repeat x1. (16 single crochet)
Round 19: *single crochet decrease, single crochet in next 6 stitches* repeat x1. (14 single crochet)
Round 20: *single crochet decrease, single crochet in next 5 stitches* repeat x1. (12 single crochet) Stuff eye ever so slightly, just enough to hold flattened oval shape.
Round 21: *single crochet decrease, single crochet in next 4 stitches* repeat x1. (10 single crochet)
Round 22: *single crochet decrease, single crochet in next 3 stitches* repeat x1. (8 single crochet)
Round 23: *single crochet decrease, single crochet in next 2 stitches* repeat x1. (6 single crochet)
Bind off, leaving a long tail for sewing. Sew opening closed and do not cut yarn.
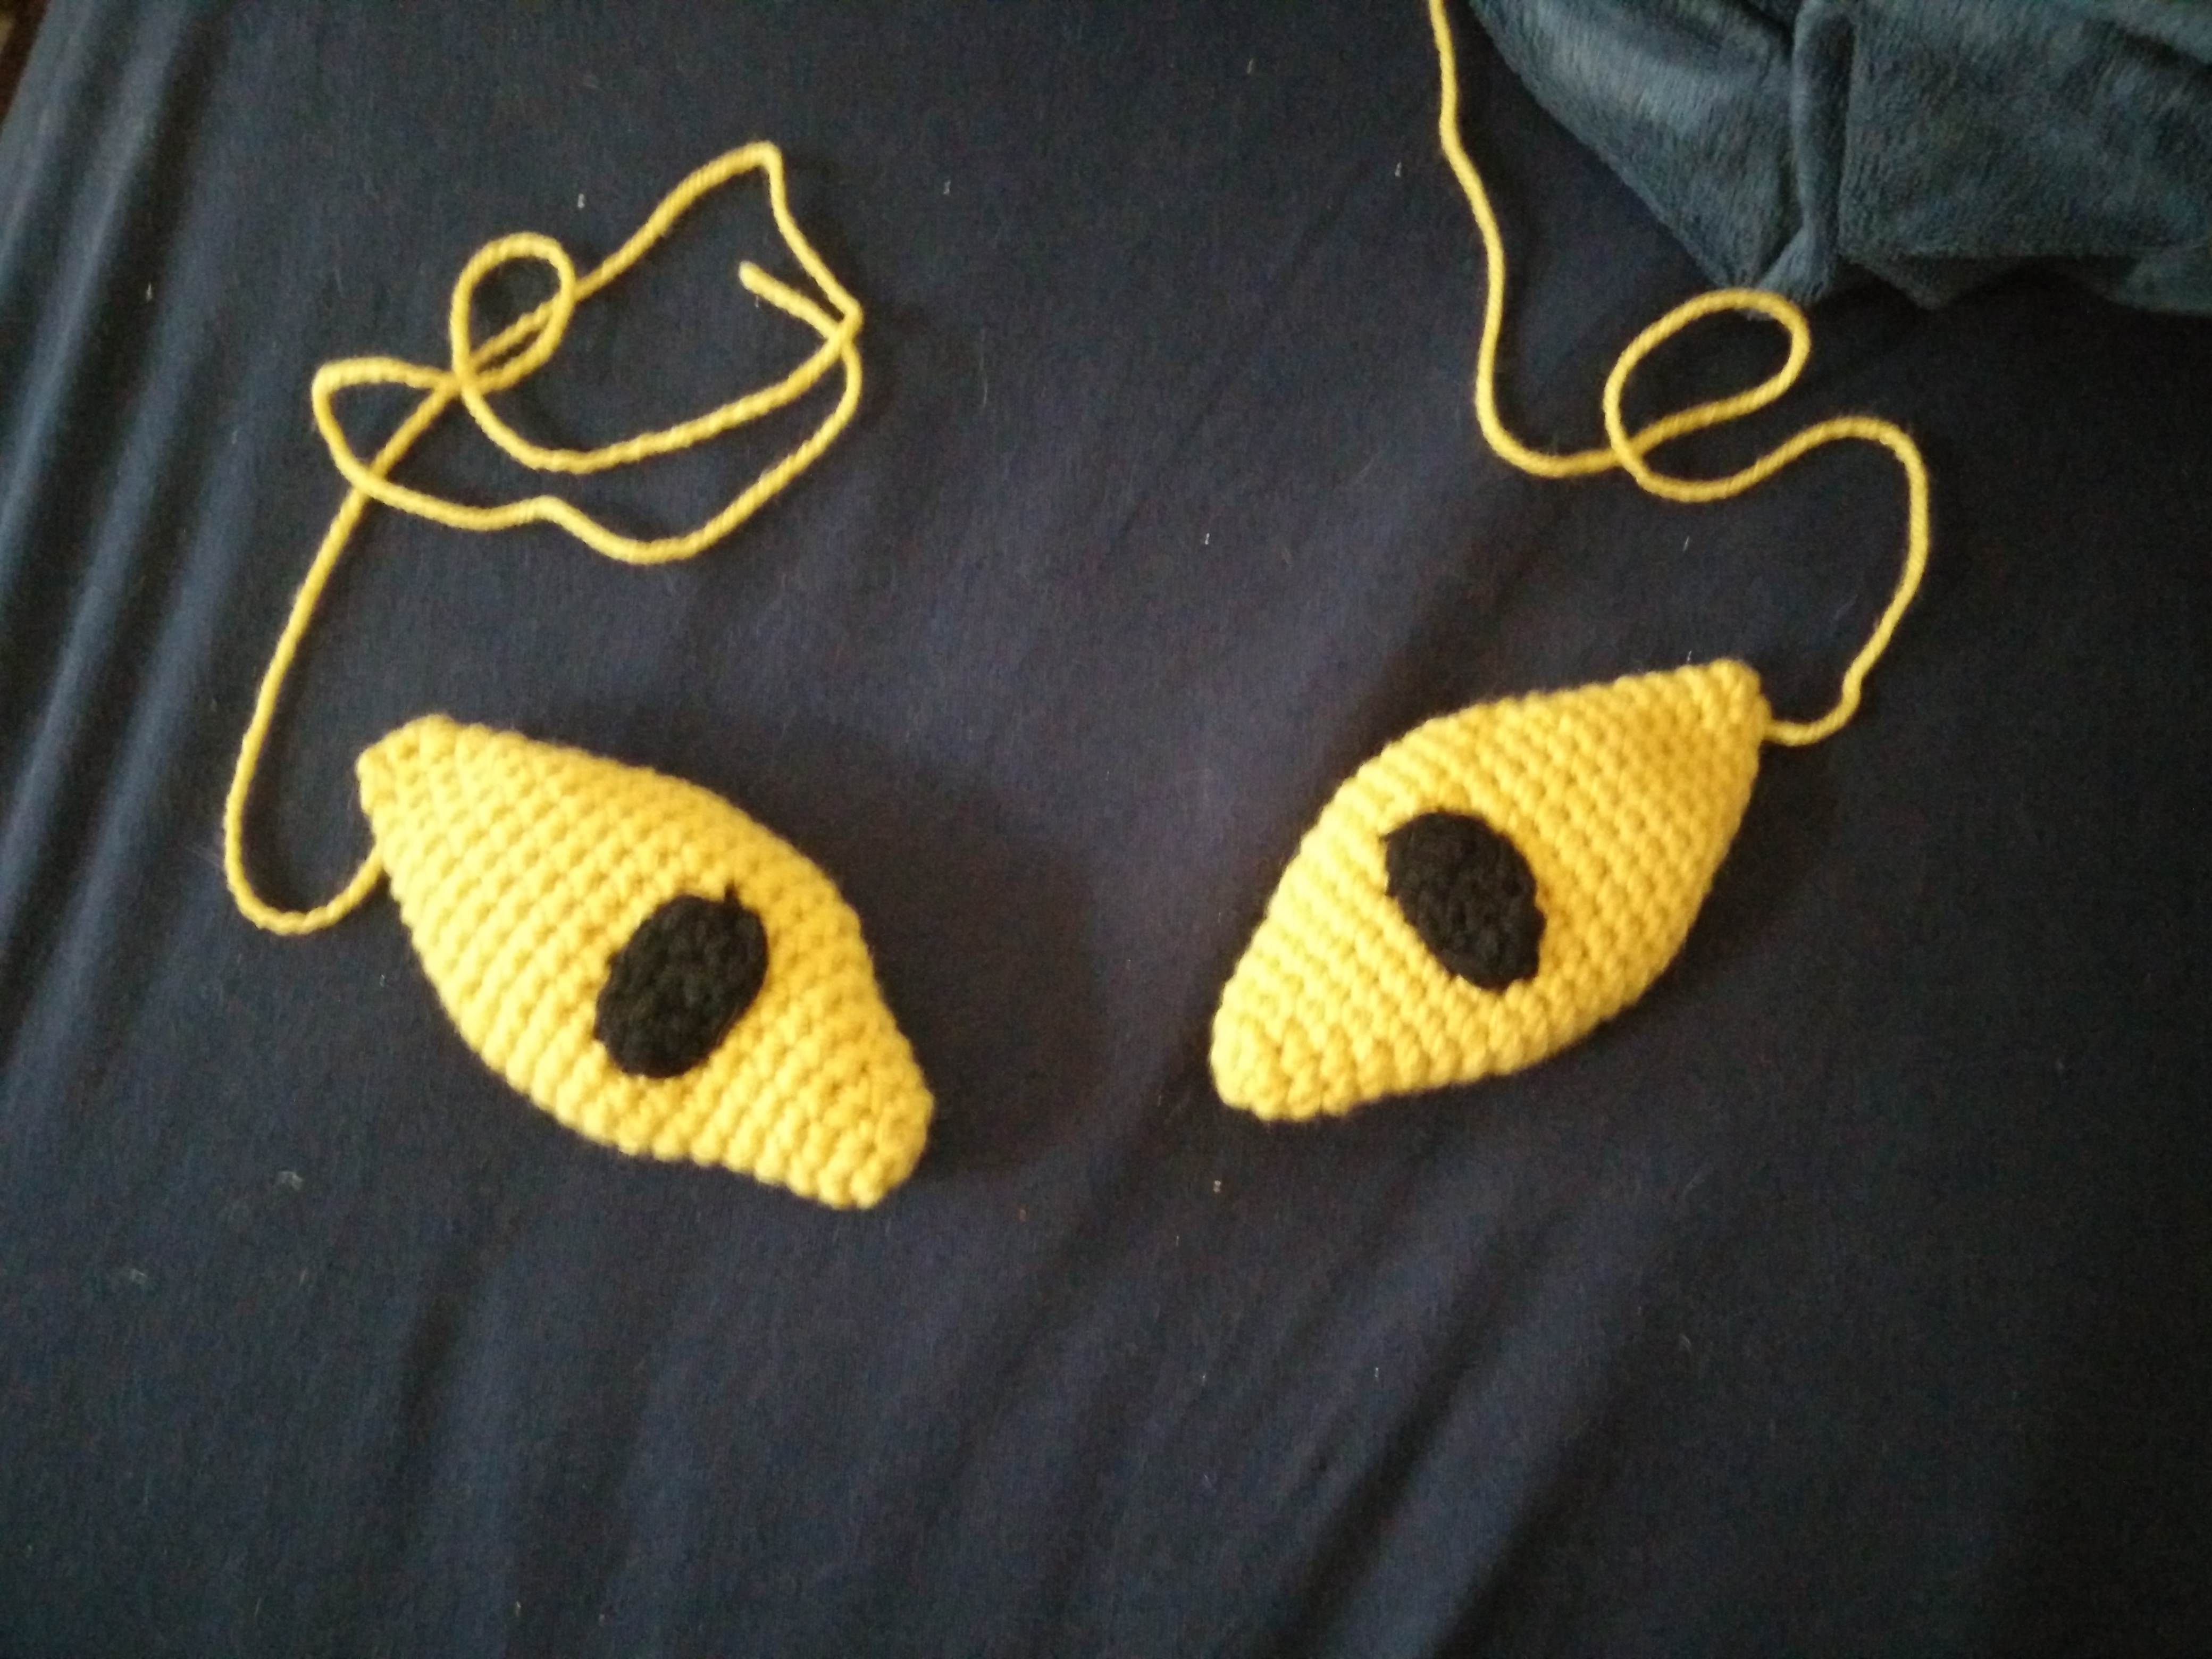
Iris: (make two)
With black and H hook. Note that if you want you could embroider the iris on making them smaller if you prefer.
Round 1: start with a magic circle (or a chain 2, working in the 2nd chain from the hook) and place 6 single crochet inside the circle
Round 2: *single crochet in the next 2 stitches. In the next stitch do 3 double crochet* repeat x1 slip stitch to first single crochet in round. Bind off, leaving a long tail for sewing.
Sew iris onto the eyes. Exact placement isn’t critical as he could be looking around. Play around with how you want your monster to look.
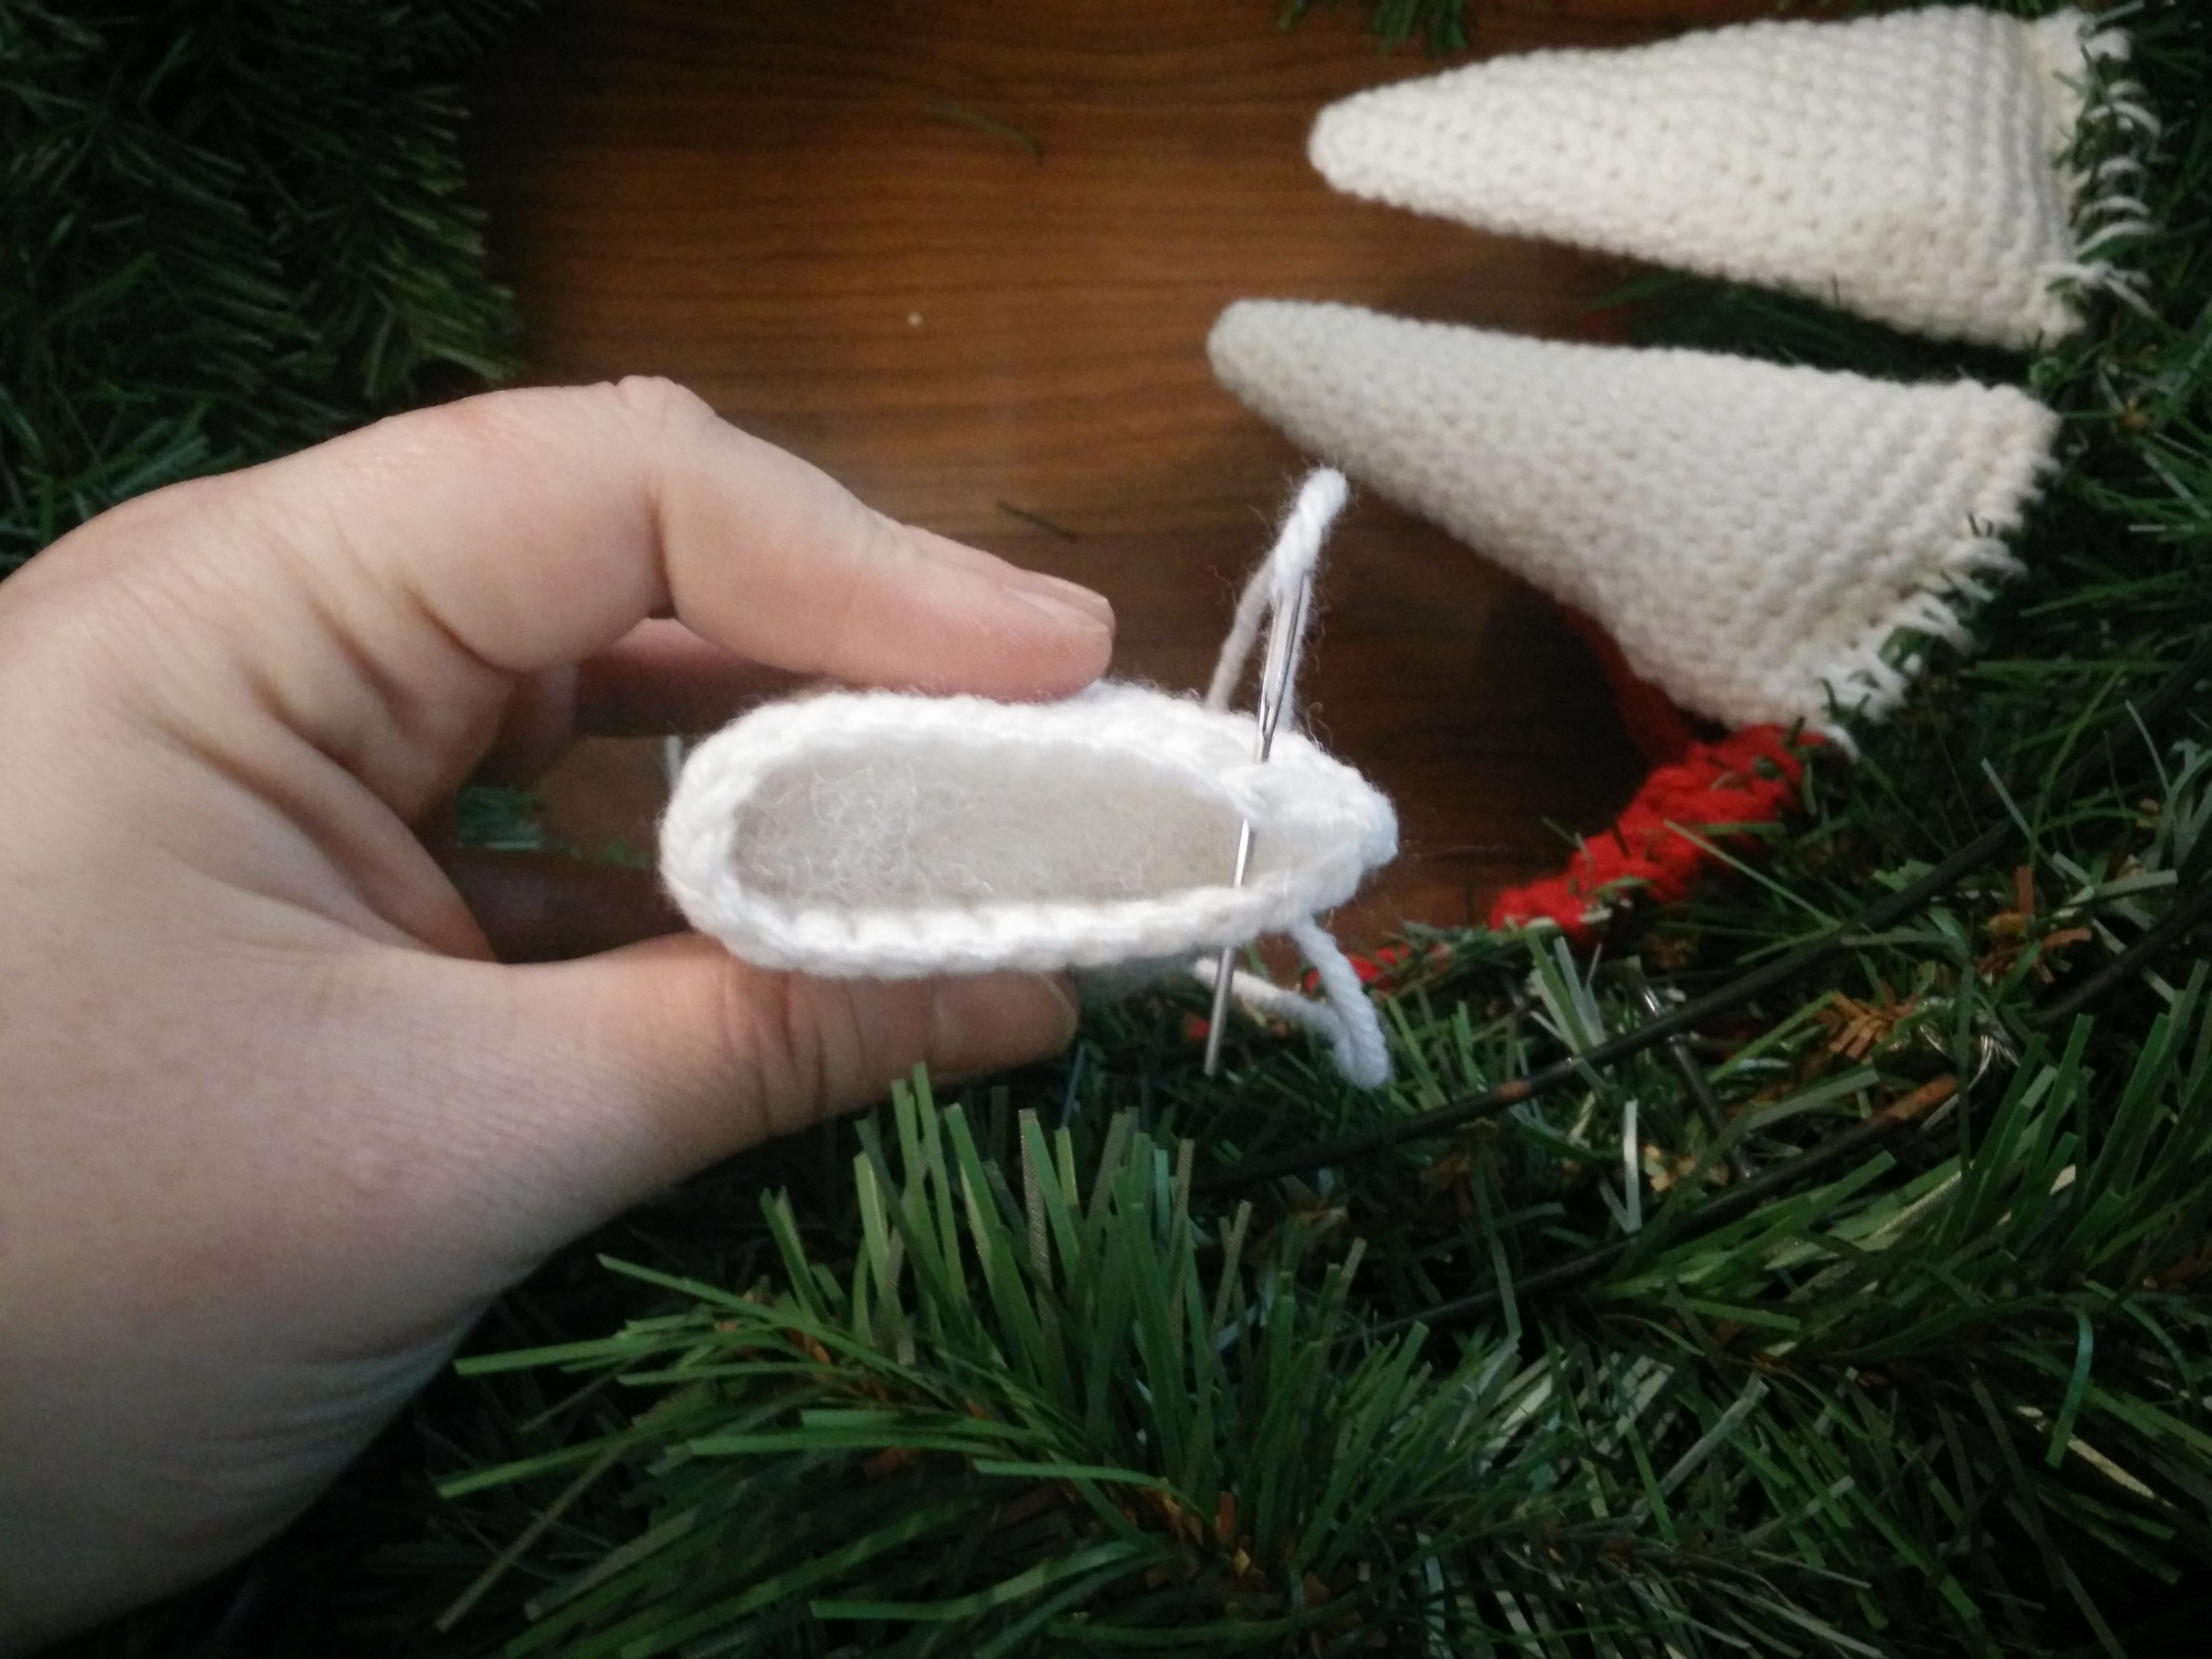
Teeth (make as many as you want and have fun with it! This is the basic tooth pattern, but you can make some longer by adding single crochet rounds or add some increase rounds or increase more early on in the tooth. The tooth pattern is worked top down, slightly stuffed to keep shape.)
With white and H hook (or G hook if you crochet loosely)
Round 1: start with a magic circle (or a chain 2, working in the 2nd chain from the hook) and place 6 single crochet inside the circle
Round 2: single crochet in each stitch (6 single crochet)
Round 3: *single crochet increase (2 single crochet in same stitch) in first stitch, single crochet in next 2 stitches* repeat x1. (8 single crochet)
Round 4: single crochet in each stitch
Round 5: *single crochet increase in first stitch, single crochet in next 3 stitches* repeat x1. (10 single crochet)
Round 6: single crochet in each stitch
Round 7: *single crochet increase in first stitch, single crochet in next 4 stitches* repeat x1. (12 single crochet)
Round 8: *single crochet increase in first stitch, single crochet in next 5 stitches* repeat x1. (14 single crochet)
Round 9-11: single crochet in each stitch
Round 12: *single crochet increase in first stitch, single crochet in next 6 stitches* repeat x1. (16 single crochet)
Round 13: *single crochet increase in first stitch, single crochet in next 7 stitches* repeat x1. (18 single crochet)
Round 14-16: single crochet in each stitch
Round 17: *single crochet increase in first stitch, single crochet in next 8 stitches* repeat x1. (20 single crochet)
Round 18: *single crochet increase in first stitch, single crochet in next 9 stitches* repeat x1. (22 single crochet)
Round 19: *single crochet increase in first stitch, single crochet in next 10 stitches* repeat x1. (24 single crochet)
Round 20-24: single crochet in each stitch. Bind off, leaving a long tail.
Stuff lightly to hold shape and sew opening closed. Do not cut your yarn.
Now, all that is left is to sew the pieces onto your wreath using the tails from your parts. Mine had these nice wire basics to sew onto to. This doesn’t mean it was easy.
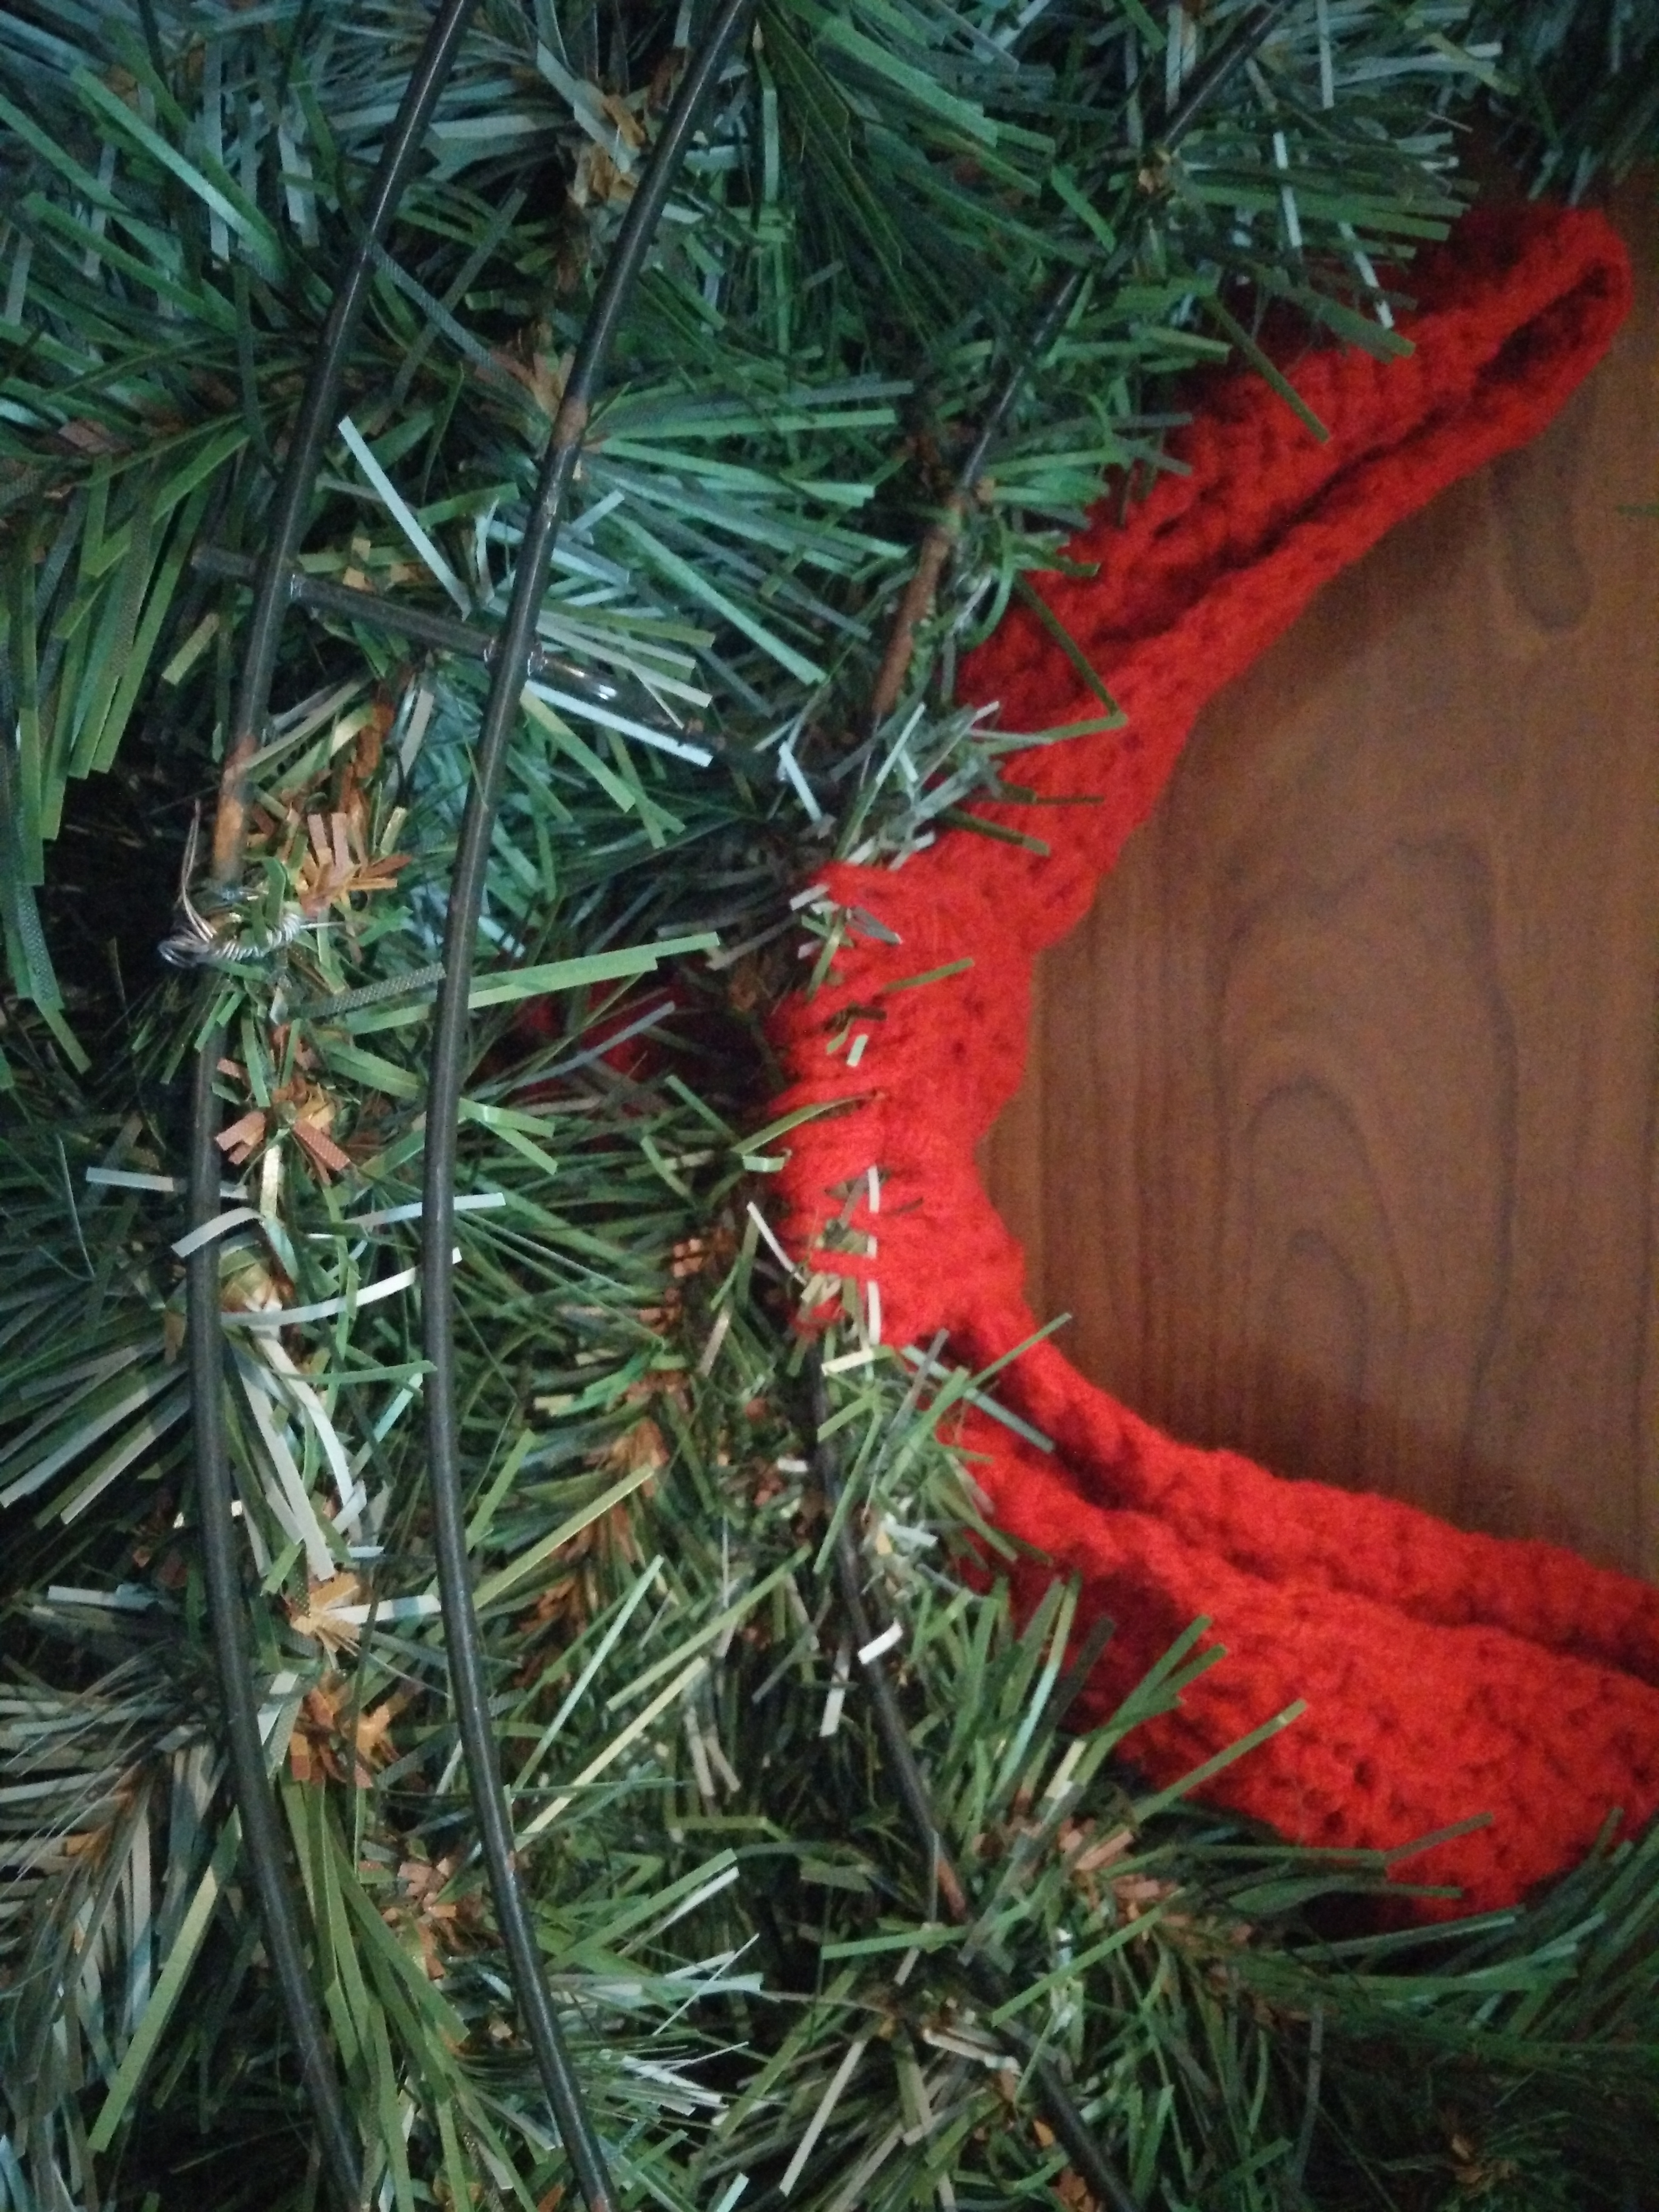
And that’s it! Mad hooking!
