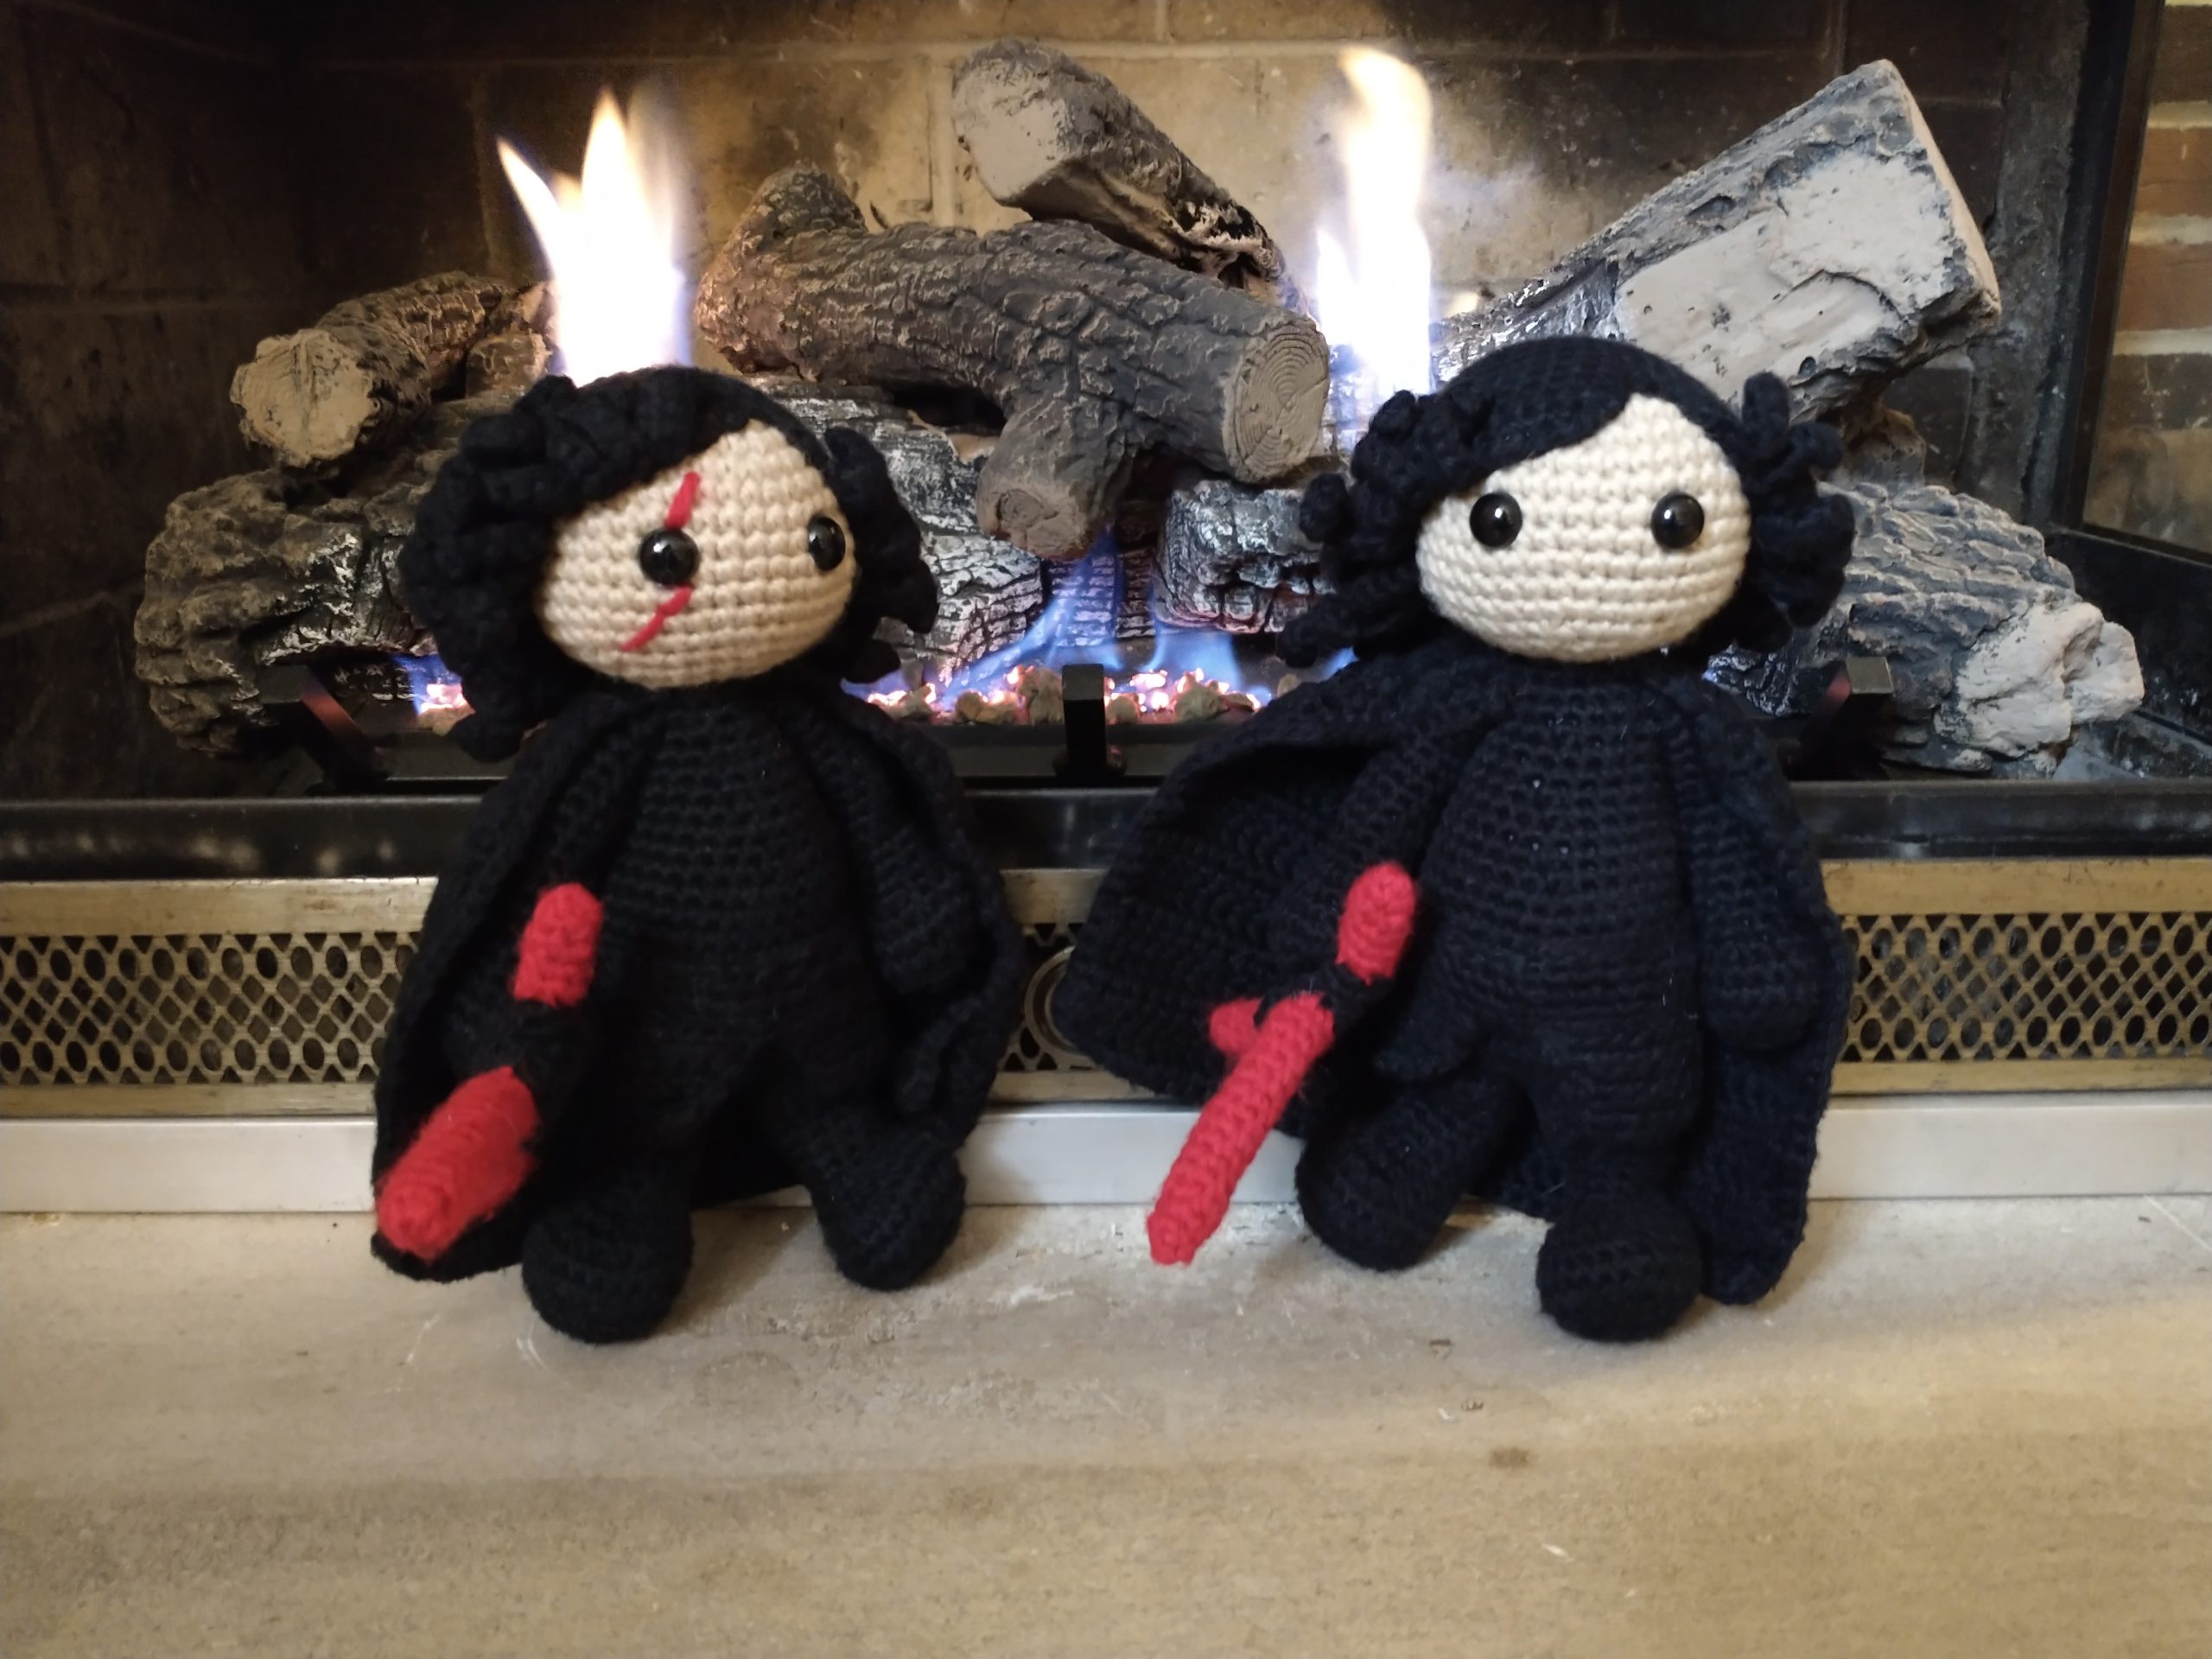
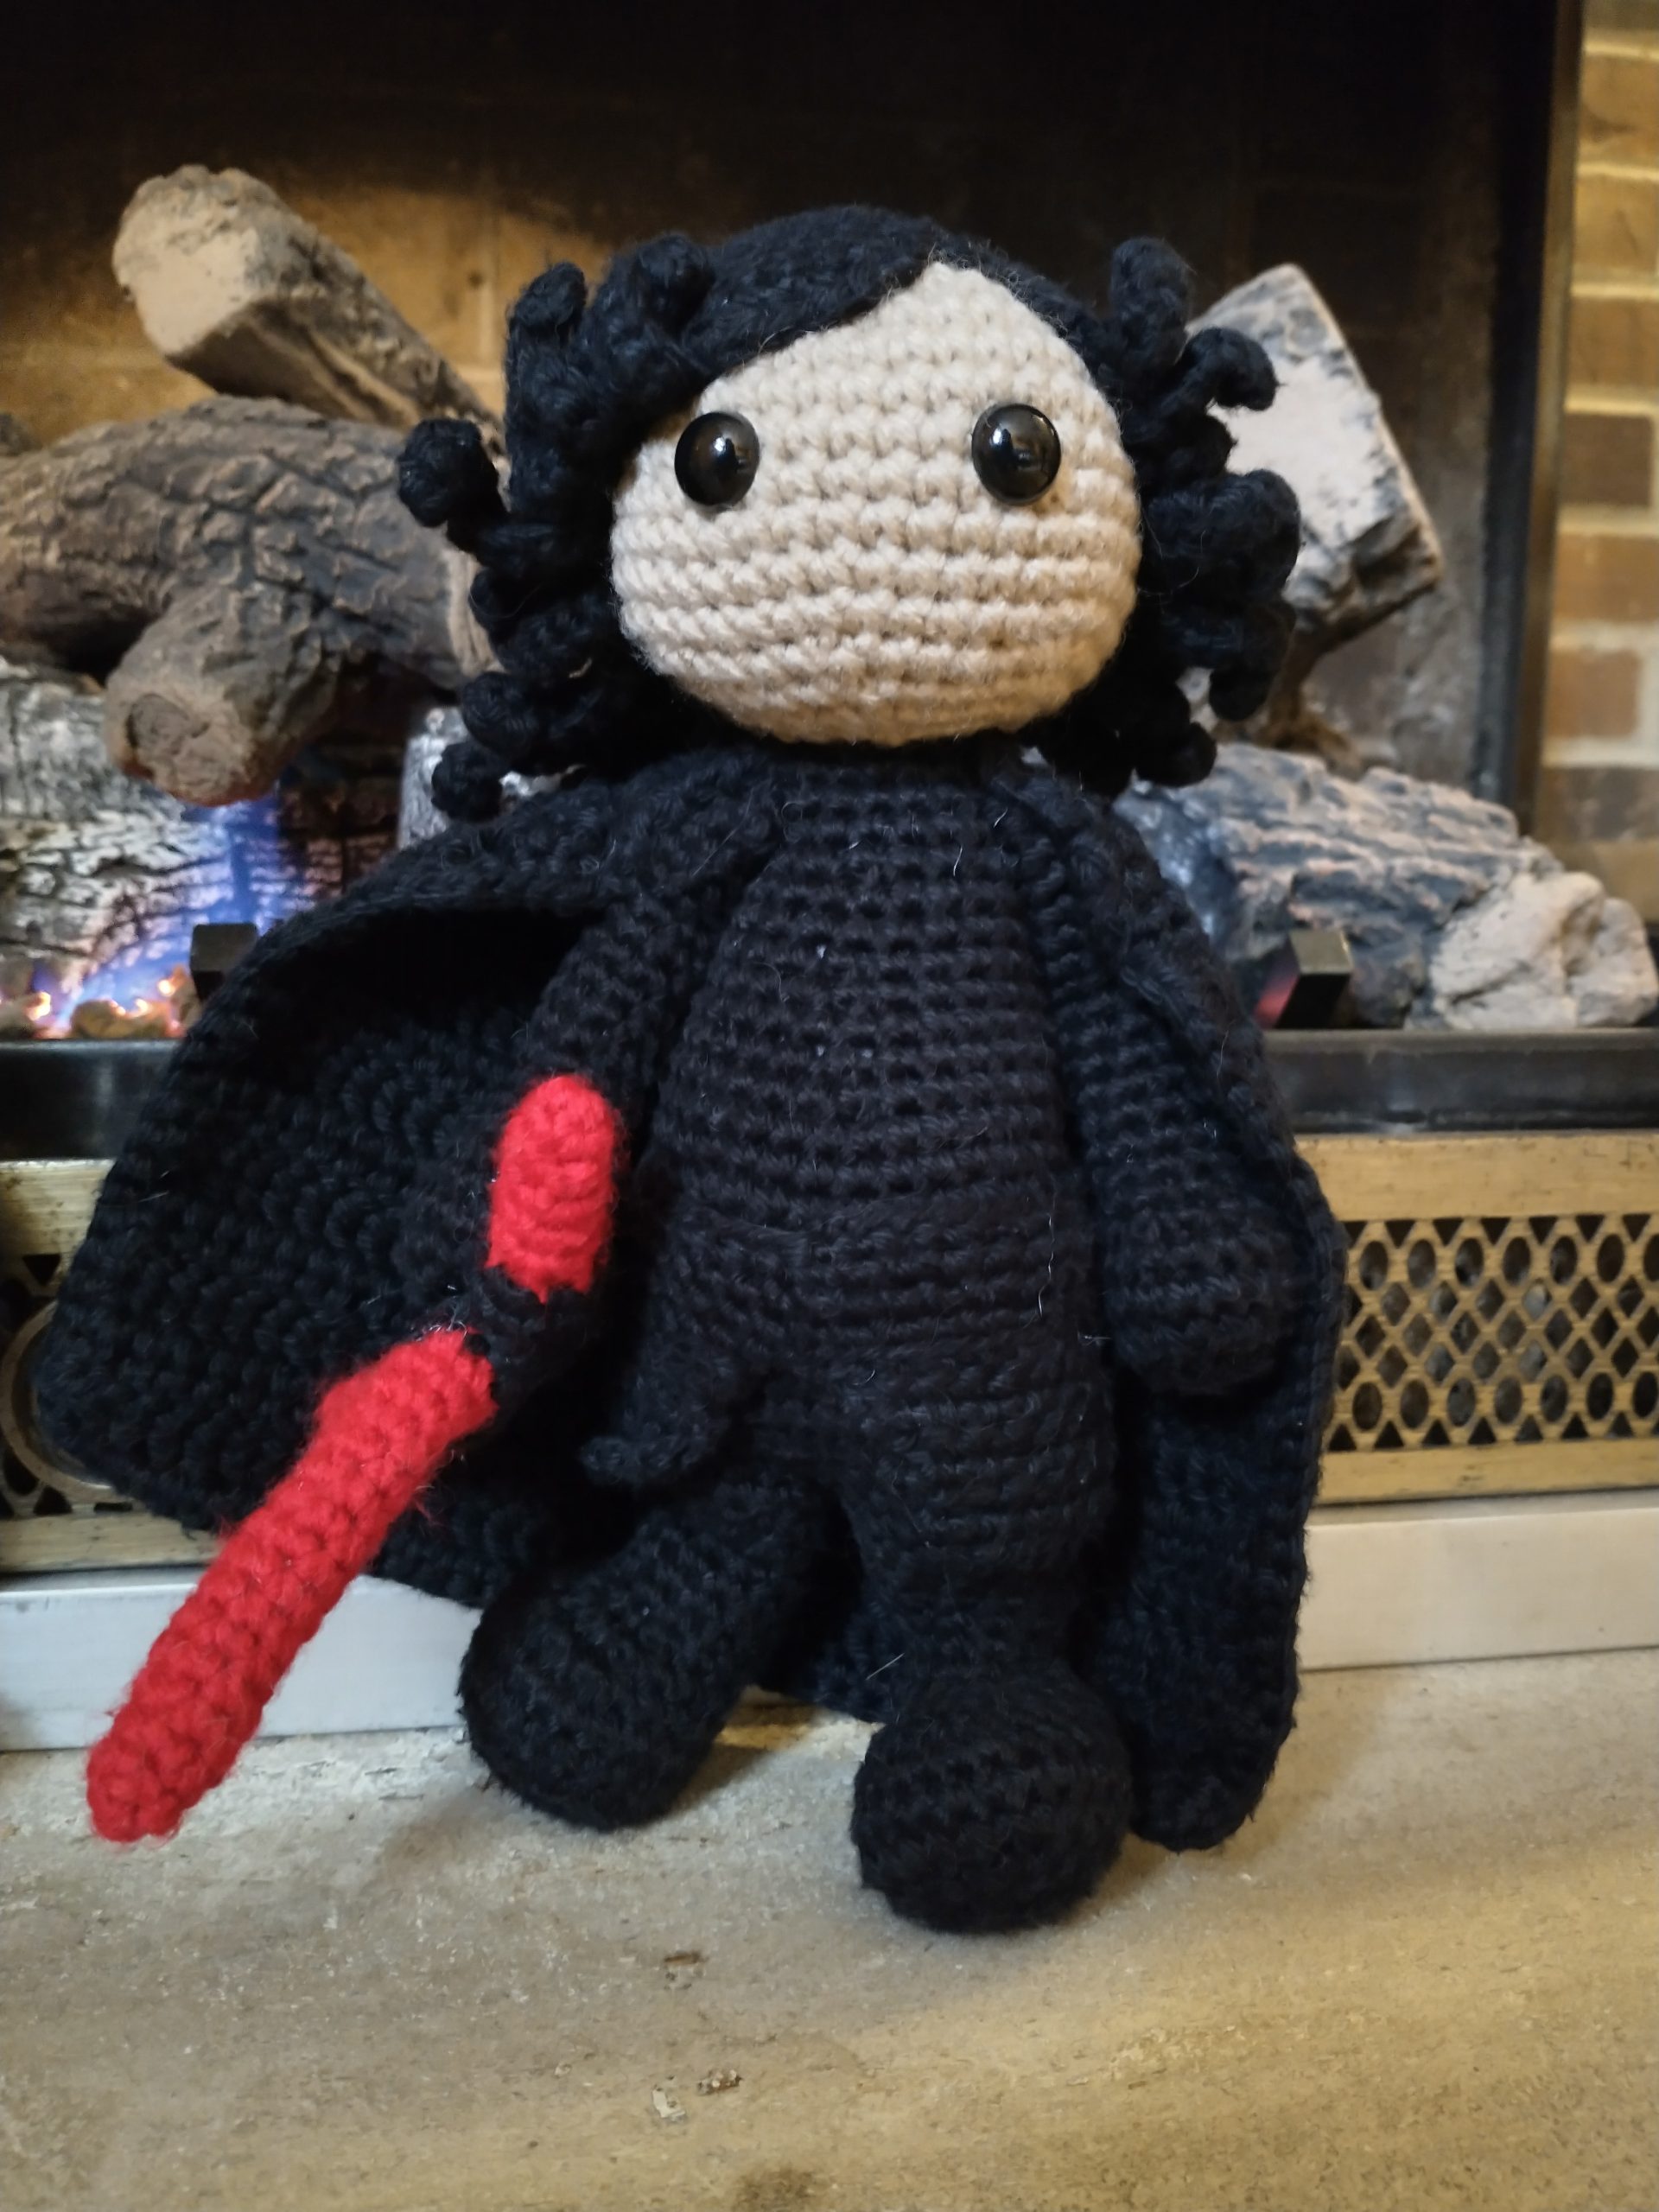
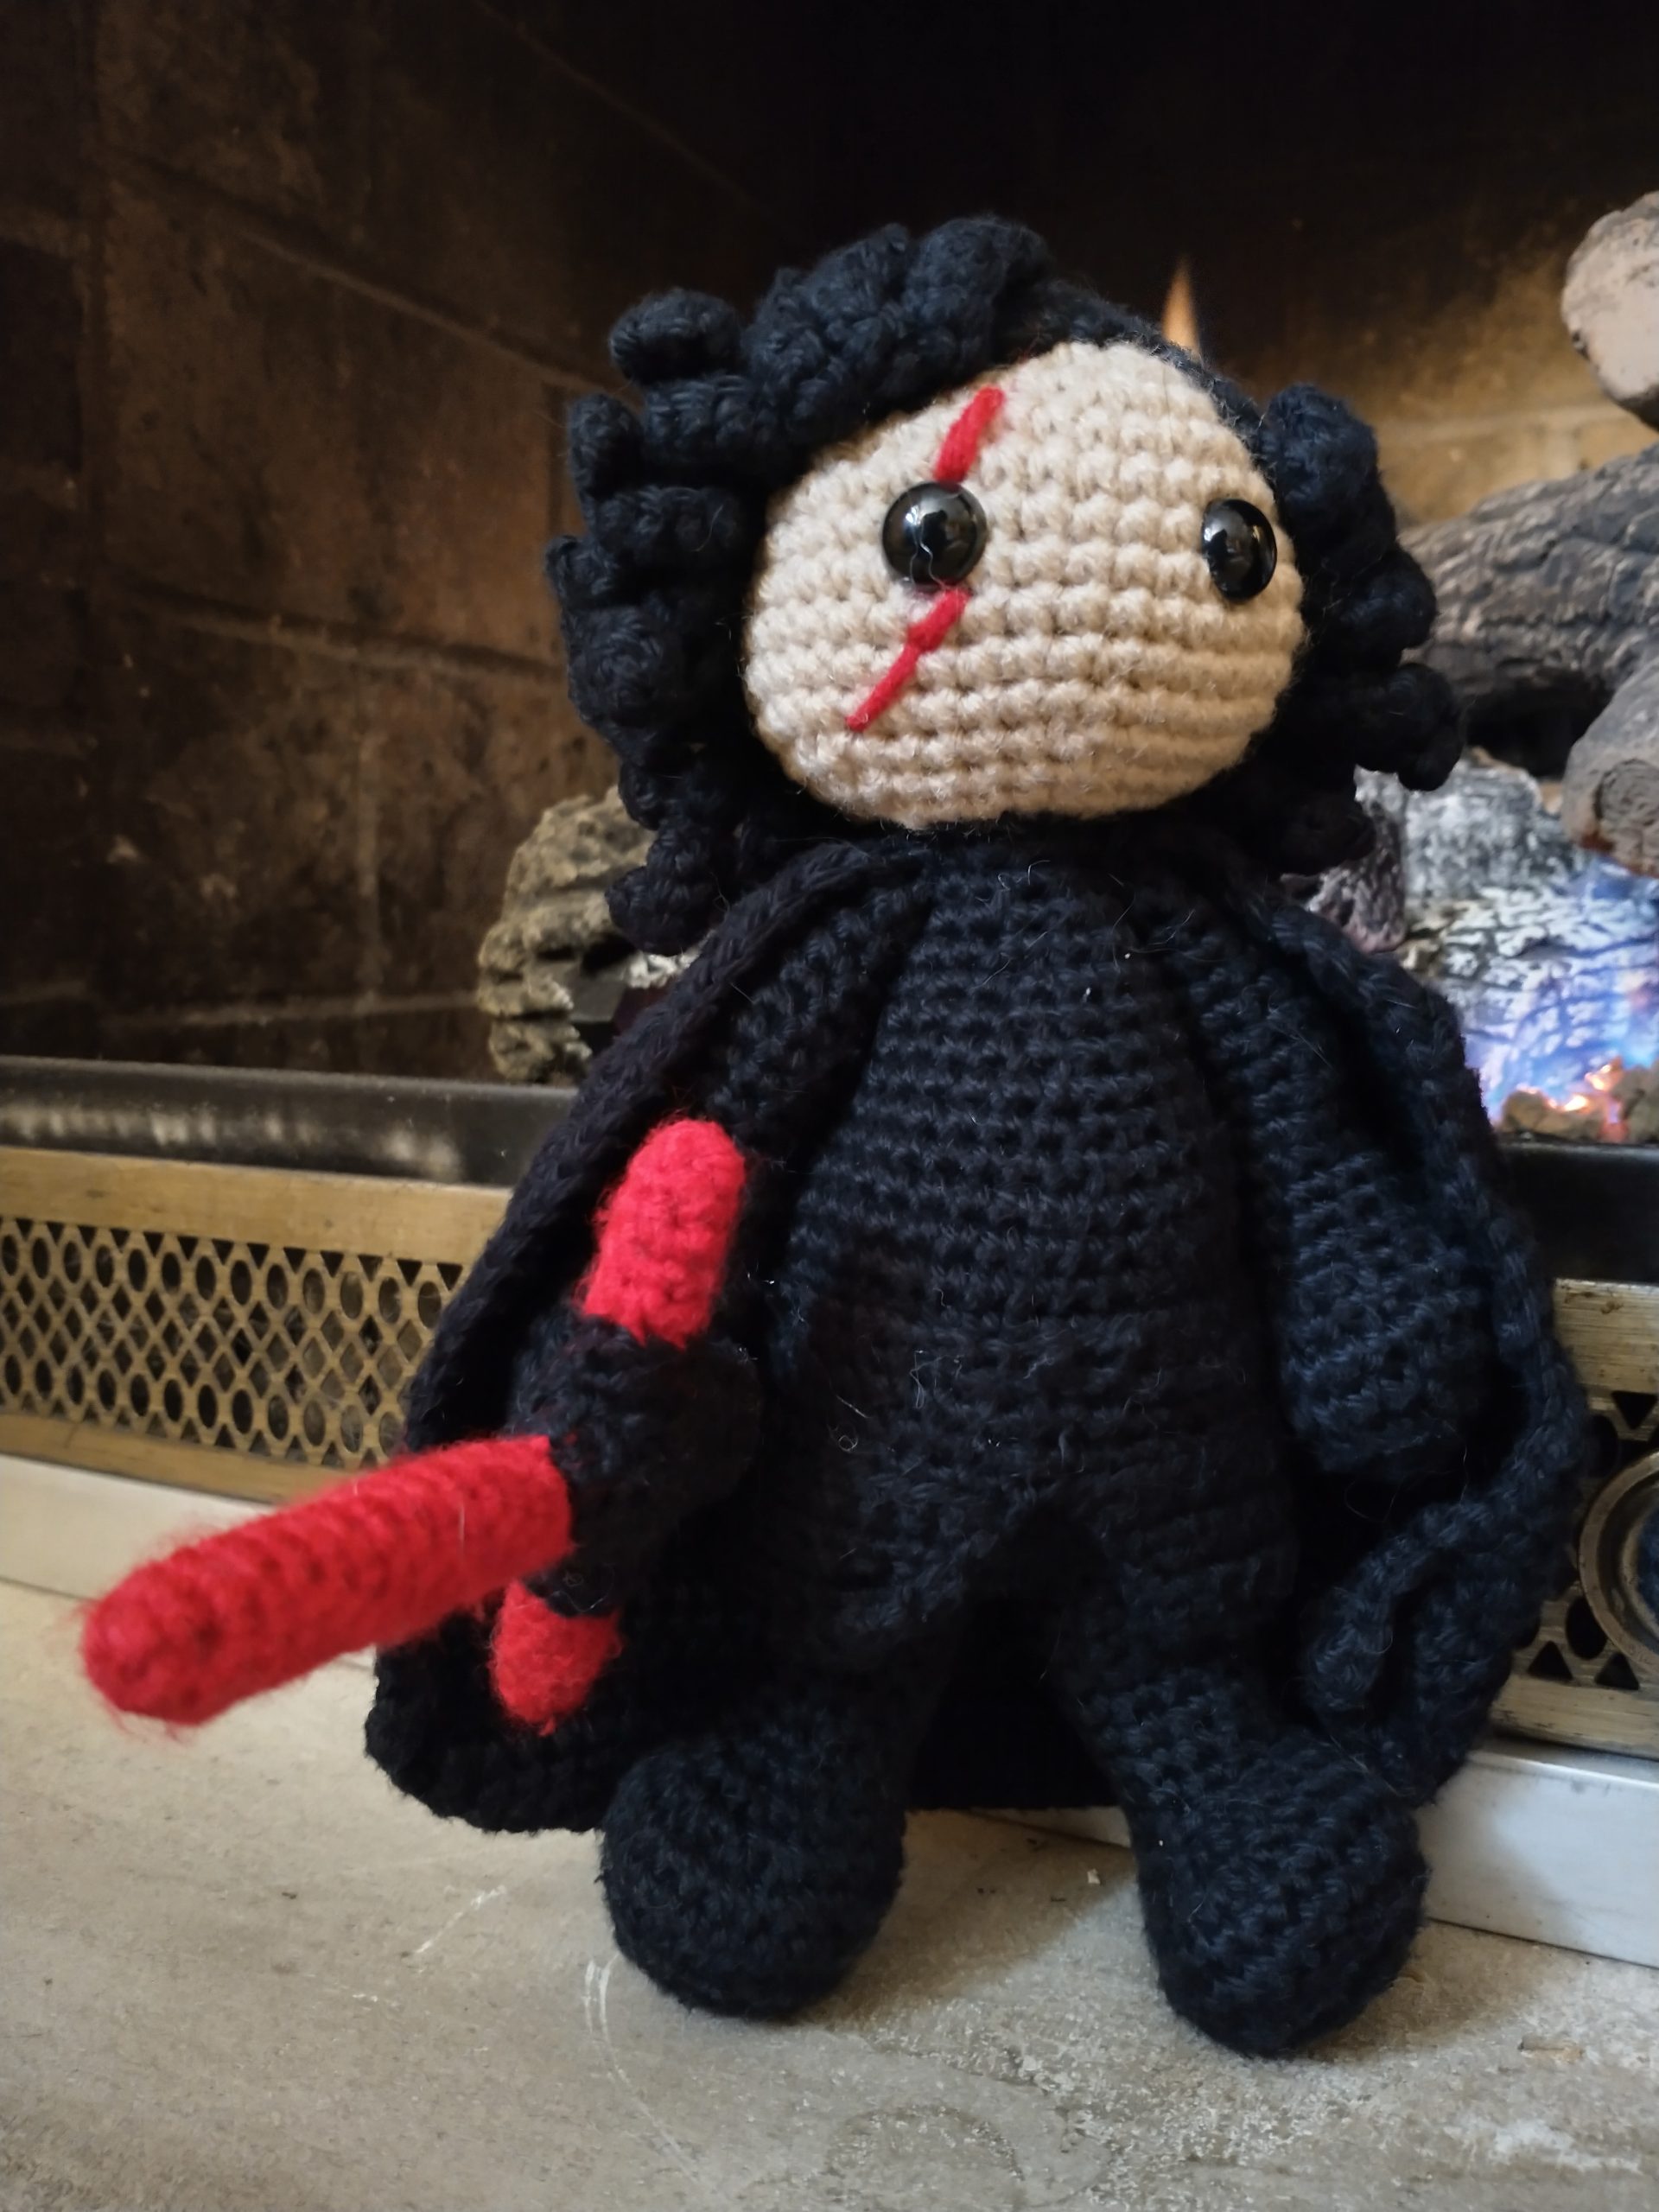
I was asked to make a Kylo Ren similar to one I had made a couple years ago. That one I made with his mask on and honestly wasn’t my favorite. Not to mention, I had trouble finding that free pattern again. I loved the idea of a Chibi version, but of course I have an aversion to paying for a pattern, so here I am. This is how I worked him up… I was originally asked for just one, but since I couldn’t choose to scar or not, I made both and then they had to decide which to give to their friend and which to keep for their youngling.
As with all my patterns, this is out there for individual use, for you to make and do as you wish. Do not claim the pattern as yours and if someone asks just share the link. Of note, this is fan art and selling copyrighted items can lead to some not fun times.
Head, in skin tone
Rnd 1: 6 sc in mcRnd 2: *inc* around
Rnd 3: *inc, sc in next sc* around
Rnd 4: *inc, sc in next 2 sc* around
Rnd 5: *inc, sc in next 3 sc* around
Rnd 6: *inc, sc in next 4 sc* around
Rnd 7: *inc, sc in next 5 sc* around
Rnd 8-14: sc around. Go ahead and put the safety eyes between rnd 10 and 11, with about 6 st in between
Rnd 15: *dec, sc in next 5* around
Rnd 16: *dec, sc in next 4* around
Rnd 17: *dec, sc in next 3* around
Rnd 18: *dec, sc in next 2* around, go ahead and stuff the head
Rnd 19: *dec, sc in next 1* around
Rnd 20: *dec, sc in next* around
Rnd 21: *dec* around, bind off and set aside
Arms, make 2, in black, making sure to stuff as you go, primarily stuff in just the hands and very lightly stuff in the actual arms
Rnd 1: 6 sc in magic circle
Rnd 2: inc around
Rnd 4: *inc, sc next 1* around
Rnd 4-5: sc around
Rnd 6: *dec, sc in next 1* around
Rnd 7: dec x2, sc around
Rnd 8-20: sc around, no need to leave a long tail for sewing
Legs, make 2, black, no need to leave tail for sewing for the first one and DO NOT bind off on the second. Second will lead to the body part. Make sure to stuff as you go.
Rnd 1: 6 sc in magic circle
Rnd 2: inc around
Rnd 3: *inc, sc* around
Rnd 4: *inc, sc next 2* around
Rnd 5-6: sc around
Rnd 7: dec x2, sc in next 6 st, dec x4, sc in next 6 st
Rnd 8: dec, sc in next 5, dec x3, sc in next 5 st
Rnd 9: sc in next 5 st, dec x2, sc in next 5st
Rnd 10-13: sc around
Rnd 14: *inc, sc in next 5* around
Rnd 15: *inc, sc in next 6* around
Rnd 16: sc around, bind off leg #1, but not leg 2, continue to body with leg two.
Body, starting with leg 2
Rnd 17: sc in next 4, dec using next sc and the 3rd from the end sc of rnd 16 on leg 1, sc around leg 1, dec using last sc in leg 1 and leg 2, sc around (the dec across keeps the gap from happening)
Rnd 18: sc around
Rnd 19: *inc, sc in next 9* around
Rnd 20-28: sc around
Rnd 29: *dec, sc in next 9* around
Rnd 30: *dec, sc in next 8* around
Rnd 31: sc around
Rnd 32: *dec, sc in next 7* around
Rnd 33: *dec, sc in next 6* around
Rnd 34: sc around
Rnd 35: *dec, sc in next 5* around
Rnd 36: sc around
Rnd 37: now, here is how I attach the arms. You can always choose to just sew them on. If you do, just sc this row. I look and see about where the arms should go. Now, crochet around the back, for me it was 5 st, but don’t get hung up on that. Just where it looks right. Now, flatten the arm hole, sc through both sc on the arm and the next one on the body. Do this for the next 5 st. Now, sc to where the next arm should go. For me it was 5 sc. Repeat the process for the next arm. This moves your start over a bit, but it’s fine.
Rnd 38: sc and bind off.
Sew head to body.
Hair, in black. Conversely, you can just choose to hook in some hair and call it a day, but I was making this for a youngling.
Rnd 1: 6 sc in mc
Rnd 2: *inc* around
Rnd 3: *inc, sc in next sc* around
Rnd 4: *inc, sc in next 2 sc* around
Rnd 5: *inc, sc in next 3 sc* around
Rnd 6: *inc, sc in next 4 sc* around
Rnd 7: *inc, sc in next 5 sc* around
Rnd 8-12: sc around
Rnd 13: ch 1, turn sc in next 10. Hdc in next 8 sc. Dc in next 6 sc. Hdc in next 8. Sc in next 6 sc. This should leave the last sc unworked. Ch 1 and turn.
Rnd 14: (formatted a bit differently to make it as easy as it can be to follow. Essentially you are making little octopus tentacles for hair) sl st next sc, sc in next 2 st.
Ch 6 st, 2 sc in 2nd ch, sc in next* back down the ch, sl st in same st as last sc. Sc in next sc.
Ch 6 st, back down the ch starting in the 2nd ch from hook *2 sc in 2nd ch, sc in next* 2 times, 2 sc in last ch, sl st in same st as last sc. Sc in next sc*
Ch 8 st, back down the ch starting in the 2nd ch from hook *2 sc in 2nd ch, sc in next* 3 times, 2 sc in last ch, sl st in same st as last sc. Sc in next sc* x 3.
Ch 10 st, back down the ch starting in the 2nd ch from hook *2 sc in 2nd ch, sc in next* 4 times, 2 sc in last ch, sl st in same st as last sc. Sc in next sc.* x 18.
Ch 8 st, back down the ch starting in the 2nd ch from hook *2 sc in 2nd ch, sc in next* 2 times, 2 sc in last ch, sl st in same st as last sc. Sc in next sc* x 5.
Ch 6 st, back down the ch starting in the 2nd ch from hook *2 sc in 2nd ch, sc in next* 2 times, 2 sc in last ch, sl st in same st as last sc. Sc in next sc* x 3
Hdc in next 3, sc in next 2, sl st in last. Bind off, leaving a long tail to sew that hair on.
Belt and bottom of tunic thingy
ch how many ever it takes to go around his tummy. Depending on stuffing and yarn, this can change, but it’s ok. For me it was 35. Don’t worry, I’m writing this to where it really doesn’t matter.
Rnd 1: be careful not to twist the ch, sc in 1st st and around. Yeah, it makes like a little weird bump thing, but sewing takes care of that really quick.
Rnd 2-4: sc around
Rnd 5: this round is all in FLO. ch 1, turn, dec, sc around, ch 1 and turn
Row 6-10: dec, sc around, ch 1, turn. On row 10, bind off and honestly, I left a long tail, weaved it to the beginning and then sewed it in place. Whatever is easiest for you, but I get lazy like that. To kinda make some kind of distinction on all this black, I made sure to keep that top loop from the ch and the loops from the FLO row visible.
Cape, I left a long tail since this is top down and that makes it easier for me to sew on, start with ch 13, this was perfect for me to go shoulder to shoulder.
Row 1: sc 12, ch 1 turn
Row 2: *inc, sc* across, turn
Row 3-4: ch 1, sc across, turn
Row 5: ch 2 (does NOT count as a st), *dc inc, dc in next 2* across, turn
Row 6: ch 2 (does NOT count as a st), *dc inc, dc in next 3* across, turn
Row 7: ch 2 (does NOT count as a st), *dc inc, dc in next 4* across, turn
Row 8-18: ch 2 (does NOT count as a st), dc across, turn
Row 19: ch 1, sc around the entire cape evenly, placing 3 sc at the corners
Now, weave in the tail and use the OG tail to sew on. I sewed about 1/3 down each arm and around the neck.
Lightsaber, completely optional, but I felt that I needed to have it… start in red, stuff as you go, but you really won’t need much honestly.
Main part
Rnd 1: 4 sc in mc
Rnd 2: sc around
Rnd 3: *inc, sc in next sc* around
Rnd 4-15: sc around and change to black at the end of rnd 15
Rnd 16: in FLO, *inc, sc in next 2* around
Rnd 17-22: sc around
Rnd 23: *dec, sc in next 2* around
Rnd 24: dec x1, bind off and sew close. Leave a tail to sew on to his hand
Sides, make 2, starting in red, stuffing as you go, but you most likely only need the ends
Rnd 1: 4 sc in mc
Rnd 2: sc around
Rnd 3: *inc, sc in next sc* around
Rnd 4-6: sc around and change to black at the end of rnd 6
Rnd 7: in FLO, *inc, sc in next 2* around
Rnd 8: sc around, leave a tail to sew onto main part
To scar or not to scar? The scar I just sewed on honestly and of course I had to make one of each!
And that’s it. Mad Hooking!


Recent Comments