Hanging Baby Feet


So, I was presented with a picture of a knitted pattern by Sandra Mceachran asking if I had anything similar.  I didn’t, but it was a little challenge and got the hamster in my head kicking a little… just a little mind you.  It was early and she hadn’t had enough caffeine.  After a few cups of coffee, I had a plan of action…

I went back and forth about toe down or sewing on the toes. Going by the picture I went with the toe down and less sewing because let’s face it, I’m all for less sewing on my crochet projects!
G hook (or whatever hook you prefer for your amigurumi projects and so the stuffing doesn’t show)
Yarn of choice (I happened to have pink Bernat worsted weight near me at the time)
Ribbon if wanted for hanging or yarn (I used a satin finish 15mm wide ribbon)
poly-fil
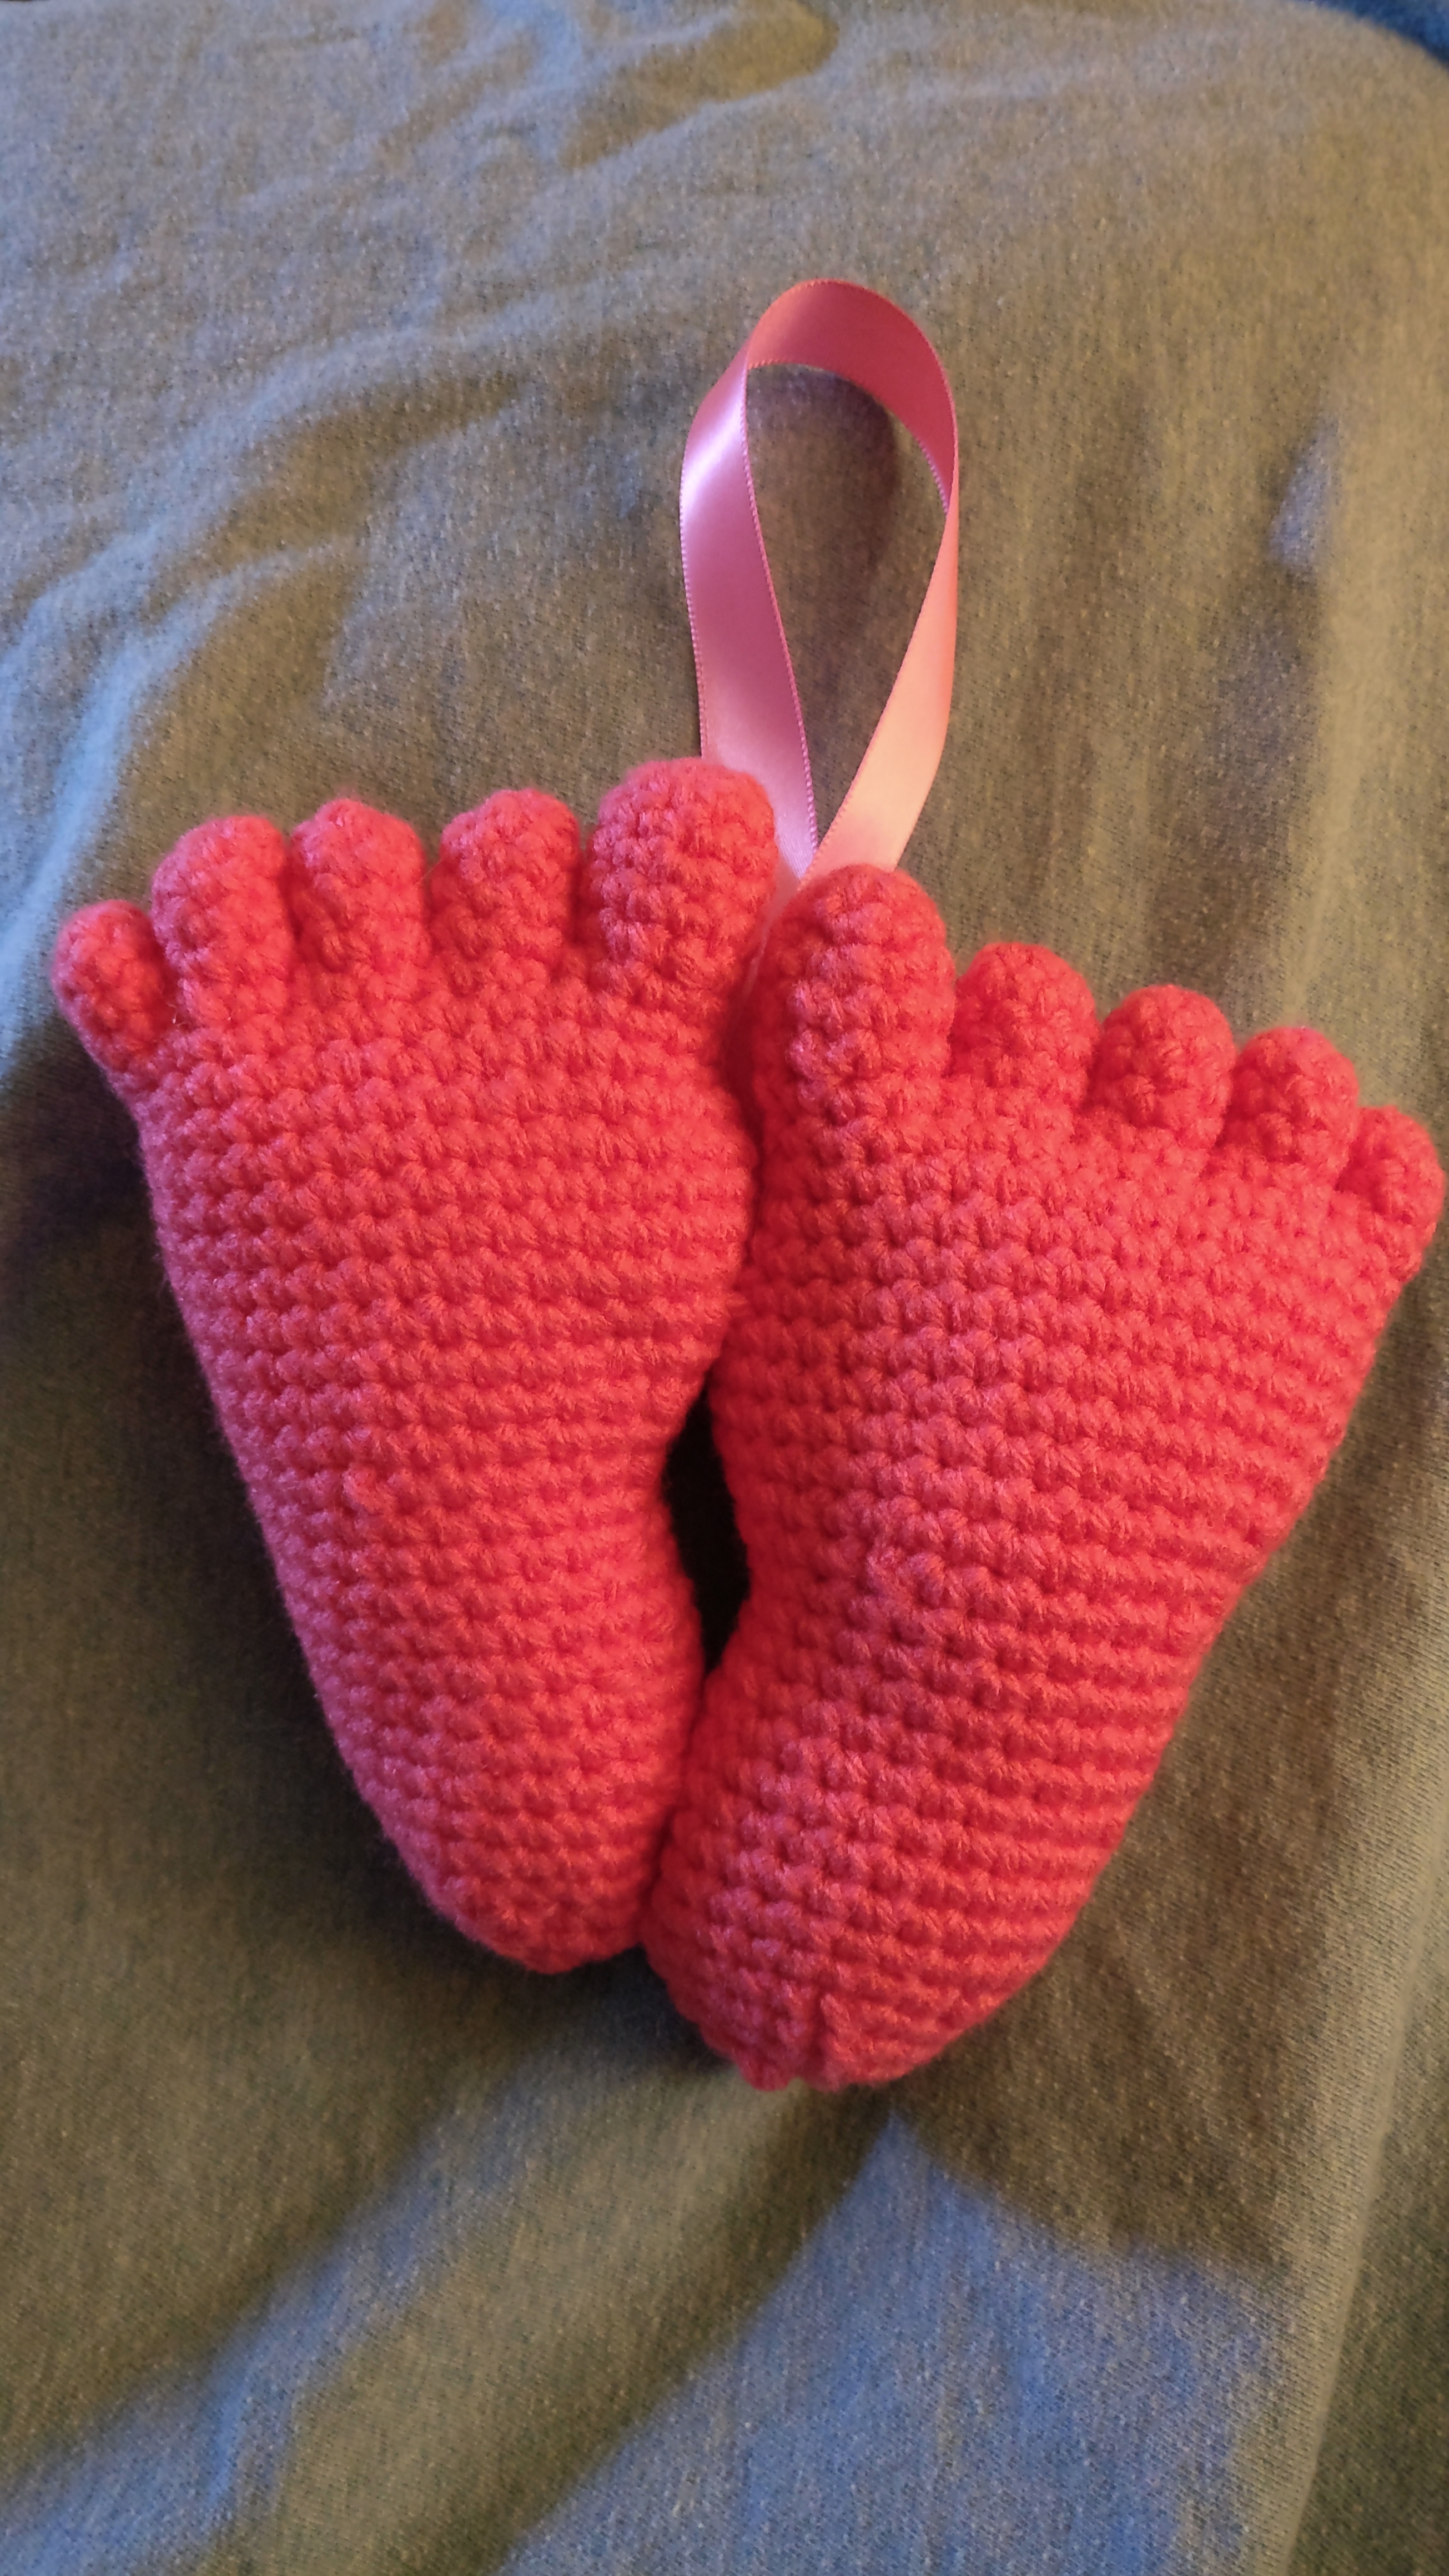
So, make two of these.  It is the same on the front as the back so flipping one makes the other foot…
Also, mine ended up being about 6.5 inches from big toe to heel.
Little Toes, 3 per foot:
6sc in magic circle
*inc, sc in next 2* around
sc for 2 rounds then bind off
Pinky Toe, 1 per foot:
6sc in magic circle
sc around for 2 rounds then bind off
Foot, starting with the big toe:
6sc in magic circle
*inc, sc* around
sc around
*inc, sc in next 2*
sc around
*dec, sc in next 2*
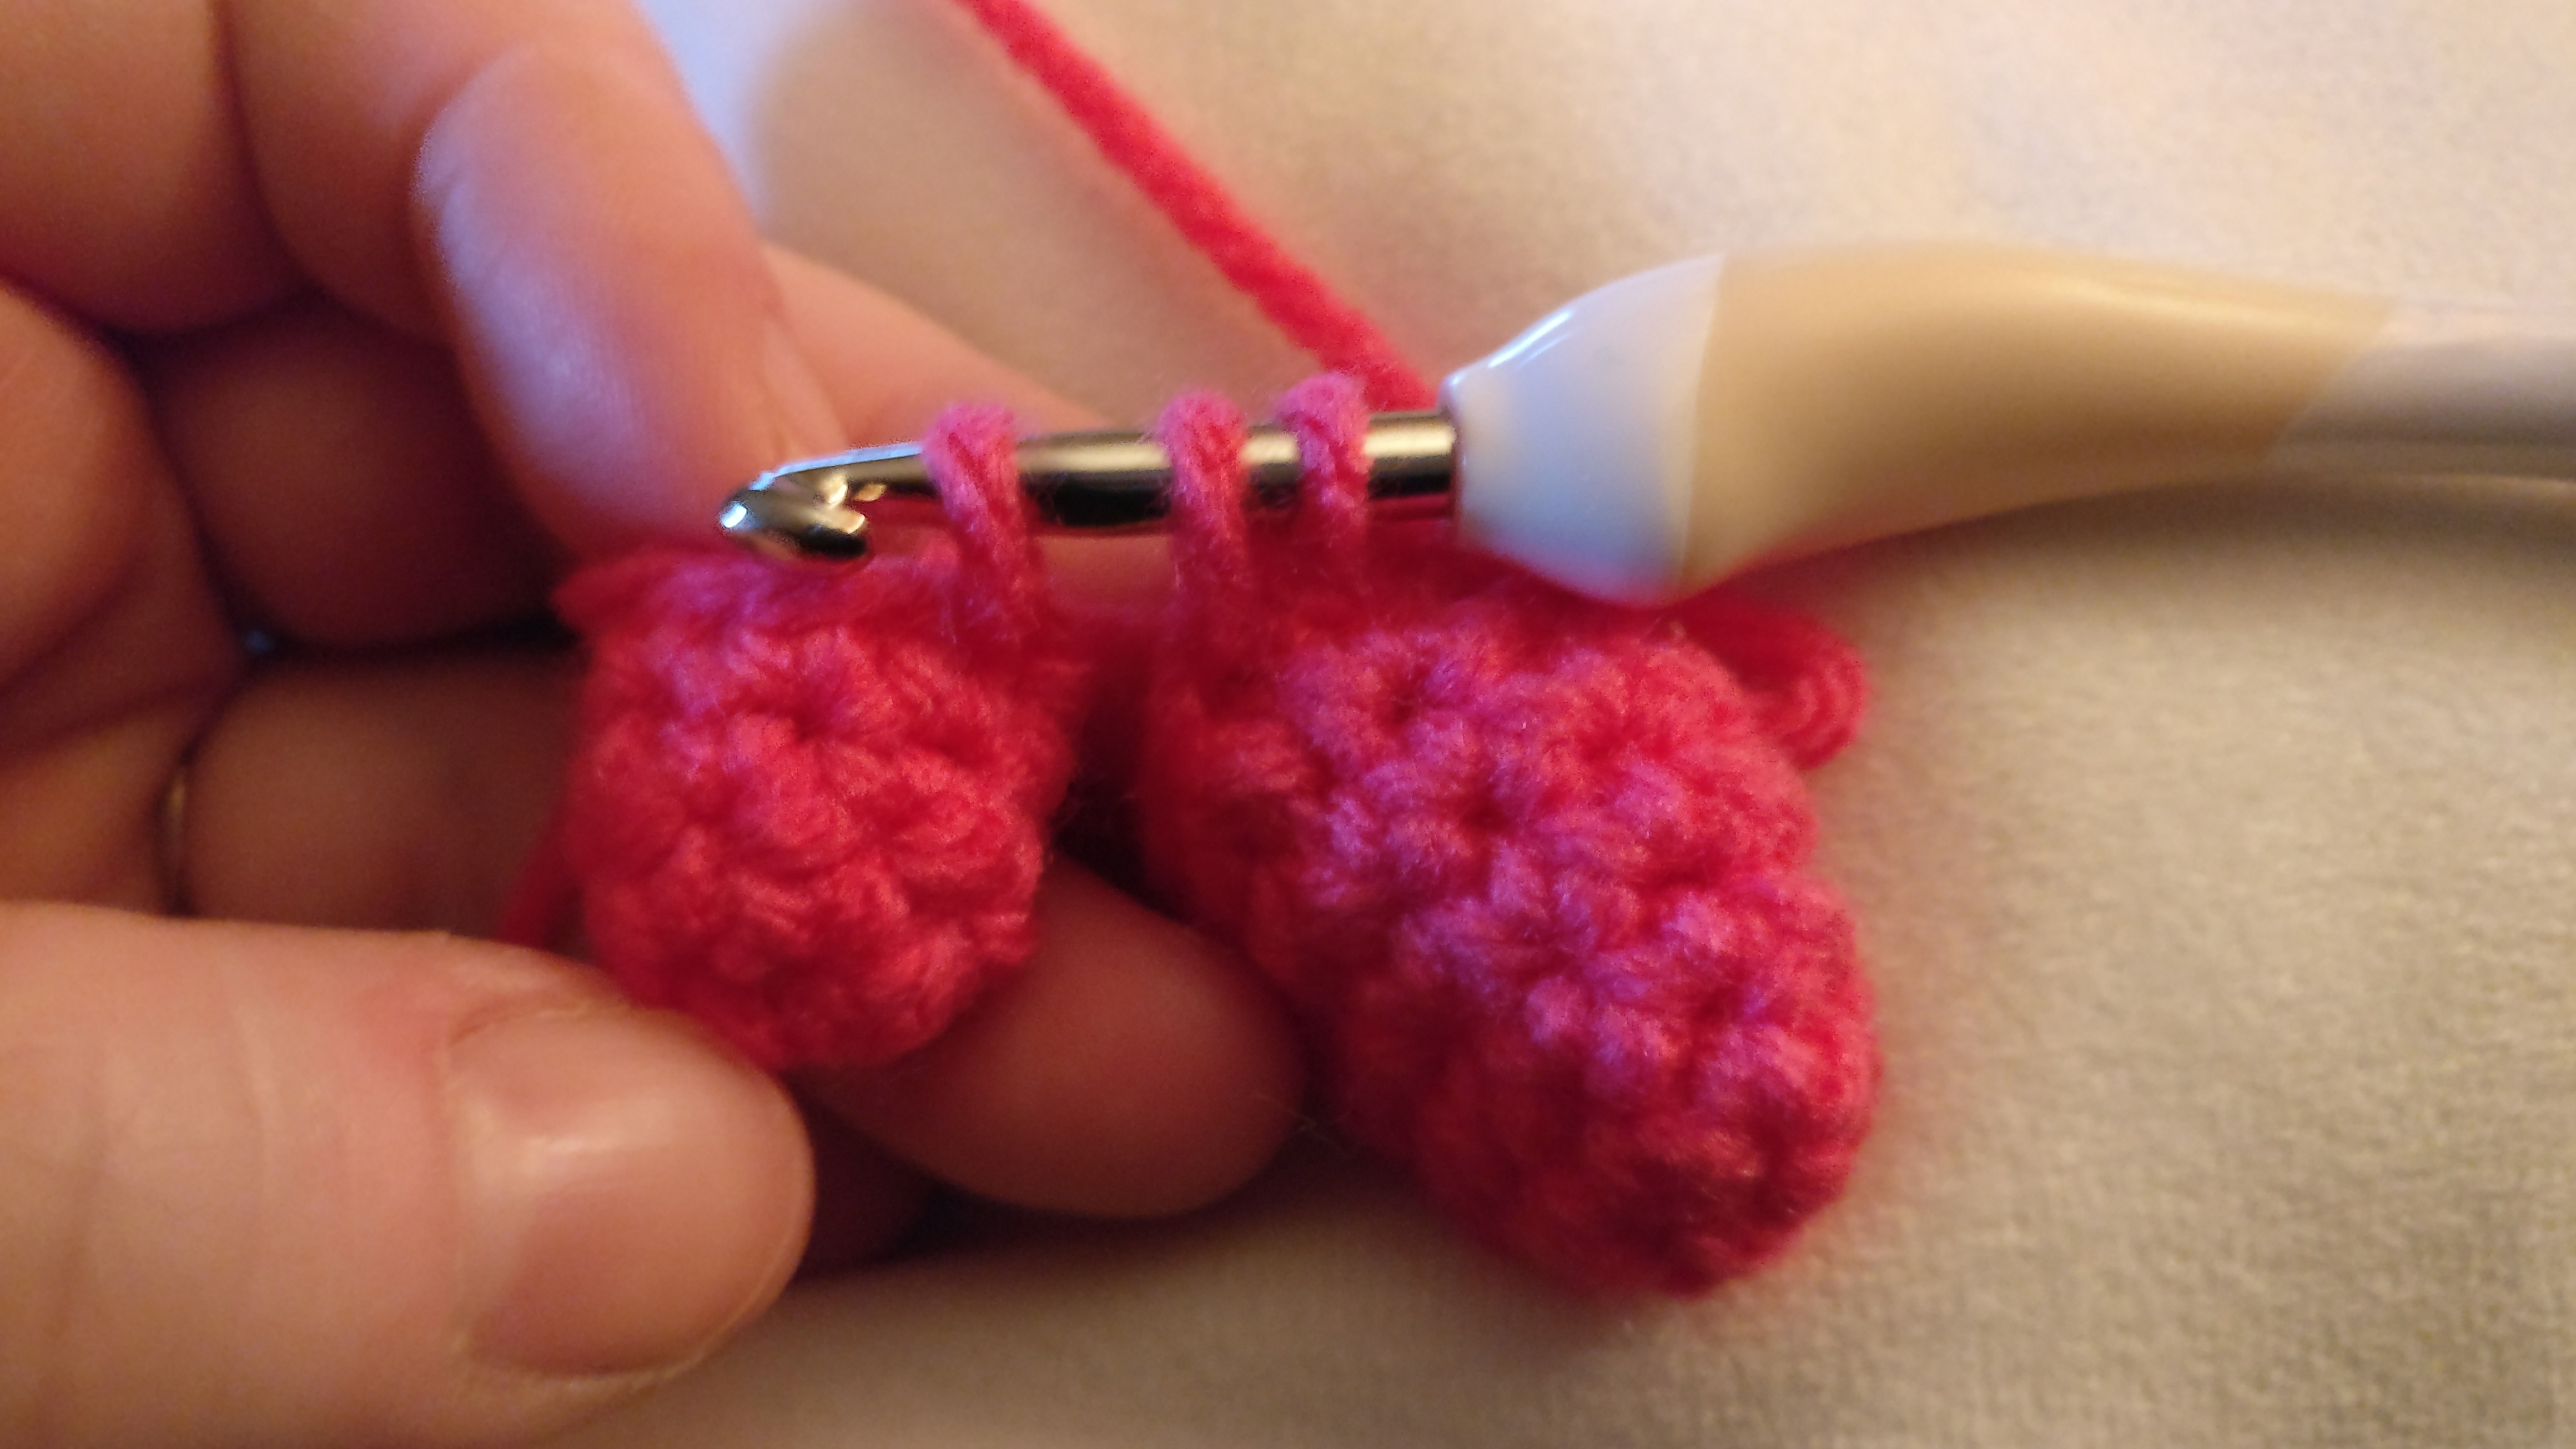
Ok, here’s where it can get tricky.  Just take one stitch at a time and it will be fine.
sc in next 3, then crochet together the second toe (draw up a loop in the current toe, draw up a loop in the new toe, yarn over and pull through all 3 loops)
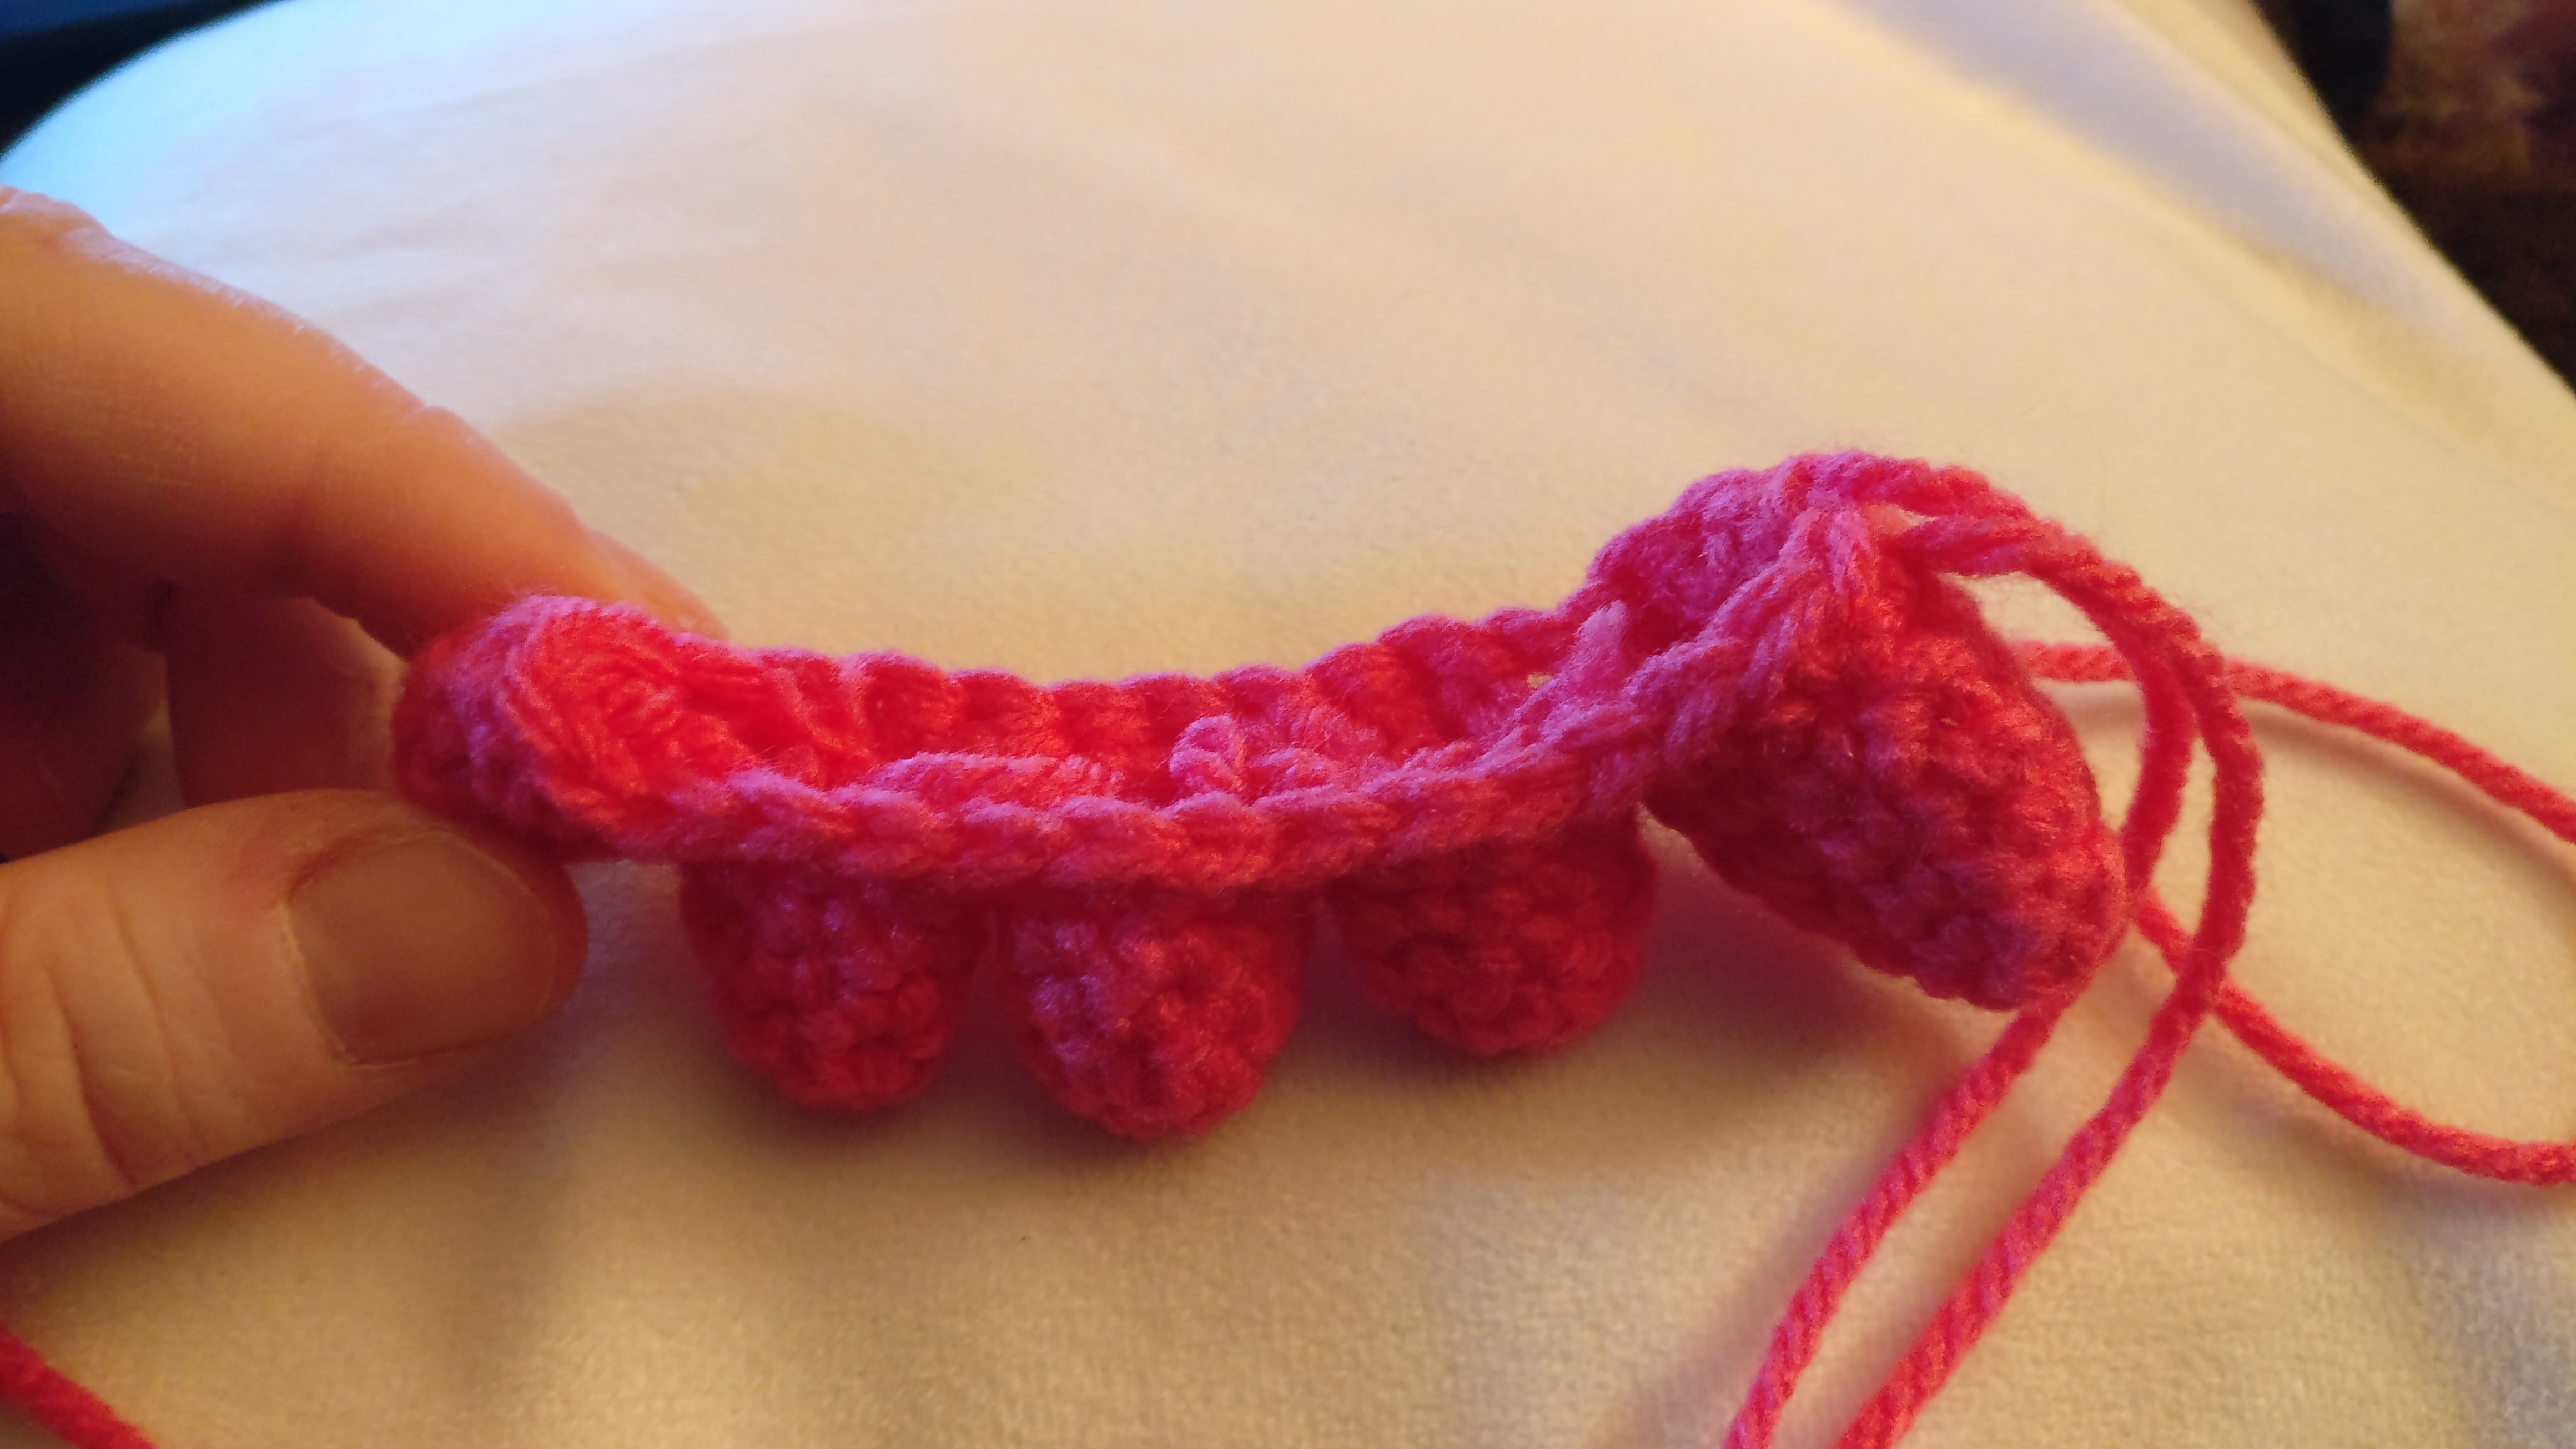
sc in next 2, crochet together third toe, sc in next 2, crochet together fourth toe, sc in next 2, crochet together the pinky toe, sc in next 4 (around the pinky toe), crochet together to the fourth toe, sc in next 2,crochet together to the third toe, sc in next 2, crochet together to the second toe, sc in next 2, crochet together to the big toe, sc in next 4 and you should be back to the beginning with a slightly curling weird thing that resembles toes.  It gets to looking better, trust me. Go ahead and stuff all the endings from the toes into the toes to get them out of your way.
Sc around for 2 rows (total of 31 stitches for those keeping count)
Inc in first stitch, sc around until the last 2 stitches.  Inc in the last 2
Sc around for 4 rounds
Sc in next 14 stitches, dec, sc in next 14, dec, dec
Sc around
Sc in next 13 stitches, dec, sc in next 12, dec, dec
*sc in next 5, dec* around
Sc around for 2 rounds then take a break and make sure those toes are stuffed the way you would like.
Inc, sc in the next 10 stitches, dec, sc in rest
Sc around
 Inc, sc in the next 10 stitches, dec, sc in rest
Sc around for 3 rounds
Sc in next 11 stitches, dec, sc in rest
Sc in next 10 stitches, dec, dec, sc in rest
*dec, sc in next 5* around
*dec, sc in next 4* around, stuff and shape as needed.  Don’t get carried away and stuff too firmly, you want it to be kinda flatish.
*dec, sc in next 3* around
*dec* around, leaving a long tail to sew close
That’s all… you can sew them together and then sew a ribbon on back for hanging or whatever you want to do with the feet!
Tip:  How I sewed my feet together I just made sure that the second foot I left a really long tail and sewed the end closed, placed the other foot next to it and went from there.  I then made the ribbon and used the same tail to sew that to the feet.  Less chance of things coming undone and certainly less threading of the needle.
Mad Hooking!

Sweet Shells Baby Bonnet and Blanket Edging

IMG_20150603_080912-2

I have to admit, I love the edging I wrote for the Granny Square and Ribbon Blanket.  I use it so very often anymore as a go to for a statement, lacy edging on fleece blankets and it never fails to make the recipients of the blanket happy.  I recently used it on a baby blanket for my brother/sister-in-law coming soon little girl and I wanted a matching hat and shoes.  I couldn’t find what I wanted, so what follows is the pattern for the edging and the bonnet.  The shoes, if you want that pattern as well, can be found here (http://www.ravelry.com/patterns/library/baby-bootie-slippers) for free even if I did my bow a little different…

As with all my patterns feel free to use and sell what you make if you want. I would ask that you link back to where you found the pattern when possible.  However do not reproduce my pattern in any format. Essentially, don’t be a troll.

Edging:

Size H hook.

The yarn I used in the picture was Red Heart with Love in Bubblegum.  To make the holes I use this nifty little tool I got from Kay’s Crochet (http://kayscrochetpatterns.com/) but I ordered mine off of their Amazon store because me and Amazon have a tight relationship like that…

Round 1: sc into the holes you made into your fleece.  Depending on how spaced apart your holes are you might do 2 sc in each hole like I do, just so you aren’t bunching up the fleece.

Round 2: sc around, placing 3 sc in the corner sc.  Don’t worry, this isn’t an exact science.  Truly don’t worry, just roughly where the corner is, throw in the 3 sc in one sc.

Round 3: Ch 3, (2 dc, ch 1, 3 dc) in same st as joining. Skip 1 st, *dc in next, skip 2 st then (3dc, ch 1, 3dc) in next st, skip 2 st* around. Corners:  When you get to the corners though you will only be skipping 1 st instead of the 2.  Sl st into top of beginning ch 3.

Round 4: Sl st in the first two dc and into the space.  Ch 3, (2 dc, ch 1, 3 dc) in same space. *fpdc (front post double crochet) around the dc in middle of groups, (3dc, ch 1, 3dc) in next ch 1 space* around. Corners:  Nothing special to do in the corners for a change. Sl st into top of beginning ch 3.

Round 5: Sl st in the first two dc and into the space like last round. Ch 3 and do 6 dc in same space. *fpdc around previous round fpdc, 7 dc in ch 1 space* around.  Corners:  Again, nothing special to do in the corners. Sl st into top of beginning ch 3. Bind off and weave in your ends and that’s it for the edging.

Bonnet:

Size H hook.

I used Red Heart with Love in White (I had this in my stash without the label so I’m not exactly sure of the name) and Bubblegum for this and according to my chart it should be for a 3 month old babe.  So, depending on your yarn it could change the size of your hat.  I have found this blog/sizing chart to be helpful (http://anniespictureperfect.blogspot.com/2013/01/how-to-properly-size-crochet-hats-chart.html?m=1)

With white, create a magic circle then ch 2

Round 1: 10 dc in the magic circle ,sl st to first then ch 2

Round 2: 2 dc in each dc around, sl st to first then ch 2

Round 3: *2 dc in first dc, 1 dc in next* around, sl st to first then ch 2

Round 4: *2 dc in first dc, 1 dc in next 2* around, sl st to first then ch 2

Round 5: *2 dc in first dc, 1 dc in next 3* around, sl st to first then ch 2

Round 6: dc in each of the next 45 st leaving the last 5 unworked, ch 3 and turn

Round 7: *dc in next, skip 2 st then (3dc, ch 1, 3dc) in next st, skip 2 st* across until the last 2 dc.  Dc in the last 2, ch 3 and turn

Round 8: fpdc (front post double crochet) around the second dc, *(3dc, ch 1, 3dc) in next ch 1 space, fpdc around next dc* then dc in top of ch 3, ch 3 and turn.

Round 9: bpdc (back post double crochet) around the second dc, *(3dc, ch 1, 3dc) in next ch 1 space, bpdc around next dc* then dc in top of ch 3, ch 3 and turn.

Round 10: fpdc (front post double crochet) around the second dc, *(3dc, ch 1, 3dc) in next ch 1 space, fpdc around next dc* then dc in top of ch 3, ch 3 and turn.

Round 11: bpdc (back post double crochet) around the second dc, *(3dc, ch 1, 3dc) in next ch 1 space, bpdc around next dc* then dc in top of ch 3 changing to pink, ch 3 and turn.

Round 12: fpdc (front post double crochet) around the second dc, *7 dc in next ch 1 space, fpdc around next dc* then dc in top of ch 3 do NOT cut yarn.

Round 13: ch 20, 3 sc in 2nd ch from hook and in each ch back to the bonnet.  Sc evenly along the side and back until you get to the beginning of round 12.  Ch 20, 3 sc in 2nd ch from hook and each ch back up to the bonnet.  Cut and weave in your yarn.

Mad Hooking!

UP Blanket Set

IMG_4137

This blanket started by me needing a gift set. Mom to be had mentioned she liked the UP movie and some of the items for the nursery. So me and my grand ideas saw a poster online that I loved. I also loved the quote “Adventure is out there” that was on it as well. This was my humble attempt to pay homage to such a lovely movie.

Note before starting: there is A LOT of sewing. Seriously, not kidding, A LOT!

Caron one pound yarn in white and sky blue
Other colors as needed for the appliques
Size H hook

We start with a basic ripple blanket. Nothing special, but you will be so tired of counting to three by the time you are finished…

Note: dc3tog – Yarn over, insert hook into st and draw up a loop, yarn over and draw through 2 loops (yarn over, insert hook into next st and draw up a loop. Yarn over, draw through 2 loops) twice, yarn over and draw through all loops on hook.

ch 134.
Row 1: Dc in 4th ch from hook (beginning ch counts as dc), *dc in next 3 ch, dc3tog, dc in next 3 ch, 3 dc in next ch; rep from * 11 more times, dc in next 3 ch, dc3tog, dc in next 3 ch, 2 dc in last ch – 13 ripples.
Row 2: Ch 3 (counts as dc), turn, dc in first dc, *dc in next 3 dc, dc3tog, dc in next 3 dc, 3 dc in next dc; rep from * 11 more times, dc in next 3 dc, dc3tog, dc in next 3 dc, 2 dc in top of turning ch.

Repeat row 2 for a total of 30 rows… or not, whatever you choose honestly. Less white, more white… also you can choose to do the color changes like I did, or just switch straight to the blue. Mind you, the color changes I did are not strict. I say to change in the valley (dc3tog) or peak (3 dc group). You can change the dc before or after the grouping. Whatever is easier for you. Also, some people prefer to carry the yarn they aren’t using behind the color they are… I didn’t. I find with white and dc it shows up and I wanted this to be seen front and back. I choose to bind off and change colors that way. Now, that being said, go have a drink, then change colors if you want.

Row 31: at the third valley change to blue for 3 peaks and switch back to white for the remainder of the row.

Row 32: at the second valley change to blue for 3 peaks. Change back to white for 3 valleys, changing to blue on the next peak for 4 valleys then back to white on the next peak. White for the remainder of the row.

Row 33: at the second valley change to blue for 5 valleys and switch back to white. After 2 valleys switch back to blue for 3 valleys. Switch back to white at the next peak and continue for the rest of the row.

Row 34: change to blue after the first valley. Change back to white after 4 valleys for 1 peak. Change to blue after the next valley and for the remainder of the row.

Row 35: all blue! Woot! No more color changes!

Alright, remind yourself you have come this far, keep going and make 40 rows in blue… ah, now you remember why you don’t like making blankets often…

Edging: for this one I choose just to do a real simple SC all around, placing 3 in every corner and changing color where need be. By the time everything is added I didn’t want it to be too busy.

Also, you might have noticed, you could decide to do a ocean blanket at this point. Up is down and down is up kind of thing…

IMG_4136

Now on to the appliques!

Balloons:
Now I ended up making 33 balloons using 5 different colors. You can use whatever colors you want though. Good time to use up some yarn from the stash! Or if you know the colors the baby’s room are to be done in, that could be a cute addition as well!
You can also decide to just make the whole blanket the balloons and the house and not even bother with the words… trust me, that would save some time and frustration so I’m not going to judge.

Starting with a magic circle, ch 2 then place 10 dc in the circle. Tighten circle and sl st into first dc.

Then ch 2, 2 dc in joining then 2 tc in next, 2 dc in each of the next 2 dc, 2 hdc in each of the next 2 dc, 2 sc in each of the next 2 dc, 2 hdc in each of the next 2 dc, sl st to top of first dc and bind off, making sure to leave enough for sewing later. Shape a little as necessary. Then repeat for as many balloons as you need.

House:
Again I used some yarn I had on hand. It was a brown for the roof and a really pale yellow for the house. Not exactly the right colors, I know, but you’ll have that. I knew to make a house this small I wasn’t going to get the detail that the house truly calls for.

House part:
Ch 10, hdc in 3rd ch and across.
*ch 2, hdc across* for 4 rows
Ch 1, sc around, putting 2 sc in the corners, bind off and leave a tail for sewing

Roof:
Ch 14, hdc in 3rd ch and across
*ch 2, hdc across* for 3 rows
Ch 1, sc around, putting 2 sc in the corners, bind off and leave a tail for sewing
Attach to the top of the roof part at the 5th hdc in. Ch 2, hdc in same as joining, hdc in each of the next 2 st. Bind off.

Now, you sew. I don’t have any real great words of wisdom except hide your stitches as you sew. That or use the clear thread (I’ve never done so, but others like it) or use some fabric to put on the back when you are done.

Attach the balloons in a overall balloon shape. The house goes below.

How I did the words and the balloon ties are the same principal. What you do is crochet a chain that is the length you need. Sounds easy, but it takes a little bit of getting used to for the words. Then you simply sew it on, making sure to hide your ends and stitches. Pinning it in place would help quite a bit. I would also highly suggest doing this with the balloon strings before attempting the words.

And then after many hours, you are done with the blanket.

IMG_4135

Aviator hat I found on the Repeat Crafted Me site found here: http://www.repeatcrafterme.com/2014/05/crochet-aviator-hat-pattern.html
I did use the Caron white yarn from the blanket though instead of the bulky white she did because I had some left and didn’t want to go buy yet some more yarn… OK I did want to buy more yarn, but my husband has started to notice the stash more…

The diaper cover I used can be found at this link: http://flowerscreations.blogspot.com/2012/05/free-diaper-cover-pattern.html

Mad Hooking!

Granny Square and Ribbon Baby Blanket Set

IMG_3885

So this one started out as my sister finding this picture of a lovely blanket and wanted me to duplicate it for a gift. It isn’t my original idea and I couldn’t find the pattern listed in my usual hunting grounds, so of course this hooker made up one!

A warning. This isn’t an exact pattern. Depending on the size of your granny square will change the count for the edging and really that is all this blanket is… a traditional granny square with a fancy edging. The hat is a bit more exact.  The hat fits a 0-3 month baby.

Red Heart with Love yarn (I used gray and bubblegum pink)
H size hook
Ribbon (I used 5/8″ or 15mm wide and it took just under 18ft or 5.4m)
Accent pearl or button (or nothing)

Alright, start by making your granny square with the gray. You can find a tutorial just about everywhere, but here is one in case you need it and are feeling lazy (like me usually) and don’t want to search… just note as a personal choice I start my squares with a chain 6 and a decent size tail. This way it is easier to start then by pulling the tail and weaving it in it closes up and takes away the starting bump.

http://stephiescorner.blogspot.com/2013/10/crochet-101-make-basic-granny-square.html

I did 34 rounds so that the blanket would be roughly 3ft wide with the edging. How big you make the square is up to you… just make sure you have enough ribbon.

Edging:

Now, I have written down what to do. That being said you might have to add a stitch or skip an extra stitch to make it work with your granny square. Keep calm, have a glass of wine or beer, and know it will be fine.  It doesn’t need to be exact as the edging is very forgiving and will look great no matter what.  Nobody wants a grumpy hooker.

Don’t bind off yarn, just continue on with the gray.  Ch 1, sc in same st as joining then sc in every st.  Put 3 sc in the corner space. Sl st into first sc.

Ch 5, *skip 1 st then tc (triple crochet) in next st, ch 1* around. Corners:  In the 2nd sc of the 3sc corner do *tc, ch 1, tc, ch 1, tc, ch 1* then skip a st and continue down the row. This is the round where you will weave in your ribbon later.

Ch 1, sc in same st as joining then sc in every tc and in each ch 1 space.  Corners:  Put 3 sc in the corner tc (the second tc in the corner grouping). Sl st into first sc and cut and bind your yarn.

Now using pink join in the second st of any of the previous round corner grouping. Ch 3, (2 dc, ch 1, 3 dc) in same st as joining. Skip 1 st, *dc in next, skip 2 st then (3dc, ch 1, 3dc) in next st, skip 2 st* around. Corners:  When you get to the corners though you will only be skipping 1 st instead of the 2.  Sl st into top of beginning ch 3.

Sl st in the first two dc and into the space (just like you did for the granny square).  Ch 3, (2 dc, ch 1, 3 dc) in same space. *fpdc (front post double crochet) around the dc in middle of groups, (3dc, ch 1, 3dc) in next space* around. Corners:  Nothing special to do in the corners for a change. Sl st into top of beginning ch 3.

Sl st in the first two dc and into the space like last round. Ch 3 and do 8 dc in same space. *fpdc around previous round fpdc, 9 dc in ch 1 space* around.  Cornets:  Again, nothing special to do in the corners. Sl st into top of beginning ch 3. Bind off and weave in your ends.

Now weave in your ribbon doing the over/under in the triple crochet row. Keep the kids away because there will most likely be some choice words here trying to keep the ribbon from twisting.  Also be sure to pull your square into flatness before you cut the ribbon. It will pull the work together a little, but you don’t want to end up with a bunched up blanket and having to reweave the ribbon. Tie your ribbon, making sure it will be where the flower goes to cover it up.  I also got out my sewing needle and thread to add some stitches in all the corners to keep it from twisting and pulling weird.  This will also secure it a bit for future washings.

For the flower I used this pattern: http://www.sccmag.com/crochet-a-sweet-simple-flower-clip-for-spring/

The top part I did with the pink, bottom with gray then I sewed on a pearl bead in the middle.

Now for the 0-3 month old baby hat! And you thought you were done… silly hooker…

IMG_3886

In pink, ch 2 then 12 dc in first chain. Sl st to top of first dc.

Ch 2, 2 dc in joining and each st around. Sl st to top of first dc.

Ch 2, 2 dc in joining. *1 dc in next st, 2 dc in next st* around. Sl st to top of first dc.

Ch 2, 2 dc in joining. *1 dc in next 2st, 2 dc in next st* around. Sl st to top of first dc.

Ch 2, dc in joining and each st around. Sl st to top of first dc. Repeat for 4 rows.

Switch to gray. Ch 2, dc in joining and each st around. Sl st to top of first dc. Repeat for 2 rows.

Switch back to pink. Ch 2, dc in joining and each st around. Sl st to top of first dc. Only for 1 row.

Ch 1, sc in joining. *skip 1 st, 5 dc in next, skip 1 st, sc in next* around. Sl st in first sc and bind off, weaving in ends.

Sew on matching flower as blanket and now you are done! Woot, Woot!

Mad Hooking!

4″ Doll for Cradle Purse

IMG_20140722_093104_050

I had some people interested in the cradle purses. I have personally loved these, but I was afraid today’s child wouldn’t like them.  So I decided to make up a few and see how they do, but I could not find a perfect size doll to fit and that wouldn’t be too expensive for the project. So I decided to make one, but of course I couldn’t find just the pattern I wanted… so here’s my own. My finished doll is a 4″ little peanut.

G hook
Worsted weight yarn
Polyfil for stuffing

Hat (color of choice)

6 sc in magic circle
*2 sc in each sc* around
*2 sc in sc, sc in next* around
*2 sc in sc, sc in next 2* around
*2 sc in sc, sc in next 3* around
Sc around for 3 rounds
Sc around in front loop only. fasten off leaving a long tail for sewing.

Head (skin color of choice)

6 sc in magic circle
*2 sc in each sc* around
*2 sc in sc, sc in next* around
*2 sc in sc, sc in next 2* around
Sc around for 5 rounds
*Dec over next 2 sc, sc in next 3 sc* around
*Dec over next 2 sc, sc in next 2 sc* around (make sure you stuff before hole becomes too tight)
*Dec over next 2 sc, sc in next* around
*Dec over next 2 sc* around fasten off leaving a tail for sewing.

Body (skin color for 3 rounds then color of choice)

6 sc in magic circle
*2 sc in each sc* around
*2 sc in sc, sc in next* around (change colors)
*2 sc in sc, sc in next 2* around
Sc around for 7 rounds
*Dec over next 2 sc, sc in next 3 sc* around
*Dec over next 2 sc, sc in next 2 sc* around (make sure you stuff before hole becomes too tight)
*Dec over next 2 sc, sc in next* around
*Dec over next 2 sc* around fasten off leaving a tail for sewing.

Sew head onto the body then the hat to the head, angling the back of the hat to meet with the body. Embroider some closed eyes and weave in all your ends.

Mad Hooking!

IMG_20140722_093026_202

Baby Turban Hat with a Bow

IMG_20140718_171929_650

I had a request for this style hat for a baby… I found a precious few free patterns and none for the light weight yarn. So like more often than not I found myself coming up with my own patten. I’m just proud that I actually wrote it down to share.

G hook
Baby light #3 yarn I used Bernat softee baby yarn because I had it in my stash

Ch 2, 12 dc in first chain, sl st into top of first dc

Ch 2, 2 dc in same as joining, *2 dc in each st around then sl st in first dc.

Ch 2, 2 dc in same as joining, 1 dc in next, *2 dc in next stitch, 1 dc in next* around then sl st in first dc.

Ch 2, 2 dc in same as joining, 1 dc in next 2, *2 dc in next stitch, 1 dc in next 2* around then sl st in first dc.

Ch 2, 2 dc in same as joining, 1 dc in next 3, *2 dc in next stitch, 1 dc in next 3* around then sl st in first dc.

Ch 2, 2 dc in same as joining, 1 dc in next 4, *2 dc in next stitch, 1 dc in next 4* around then sl st in first dc.

For the next 4 rows: Ch 2, dc in same as joining and then in each st around.

Ch 1, sc in joining and each st around, sl st in first sc.

Ch 1, hdc in joining in the back loop only and in each st around. Sl st in first hdc.

Repeat last two rows for total of 8 rows.

Ch 1, sc in joining and each st around, sl st in first sc.

Finish off and weave the ends.

Bow

Ch 27, dc in 3rd Ch and across. Turn

Ch 2,  dc across.

Repeat for a total of 8 rows. Finish off and leave a really long tail.

Weave the tail to the middle of the square, pinch together the middle and wrap about 10 times. Thread your yarn into a needle.

Now place it on the hat roughly where the second row of hdc is and holding tightly in place you want to insert your needle where you want the bow to be. Now bring up the yarn on the outside of the hat and pull tight creating the v. Do this another 10ish times and knot the yarn on the inside of the hat.

I then added some hidden stitches to hold the bow into place about an inch from the edges of the bow. Just my preference honestly. Just make sure to weave in the ends when you are done.

Mad Hooking!

Baby Marshmallow

IMG_2585So I took the kids to see Cloudy with a Chance of Meatballs 2 and spent the whole movie thinking about what I could turn into crochet… yeah, the life of a Mad Hooker…

My first to make is the Marshmallows since they were the cutest and the first I thought of when I got home.

Baby Marshmallow – Around 2.5 inches tall

Yarn: I just used some miscellaneous white I had and a small amount of black
Hook: size “G”
Other: either 12mm black safety eyes or some black buttons

6 sc in a magic circle, do not join. She is worked in a round
1.  2sc in each st
2.  *2sc in 1 st, 1sc in next st* around
3.  *2sc in 1 st, 1 sc in next 2 st* around
4.  *2sc in 1 st, 1 sc in next 3 st* around
5.  *2sc in 1 st, 1 sc in next 4 st* around
6.  *2sc in 1 st, 1 sc in next 5 st* around
7-17. Sc around
18.  *1sc over the next 2sc, 1sc in next 5sc* around
19.  *1sc over the next 2sc, 1sc in next 4sc* around
You should go ahead and insert the safety eyes now between rows 3 and 4 and stuff her lightly. Marshmallows are fluffy remember!
20.  *1sc over the next 2sc, 1sc in next 3sc* around
21.  *1sc over the next 2sc, 1sc in next 2sc* around
22.  *1sc over the next 2sc, 1sc in next 1sc* around
23.  *1sc over the next 2sc* around
Cut your yarn, finish closing and weave in your yarn.

Now just sew on a smile and the buttons if you choose those instead of the safety eyes and you are done!

Mad Hooking!

IMG_2584