So, I was presented with a picture of a knitted pattern by Sandra Mceachran asking if I had anything similar. I didn’t, but it was a little challenge and got the hamster in my head kicking a little… just a little mind you. It was early and she hadn’t had enough caffeine. After a few cups of coffee, I had a plan of action…
I went back and forth about toe down or sewing on the toes. Going by the picture I went with the toe down and less sewing because let’s face it, I’m all for less sewing on my crochet projects!
G hook (or whatever hook you prefer for your amigurumi projects and so the stuffing doesn’t show)
Yarn of choice (I happened to have pink Bernat worsted weight near me at the time)
Ribbon if wanted for hanging or yarn (I used a satin finish 15mm wide ribbon)
poly-fil
So, make two of these. It is the same on the front as the back so flipping one makes the other foot…
Also, mine ended up being about 6.5 inches from big toe to heel.
Little Toes, 3 per foot:
6sc in magic circle
*inc, sc in next 2* around
sc for 2 rounds then bind off
Pinky Toe, 1 per foot:
6sc in magic circle
sc around for 2 rounds then bind off
Foot, starting with the big toe:
6sc in magic circle
*inc, sc* around
sc around
*inc, sc in next 2*
sc around
*dec, sc in next 2*
Ok, here’s where it can get tricky. Just take one stitch at a time and it will be fine.
sc in next 3, then crochet together the second toe (draw up a loop in the current toe, draw up a loop in the new toe, yarn over and pull through all 3 loops) 
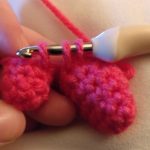
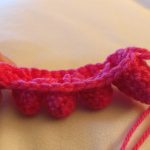
sc in next 2, crochet together third toe, sc in next 2, crochet together fourth toe, sc in next 2, crochet together the pinky toe, sc in next 4 (around the pinky toe), crochet together to the fourth toe, sc in next 2,crochet together to the third toe, sc in next 2, crochet together to the second toe, sc in next 2, crochet together to the big toe, sc in next 4 and you should be back to the beginning with a slightly curling weird thing that resembles toes. It gets to looking better, trust me. Go ahead and stuff all the endings from the toes into the toes to get them out of your way.
Sc around for 2 rows (total of 31 stitches for those keeping count)
Inc in first stitch, sc around until the last 2 stitches. Inc in the last 2
Sc around for 4 rounds
Sc in next 14 stitches, dec, sc in next 14, dec, dec
Sc around
Sc in next 13 stitches, dec, sc in next 12, dec, dec
*sc in next 5, dec* around
Sc around for 2 rounds then take a break and make sure those toes are stuffed the way you would like.
Inc, sc in the next 10 stitches, dec, sc in rest
Sc around
Inc, sc in the next 10 stitches, dec, sc in rest
Sc around for 3 rounds
Sc in next 11 stitches, dec, sc in rest
Sc in next 10 stitches, dec, dec, sc in rest
*dec, sc in next 5* around
*dec, sc in next 4* around, stuff and shape as needed. Don’t get carried away and stuff too firmly, you want it to be kinda flatish.
*dec, sc in next 3* around
*dec* around, leaving a long tail to sew close
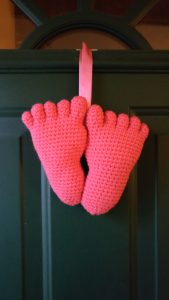
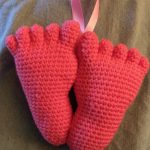
That’s all… you can sew them together and then sew a ribbon on back for hanging or whatever you want to do with the feet!
Tip: How I sewed my feet together I just made sure that the second foot I left a really long tail and sewed the end closed, placed the other foot next to it and went from there. I then made the ribbon and used the same tail to sew that to the feet. Less chance of things coming undone and certainly less threading of the needle.
Mad Hooking!


Recent Comments