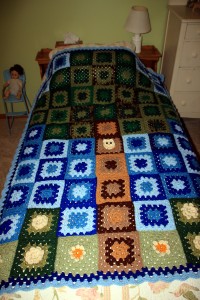
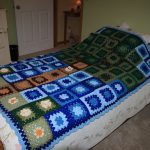
So this was an idea I had when trying to think of more ways to use up the stash of yarn I have residing in my house. Nothing special about this one, just a bunch of granny squares.
You are going to need a total of 70 squares to make up this blanket like I did. Now, you can always choose to do it differently, but I’m going to keep these instructions to what I did for this blanket.
Blanket measures 76″ tall by 46″ wide
Made with stash worsted weight yarn and H size hook
If you need a how to for the squares:
http://www.jpfun.com/patterns/
As far as how big I made the squares, I did a total of six rounds which makes it to on the last round you have four groups of three in-between the corners. I choose to change colors every two rounds, making as many different combinations as I could.
You will need a total of:
30 blue colored granny squares
26 green colored granny squares
5 brown colored granny squares
Now for the special granny squares. Just keep in mind to make them the same size as the plain ones. Just continue with the granny square pattern as needed.
1 owl granny square ( http://www.repeatcrafterme.
4 of this flower granny square ( http://crochetmaryellen.
4 of this flower granny square ( http://rosehip.typepad.com/
Now, for the fun part! Sewing all these together! Yeah… Now I used the ladder method of invisible join. I prefer it, but if you don’t choose what works for you. Use the picture of the pattern for placement.
Finally done sewing? Now for the boarder. First three rows are basically the granny square pattern around the whole blanket.
Join in one of the corners, ch 3, 2 DC, ch 2, 3 DC. Ch 1
*In next space 3 DC, ch 1 and repeat until the corner
In corner, 3 DC, ch 2, 3 DC, ch 1* repeat around.
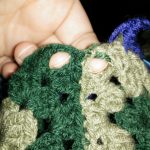
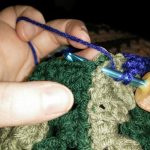
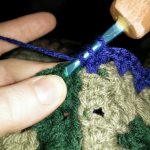
Now, the only thing is where two squares meet up. You are going to see the corner of one next to the corner of the other separated by the seam of sewing them together. Do your first DC in the first corner. Then you are going to do a DC tog (yarn over, insert hook in first corner, yarn over and pull through the corner. Now yarn over and pull through two loops. Yarn over and insert hook through next corner and pull through the corner. Now yarn over and pull through two loops. Yarn over and pull through the rest of the loops.) the last DC in the group will be in the second corner.
Pictures for reference:
Last round of the boarder
Start in a corner, ch 3, 6dc, ch 1
*in next space SC, ch1. Then in next space 5dc* continue until corner. The corner will have 7 DC in each. However I did have it happen where I didn’t end with the SC before the corner. If this happens just put the SC, ch 1 in the last DC before the corner, 7dc, ch 1, SC in first DC, ch 1.
And you are done!
Mad hooking!




Just stumbled on your blog, then found this. This is the most amazing thing I’ve seen in ages! Simply adorable and so very creative. I’m obsessed with classic grannies, totally my favorite to do, and I’m pretty sure I’m going to have to make something inspired by this idea. Thank you for sharing!!
I so love granny squares and think they are underrated! I personally think this is my favorite blanket I had made… There are so many cute squares out there! Just take someone to put them together…