Shark Lapghan Pattern

merged

I cannot tell you how many requests I got for one of these. Of course I wasn’t going to revisit my problem from before of buying a pattern, especially when it is so close to my mermaid lapghan… So disclaimer, this was my first run on it and the pattern hasn’t been retested. I hope you like it.

This pattern is for an adult sized shark lapghan. That being said, check the measurements (approximately 41 inches wide by 41 inches long). It is also perfect for a young adult to be able to grow into.

As with all patterns, look ahead and see if this is what you want to do. My take on this one is a little different than some others.

A note on the Polyfil. I used it and the lapghan is still washable. However it can make the tail fin a bit heavier. How it is constructed it will hold its shape decently without it, but I wanted to show it stuffed… And it had been my original thought.

G and H size hooks
Grey yarn (I used Red Heart I Love this Yarn. It took roughly 4 skeins of grey.)
White yarn (small amount, just for the teeth)
Black yarn (really small amount, just for the eyes)
Polyfil (if desired)
Stitch markers if you like

To start, ch 152 (this gave me a width of 41″)

Row 1: dc in third chain and across, ch 2 (150 dc with ch 2 NOT counting as a stitch)

Row 2-64: dc in each st across (do not skip 1st st), ch 2 and turn (150 dc with a total length of 28″)

Row 65: dc in each st across but do not turn. Sl st in the first dc of the row, bringing both sides together, ch 2, do not turn.

We will now continue on in rounds. Note: this pattern has only been done once as of right now. Don’t stress about exactness of the decreases. If you need to add a dc or two at the end of the round, meh. It will work out fine. The lapghan will not implode. It will work out just fine.

Round 66-70: dc in same as join and in each dc around, sl st to first dc, ch 2.

Round 71: dc same as join, dc in next 7. Dc2tog (dc decrease), *dc in next 8, dc2tog* sl st to first dc, ch 2.

Round 72: dc same as join, dc in next 6. Dc2tog (dc decrease), *dc in next 7, dc2tog* sl st to first dc, ch 2.

Round 73: dc same as join and around.

Round 74: dc same as join, dc in next 5. Dc2tog (dc decrease), *dc in next 6, dc2tog* sl st to first dc, ch 2.

Round 75: dc same as join, dc in next 4. Dc2tog (dc decrease), *dc in next 5, dc2tog* sl st to first dc, ch 2.

Round 76: dc same as join and around.

Round 77: dc same as join, dc in next 3. Dc2tog (dc decrease), *dc in next 4, dc2tog* sl st to first dc, ch 2.

Round 78: dc same as join, dc in next 2. Dc2tog (dc decrease), *dc in next 3, dc2tog* sl st to first dc, ch 2.

Round 79-80: dc same as join and around.

Round 81: dc same as join, dc in next st. Dc2tog (dc decrease), *dc in next 2, dc2tog* sl st to first dc, ch 2.

Round 82-83: dc same as join and around.

Round 84: dc same as join, dc in next 2. Dc2tog (dc decrease), *dc in next 3, dc2tog* sl st to first dc, ch 2.

Round 85-86: dc same as join and around.

NOTE: At the end of round 86 you should have 36 stitches. What if you don’t? Either add (increase) how many you need or subtract (decrease) so you are at this number. You should be close if not dead on, so it will be fine. Truly, it will be. Don’t worry.

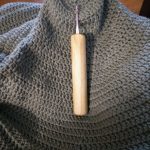
Switch to a size G hook. Use a stitch marker for the beginning of the rounds if needed.
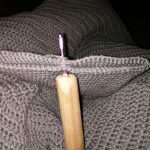
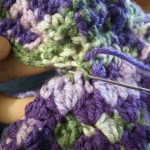
Round 87: in BACK LOOPS ONLY, sc in same as join, sc in next 4. Sc2tog (sc decrease), *Sc in next 5, sc2tog* around. Do NOT sl st, we are going to spiral the rest of the way close.

IMG_20150811_204245

Round 88: working in both loops and starting in the first sc from the previous round, *sc in next 4, sc2tog*around.

Round 89: *sc in next 3, sc2tog*around.

Round 90: *sc in next 2, sc2tog*around.

Round 91: *sc in next 1, sc2tog*around.

Round 92: sc2tog around. Bind off, leave a long tail to sew close.

Join grey at the ‘v’ in the back of the lapghan, where you switched from rows to rounds and with your H hook, sc around the entire opening placing 3 sc in the top corners. Bind off and weave in your ends.

Teeth
White yarn
H hook

Attach yarn to top corner.

Row 1: *Sc, hdc, hdc, dc and tc in next, tc and dc in next, hdc, hdc, sc, sl st, sl st* across. Bind off, weave in ends.

Row 2: attach yarn to first sc and sc in each st until the tc. In first tc, sc, ch 1. sc until the sl st then sl st in those. Continue down the line and then bind off, weaving in the ends.

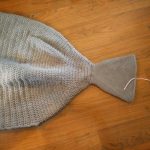
Now on to the fins. This is where I have made up about twenty different styles and decided on these. I wanted to be able to add some polyfil to keep the shape, but keep them washable. That made me decide on making them like amigurumi so bear with me on this one.

Tail fin
G hook
Grey yarn
Polyfil (if desired)
Stitch markers

Now I made these so that once you saw the stitch pattern repetition you could adjust as needed if you want. Adding rounds or doing less rounds… That sort of thing.

Attach your yarn to the front loops of round 87.

Round 1-5: sc around do NOT join at the end of every round. We will be working in a spiral. Use stitch markers if needed. Also, you should have 36 sc in each round. If not, just decrease or increase as needed.

Round 6: *2 sc in next, sc in next 6* around

Round 7: sc around

Round 8: *2 sc in next, sc in next 7* around

Round 9: sc around

Round 10: *2 sc in next, sc in next 8* around

Round 11: sc around

Round 12: *2 sc in next, sc in next 9* around

Round 13-15: sc around

Round 16: *2 sc in next, sc in next 10* around

Round 17-19: sc around

Round 18: *2 sc in next, sc in next 11* around

Round 19-21: sc around

Round 22: *2 sc in next, sc in next 12* around

Round 23-25: sc around

Round 26: *2 sc in next, sc in next 13* around

Round 27-29: sc around

Round 30: *2 sc in next, sc in next 14* around

Round 31-33: sc around

Round 34: *2 sc in next, sc in next 15* around

Round 35-37: sc around, bind off.

Now, fold your lapghan in half (bringing the edges of the V together) on the floor. Smooth out the tail fin so it is flat as well and mark the roughly half way spot. This is where you are going to attach your yarn through both thickness.

IMG_20150818_175153 IMG_20150818_180741

Round 38: sc in same as join and sc around until you get back to the stitch before the join. Now sc2tog the last stitch and the first stitch you made. Mark this stitch.

Round A 39-close: sc around until last stitch before join then sc3tog. Note the 3. It is the stitch before the tog stitch, tog stitch and the 1st sc of the next round. Also, when I say close it is to keep going in spirals until you only have 6 st left. Then you cut your yarn and sew the rest close. Stuff the fin if desired.

Round B 39-close: do the exact same as Round A. Continue to stuff if needed.

Dorsal (top) fin

G hook
Grey yarn
Polysilicon (if desired)
Stitch markers

Round 1: 6 sc in a magic circle

Round 2: sc around

Round 3: 2 sc in each st around

Round 5-6: sc around

Round 7: *2 sc in next st, sc next* around

Round 8-9: sc around

Round 10: *2 sc in next st, sc next 2* around

Round 11-13: sc around

Round 14: *2 sc in next st, sc next 3* around

Round 15-17: sc around

Round 18: *2 sc in next st, sc next 4* around

Round 19-21: sc around

Round 22: *2 sc in next st, sc next 5* around

Round 23-25: sc around

Round 26: *2 sc in next st, sc next 6* around

Round 27-30a: sc around

Round 31: hdc in next st, dc in next 2, *2 dc in next st, dc in next 3* around. Sl st to first hdc, bind off leaving a LONG tail for sewing. (Now don’t worry if this row doesn’t come out perfect. It is only to make it easier to attach the fin to the lapghan. Technically you don’t have to have it, but it makes life easier.)

Round 32: attach your yarn to the unworked (back loops) of round 31. *Sc in the next 6, sc2tog* around (note: I didn’t keep exact count because I forgot to honestly. Working nights does that to you. Don’t stress if the rounds don’t work up perfectly. It’s just to help keep the stuffing in.)

Round 33: *Sc in the next 5, sc2tog* around

Round 34: *Sc in the next 4, sc2tog* around

Round 35: *Sc in the next 3, sc2tog* around

Round 36: *Sc in the next 2, sc2tog* around

Round 37: *Sc in the next 2, sc2tog* around. Go ahead and stuff the fin if desired.

Round 38: *Sc in the next 1, sc2tog* around

Round 39: *Sc in the next 1, sc2tog* around

Round 40: *sc2tog* around. Bind off and sew close. Now I then placed about 5 stitches in the middle of the fin to make it angle back more. Not strictly necessary, but it made sense to me.

Sew the top fin in the middle top of blanket. Pin in place before sewing to make your life a little easier.

Eyes
Black yarn
H hook

Round 1: 12 dc in a magic circle, sl st to first dc, ch 2

Round 2: 2 dc in first dc and in every dc around, sl st to first, bind off and leave a long tail for sewing.

Sew eyes on either side of the top fin, about halfway from the top to the fin.

And that’s it!
Mad hooking!

Adult Sized Mermaid Tail Lapghan

IMG_20150219_164934

IMG_20150219_165005 IMG_20150219_164902

As with a lot of things I make, this started with an idea from someone. They had an idea of what they wanted because they saw a picture… Of a paid pattern. Now, I typically stay away from paid patterns on general principal, but I had a weak moment. I bought the rather pricey pattern… I knew I shouldn’t, but I did.  It was absolutely dreadful!  It had good reviews and was written decently, but I found it just awful.  It was made of motifs that you connected as you went… OK, I can do that.  However when you did connect them it left gaping holes in the pattern and did not look like scales at all!  Just not for me… so here is what I came up with after I got rid of that hideous attempt.

Measurements:
Tail to top 42 inches
Tail to tip of fin 12 inches
Top width 38 inches

size H hook

worsted weight yarn: The best estimate I have on how much I used until I duplicate this more is a total of 1600 yds. Now the one pictured I used Bernat super value (426 yds per skein) in lilac and light damson. Then the variegated yarn was 2 skeins (since they come in 275 yd skeins)  in fresh lilac.  As always though everyone can use different amounts of yarn depending on how tight or loose you crochet. Please err on the side of having extra yarn.  As I have made more this is roughly accurate. Notice though I find I need extra yarn of the two solid colors (not just one skein of the super value) and so I can do a two stranded fin.

Edit: So I’ve been grabbing 2 skeins each of the solid color and 2 of the variegated yarn. I swear every time I make this I have different amount of yarn leftover… The last two I’ve made the fin out of the solid colors because the variegated almost ran out. The solid colors I am left with over a half of one and all over 3/4 of the other… Trying to get down the yardage for this has been tearing my hair out. The yarns are not exactly the same is my thought. 

Also for those who need to resize the pattern, Rachel Z. Commented this: 

“Thanks for the great pattern. I just finished a child size one and I’ve seen a lot of request for the modifications… my top chain was 128 (includes 2 turning chains). If you work in multiples of 6 and add 2 for turning, it always works out. I did 42 5dc rows then joined it together. After joining, I did 15 5dc rows. When reducing to a 3dc pattern, I followed the remaining instructions until I had 14 st at the close. I made the same fin, which the top reduces to 7 st and it attaches to the tail perfectly. I hope this helps others wanting to make a child sized blanket :)”

Also for those with problems understanding the crochet language a fellow hooker named HAB posted this: “For instructions of terminology you don’t understand, use Google search engine to ask or go to a yarn website and search for abbreviations. At the very least buy a basic crochet book. sctog = single crochet two together.  http://www.lionbrand.com/faq/217.html

For Knit and Crochet abbreviationshttp://www.lionbrand.com/cgi-bin/faq-search.cgi?store=/stores/eyarn&dictionaryOfAbbreviations=1

This free pattern is written by someone who is not a professional pattern writer. I applaud her efforts. To understand how she writes her pattern requires being very familiar with crochet terminology and patterns in general. Or locating instructions/terms unfamiliar to you in a crochet book or online crochet information source. Here is a great one:http://www.craftyarncouncil.com/crochet.html
To help you decipher her instructions I suggest you copy and paste into a word processor and then begin labeling rows and rounds. Make sure you understand *the stitch pattern* (the crocodile stitch) as noted in the first paragraph following the initial chains: *sc in first dc, sk 2 dc, 5 dc in next, sk 2 dc* (this makes what I will call 5dc (stitch) pattern for the rest of the (mermaid) pattern) My (stitch) pattern ended on a sc.  ch 2 and turn”


Note on the color changes.  I started changing color after the first 5dc pattern row and changed color after each row.  Being that I was using 3 different yarns that made things easier and less ends to weave in because I never bound off at the end of the row.  I simply dropped one color, picked up the next and went.  Now, I did NOT carry behind the work.  I truly just let it stay there.  Believe it or not, it works and doesn’t mess up the color pattern you are doing. After you have all three colors joined in you will see that when you end a row you just pick up the strand you had left before.  Sounds so much more difficult than it really is, but so much a time saver not having to weave in all those ends.

Also note.  Your work might not be the exact same counts as mine.  That’s cool.  It might end on a sc where I had 3dc.  That’s cool.  It is really just that 5 dc shell pattern you want for the scales.  If your row ends on a sc, ch 2 turn, 2dc in first then go with the pattern.  If your row ends on a dc group, sc in last st, ch 1 turn and sc in first the go with the pattern.  It is really simple once you get used to it.

To start, ch 153 (this gave me the width I was looking for, so if you are altering for a different size start with a chain that works for your project)

dc in third chain and across, chain 1

*sc in first dc, sk 2 dc, 5 dc in next, sk 2 dc* (this makes what I will call 5dc pattern for the rest of the pattern) My pattern ended on a sc.  ch 2 and turn

2dc in first st (that last sc), sk 2 st, sc in the 3rd dc of the 5 dc shell, sk 2 st, then follow the 5dc pattern until last sc where you only do 3dc, ch 1 and turn

sc in first st, sk 2 st, then follow the 5dc pattern until the end where you sc in that last st/dc.  ch 2 and turn

Now you just do those last two rows for 72 5dc pattern rows.  This made the lapghan go down to about the calf length (in case you are re-sizing the pattern).

Now we are going to start going in rounds instead of rows.  How you might ask?  Very carefully… Make sure when you pull the ends together the right side of the first row of dc is facing out.  Or not, either way would be fine I imagine honestly.  Just keep the strands of the none working yarn to the back/inside of the tail and change colors where it looks best to you.

What follows is how I brought the two sides together so I could work more of a spiral because that made things easier on me and doesn’t leave a seam.  Truly, you could just do what makes sense to you as you look at the work in your hands.  As long as you are still doing the 5dc pattern, it will all be good.  Just relax and have a drink and go with it.

Sl st to the 1st dc of the row, ch 1, sc in joining, then proceed on with 5 dc pattern.

Sl st to 1st sc, changing colors, ch 2 and 4dc in same as join. 5 dc pattern to last sc. Now sc tog last sc to the 2nd dc from the beginning, make sure to change color.

Ch 1, sc in same as join then go on with the 5 dc pattern.

From here you should be able to just go in a spiral, changing colors as you get back to the start of the spiral.  I did a total of 20 rounds counting from the beginning of the original join.  This took the me down to about covering the foot when the foot is pointed.

Now you get to start bringing it in to a close.  So that means you are almost done!

Keep doing the pattern and color changing around, but instead of the 5dc, do only 3dc, still skipping 2 stitches.  On the 2nd, 3rd and 4th round only sk 1 st in-between the dc and the sc.  Do this for a total of  4 3dc pattern rounds.

Then you are going to 3dc, sc tog (tog is also known as a decrease) where the next 2 sc would go (in the 2nd dc of the 3 dc group).  Do your 3dc pattern until every 3rd sc spot,  then sc tog.

Next round, change colors in the first sc spot, 3dc then sc tog (in the 2nd dc of the 3 dc group). Do your 3dc patten until every 3rd sc spot, then sc tog. 

This next round 3dc, sc tog over the next 2 sc spot. Do your 3rd dc patten until every 3rd sc spot, then sc tog.

This should leave it almost closed up and you tired of turning your work around and around.  So go ahead and change colors in the first sc, then sc tog where every sc spot should be for 2 rounds.

Bind off, and leave a tail so you can go ahead and sew the tail closed.

Join your yarn on the outside of the opening where you joined the rounds and sc around the opening.  Placing 3 sc in the corners.  Bind off and weave in the end.

IMG_20150219_084858

Feels great to be done with that part doesn’t it?  Now on to the much easier to do fin.  Again, I sized it for the lapghan I was working on.

Fin

I did the fin in the variegated yarn. If you want a thicker fin, use two strands held together.  The fin shape will have a straight side with the opposite side decreasing in, then increasing back out. The straight side will be the top where you do your sc tog to then sew it on the tail.

Another option on the tail can be found here (https://handcraftsofjoy.com/2015/10/14/handcrafts-of-joys-mermaid-tail-fin-pattern/) it works up well and it is a bigger version of what I did.

Ch 43

dc in 4th chain and dc across, ch 2 and turn

*dc tog, dc in rest of stitches, ch 2 and turn

dc across, dc tog in last two dc, ch 2 and turn*

repeat this pattern for a total of 5 times

now do 2 dc tog, dc in rest of stitches, ch 2 and turn

dc across and do 2 dc tog in last 4 st, ch 2 and turn

2 dc in each of the next 2 st, dc across, ch 2 and turn

dc across, put 2 dc in each of the last 2 dc, ch 2 and turn

*2 dc in first dc, dc across, ch 2 and turn

dc across, 2 dc in last st, ch 2 and turn*

repeat this pattern for a total of 5 times

dc across, ch 1 and turn

sc around, making sure to put 3 sc in the corners except the last corner you come to.  Ch 1 and turn so that now you are working on the top of the fin (where you just have a bunch of dc, not the dc tog or 2dc)

sc tog across, ch 1

sc tog across, ch 1

*sc tog, sc* ch 1

*sc tog, sc * ch 1

bind off, leaving a long tail for sewing.

Now you are going to sew this where the bottom of your fin is… where you sewed it close.  It is worth noting that I sewed the sides of the sc rows to the tail as well as the sc.  I thought it looked better and helped hold the fin out.

IMG_20150219_163501

There you have it… a cozy mermaid tail!

Mad Hooking!