So I took the kids to see Cloudy with a Chance of Meatballs 2 and spent the whole movie thinking about what I could turn into crochet… yeah, the life of a Mad Hooker…
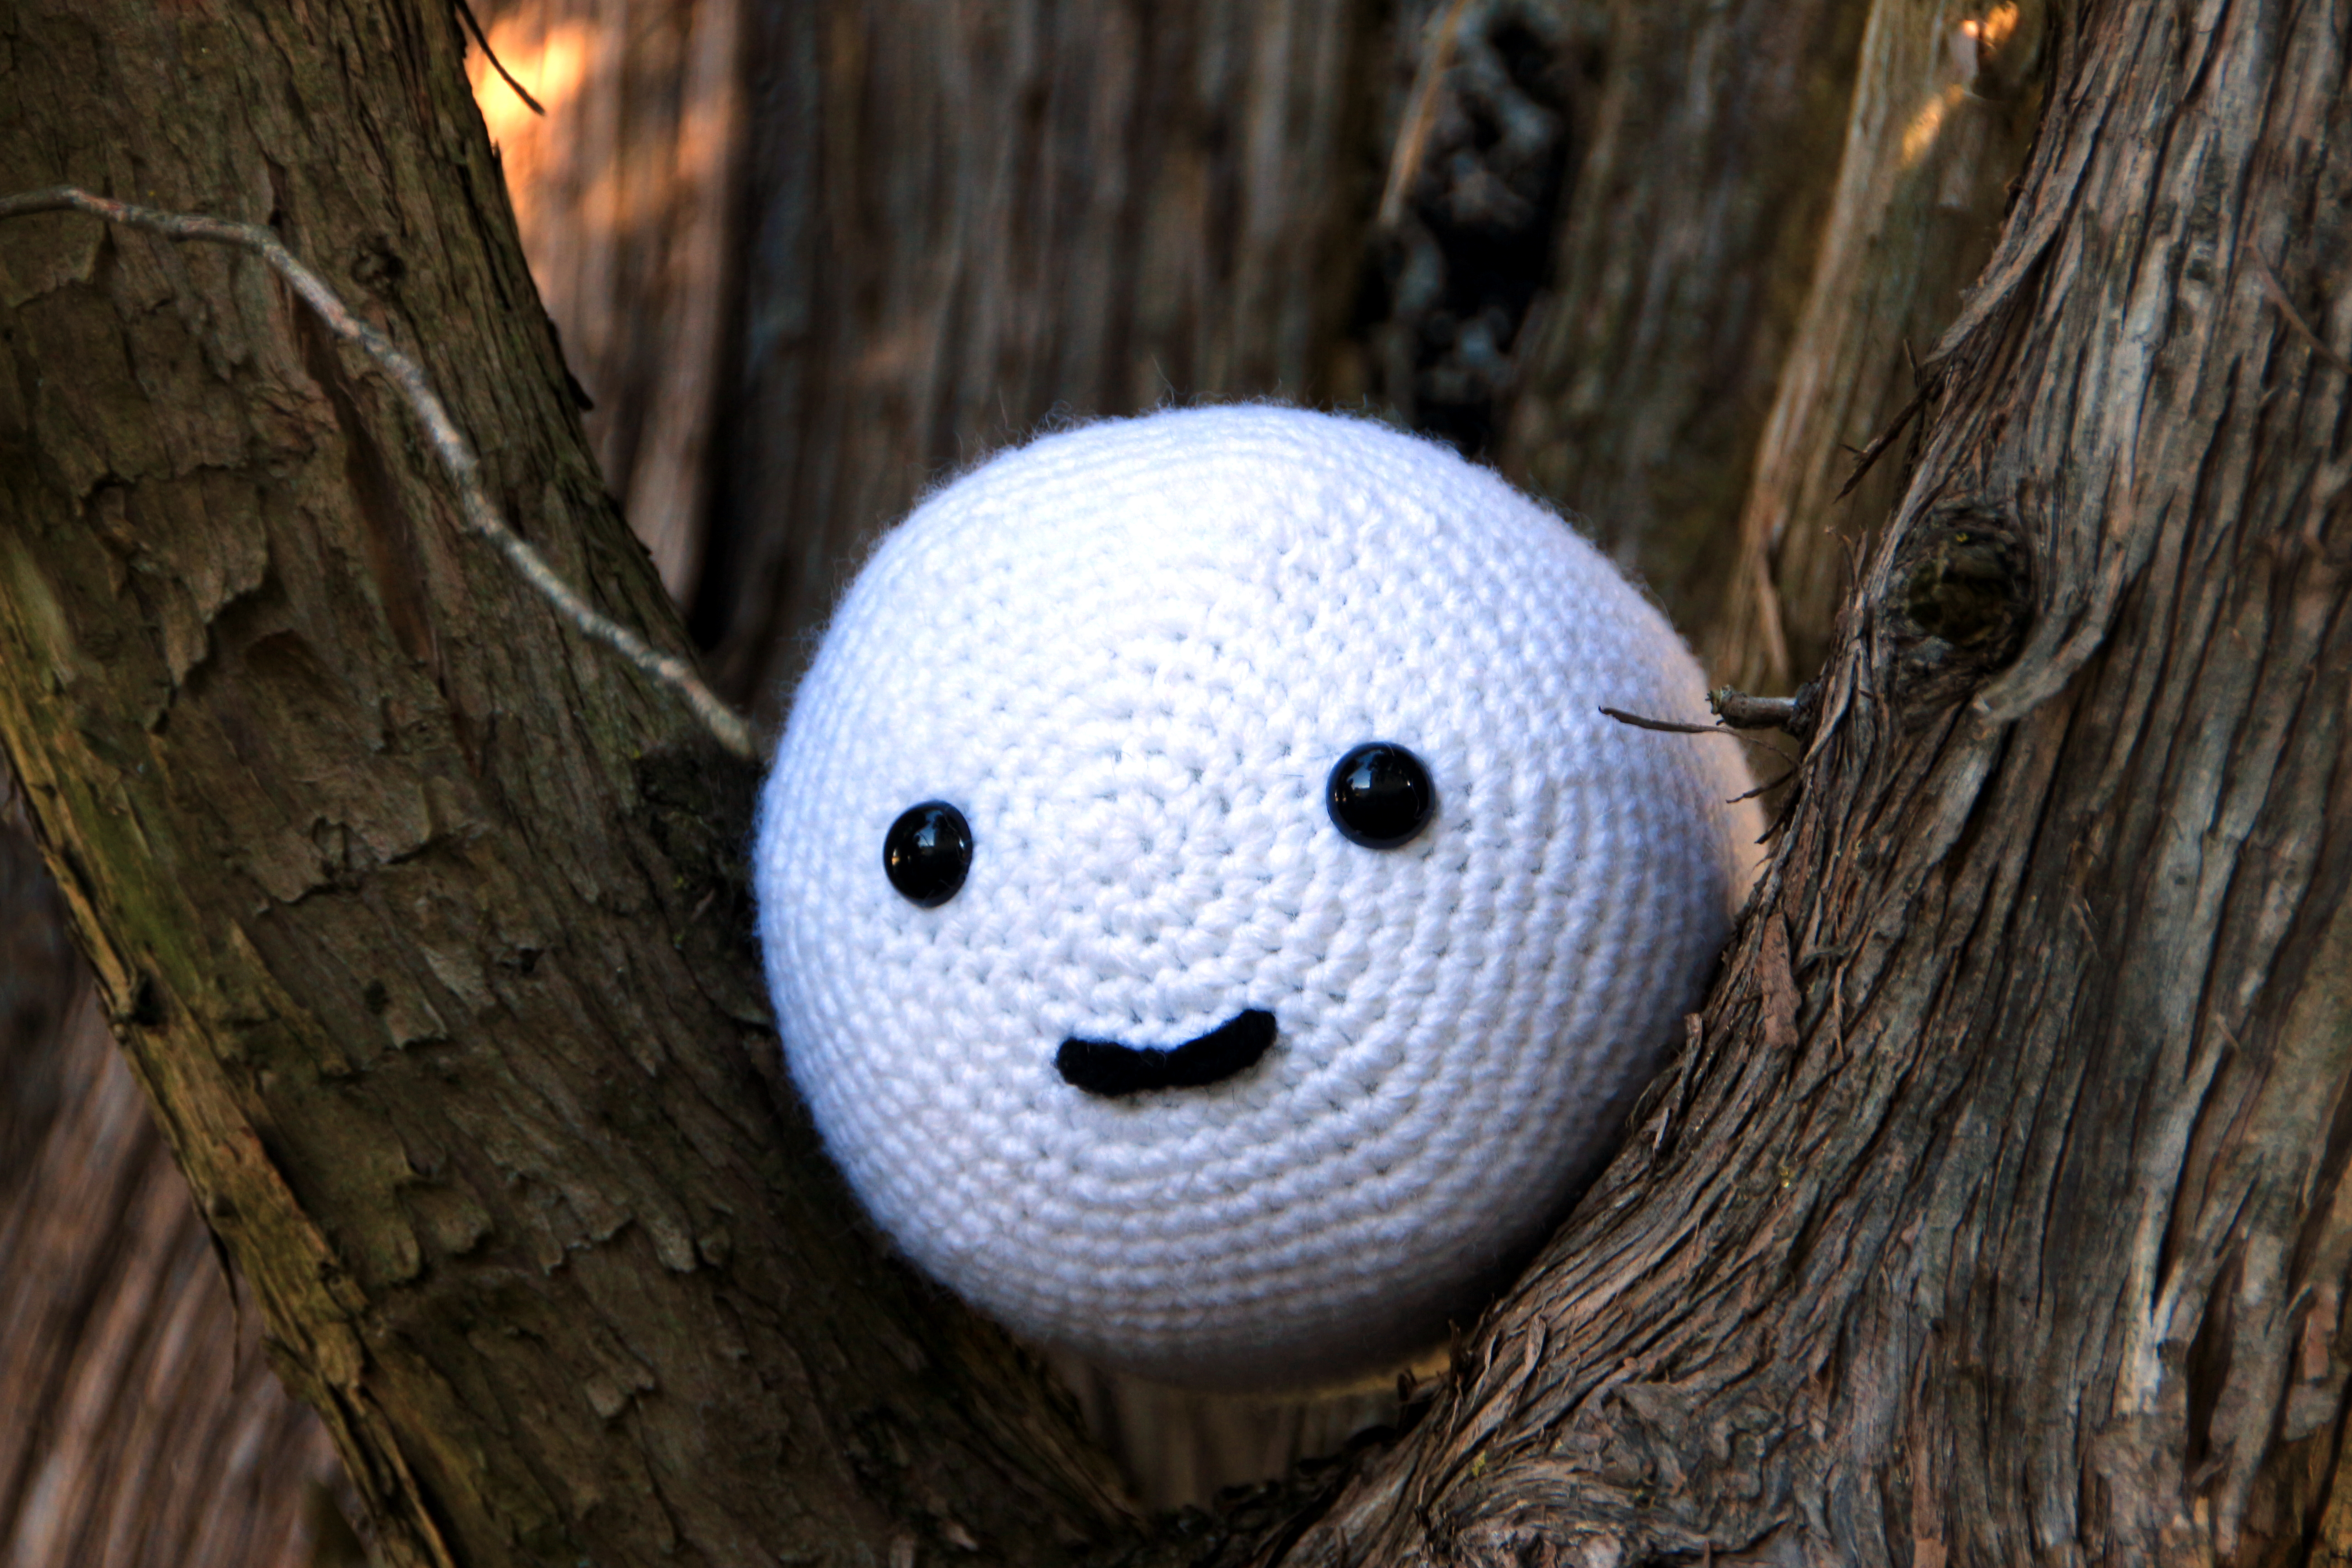
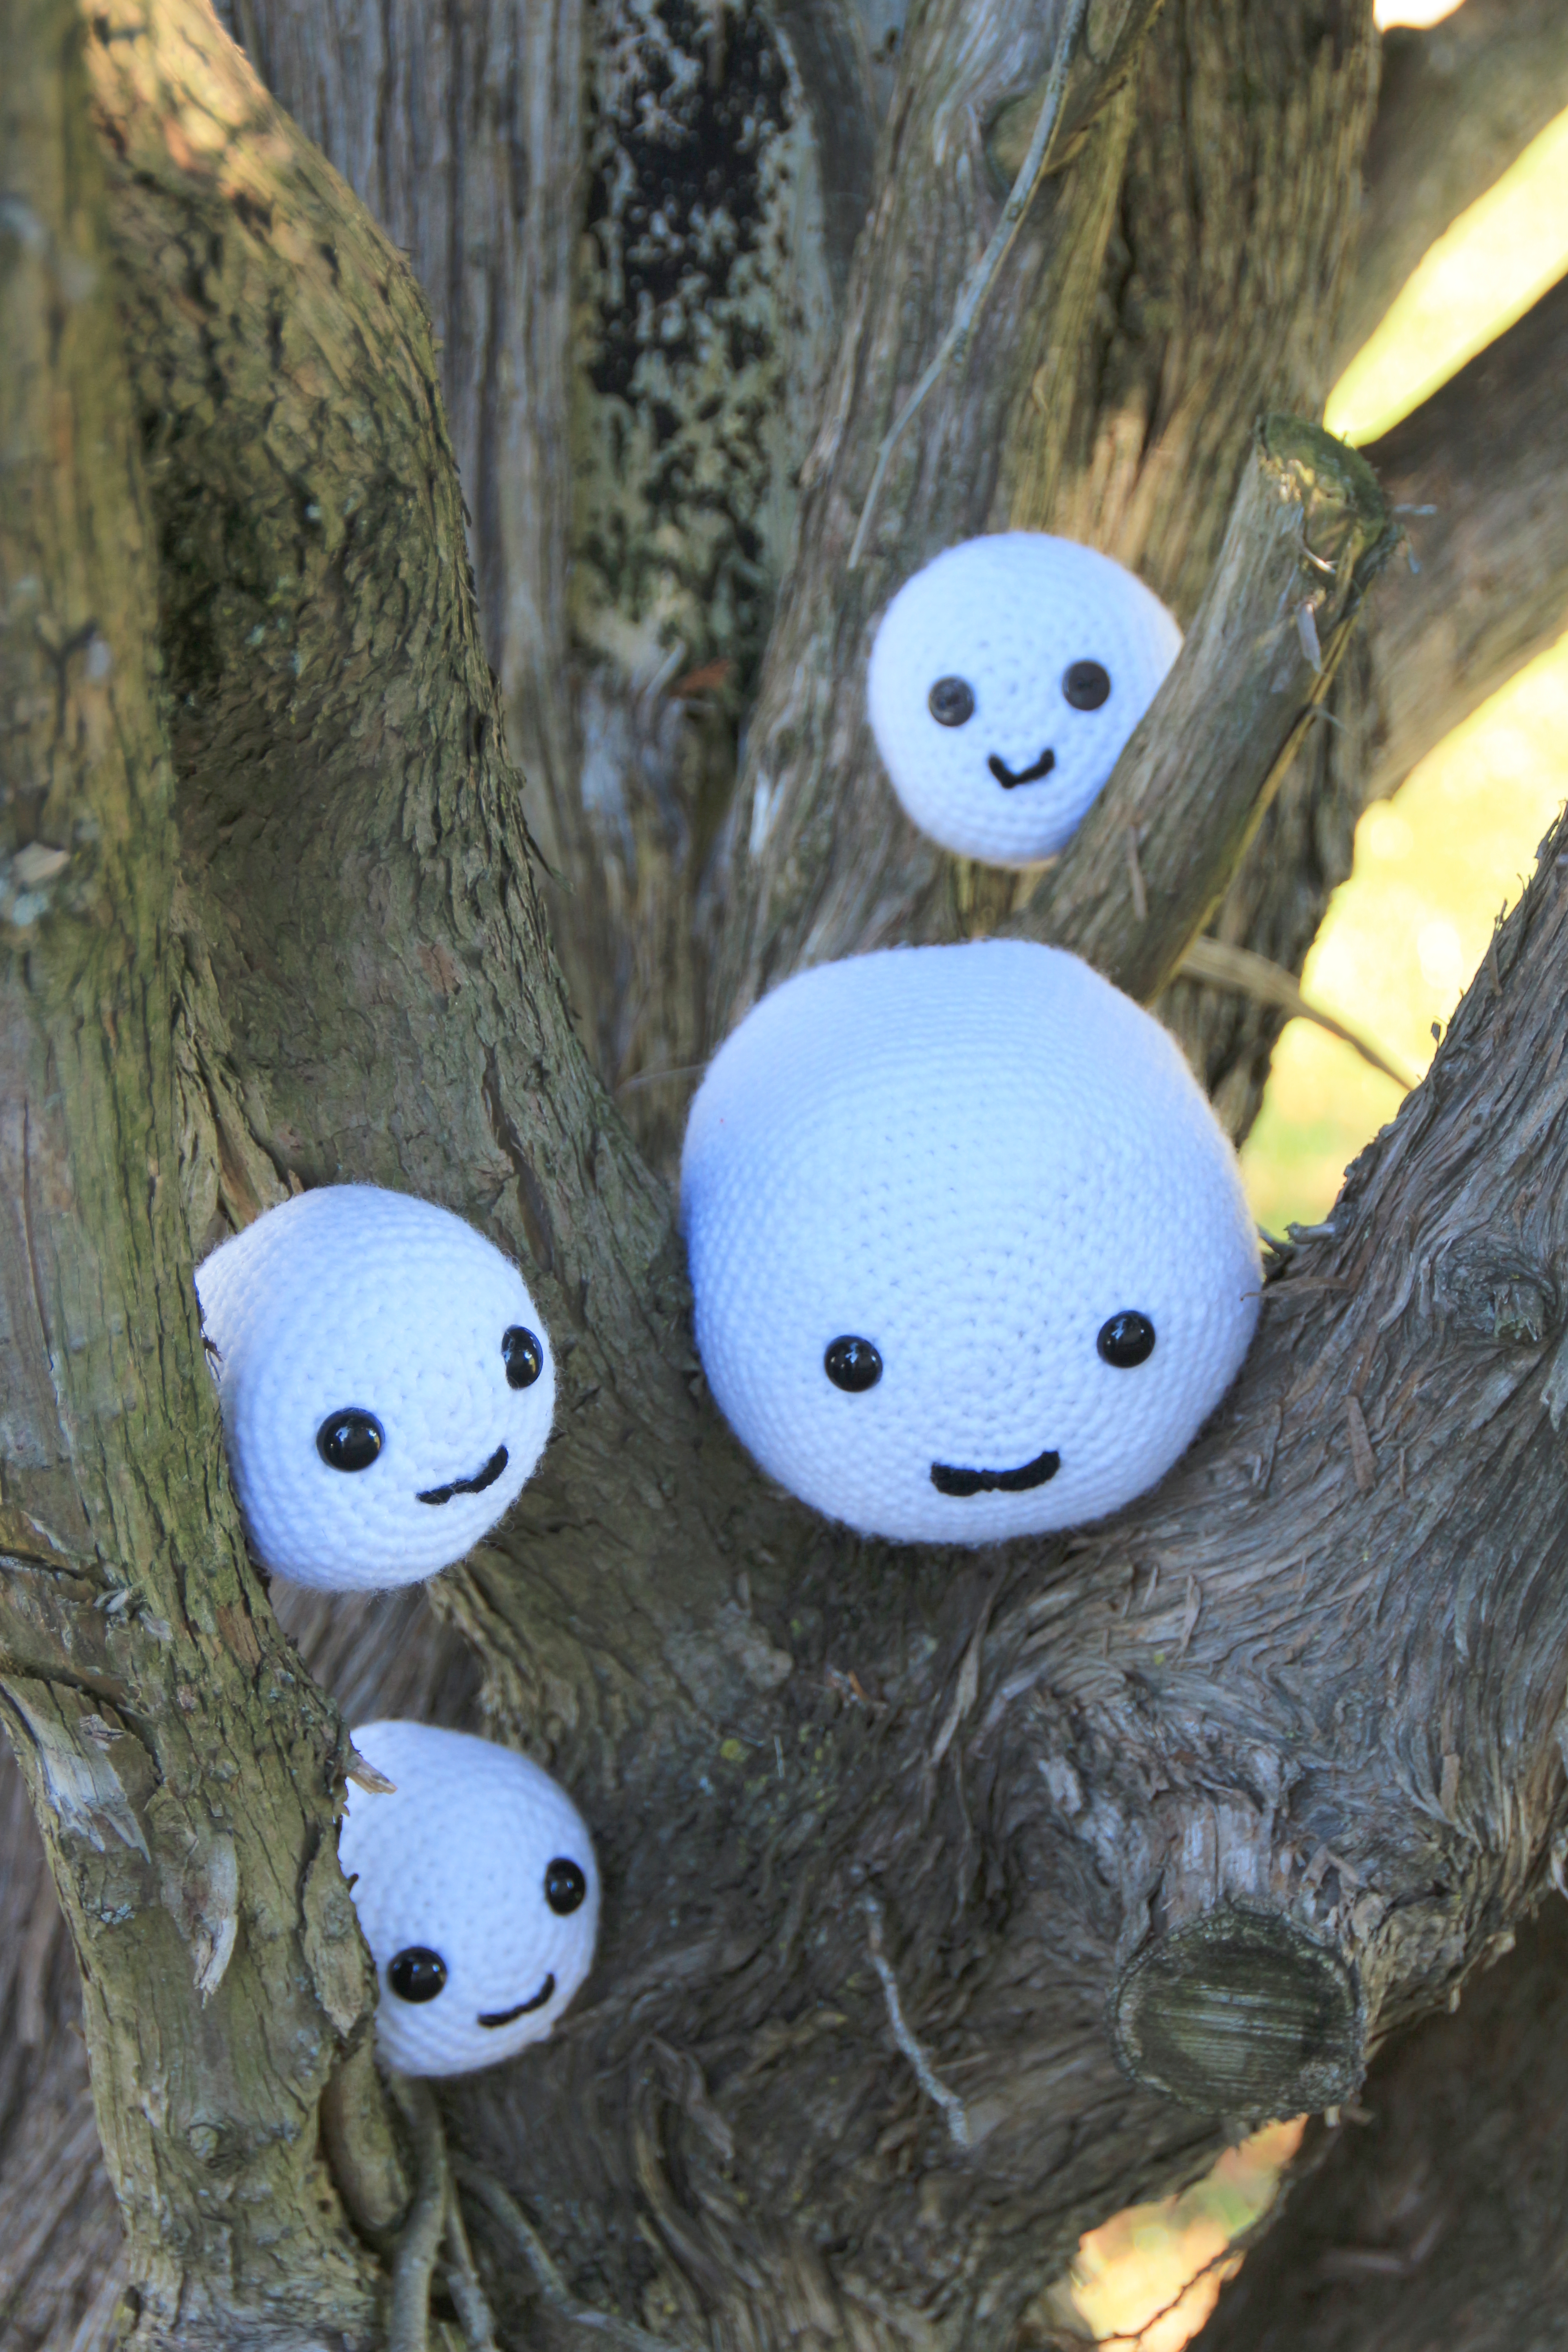
My first to make is the Marshmallows since they were the cutest and the first I thought of when I got home.
Momma Marshmallow – A little over 4 inches tall
Yarn: I just used some miscellaneous white I had and a small amount of black Hook: size “G” Other: either 12mm black safety eyes or some black buttons
6 sc in a magic circle, do not join. She is worked in a round 1. 2sc in each st 2. *2sc in 1 st, 1sc in next st* around 3. *2sc in 1 st, 1 sc in next 2 st* around 4. *2sc in 1 st, 1 sc in next 3 st* around 5. *2sc in 1 st, 1 sc in next 4 st* around 6. *2sc in 1 st, 1 sc in next 5 st* around 7. *2sc in 1 st, 1 sc in next 6 st* around 8. *2sc in 1 st, 1 sc in next 7 st* around 9. *2sc in 1 st, 1 sc in next 8 st* around 10. *2sc in 1 st, 1 sc in next 9 st* around 11. *2sc in 1 st, 1 sc in next 10 st* around 12-22. Sc around 23. *1sc over the next 2sc, 1sc in next 10sc* around 24. *1sc over the next 2sc, 1sc in next 9sc* around 25. *1sc over the next 2sc, 1sc in next 8sc* around 26. *1sc over the next 2sc, 1sc in next 7sc* around 27. *1sc over the next 2sc, 1sc in next 6sc* around 28. *1sc over the next 2sc, 1sc in next 5sc* around 29. *1sc over the next 2sc, 1sc in next 4sc* around You should go ahead and insert the safety eyes now between rows 5 and 6 and stuff her lightly. Marshmallows are fluffy remember! 30. *1sc over the next 2sc, 1sc in next 3sc* around 31. *1sc over the next 2sc, 1sc in next 2sc* around 32. *1sc over the next 2sc, 1sc in next 1sc* around 33. *1sc over the next 2sc* around Cut your yarn, finish closing and weave in your yarn.
Now just sew on a smile and the buttons if you choose those instead of the safety eyes and you are done!
OK, so there is nothing really new about making a ear warmer at all. There are truly lots of patterns you can find and free at that. I have tried quite a few and just could not get the result I was looking for. Everything seems to be in the bulky yarns with a large hook… that or I must have the biggest melon around as they were always turning out way the hell too small. So that is why I wrote this pattern and figured I would share it for others who find themselves stuck like me. Well that and so I can find the pattern easier than searching through all my crochet paraphernalia…
Ear warmer Sizing: This pattern I have found will make an ear warmer that will fit anywhere from a tween size melon to adult with different degrees of looseness. It fit me comfortably and my 10 year old daughter as well.
Yarn: I used Red Heart Soft yarn Hook: size “H”
Ch 90 and then sl st to the 1st chain being careful not to let it twist on you. Because it will, because yarn likes to troll sometimes.
1. Ch 1 and sc in same stitch as joining to decrease that stupid looking gap that sometimes happens. Now sc in next 14 st then dc in the next 75 st. Do NOT join, even if you want, just keep on crocheting and work in rounds. Makes things easier.. at least in my mind so no popping my bubble.
2. SC in the next 15 st then dc in the 75 st
3. Repeat round 2 for a total of 10 dc rounds. If you want a wider ear warmer, just keep going around.
4. SC around and bind off your end. Now turn the complete work, join your yarn, Ch 1, sc in same as joining and sc around into the original Ch. Do you have to? Hell no, it is your project, do what you want. I liked it, so I took the time to make it look more finished to me.
5. Done! I added the the buckeye applique, but again your project, do what you want.
Buckeye Applique size: it fits on the ear warmer Yarn: Red Heart extras that I had in my stash. You will need light brown, medium brown and green… well unless you decide to make it some other funky colors. That could be interesting… Hook: size “G”
Buckeye: Make 2. This is worked in a round so NO joining after each rounds.
1. With the light brown 6 sc in magic circle then switch to the medium brown
2. 2 sc in each st around
3. *2 sc in next st, 1sc in next st* and repeat around then bind off making sure to leave a tail for sewing.
Leaves: Make 3. (Now there is nothing special about this pattern. I have been making then for a while and I can’t remember even where I got it from anymore. I wish I could to give them credit.)
1. Ch 10, turn
2. Starting in the 2nd Ch from your hook work as follows: sl, sc, hdc, dc, tc, dc, hdc, sc, sl then working in the opposite side of the original Ch sl, sc, hdc, dc, tc, dc, hdc, sc, sl then bind off leaving a long tail for sewing.
Now attach the applique however you want or use my pictures to do as I did. Again, your creation, your decision.
You are done, celebrate by making more or going on to your next pattern… the circle of crochet!
I worked a while trying to get the pattern down because I couldn’t find one that I really liked. These are thick and fit perfectly into my hand so you don’t have to refold them while doing dishes. The pattern isn’t perfect though and a lot of add a hdc here or sc there on two rounds… G hook with sugar ‘n cream yarn.
Puff st is (YO, pull up loop) three times then YO and pull through all loops.
basically ch 6 and sl st to make a circle
Round 1: ch 1, (puff st, ch 1) six times then sl st to original ch 1
Round 2: ch 1, puff st in same as connecting, ch 1, (1 puff st , ch 1, puff st, ch 1 in-between the previous round puff st) five times then a puff st in last ch from the previous round, ch 1 then sl st in original ch 1
Round 3: ch 1, puff st in same as connecting, ch 1; puff st, ch 1 in next ch 1 space, (puff st, ch 1, puff st, ch1 in next ch 1 space then in next ch 1 space do another puff st, ch 1) five times then a puff st in last ch from the previous round, ch 1 then sl st in original ch 1
Round 4: ch 2, (hdc in next 4, 2hdc in next) around. May end up with extra hdc at the end then sl st to top of original ch 2
Round 5: ch 1 (sc in next 5, 2 sc in next) around. May end up with extra sc then sl st to top of original ch 1
Round 6: do NOT make any ch to start. (Skip one ch then 5 dc in next st, skip one ch, sl st next) around and sl st to sl st from previous round. Every now and the I have to either fit another 5 dc before ending it seems, basically just go by how it looks.
I did this one a bit different because I couldn’t find a pattern I liked. Most of them out there had you make two stars then sew them together. Meh… so I tried to make a no sew one and surprised myself that it worked. See if you can follow this a bit. I used a size F hook for tighter stitches.
Essentially you make two flat ami circles how ever many rows of increases you want (this one is up to 2sc in 1 then sc in next 6sc).
Count how many sc you have and make sure it’s dividable by 5. Now put the wrong sides of your circle together and connect with a sl st. Sc down the one circle your number, turn and sc back up the other circle. You now are crocheting in a round. Every time you go to do a ‘turn’ sc tog. End at the tip of the point, bind off.
The next point you do the same way, but I found it helpful to sl st in the last sc of the previous point then start sc in the next.
Stuff after you have four points and then stuff when you have the last point almost done. Whip-stitch two eyes and that’s all…
So, I have had MANY requests for the pattern of my Reddit Alien hat that I’m going to go ahead and post my pattern without the usual testing that I would consider normal before releasing a pattern. Please, if you have any questions or find any errors let me know and I apologize upfront for it, alright? That being said, it really is an easy hat to make believe it or not.It made a hat big enough for my head and my hubby’s head, but was a bit big for the children so take that into mind if you need to omit a round of increases or such.
Get out those stitch markers, I did it in a round.
‘H’ hook
small amount of polyfil
White yarn and a small amount of red yarn (for the eyes)
Hat:
rnd 1: 8 sc in magic circle
rnd 2: 2 hdc in each sc
rnd 3: *2 hdc in 1 hdc, hdc in next* around
rnd 4: *2 hdc in 1 hdc, 1 hdc in next 2 hdc* around
rnd 5: *2 hdc in 1 hdc, 1 hdc in next 3 hdc* around
rnd 6: *2 hdc in 1 hdc, 1 hdc in next 4 hdc* around
rnd 7: *2 hdc in 1 hdc, 1 hdc in next 5 hdc* around
rnd 8: *2 hdc in 1 hdc, 1 hdc in next 6 hdc* around
rnd 9-20: *1hdc in each hdc* around
bind off
Earflaps: (you can use this simple one or one of your favorite ear flap patterns or no ear flaps at all)
For the right earflap join with sl st about 10 hdc from binding off point
row 1: hdc in next 12 st
row 2-6: ch 2, hdc across
bind off
For the left earflap count back from original hat end point about 22 hdc then follow the instructions for the right earflap.
Now to finish up the bottom of the hat!
join with sl at the original binding off point of the hat
sc in each hdc around, up and down both sides of the earflaps with the exception of the bottom of the earflaps do:
3 hdc in first hdc
1 hdc in next hdc
1 dc in next 3 hdc
1 tc in next 2 hdc
1 dc in next 3 hdc
1 hdc in next hdc
3 hdc in last hdc
Bind off and weave in ends.
Ties:
Cut 4 strands of the white and red yarns about 24 in strands. If you want longer ties, cut your strands longer. Now fed the one end through the two tc on the ear flaps and put the middle of the strands there. Divide out the yarn into groups of three and braid down the length as far as you want or all the way down. When done do a simple loop knot followed by another loop knot about an inch apart and trim off the ends.
Antennae: I used a size F hook just for this part to keep the stitches close (stuff as you go, trust me)
6 sc in magic circle (or ch 2, then 6 sc in 2nd loop)
rnd 1: 2 sc in each sc around
rnd 2: 2 sc in each sc around
rnd 3: *1 sc in next 2sc, then sc2tog* around
rnd 4: *1 sc in next sc, sc2tog* around
rnd 5: sc2tog around
rnd 6-15: sc around
rnd 16 – 20: 1sc in next 3, hdc in next 3 (this makes the bump on the top of the antennae)
rnd 21 -35: 1 sc in each sc around
the next two rows are optional, but I find it really helps the antennae stand up and easier to attach)
rnd 36: 2 sc in each sc around
rnd 37: *1 sc in next two sc, 2 sc in 1 sc* around
bind off, weave in, finish stuffing and then sew to the very top of your hat.
Ears: (make four, join 2 together with sc along the top curve)
row 1: ch 3, 4 hdc in 3rd ch
row 2: ch 2, 1 hdc in 1st hdc, *2 hdc in 1 hdc* remaining sts
row 3: ch 2, 1 hdc in next 2 hdc, *3 hdc in 1 hdc* remaining sts
row 4: ch 2, 1 hdc in 1st hdc, 2 hdc in next hdc, *2 hdc in 1 hdc, 1 hdc in next 2 hdc* remaining sts
I stuffed my ears before attaching them to the hat for a ‘fuller’ looking ear.
Attach tip of ear to the hat at around the fourth row of your hat and hold the ear together as you sew down the length of the ear.
Eyes: (make two)
rnd 1: 6sc in magic circle
rnd 2: 2sc in each sc around
rnd 3: *2sc in 1 sc, 1 sc in next* around
bind off and sew onto the hat. I had the bottom of the eye at around the third row from the bottom of the original hat with about 6 hdc in-between them.
Alright, take a deep breath and the wOOt as loud as you dare for you should have a lovely hat!
So, I have been very busy, but I wanted to start posting some of my patterns for others to use. The first will be my Brain Slug Hat. I was making some Brain Slugs ( based upon Alicia Ramirez http://www.hookandneedles.com/wp-content/uploads/2008/10/brainslug.pdf ) and someone at hubby’s job requested a hat to be made for his sister. Reading the pattern you can easily see how to make this into a lovely hat! Essentially you want to make your favorite beanie. Now, at the bottom of that beanie follow rows 23 and 24 on the larger Slug. For the eye I used some felt, stuck a black plastic eye doll’s eye through it and used a little bit of poly-fil behind the white felt while I sewed it on. You can do the eye however best you see fit, but this worked out really well for me and makes the eye ‘stick out’ a little bit. Now for the antennas… this is where I made up my own little pattern. I wanted them to stand up on their own without wire because I the idea of a floppy antennaed Brain Slug makes me shudder. I used a size F hook (or your favorite hook that is a size or two smaller than what you would use for that yarn) with some of my Brain Slug green (which isn’t the easiest color to find). Remember to stuff as you go and use a stitch marker.
6 sc in magic circle (or ch 2, then 6 sc in 2nd loop) rnd 1: 2 sc in each sc around rnd 2: 2 sc in each sc around rnd 3: *1 sc in next 2sc, then sc2tog* around rnd 4: *1 sc in next sc, sc2tog* around rnd 5: sc2tog around rnd 6 – 8: 1sc in next 3, hdc in next 3 (this makes the bump on the top of the antennae) rnd 9 -20: 1 sc in each sc around the next two rows are optional, but I find it really helps the antennae stand up and easier to attach) rnd 21: 2 sc in each sc around rnd 22: *1 sc in next two sc, 2 sc in 1 sc* around bind off, weave in, finish stuffing and then sew them on to the top of your Brain Slug hat and show off and enjoy!
Operating this blog takes money and with thousands of hits a day it's not an insubstantial cost. This site will always remain ad-free but if you are able we appreciate any support you can offer!!


Recent Comments