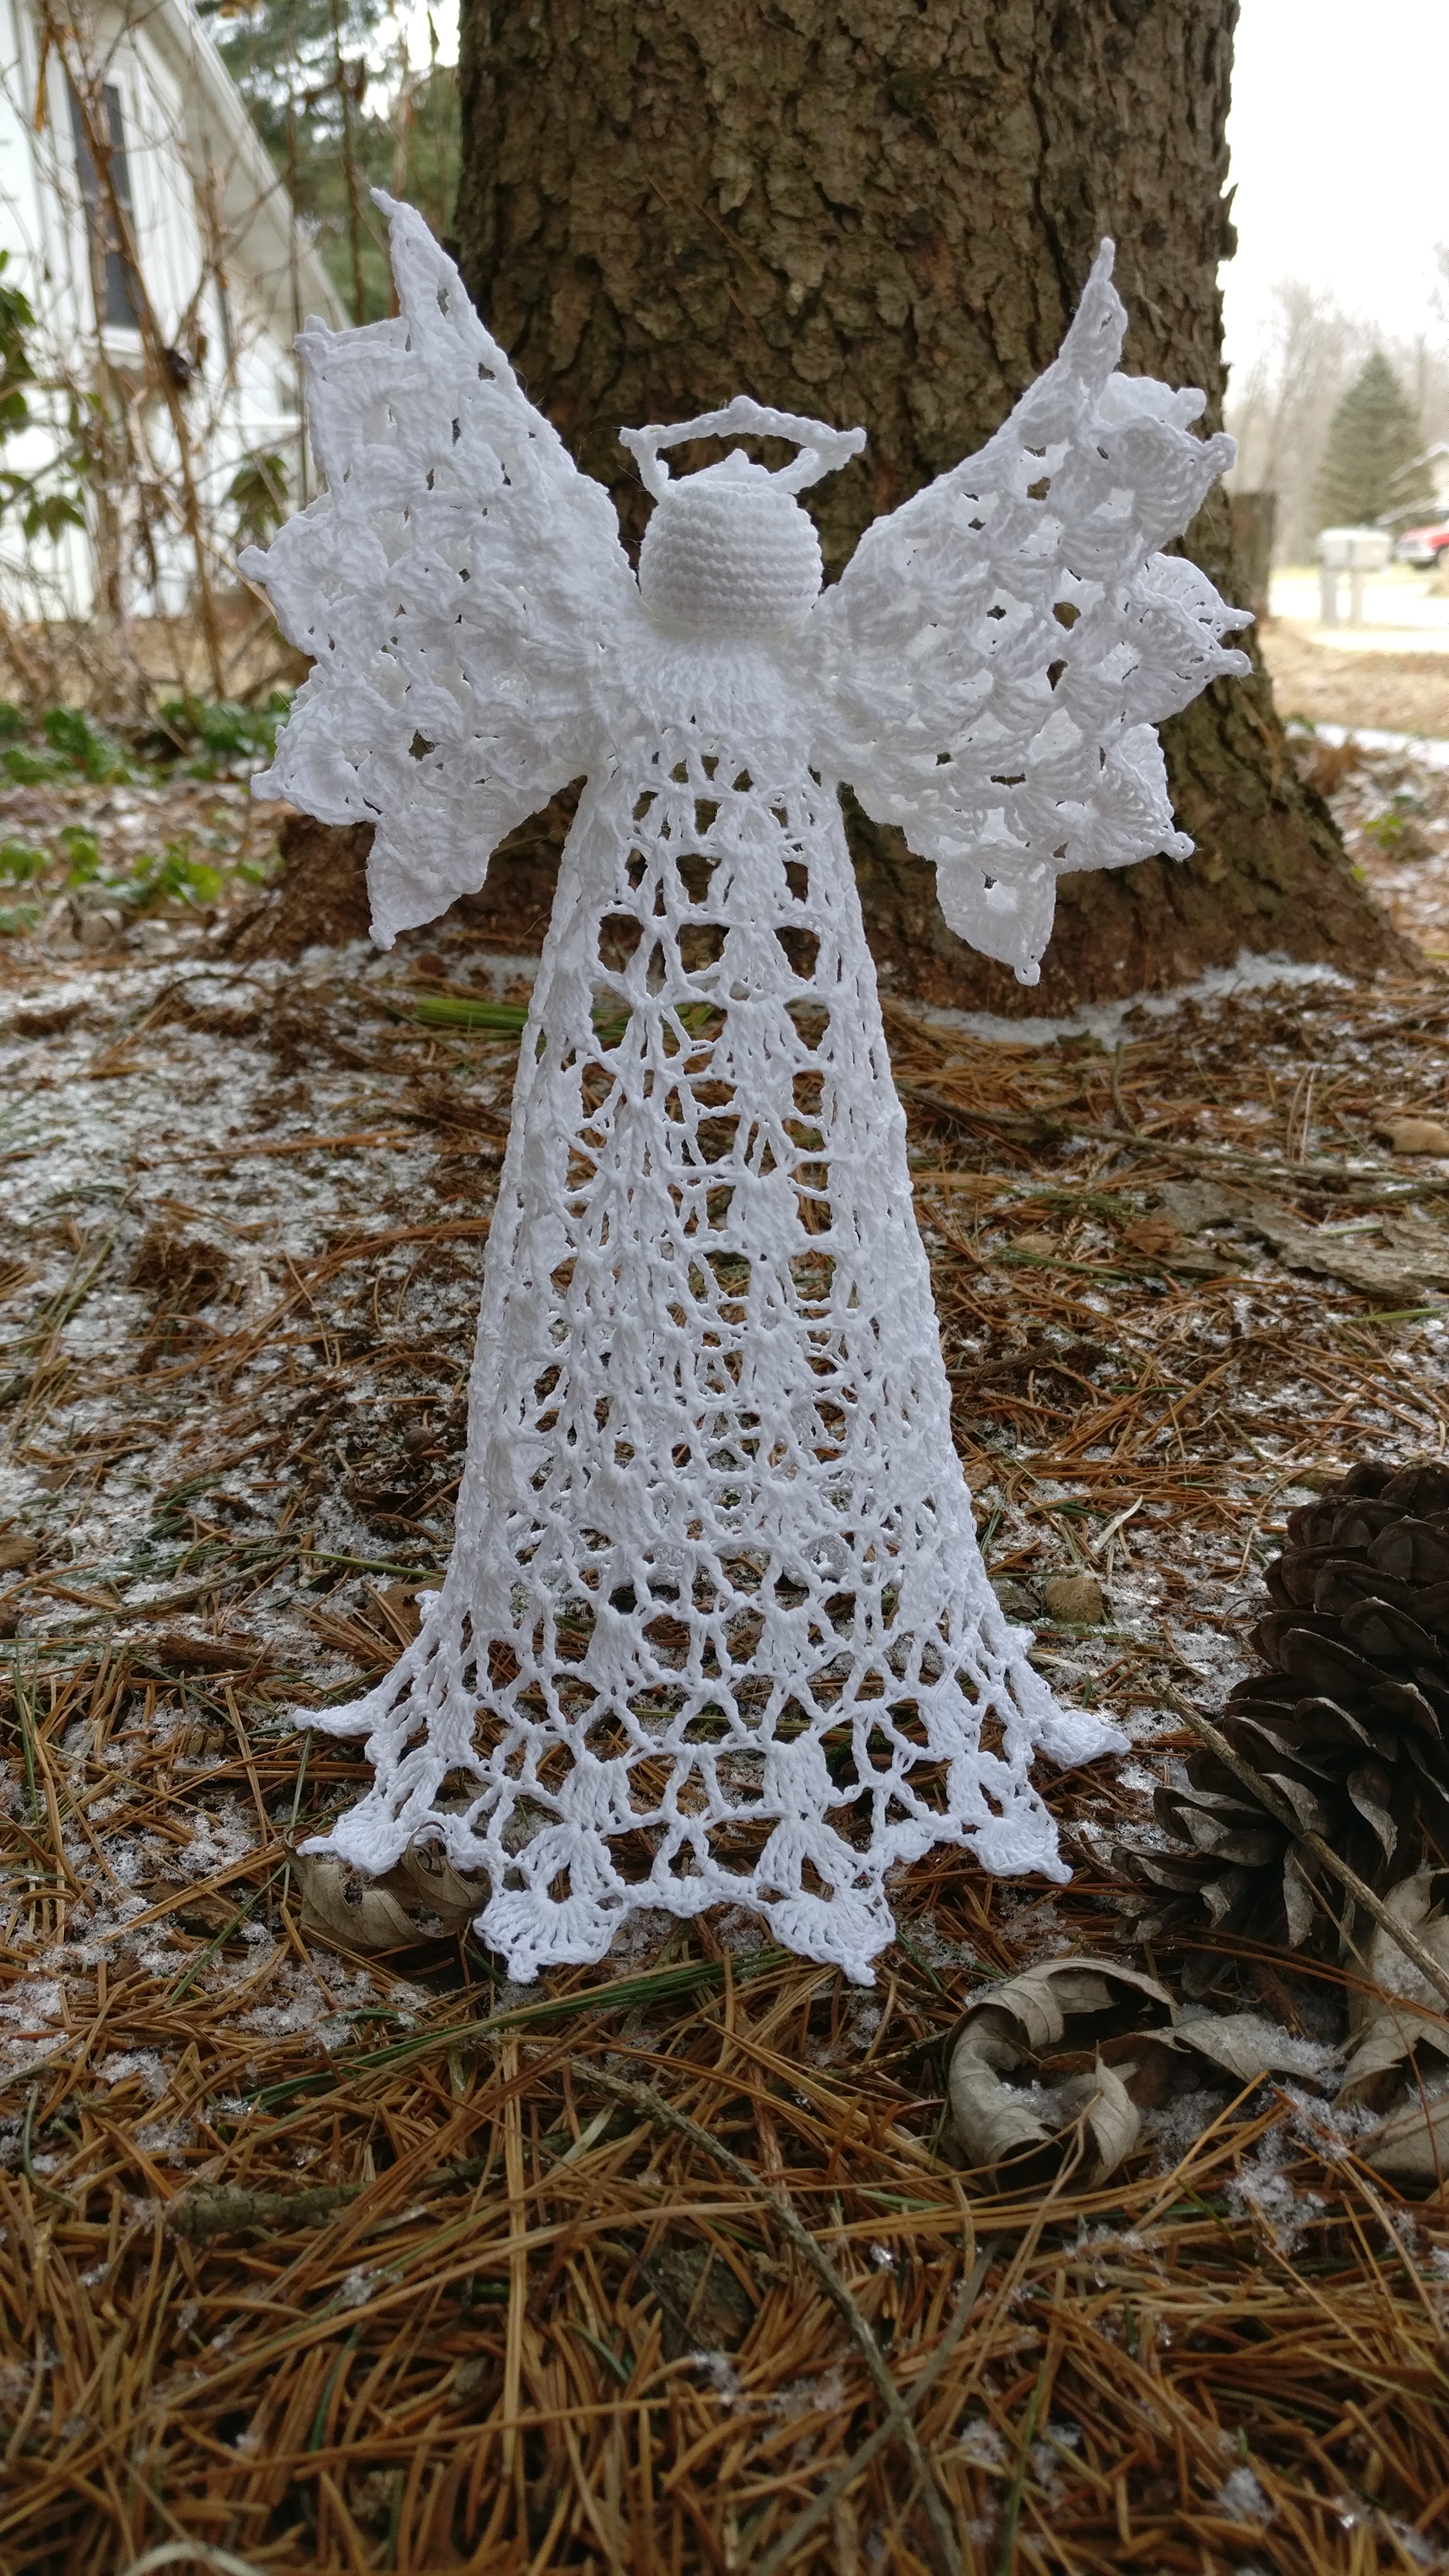
I was asked to recreate a loved angel topper… I did, but of course I couldn’t help but make another one that was better. The original was only about 7 inches tall and of course it’s go big right?! This wonderful angel comes in at 9 inches tall! So here’s my take on the angel Christmas tree topper.. Though it would look just as lovely as a centerpiece. I hope you enjoy!
size 10 cotton thread
1.50mm crochet hook
small amount of poly-fil
stiffening solution (I used 1 part Elmer’s glue to 2 parts water)
rust proof pins
pinning board
foam cones and cover with saran wrap to make it easier to remove the angels
Head is worked without joining in each round. Use a stitch marker if you prefer to mark the beginning of each round.
10 sc in magic circle
Inc in each around
*inc, sc in next* around
*inc, sc in next 9* around (33 sc)
sc around for 6 rounds
sc, *dec, sc in next 2* around (make sure to stuff head firmly)
sc *dec x12* this time go ahead and join with a sl s to beginning sc but do NOT bind off and continue on to the body (13 sc)
Body
Round 1: Ch 4, dc in same space *(dc, ch 1, dc)* in each st around, join with st st to 3rd ch of beginning ch
Round 2: Ch 4, dc in same space *(dc, ch 1, dc)* in the next 8 dc. *(tr, ch 1, tr)* in next 4 dc. *(dc, ch 1, dc)* in the next 9 dc. *(tr, ch 1, tr)* in next 4 dc, join with st st to 3rd ch of beginning ch
Round 3: Sl st to ch between original ch and dc. Ch 4, dc in same space *(dc, ch 1, dc)* in next 8 ch 1 space. *(tr, ch 1, tr)* in next 4 ch 1 space. *(dc, ch 1, dc)* in next 9 ch 1 space. *(tr, ch 1, tr)* in next 4 ch 1 space. join with st st to 3rd ch of beginning ch.
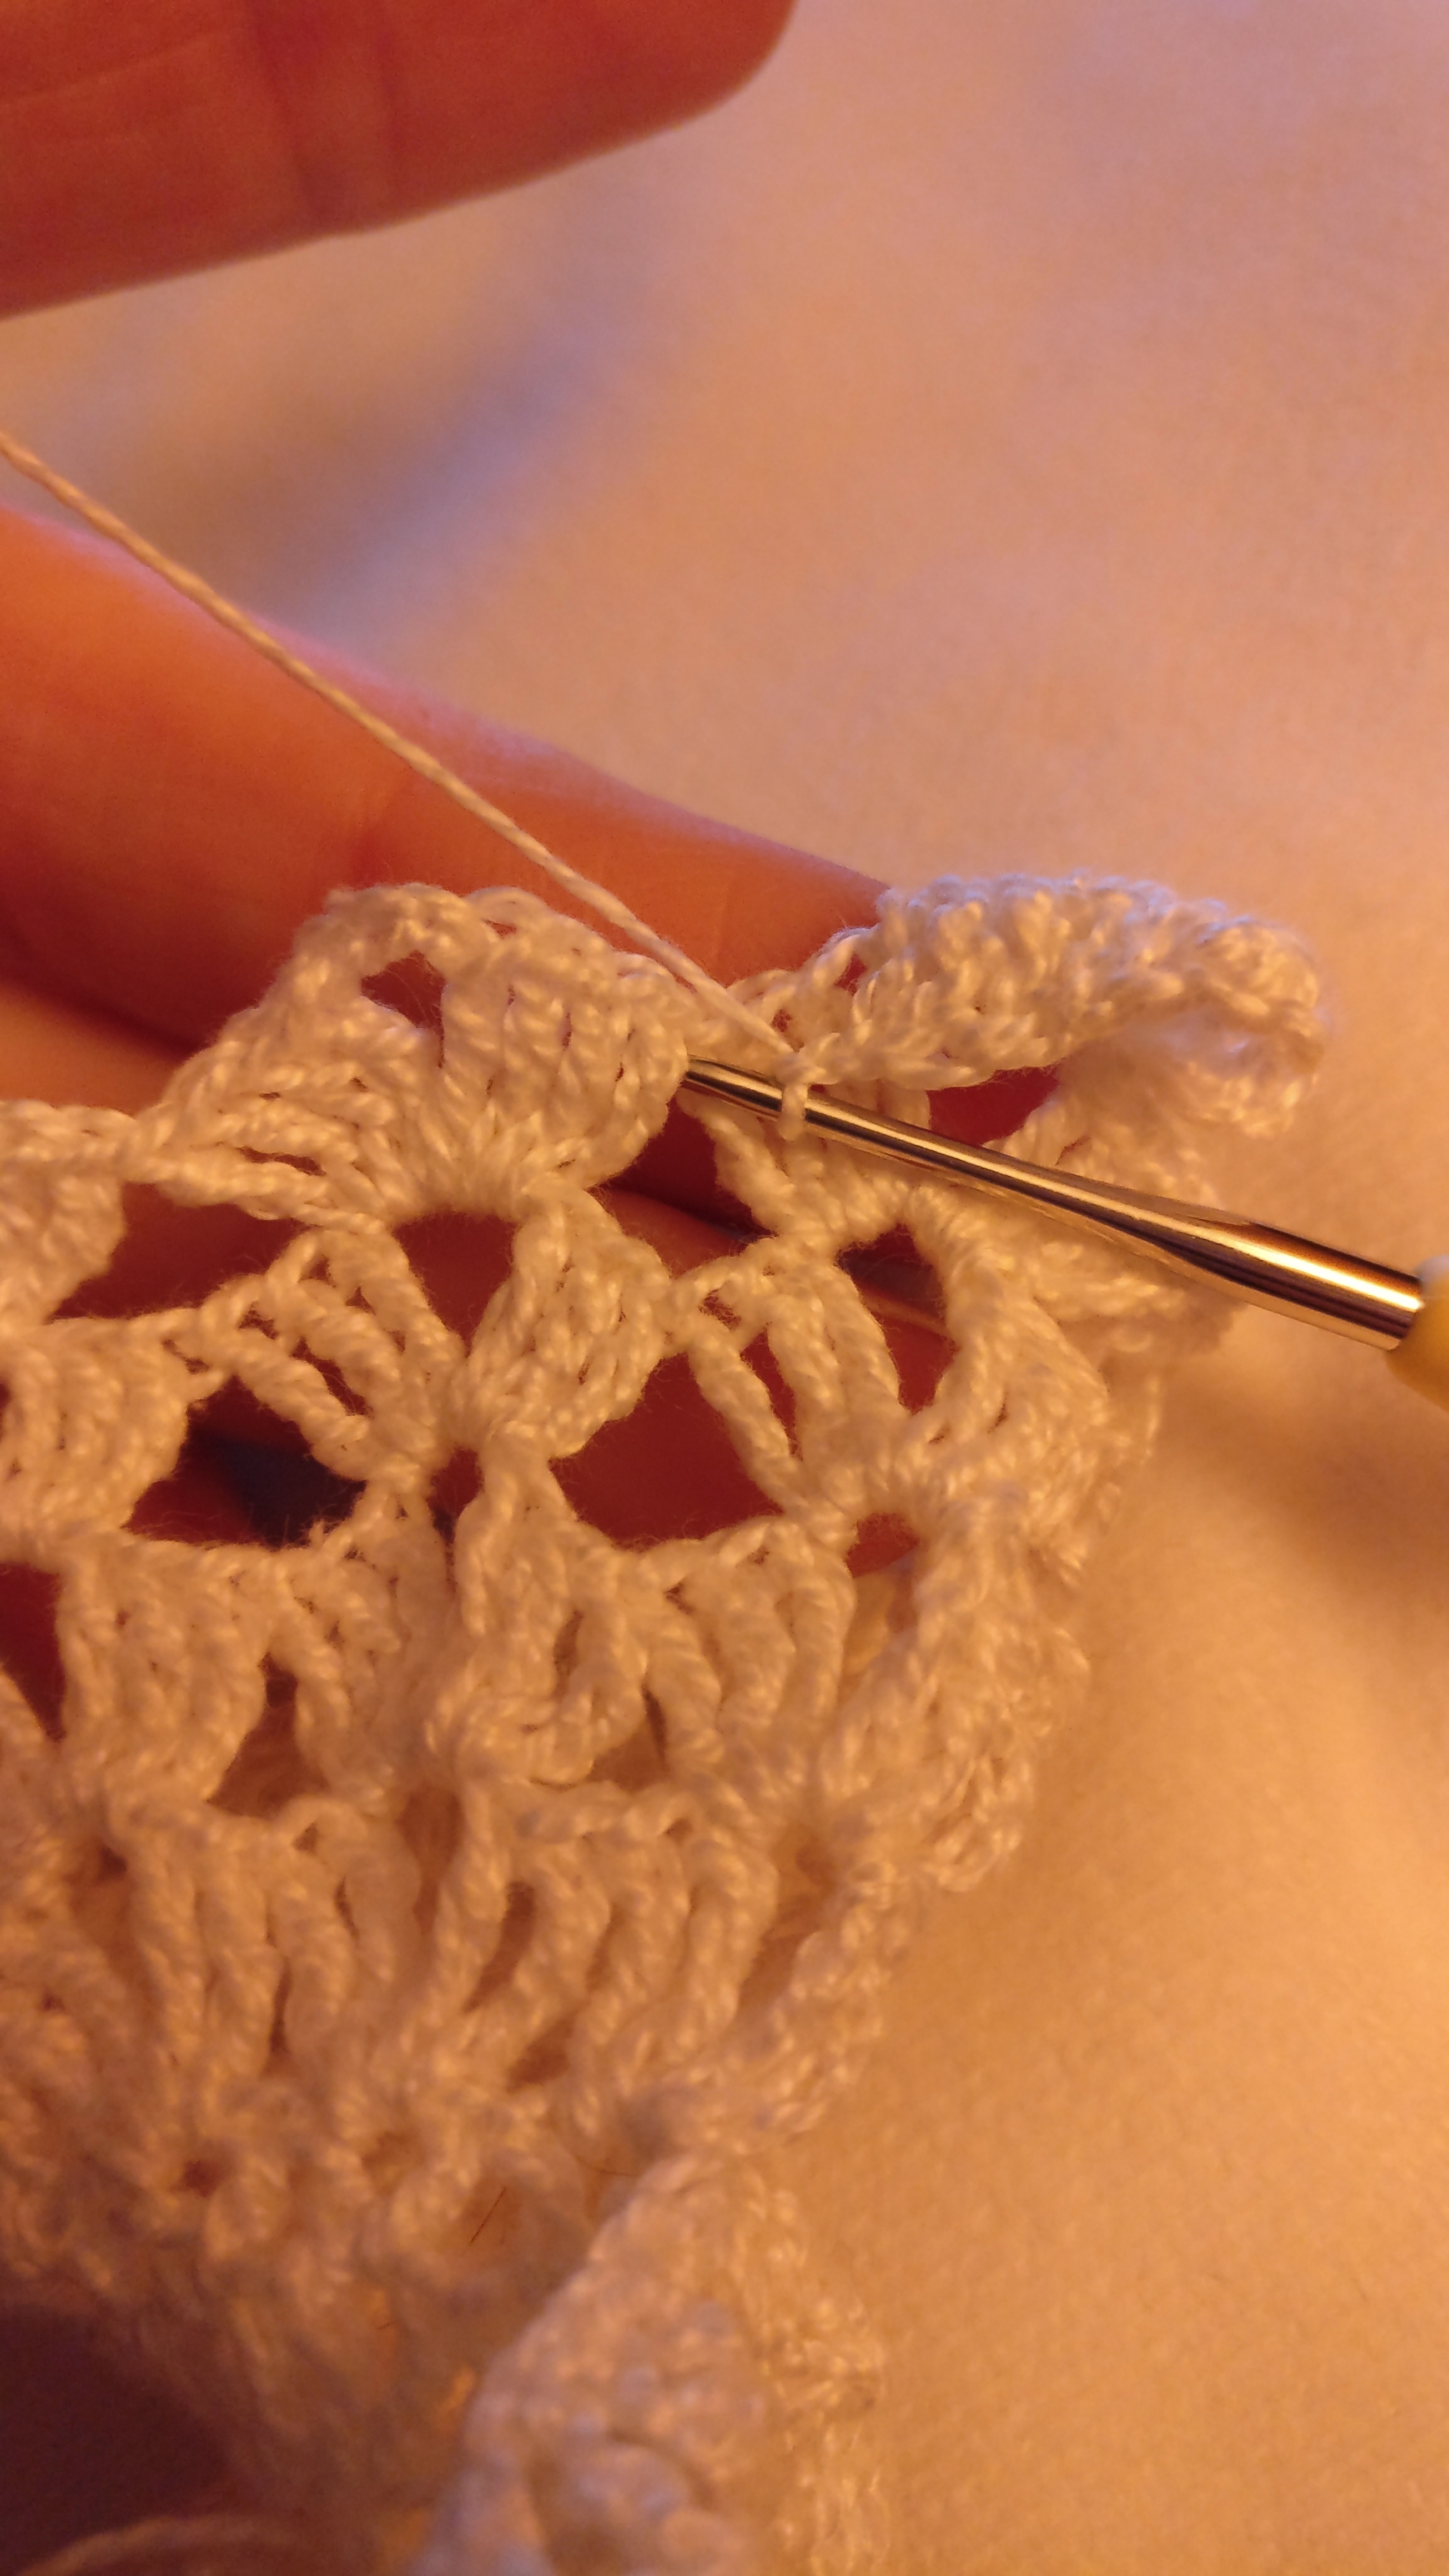
Wing 1
Round 1: Sl st to ch between original ch and dc. Ch 4, (tr, ch 2, 2 tr) in same space. *(2 tr, ch 2, 2 tr)* in next 8 ch 1 space. Join with sl st to top of ch 4 of original ch, leaving the rest unworked for now.
Round 2: Sl st to chs between tc clusters. Ch 4, 2 tr, ch 2, 3 tr in same space. *(3 tr, ch 2, 3 tr) around. Join with sl st to top of ch 4 of original ch.
Round 3: Sl st to chs between tc clusters. Ch 4, 2 tr, ch 2, 3 tr in same space. *(3 tr, ch 2, 3 tr) around. Join with sl st to top of ch 4 of original ch.
Round 4: Sl st to chs between tc clusters. Ch 4, 3 tr, ch 3, 4 tr in same space. *(4 tr, ch 3, 4 tr) around. Join with sl st to top of ch 4 of original ch.
Round 5: Sl st to chs between tc clusters. Ch 3, 4 tr, ch 3 picot, 4 tr in same space, dc, ch 1, sc in the space between tc clusters. *(dc, 4 tr, ch 3 picot, 4 tr, dc) in ch 2 space. Ch 1, sc inbetween tc clusters, ch 1* around. Join with sl st to top of ch 3 of original ch. Bind off and weave in end.
Wing 2
Skip 4 of the (tr, ch 1, tr) and join thread with sl st in the next space between the next (dc, ch 1, dc).
Round 1: Ch 4, tr, ch 2, 2 tr in same space. *(2 tr, ch 2, 2 tr)* in next 8 ch 1 space. Join with sl st to top of ch 4 of original ch, leaving the rest unworked for now.
Round 2: Sl st to chs between tc clusters. Ch 4, 2 tr, ch 2, 3 tr in same space. *(3 tr, ch 2, 3 tr) around. Join with sl st to top of ch 4 of original ch.
Round 3: Sl st to chs between tc clusters. Ch 4, 2 tr, ch 2, 3 tr in same space. *(3 tr, ch 2, 3 tr) around. Join with sl st to top of ch 4 of original ch.
Round 4: Sl st to chs between tc clusters. Ch 4, 3 tr, ch 3, 4 tr in same space. *(4 tr, ch 3, 4 tr) around. Join with sl st to top of ch 4 of original ch.
Round 5: Sl st to chs between tc clusters. Ch 3, 4 tr, ch 3 picot, 4 tr in same space, dc, ch 1, sc in the space between tc clusters. *(dc, 4 tr, ch 3 picot, 4 tr, dc) in ch 2 space. Ch 1, sc inbetween tc clusters, ch 1* around. Join with sl st to top of ch 3 of original ch. Bind off and weave in end.
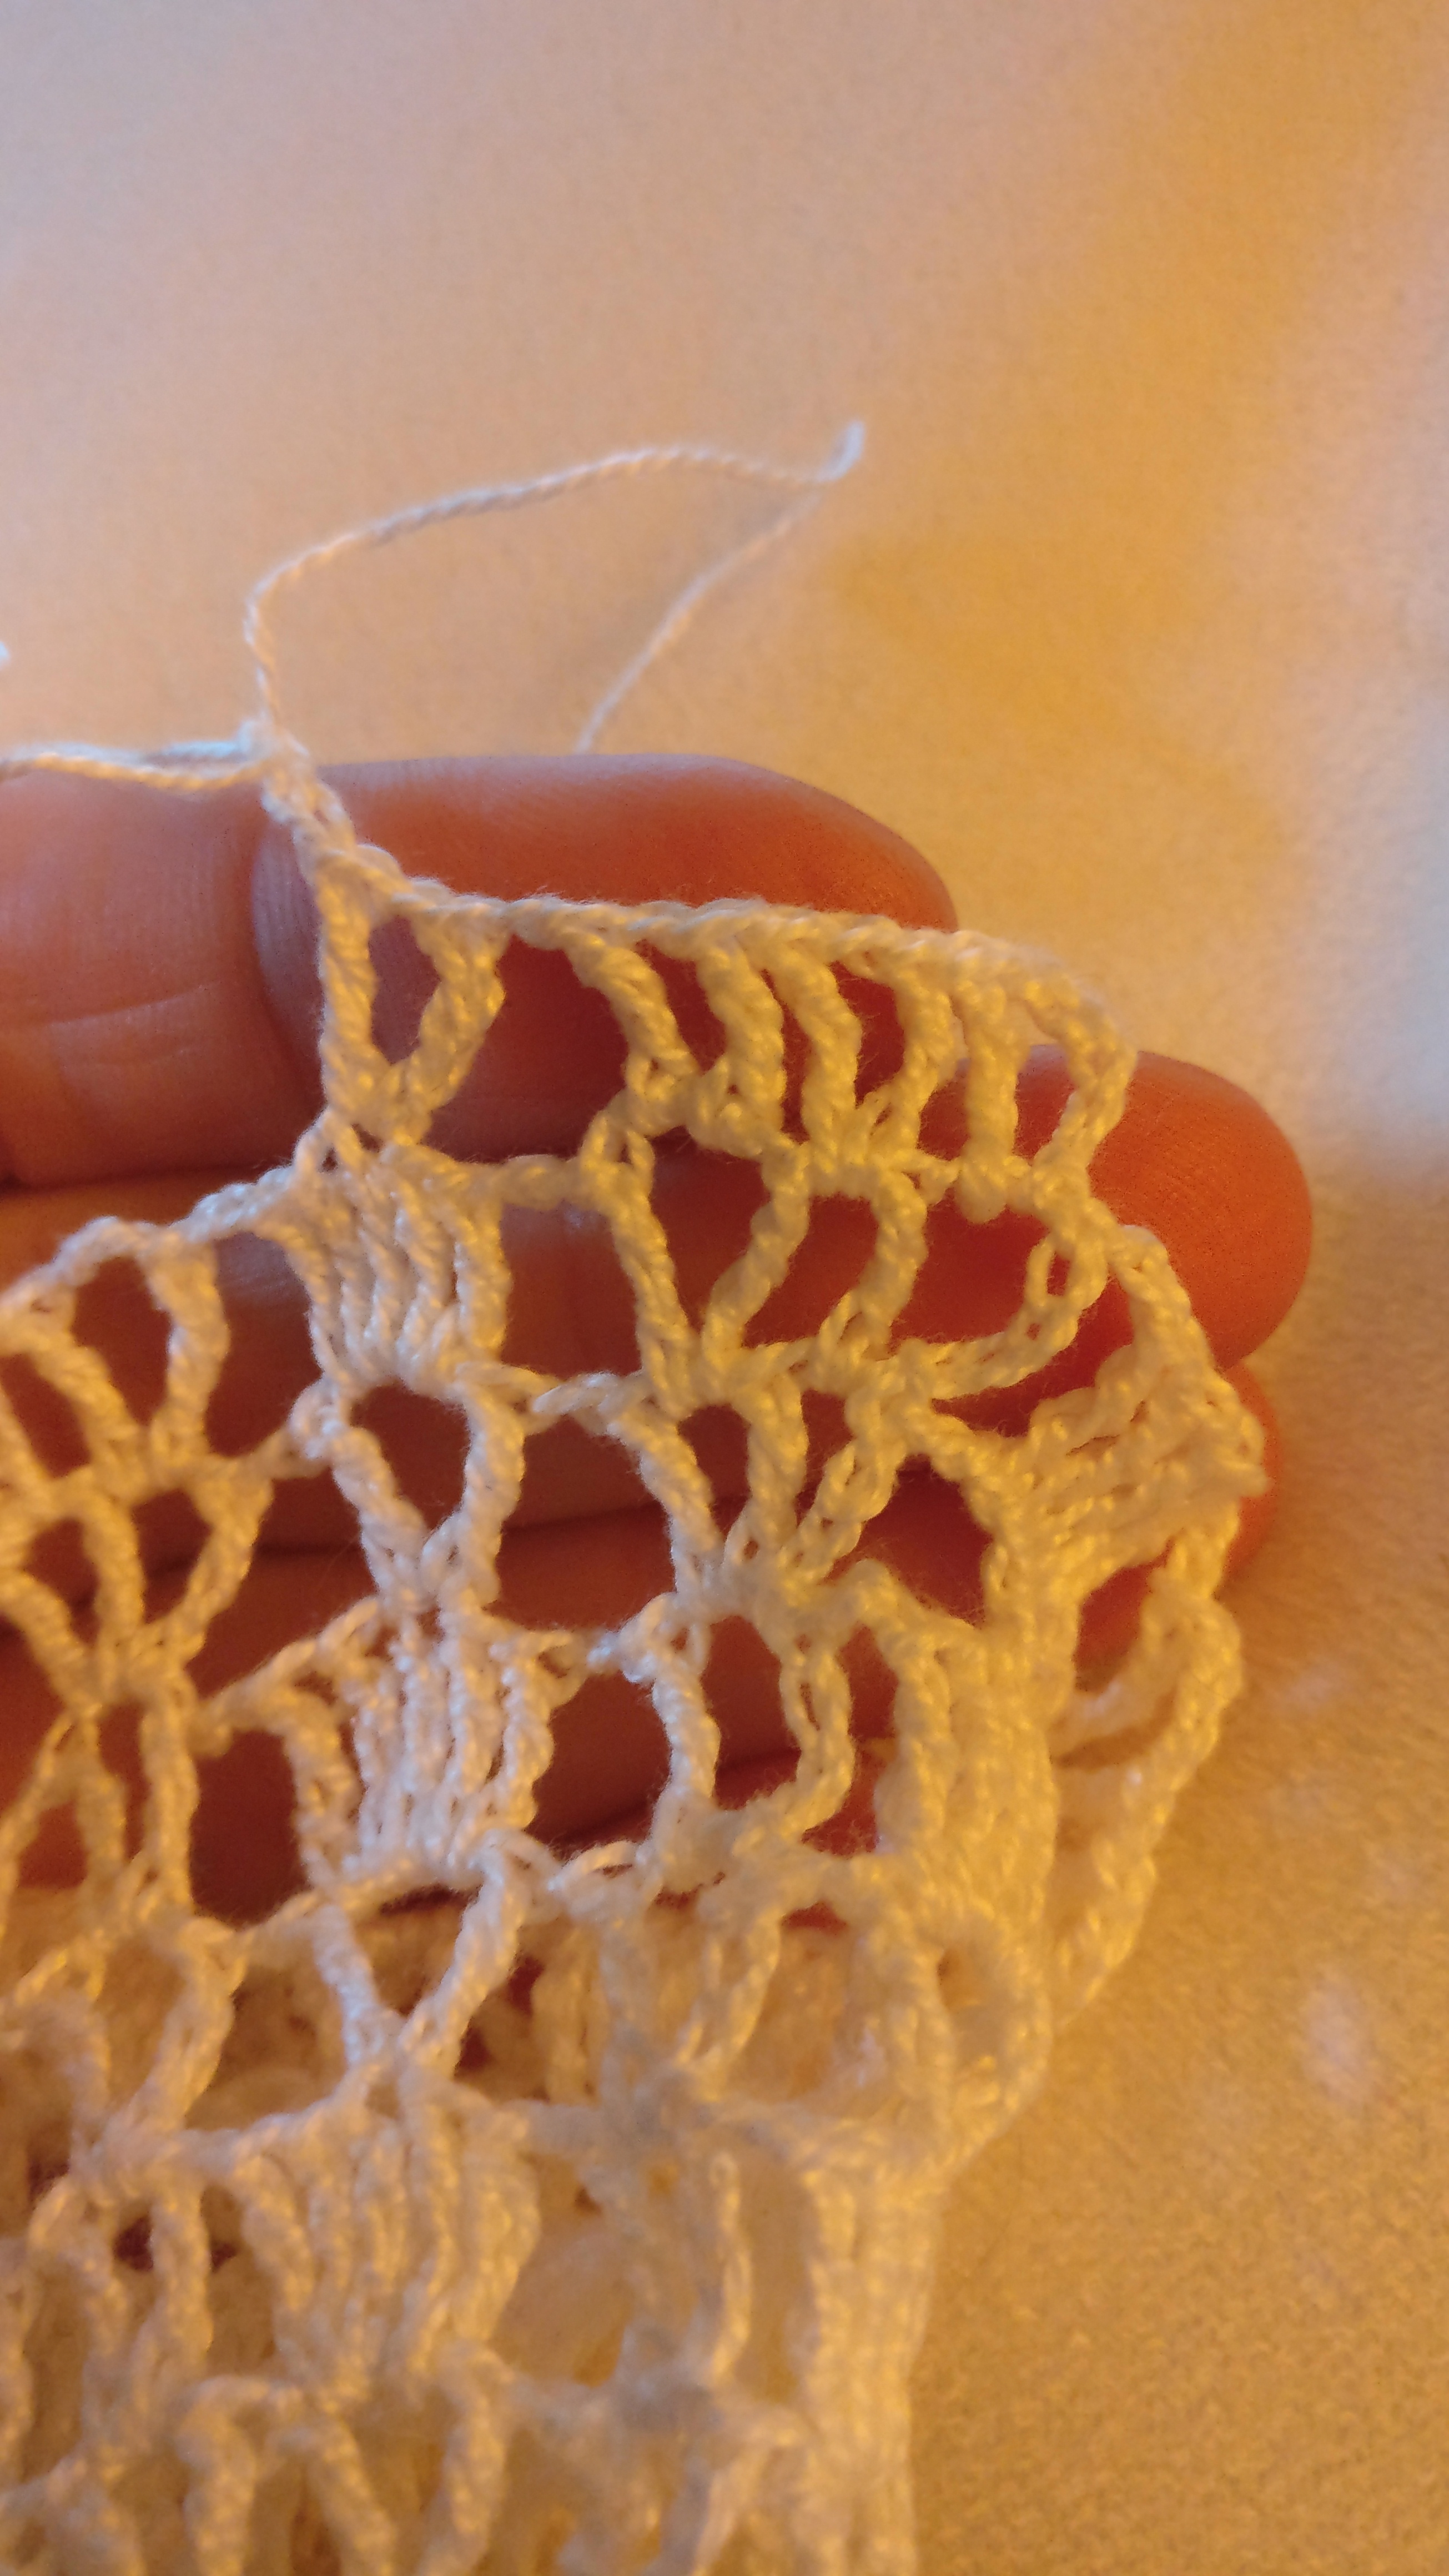
Skirt
Round 1: Join thread with sl st in the first ch 1 space of the back (tr, ch 1, tr). Ch 5, tr in same space. *(tr, ch 1, tr)* in the next 3 ch 1 spaces, in the joining of the wing base, in the next 4 and in the next joining of the wing base. Sl st to the 4th ch of the beginning ch 5.
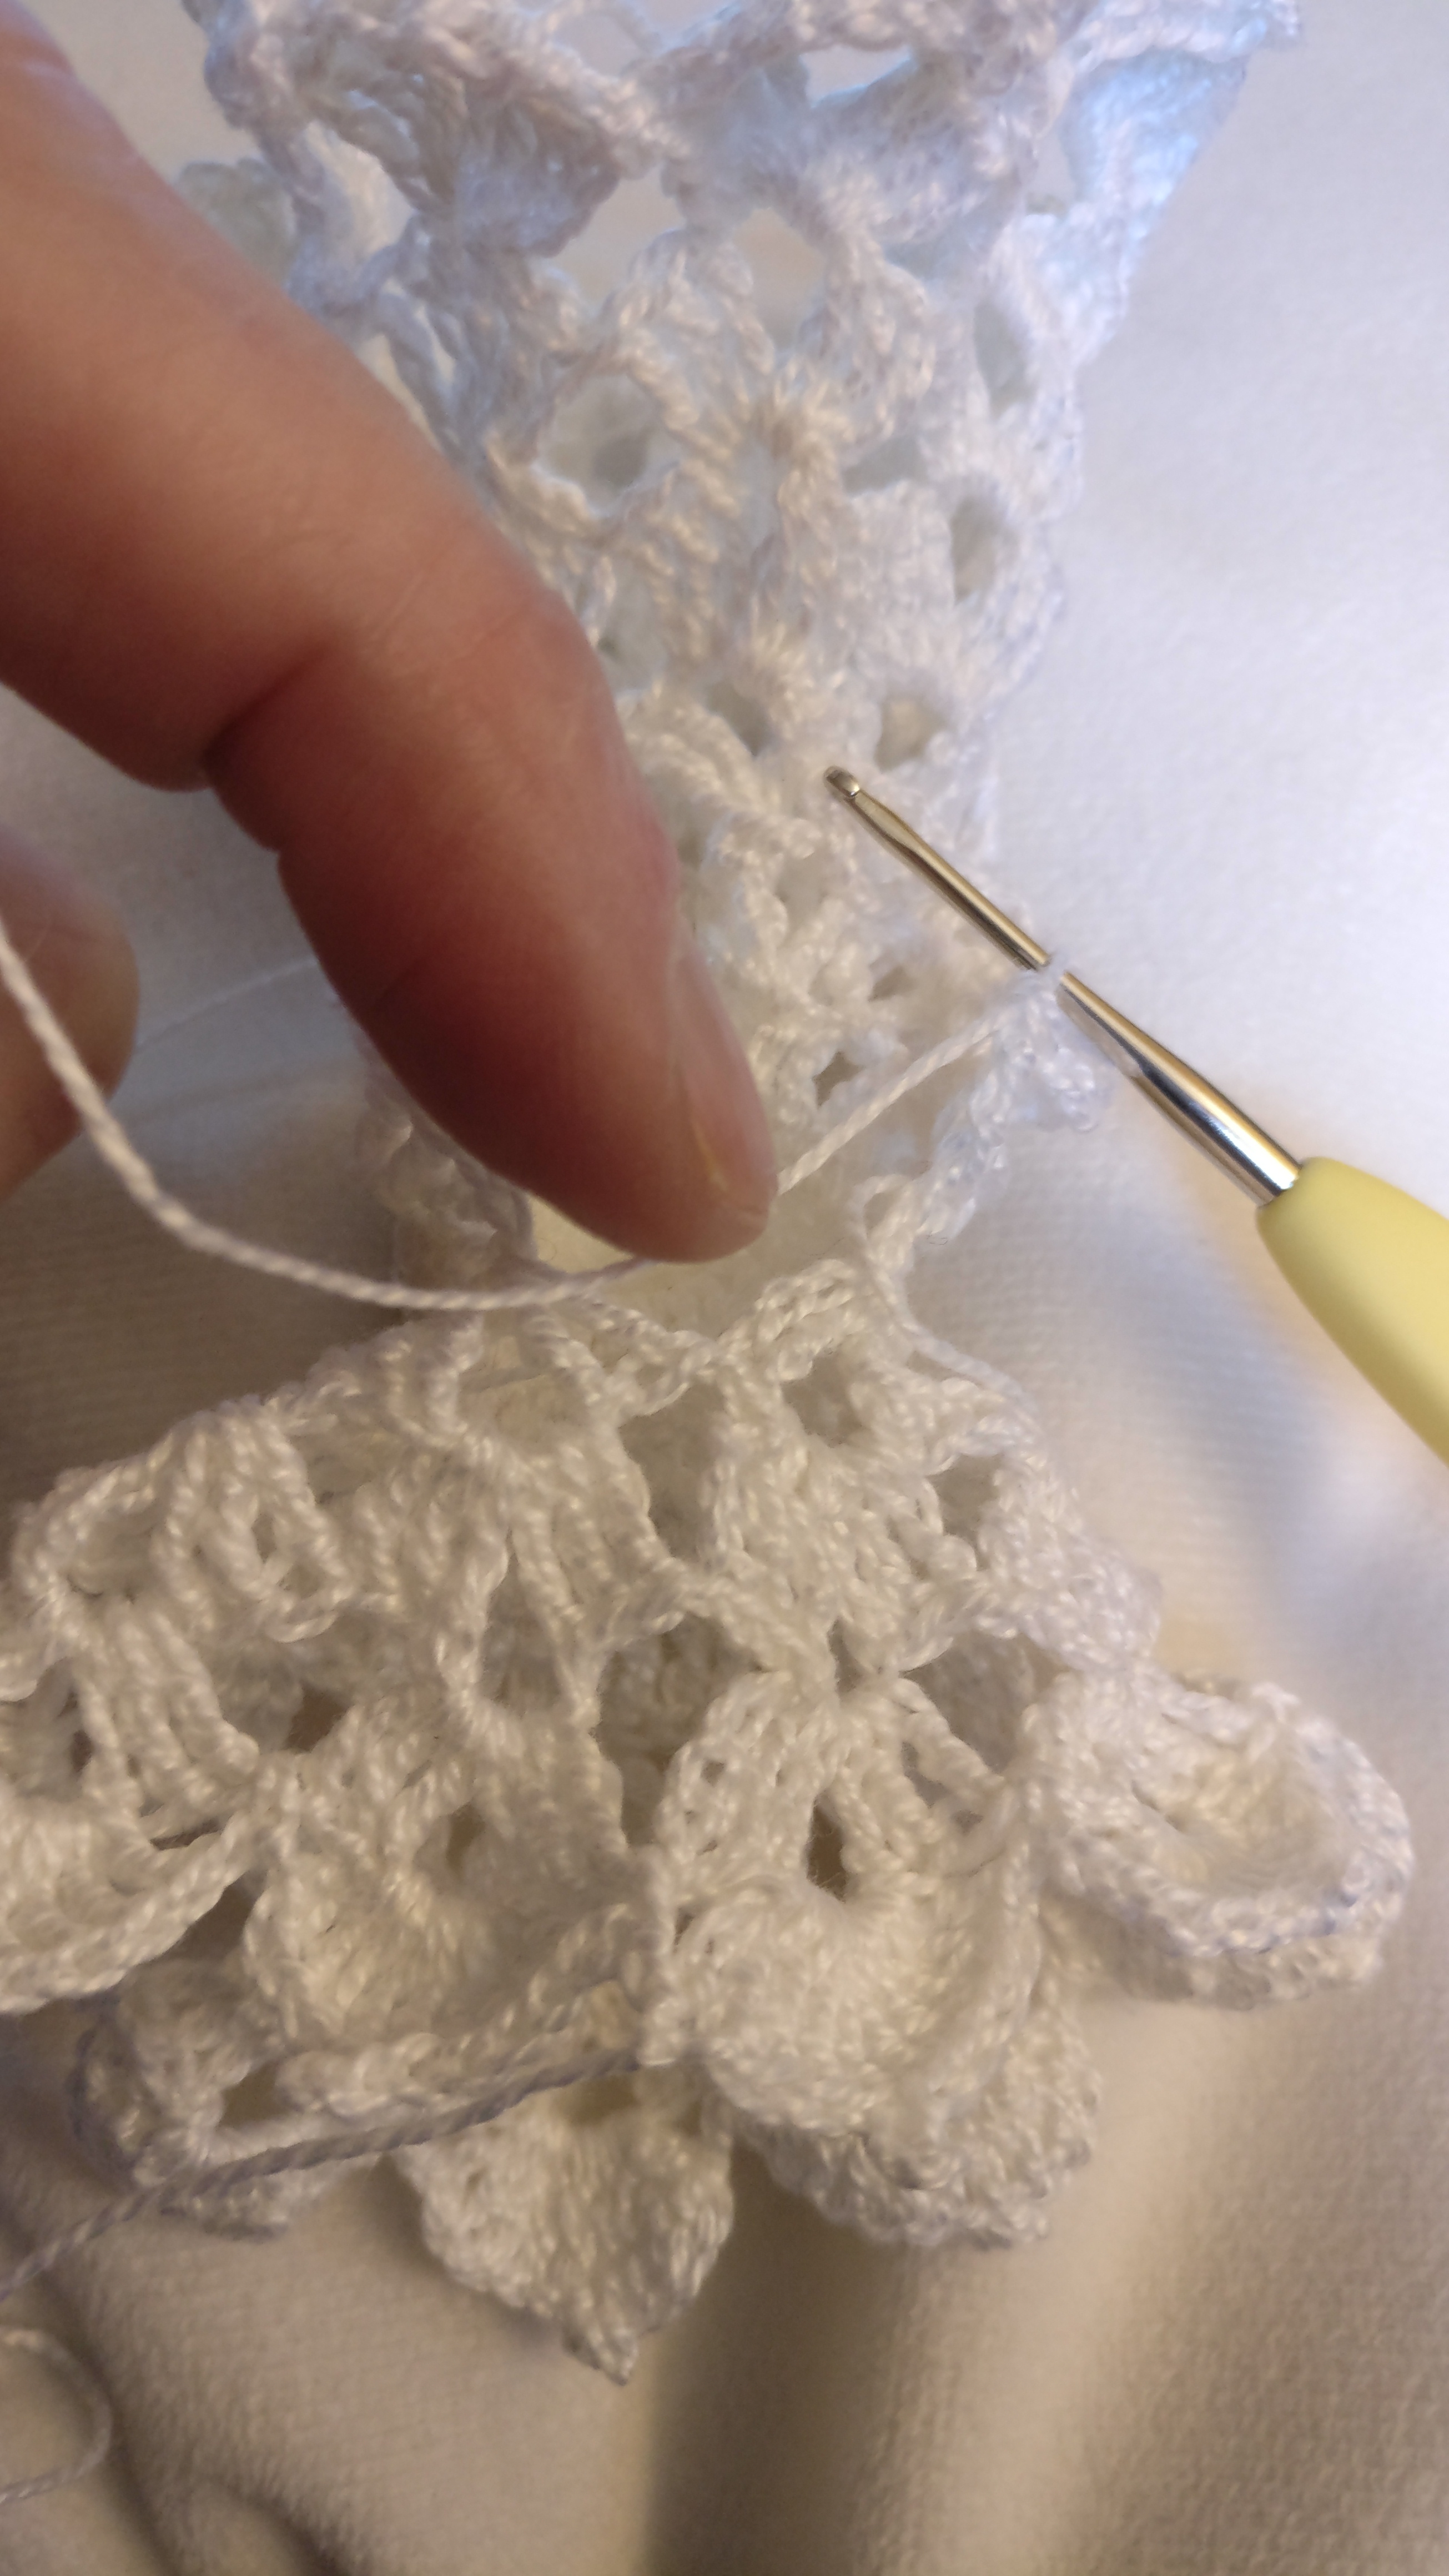
Round 2: Sl st to ch between tc clusters. Ch 5, tr in same space. *ch 1, 5 tr in the next ch 1 space, ch 1, (tr, ch 1, tr) in next ch 1 space* around. Sl st to the 4th ch of the beginning ch 5.
Round 3: Sl st to ch between tc clusters. Ch 6, tr in same space. Ch 1, (tr, ch 2, tr) in 3rd tr of next cluster, ch 1, *(tr, ch 2, tr) in next ch 1 space, (tr, ch 2, tr) in 3rd tr of next cluster* around. Sl st to the 4th ch of the beginning ch 6.
Round 4: Sl st to ch between tc clusters. Ch 6, tr in same space. Ch 2, 5 tr in next ch 2 space, ch 2, *(tr, ch 2, tr) in next ch 2 space, ch 2, 5 tr in next ch 2 space, ch 2* around. Sl st to the 4th ch of the beginning ch 6.
Round 5: Sl st to ch between tc clusters. Ch 5, (tr, ch 1, tr) in same space. Ch 1, (tr, ch 3, tr) in 3rd tr of next cluster, ch 1. *(tr, ch 1, tr, ch 1, tr) in next ch 1 space, ch 1, (tr, ch 3, tr) in 3rd tr of next cluster, ch1* around. Sl st to the 4th ch of the beginning ch 5.
Round 6: Sl st to ch between tc clusters. Ch 7, tr in same space. (tr, ch 3, tr) in next ch 1 cluster *ch 2, 5tr in next ch 3 space, ch 2, (tr, ch 3, tr) in next 2 ch 1 spaces* around. Sl st to the 4th ch of the beginning ch 7.
Round 7: Sl st to ch between tc clusters. Ch 5, tr in same space, (tr, ch 1, tr) in space in-between previous round, (tr, ch 1, tr) in next ch 3 space, ch 2, (tr, ch 1, tr) in in 3rd tr of next cluster, ch 2, *(tr, ch 1, tr) in next ch 3 space, (tr, ch 1, tr) in space in-between previous round , (tr, ch 1, tr) in next ch 3 space, ch 2, (tr, ch 1, tr) in next ch 3 space, ch 2* around. (tr, ch 1, tr) in last ch 3 space. Sl st to the 4th ch of the beginning ch 5.
Round 8: Sl st to ch between tc clusters. Ch 5, tr in same space. *3 tr in next ch 1 space, (tr, ch 1, tr) in next ch 1 space, ch 2, 5 tr in next ch 1 space, ch 2, (tr, ch 1, tr) in next ch 1 space* around. 5 tr in last ch 1 space. Sl st to the 4th ch of the beginning ch 5.
Round 9: Sl st to ch between tc clusters. Ch 6, tr in same space. *(tr, ch 2, tr) in 2nd ch of previous 3 tr cluster, (tr, ch 2, tr) in next ch 1 space, ch 2, (tr, ch 2, tr) in 3rd tr of next tr cluster, ch 2, (tr, ch 2, tr) in next ch 1 space* around. Ch 2, (tr, ch 2, tr) in 3rd tr of next tr cluster, ch 2. Sl st to the 4th ch of the beginning ch 6.
Round 10: Sl st to ch between tc clusters. Ch 5, tr in same space. 5 tr in next ch 2 space. *(tr, ch 1, tr) in next ch 2 space, 5 tr in next ch 2 space* around. Sl st to the 4th ch of the beginning ch 5.
Round 11: Sl st to ch between tc clusters. Ch 6, tr in same space. Ch 1, (tr, ch 2, tr) in 3rd tr of next cluster, ch 1, *(tr, ch 2, tr) in next ch 1 space, (tr, ch 2, tr) in 3rd tr of next cluster* around. Sl st to the 4th ch of the beginning ch 6.
Round 12: Sl st to ch between tc clusters. Ch 5, tr in same space. *ch 1, 5 tr in the next ch 1 space, ch 1, (tr, ch 1, tr) in next ch 1 space* around. Sl st to the 4th ch of the beginning ch 5.
Round 13: Sl st to ch between tc clusters. Ch 7, tr in same space. (tr, ch 3, tr) in each (tr, ch 1, tr) and each 3rd st of the 5tr clusters around. Sl st to the 4th ch of the beginning ch 7.
Round 14: Sl st to ch between tc clusters. Ch 6, tr in same space. Ch 2, 5 tr in next ch 2 space, ch 2, *(tr, ch 2, tr) in next ch 2 space, ch 2, 5 tr in next ch 2 space, ch 2* around. Sl st to the 4th ch of the beginning ch 6.
Round 15: Sl st to ch between tc clusters. Ch 6, tr in same space. Ch 2, *(3 tr, ch 3, 3tr) in 3rd ch of next 5 tr cluster, ch 2, (tr, ch 2, tr) in next ch 2 space, ch 2* around. (3tr, ch 3, 3tr) in last 3rd ch of next 5 tr cluster. Sl st to the 4th ch of the beginning ch 6.
Round 16: Sl st to ch between tc clusters. ch 1, 2 dc, sc in same space. *2 sc over next ch 2 space, ch 1, (dc, 4tr, ch 3 picot, 4tr, dc) in next ch 3 space, ch 1, 2 sc over next ch 2 space, (sc, 2 dc, sc) in next (tr, ch 2, tr)* around. Finish with 2 sc over next ch 2 space, ch 1, (dc, 4tr, ch 3 picot, 4tr, dc) in next ch 3 space, ch 1, 2 sc over last ch 2 space. Sl st to the the beginning ch 1. Bind off and weave in end.
Halo
Ch 25, join with sl st to beg ch.
Ch 1, *2 sc, 2 hdc, ch 3 picot, 2 hdc, 2 sc* 5 times in the ring, join with sl st in beginning sc. Bind off and sew onto the back of the head. (Now, without fail I always have to adjust the stitches around on the ring to space out the way I want it to look.)
Now, the not so fun part. Make your stiffening solution (I used 1 part glue to 3 parts water) and pin the head and wings into place. I used one pin stabbed through and then let the top part slide up the pin. The halo I put into place held together with pins on both sides. Let dry for 24 hours. Then dip the skirt, pin and let dry for 24 hours. I was able to find a styrofoam cone to fit inside the skirt to do this part. I did wrap the cone with plastic wrap to keep it from glueing accidently to the cone.


Recent Comments